
SWIG (Simplified Wrapper and Interface Generator) is a software development tool for building scripting language interfaces to C and C++ programs. Originally developed in 1995, SWIG was first used by scientists in the Theoretical Physics Division at Los Alamos National Laboratory for building user interfaces to simulation codes running on the Connection Machine 5 supercomputer. In this environment, scientists needed to work with huge amounts of simulation data, complex hardware, and a constantly changing code base. The use of a scripting language interface provided a simple yet highly flexible foundation for solving these types of problems. SWIG simplifies development by largely automating the task of scripting language integration--allowing developers and users to focus on more important problems.
Although SWIG was originally developed for scientific applications, it has since evolved into a general purpose tool that is used in a wide variety of applications--in fact almost anything where C/C++ programming is involved.
In the late 1990's, the most stable version of SWIG was release 1.1p5. Versions 1.3.x were officially development versions and these were released over a period of 10 years starting from the year 2000. The final version in the 1.3.x series was 1.3.40, but in truth the 1.3.x series had been stable for many years. An official stable version was released along with the decision to make SWIG license changes and this gave rise to version 2.0.0 in 2010.
The LICENSE file shipped with SWIG in the top level directory contains the SWIG license. For further insight into the license including the license of SWIG's output code, please visit the SWIG legal page - http://www.swig.org/legal.html.
The license was clarified in version 2.0.0 so that the code that SWIG generated could be distributed under license terms of the user's choice/requirements and at the same time the SWIG source was placed under the GNU General Public License version 3.
The official location of SWIG related material is
This site contains the latest version of the software, users guide, and information regarding bugs, installation problems, and implementation tricks.
You can also subscribe to the swig-user mailing list by visiting the page
The mailing list often discusses some of the more technical aspects of SWIG along with information about beta releases and future work.
Git and Subversion access to the latest version of SWIG is also available. More information about this can be obtained at:
This manual assumes that you know how to write C/C++ programs and that you have at least heard of scripting languages such as Tcl, Python, and Perl. A detailed knowledge of these scripting languages is not required although some familiarity won't hurt. No prior experience with building C extensions to these languages is required---after all, this is what SWIG does automatically. However, you should be reasonably familiar with the use of compilers, linkers, and makefiles since making scripting language extensions is somewhat more complicated than writing a normal C program.
Over time SWIG releases have become significantly more capable in their C++ handling--especially support for advanced features like namespaces, overloaded operators, and templates. Whenever possible, this manual tries to cover the technicalities of this interface. However, this isn't meant to be a tutorial on C++ programming. For many of the gory details, you will almost certainly want to consult a good C++ reference. If you don't program in C++, you may just want to skip those parts of the manual.
The first few chapters of this manual describe SWIG in general and provide an overview of its capabilities. The remaining chapters are devoted to specific SWIG language modules and are self contained. Thus, if you are using SWIG to build Python interfaces, you can probably skip to that chapter and find almost everything you need to know.
If you hate reading manuals, glance at the "Introduction" which contains a few simple examples. These examples contain about 95% of everything you need to know to use SWIG. After that, simply use the language-specific chapters as a reference. The SWIG distribution also comes with a large directory of examples that illustrate different topics.
If you are a previous user of SWIG, don't expect SWIG to provide complete backwards compatibility. Although the developers strive to the utmost to keep backwards compatibility, this isn't always possible as the primary goal over time is to make SWIG better---a process that would simply be impossible if the developers are constantly bogged down with backwards compatibility issues. Potential incompatibilities are clearly marked in the detailed release notes.
If you need to work with different versions of SWIG and backwards compatibility is an issue, you can use the SWIG_VERSION preprocessor symbol which holds the version of SWIG being executed. SWIG_VERSION is a hexadecimal integer such as 0x010311 (corresponding to SWIG-1.3.11). This can be used in an interface file to define different typemaps, take advantage of different features etc:
#if SWIG_VERSION >= 0x010311
/* Use some fancy new feature */
#endif
Note: The version symbol is not defined in the generated SWIG wrapper file. The SWIG preprocessor has defined SWIG_VERSION since SWIG-1.3.11.
The CHANGES.current, CHANGES and RELEASENOTES files shipped with SWIG in the top level directory contain, respectively, detailed release notes for the current version, detailed release notes for previous releases and summary release notes from SWIG-1.3.22 onwards.
SWIG is an unfunded project that would not be possible without the contributions of many people working in their spare time. If you have benefitted from using SWIG, please consider Donating to SWIG to keep development going. There have been a large varied number of people who have made contributions at all levels over time. Contributors are mentioned either in the COPYRIGHT file or CHANGES files shipped with SWIG or in submitted bugs.
Although every attempt has been made to make SWIG bug-free, we are also trying to make feature improvements that may introduce bugs. To report a bug, either send mail to the SWIG developer list at the swig-devel mailing list or report a bug at the SWIG bug tracker. In your report, be as specific as possible, including (if applicable), error messages, tracebacks (if a core dump occurred), corresponding portions of the SWIG interface file used, and any important pieces of the SWIG generated wrapper code. We can only fix bugs if we know about them.
Please see the dedicated Windows chapter for instructions on installing SWIG on Windows and running the examples. The Windows distribution is called swigwin and includes a prebuilt SWIG executable, swig.exe, included in the top level directory. Otherwise it is exactly the same as the main SWIG distribution. There is no need to download anything else.
You must use GNU make to build and install SWIG.
PCRE needs to be installed on your system to build SWIG, in particular pcre-config must be available. If you have PCRE headers and libraries but not pcre-config itself or, alternatively, wish to override the compiler or linker flags returned by pcre-config, you may set PCRE_LIBS and PCRE_CFLAGS variables to be used instead. And if you don't have PCRE at all, the configure script will provide instructions for obtaining it.
To build and install SWIG, simply type the following:
$ ./configure
$ make
$ make install
By default SWIG installs itself in /usr/local. If you need to install SWIG in a different location or in your home directory, use the --prefix option to ./configure. For example:
$ ./configure --prefix=/home/yourname/projects
$ make
$ make install
Note: the directory given to --prefix must be an absolute pathname. Do not use the ~ shell-escape to refer to your home directory. SWIG won't work properly if you do this.
The INSTALL file shipped in the top level directory details more about using configure. Also try
$ ./configure --help.
The configure script will attempt to locate various packages on your machine including Tcl, Perl5, Python and all the other target languages that SWIG supports. Don't panic if you get 'not found' messages -- SWIG does not need these packages to compile or run. The configure script is actually looking for these packages so that you can try out the SWIG examples contained in the 'Examples' directory without having to hack Makefiles. Note that the --without-xxx options, where xxx is a target language, have minimal effect. All they do is reduce the amount of testing done with 'make check'. The SWIG executable and library files installed cannot currently be configured with a subset of target languages.
SWIG used to include a set of runtime libraries for some languages for working with multiple modules. These are no longer built during the installation stage. However, users can build them just like any wrapper module as described in the Modules chapter. The CHANGES file shipped with SWIG in the top level directory also lists some examples which build the runtime library.
Note:
SWIG is known to work on various flavors of OS X. Follow the Unix installation instructions above. However, as of this writing, there is still great deal of inconsistency with how shared libaries are handled by various scripting languages on OS X.
Users of OS X should be aware that Darwin handles shared libraries and linking in a radically different way than most Unix systems. In order to test SWIG and run the examples, SWIG configures itself to use flat namespaces and to allow undefined symbols (-flat_namespace -undefined suppress). This mostly closely follows the Unix model and makes it more likely that the SWIG examples will work with whatever installation of software you might have. However, this is generally not the recommended technique for building larger extension modules. Instead, you should utilize Darwin's two-level namespaces. Some details about this can be found here http://developer.apple.com/documentation/ReleaseNotes/DeveloperTools/TwoLevelNamespaces.html .
Needless to say, you might have to experiment a bit to get things working at first.
If you want to test SWIG after building it, a check can be performed on Unix operating systems. Type the following:
$ make -k check
This step can be performed either before or after installation. The check requires at least one of the target languages to be installed. If it fails, it may mean that you have an uninstalled language module or that the file 'Examples/Makefile' has been incorrectly configured. It may also fail due to compiler issues such as a broken C++ compiler. Even if the check fails, there is a pretty good chance SWIG still works correctly --- you will just have to mess around with one of the examples and some makefiles to get it to work. Some tests may also fail due to missing dependency packages, eg PCRE or Boost, but this will require careful analysis of the configure output done during configuration.
The test suite executed by the check is designed to stress-test many parts of the implementation including obscure corner cases. If some of these tests fail or generate warning messages, there is no reason for alarm --- the test may be related to some new SWIG feature or a difficult bug that we're trying to resolve. Chances are that SWIG will work just fine for you. Note that if you have more than one CPU/core, then you can use parallel make to speed up the check as it does take quite some time to run, for example:
$ make -j2 -k check
Also, SWIG's support for C++ is sufficiently advanced that certain tests may fail on older C++ compilers (for instance if your compiler does not support member templates). These errors are harmless if you don't intend to use these features in your own programs.
Note: The test-suite currently contains over 500 tests. If you have many different target languages installed and a slow machine, it might take more than an hour to run the test-suite.
The Examples directory contains a variety of examples of using SWIG and it has some browsable documentation. Simply point your browser to the file "Example/index.html".
The Examples directory also includes Visual C++ project 6 (.dsp) files for building some of the examples on Windows. Later versions of Visual Studio will convert these old style project files into a current solution file.
SWIG is a software development tool that simplifies the task of interfacing different languages to C and C++ programs. In a nutshell, SWIG is a compiler that takes C/C++ declarations and creates the wrappers needed to access those declarations from other languages including including Perl, Python, Tcl, Ruby, Guile, and Java. SWIG normally requires no modifications to existing code and can often be used to build a usable interface in only a few minutes. Possible applications of SWIG include:
SWIG was originally designed to make it extremely easy for scientists and engineers to build extensible scientific software without having to get a degree in software engineering. Because of this, the use of SWIG tends to be somewhat informal and ad-hoc (e.g., SWIG does not require users to provide formal interface specifications as you would find in a dedicated IDL compiler). Although this style of development isn't appropriate for every project, it is particularly well suited to software development in the small; especially the research and development work that is commonly found in scientific and engineering projects. However, nowadays SWIG is known to be used in many large open source and commercial projects.
As stated in the previous section, the primary purpose of SWIG is to simplify the task of integrating C/C++ with other programming languages. However, why would anyone want to do that? To answer that question, it is useful to list a few strengths of C/C++ programming:
Next, let's list a few problems with C/C++ programming
To address these limitations, many programmers have arrived at the conclusion that it is much easier to use different programming languages for different tasks. For instance, writing a graphical user interface may be significantly easier in a scripting language like Python or Tcl (consider the reasons why millions of programmers have used languages like Visual Basic if you need more proof). An interactive interpreter might also serve as a useful debugging and testing tool. Other languages like Java might greatly simplify the task of writing distributed computing software. The key point is that different programming languages offer different strengths and weaknesses. Moreover, it is extremely unlikely that any programming is ever going to be perfect. Therefore, by combining languages together, you can utilize the best features of each language and greatly simplify certain aspects of software development.
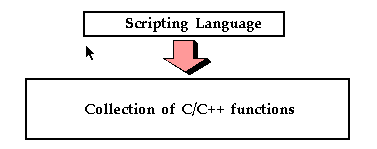
From the standpoint of C/C++, a lot of people use SWIG because they want to break out of the traditional monolithic C programming model which usually results in programs that resemble this:
Instead of going down that route, incorporating C/C++ into a higher level language often results in a more modular design, less code, better flexibility, and increased programmer productivity.
SWIG tries to make the problem of C/C++ integration as painless as possible. This allows you to focus on the underlying C program and using the high-level language interface, but not the tedious and complex chore of making the two languages talk to each other. At the same time, SWIG recognizes that all applications are different. Therefore, it provides a wide variety of customization features that let you change almost every aspect of the language bindings. This is the main reason why SWIG has such a large user manual ;-).
The best way to illustrate SWIG is with a simple example. Consider the following C code:
/* File : example.c */

double  My_variable  = 3.0;

/* Compute factorial of n */
int  fact(int n) {
	if (n <= 1) return 1;
	else return n*fact(n-1);
}

/* Compute n mod m */
int my_mod(int n, int m) {
	return(n % m);
}
Suppose that you wanted to access these functions and the global variable My_variable from Tcl. You start by making a SWIG interface file as shown below (by convention, these files carry a .i suffix) :
/* File : example.i */
%module example
%{
/* Put headers and other declarations here */
extern double My_variable;
extern int    fact(int);
extern int    my_mod(int n, int m);
%}

extern double My_variable;
extern int    fact(int);
extern int    my_mod(int n, int m);
The interface file contains ANSI C function prototypes and variable declarations. The %module directive defines the name of the module that will be created by SWIG. The %{ %} block provides a location for inserting additional code, such as C header files or additional C declarations, into the generated C wrapper code.
SWIG is invoked using the swig command. We can use this to build a Tcl module (under Linux) as follows :
unix > swig -tcl example.i
unix > gcc -c -fpic example.c example_wrap.c -I/usr/local/include
unix > gcc -shared example.o example_wrap.o -o example.so
unix > tclsh
% load ./example.so
% fact 4
24
% my_mod 23 7
2
% expr $My_variable + 4.5
7.5
%
The swig command produced a new file called example_wrap.c that should be compiled along with the example.c file. Most operating systems and scripting languages now support dynamic loading of modules. In our example, our Tcl module has been compiled into a shared library that can be loaded into Tcl. When loaded, Tcl can now access the functions and variables declared in the SWIG interface. A look at the file example_wrap.c reveals a hideous mess. However, you almost never need to worry about it.
Now, let's turn these functions into a Perl5 module. Without making any changes type the following (shown for Solaris):
unix > swig -perl5 example.i
unix > gcc -c example.c example_wrap.c \
	-I/usr/local/lib/perl5/sun4-solaris/5.003/CORE
unix > ld -G example.o example_wrap.o -o example.so		# This is for Solaris
unix > perl5.003
use example;
print example::fact(4), "\n";
print example::my_mod(23,7), "\n";
print $example::My_variable + 4.5, "\n";
<ctrl-d>
24
2
7.5
unix >
Finally, let's build a module for Python (shown for Irix).
unix > swig -python example.i
unix > gcc -c -fpic example.c example_wrap.c -I/usr/local/include/python2.0
unix > gcc -shared example.o example_wrap.o -o _example.so
unix > python
Python 2.0 (#6, Feb 21 2001, 13:29:45)
[GCC egcs-2.91.66 19990314/Linux (egcs-1.1.2 release)] on linux2
Type "copyright", "credits" or "license" for more information.
>>> import example
>>> example.fact(4)
24
>>> example.my_mod(23,7)
2
>>> example.cvar.My_variable + 4.5
7.5
To the truly lazy programmer, one may wonder why we needed the extra interface file at all. As it turns out, you can often do without it. For example, you could also build a Perl5 module by just running SWIG on the C header file and specifying a module name as follows
unix > swig -perl5 -module example example.h
unix > gcc -c example.c example_wrap.c \
	-I/usr/local/lib/perl5/sun4-solaris/5.003/CORE
unix > ld -G example.o example_wrap.o -o example.so
unix > perl5.003
use example;
print example::fact(4), "\n";
print example::my_mod(23,7), "\n";
print $example::My_variable + 4.5, "\n";
<ctrl-d>
24
2
7.5
A primary goal of the SWIG project is to make the language binding process extremely easy. Although a few simple examples have been shown, SWIG is quite capable in supporting most of C++. Some of the major features include:
Currently, the only major C++ feature not supported is nested classes--a limitation that should be removed in a future release, but has some workarounds for the moment.
It is important to stress that SWIG is not a simplistic C++ lexing tool like several apparently similar wrapper generation tools. SWIG not only parses C++, it implements the full C++ type system and it is able to understand C++ semantics. SWIG generates its wrappers with full knowledge of this information. As a result, you will find SWIG to be just as capable of dealing with nasty corner cases as it is in wrapping simple C++ code. In fact, SWIG is able handle C++ code that stresses the very limits of many C++ compilers.
When used as intended, SWIG requires minimal (if any) modification to existing C or C++ code. This makes SWIG extremely easy to use with existing packages and promotes software reuse and modularity. By making the C/C++ code independent of the high level interface, you can change the interface and reuse the code in other applications. It is also possible to support different types of interfaces depending on the application.
SWIG is a command line tool and as such can be incorporated into any build system that supports invoking external tools/compilers. SWIG is most commonly invoked from within a Makefile, but is also known to be invoked from popular IDEs such as Microsoft Visual Studio.
If you are using the GNU Autotools ( Autoconf/ Automake / Libtool) to configure SWIG use in your project, the SWIG Autoconf macros can be used. The primary macro is ax_pkg_swig, see http://www.gnu.org/software/autoconf-archive/ax_pkg_swig.html#ax_pkg_swig . The ax_python_devel macro is also helpful for generating Python extensions. See the Autoconf Archive for further information on this and other Autoconf macros.
There is growing support for SWIG in some build tools, for example CMake is a cross-platform, open-source build manager with built in support for SWIG. CMake can detect the SWIG executable and many of the target language libraries for linking against. CMake knows how to build shared libraries and loadable modules on many different operating systems. This allows easy cross platform SWIG development. It also can generate the custom commands necessary for driving SWIG from IDE's and makefiles. All of this can be done from a single cross platform input file. The following example is a CMake input file for creating a python wrapper for the SWIG interface file, example.i:
# This is a CMake example for Python

FIND_PACKAGE(SWIG REQUIRED)
INCLUDE(${SWIG_USE_FILE})

FIND_PACKAGE(PythonLibs)
INCLUDE_DIRECTORIES(${PYTHON_INCLUDE_PATH})

INCLUDE_DIRECTORIES(${CMAKE_CURRENT_SOURCE_DIR})

SET(CMAKE_SWIG_FLAGS "")

SET_SOURCE_FILES_PROPERTIES(example.i PROPERTIES CPLUSPLUS ON)
SET_SOURCE_FILES_PROPERTIES(example.i PROPERTIES SWIG_FLAGS "-includeall")
SWIG_ADD_MODULE(example python example.i example.cxx)
SWIG_LINK_LIBRARIES(example ${PYTHON_LIBRARIES})
The above example will generate native build files such as makefiles, nmake files and Visual Studio projects which will invoke SWIG and compile the generated C++ files into _example.so (UNIX) or _example.pyd (Windows). For other target languages on Windows a dll, instead of a .pyd file, is usually generated.
SWIG is designed to produce working code that needs no hand-modification (in fact, if you look at the output, you probably won't want to modify it). You should think of your target language interface being defined entirely by the input to SWIG, not the resulting output file. While this approach may limit flexibility for hard-core hackers, it allows others to forget about the low-level implementation details.
No, this isn't a special section on the sorry state of world politics. However, it may be useful to know that SWIG was written with a certain "philosophy" about programming---namely that programmers are smart and that tools should just stay out of their way. Because of that, you will find that SWIG is extremely permissive in what it lets you get away with. In fact, you can use SWIG to go well beyond "shooting yourself in the foot" if dangerous programming is your goal. On the other hand, this kind of freedom may be exactly what is needed to work with complicated and unusual C/C++ applications.
Ironically, the freedom that SWIG provides is countered by an extremely conservative approach to code generation. At it's core, SWIG tries to distill even the most advanced C++ code down to a small well-defined set of interface building techniques based on ANSI C programming. Because of this, you will find that SWIG interfaces can be easily compiled by virtually every C/C++ compiler and that they can be used on any platform. Again, this is an important part of staying out of the programmer's way----the last thing any developer wants to do is to spend their time debugging the output of a tool that relies on non-portable or unreliable programming features.
This chapter describes SWIG usage on Microsoft Windows. Installing SWIG and running the examples is covered as well as building the SWIG executable. Usage within the Unix like environments MinGW and Cygwin is also detailed.
SWIG does not come with the usual Windows type installation program, however it is quite easy to get started. The main steps are:
The swigwin distribution contains the SWIG Windows executable, swig.exe, which will run on 32 bit versions of Windows, ie Windows 95 and later. If you want to build your own swig.exe have a look at Building swig.exe on Windows.
Using Microsoft Visual C++ is the most common approach to compiling and linking SWIG's output. The Examples directory has a few Visual C++ project files (.dsp files). These were produced by Visual C++ 6. Later versions of Visual Studio should also be able to open and convert these project files. The C# examples come with .NET 2003 solution (.sln) and project files instead of Visual C++ 6 project files. The project files have been set up to execute SWIG in a custom build rule for the SWIG interface (.i) file. Alternatively run the examples using Cygwin.
More information on each of the examples is available with the examples distributed with SWIG (Examples/index.html).
Ensure the SWIG executable is as supplied in the SWIG root directory in order for the examples to work. Most languages require some environment variables to be set before running Visual C++. Note that Visual C++ must be re-started to pick up any changes in environment variables. Open up an example .dsp file, Visual C++ will create a workspace for you (.dsw file). Ensure the Release build is selected then do a Rebuild All from the Build menu. The required environment variables are displayed with their current values.
The list of required environment variables for each module language is also listed below. They are usually set from the Control Panel and System properties, but this depends on which flavour of Windows you are running. If you don't want to use environment variables then change all occurrences of the environment variables in the .dsp files with hard coded values. If you are interested in how the project files are set up there is explanatory information in some of the language module's documentation.
The C# examples do not require any environment variables to be set as a C# project file is included. Just open up the .sln solution file in Visual Studio .NET 2003 or later, select Release Build, and do a Rebuild All from the Build menu. The accompanying C# and C++ project files are automatically used by the solution file.
JAVA_INCLUDE : Set this to the directory containing
jni.h
JAVA_BIN : Set this to the bin directory containing
javac.exe
Example using JDK1.3:
JAVA_INCLUDE: D:\jdk1.3\include
JAVA_BIN: D:\jdk1.3\bin
PERL5_INCLUDE : Set this to the directory containing
perl.h
PERL5_LIB : Set this to the Perl library including
path for linking
Example using nsPerl 5.004_04:
PERL5_INCLUDE: D:\nsPerl5.004_04\lib\CORE
PERL5_LIB: D:\nsPerl5.004_04\lib\CORE\perl.lib
PYTHON_INCLUDE : Set this to the directory that
contains Python.h
PYTHON_LIB : Set this to the python library
including path for linking
Example using Python 2.1.1:
PYTHON_INCLUDE: D:\python21\include
PYTHON_LIB: D:\python21\libs\python21.lib
TCL_INCLUDE : Set this to the directory containing
tcl.h
TCL_LIB : Set this to the TCL library including
path for linking
Example using ActiveTcl 8.3.3.3
TCL_INCLUDE: D:\tcl\include
TCL_LIB: D:\tcl\lib\tcl83.lib
R_INCLUDE : Set this to the directory containing R.h
R_LIB : Set this to the R library (Rdll.lib)
including path for linking. The library needs to be built as described
in the R README.packages file (the pexports.exe approach is the
easiest).
Example using R 2.5.1:
R_INCLUDE: C:\Program Files\R\R-2.5.1\include
R_LIB: C:\Program Files\R\R-2.5.1\bin\Rdll.lib
RUBY_INCLUDE : Set this to the directory containing
ruby.h
RUBY_LIB : Set this to the ruby library including
path for linking
Example using Ruby 1.6.4:
RUBY_INCLUDE: D:\ruby\lib\ruby\1.6\i586-mswin32
RUBY_LIB: D:\ruby\lib\mswin32-ruby16.lib
If you do not have access to Visual C++ you will have to set up project files / Makefiles for your chosen compiler. There is a section in each of the language modules detailing what needs setting up using Visual C++ which may be of some guidance. Alternatively you may want to use Cygwin as described in the following section.
SWIG can also be compiled and run using Cygwin or MinGW which provides a Unix like front end to Windows and comes free with gcc, an ANSI C/C++ compiler. However, this is not a recommended approach as the prebuilt executable is supplied.
If you want to replicate the build of swig.exe that comes with the download, follow the MinGW instructions below. This is not necessary to use the supplied swig.exe. This information is provided for those that want to modify the SWIG source code in a Windows environment. Normally this is not needed, so most people will want to ignore this section.
The short abbreviated instructions follow...
The step by step instructions to download and install MinGW and MSYS, then download and build the latest version of SWIG from Github follow... Note that the instructions for obtaining SWIG from Github are also online at SWIG Bleeding Edge.
Pitfall note: Execute the steps in the order shown and don't use spaces in path names. In fact it is best to use the default installation directories.
cd /
tar -jxf msys-automake-1.8.2.tar.bz2
tar -jxf msys-autoconf-2.59.tar.bz2
tar -zxf bison-2.0-MSYS.tar.gz
mkdir /usr/src
cd /usr/src
git clone https://github.com/swig/swig.git
cd /usr/src/swig
Tools/pcre-build.sh
cd /usr/src/swig
./autogen.sh
./configure
make
Note that SWIG can also be built using Cygwin. However, SWIG will then require the Cygwin DLL when executing. Follow the Unix instructions in the README file in the SWIG root directory. Note that the Cygwin environment will also allow one to regenerate the autotool generated files which are supplied with the release distribution. These files are generated using the autogen.sh script and will only need regenerating in circumstances such as changing the build system.
If you don't want to install Cygwin or MinGW, use a different compiler to build SWIG. For example, all the source code files can be added to a Visual C++ project file in order to build swig.exe from the Visual C++ IDE.
The examples and test-suite work as successfully on Cygwin as on any other Unix operating system. The modules which are known to work are Python, Tcl, Perl, Ruby, Java and C#. Follow the Unix instructions in the README file in the SWIG root directory to build the examples.
A common problem when using SWIG on Windows are the Microsoft function calling conventions which are not in the C++ standard. SWIG parses ISO C/C++ so cannot deal with proprietary conventions such as __declspec(dllimport), __stdcall etc. There is a Windows interface file, windows.i, to deal with these calling conventions though. The file also contains typemaps for handling commonly used Windows specific types such as __int64, BOOL , DWORD etc. Include it like you would any other interface file, for example:
%include <windows.i>

__declspec(dllexport) ULONG __stdcall foo(DWORD, __int32);
This chapter provides a brief overview of scripting language extension programming and the mechanisms by which scripting language interpreters access C and C++ code.
When a scripting language is used to control a C program, the resulting system tends to look as follows:
In this programming model, the scripting language interpreter is used for high level control whereas the underlying functionality of the C/C++ program is accessed through special scripting language "commands." If you have ever tried to write your own simple command interpreter, you might view the scripting language approach to be a highly advanced implementation of that. Likewise, If you have ever used a package such as MATLAB or IDL, it is a very similar model--the interpreter executes user commands and scripts. However, most of the underlying functionality is written in a low-level language like C or Fortran.
The two-language model of computing is extremely powerful because it exploits the strengths of each language. C/C++ can be used for maximal performance and complicated systems programming tasks. Scripting languages can be used for rapid prototyping, interactive debugging, scripting, and access to high-level data structures such associative arrays.
Scripting languages are built around a parser that knows how to execute commands and scripts. Within this parser, there is a mechanism for executing commands and accessing variables. Normally, this is used to implement the builtin features of the language. However, by extending the interpreter, it is usually possible to add new commands and variables. To do this, most languages define a special API for adding new commands. Furthermore, a special foreign function interface defines how these new commands are supposed to hook into the interpreter.
Typically, when you add a new command to a scripting interpreter you need to do two things; first you need to write a special "wrapper" function that serves as the glue between the interpreter and the underlying C function. Then you need to give the interpreter information about the wrapper by providing details about the name of the function, arguments, and so forth. The next few sections illustrate the process.
Suppose you have an ordinary C function like this :
int fact(int n) {
	if (n <= 1) return 1;
	else return n*fact(n-1);
}
In order to access this function from a scripting language, it is necessary to write a special "wrapper" function that serves as the glue between the scripting language and the underlying C function. A wrapper function must do three things :
As an example, the Tcl wrapper function for the fact() function above example might look like the following :
int wrap_fact(ClientData clientData, Tcl_Interp *interp,
		int argc, char *argv[]) {
	int result;
	int arg0;
	if (argc != 2) {
		interp->result = "wrong # args";
		return TCL_ERROR;
	}
	arg0 = atoi(argv[1]);
	result = fact(arg0);
	sprintf(interp->result,"%d", result);
	return TCL_OK;
}
Once you have created a wrapper function, the final step is to tell the scripting language about the new function. This is usually done in an initialization function called by the language when the module is loaded. For example, adding the above function to the Tcl interpreter requires code like the following :
int Wrap_Init(Tcl_Interp *interp) {
	Tcl_CreateCommand(interp, "fact", wrap_fact, (ClientData) NULL,
				(Tcl_CmdDeleteProc *) NULL);
	return TCL_OK;
}
When executed, Tcl will now have a new command called "fact " that you can use like any other Tcl command.
Although the process of adding a new function to Tcl has been illustrated, the procedure is almost identical for Perl and Python. Both require special wrappers to be written and both need additional initialization code. Only the specific details are different.
Variable linking refers to the problem of mapping a C/C++ global variable to a variable in the scripting language interpreter. For example, suppose you had the following variable:
double Foo = 3.5;
It might be nice to access it from a script as follows (shown for Perl):
$a = $Foo * 2.3;   # Evaluation
$Foo = $a + 2.0;   # Assignment
To provide such access, variables are commonly manipulated using a pair of get/set functions. For example, whenever the value of a variable is read, a "get" function is invoked. Similarly, whenever the value of a variable is changed, a "set" function is called.
In many languages, calls to the get/set functions can be attached to evaluation and assignment operators. Therefore, evaluating a variable such as $Foo might implicitly call the get function. Similarly, typing $Foo = 4 would call the underlying set function to change the value.
In many cases, a C program or library may define a large collection of constants. For example:
#define RED   0xff0000
#define BLUE  0x0000ff
#define GREEN 0x00ff00
To make constants available, their values can be stored in scripting language variables such as $RED, $BLUE, and $GREEN. Virtually all scripting languages provide C functions for creating variables so installing constants is usually a trivial exercise.
Although scripting languages have no trouble accessing simple functions and variables, accessing C/C++ structures and classes present a different problem. This is because the implementation of structures is largely related to the problem of data representation and layout. Furthermore, certain language features are difficult to map to an interpreter. For instance, what does C++ inheritance mean in a Perl interface?
The most straightforward technique for handling structures is to implement a collection of accessor functions that hide the underlying representation of a structure. For example,
struct Vector {
	Vector();
	~Vector();
	double x,y,z;
};
can be transformed into the following set of functions :
Vector *new_Vector();
void delete_Vector(Vector *v);
double Vector_x_get(Vector *v);
double Vector_y_get(Vector *v);
double Vector_z_get(Vector *v);
void Vector_x_set(Vector *v, double x);
void Vector_y_set(Vector *v, double y);
void Vector_z_set(Vector *v, double z);
Now, from an interpreter these function might be used as follows:
% set v [new_Vector]
% Vector_x_set $v 3.5
% Vector_y_get $v
% delete_Vector $v
% ...
Since accessor functions provide a mechanism for accessing the internals of an object, the interpreter does not need to know anything about the actual representation of a Vector.
In certain cases, it is possible to use the low-level accessor functions to create a proxy class, also known as a shadow class. A proxy class is a special kind of object that gets created in a scripting language to access a C/C++ class (or struct) in a way that looks like the original structure (that is, it proxies the real C++ class). For example, if you have the following C definition :
class Vector {
public:
	Vector();
	~Vector();
	double x,y,z;
};
A proxy classing mechanism would allow you to access the structure in a more natural manner from the interpreter. For example, in Python, you might want to do this:
>>> v = Vector()
>>> v.x = 3
>>> v.y = 4
>>> v.z = -13
>>> ...
>>> del v
Similarly, in Perl5 you may want the interface to work like this:
$v = new Vector;
$v->{x} = 3;
$v->{y} = 4;
$v->{z} = -13;
Finally, in Tcl :
Vector v
v configure -x 3 -y 4 -z 13
When proxy classes are used, two objects are at really work--one in the scripting language, and an underlying C/C++ object. Operations affect both objects equally and for all practical purposes, it appears as if you are simply manipulating a C/C++ object.
The final step in using a scripting language with your C/C++ application is adding your extensions to the scripting language itself. There are two primary approaches for doing this. The preferred technique is to build a dynamically loadable extension in the form a shared library. Alternatively, you can recompile the scripting language interpreter with your extensions added to it.
To create a shared library or DLL, you often need to look at the manual pages for your compiler and linker. However, the procedure for a few common machines is shown below:
# Build a shared library for Solaris
gcc -c example.c example_wrap.c -I/usr/local/include
ld -G example.o example_wrap.o -o example.so

# Build a shared library for Linux
gcc -fpic -c example.c example_wrap.c -I/usr/local/include
gcc -shared example.o example_wrap.o -o example.so

# Build a shared library for Irix
gcc -c example.c example_wrap.c -I/usr/local/include
ld -shared example.o example_wrap.o -o example.so
To use your shared library, you simply use the corresponding command in the scripting language (load, import, use, etc...). This will import your module and allow you to start using it. For example:
% load ./example.so
% fact 4
24
%
When working with C++ codes, the process of building shared libraries may be more complicated--primarily due to the fact that C++ modules may need additional code in order to operate correctly. On many machines, you can build a shared C++ module by following the above procedures, but changing the link line to the following :
c++ -shared example.o example_wrap.o -o example.so
When building extensions as shared libraries, it is not uncommon for your extension to rely upon other shared libraries on your machine. In order for the extension to work, it needs to be able to find all of these libraries at run-time. Otherwise, you may get an error such as the following :
>>> import graph
Traceback (innermost last):
  File "<stdin>", line 1, in ?
  File "/home/sci/data1/beazley/graph/graph.py", line 2, in ?
    import graphc
ImportError:  1101:/home/sci/data1/beazley/bin/python: rld: Fatal Error: cannot
successfully map soname 'libgraph.so' under any of the filenames /usr/lib/libgraph.so:/
lib/libgraph.so:/lib/cmplrs/cc/libgraph.so:/usr/lib/cmplrs/cc/libgraph.so:
>>>
What this error means is that the extension module created by SWIG depends upon a shared library called "libgraph.so" that the system was unable to locate. To fix this problem, there are a few approaches you can take.
With static linking, you rebuild the scripting language interpreter with extensions. The process usually involves compiling a short main program that adds your customized commands to the language and starts the interpreter. You then link your program with a library to produce a new scripting language executable.
Although static linking is supported on all platforms, this is not the preferred technique for building scripting language extensions. In fact, there are very few practical reasons for doing this--consider using shared libraries instead.
This chapter describes the basic operation of SWIG, the structure of its input files, and how it handles standard ANSI C declarations. C++ support is described in the next chapter. However, C++ programmers should still read this chapter to understand the basics. Specific details about each target language are described in later chapters.
To run SWIG, use the swig command with options and a filename like this:
swig [ options ] filename
where filename is a SWIG interface file or a C/C++ header file. Below is a subset of options that can be used. Additional options are also defined for each target language. A full list can be obtained by typing swig -help or swig - lang -help.
-allegrocl            Generate ALLEGROCL wrappers
-chicken              Generate CHICKEN wrappers
-clisp                Generate CLISP wrappers
-cffi                 Generate CFFI wrappers
-csharp               Generate C# wrappers
-go                   Generate Go wrappers
-guile                Generate Guile wrappers
-java                 Generate Java wrappers
-lua                  Generate Lua wrappers
-modula3              Generate Modula 3 wrappers
-mzscheme             Generate Mzscheme wrappers
-ocaml                Generate Ocaml wrappers
-perl                 Generate Perl wrappers
-php                  Generate PHP wrappers
-pike                 Generate Pike wrappers
-python               Generate Python wrappers
-r                    Generate R (aka GNU S) wrappers
-ruby                 Generate Ruby wrappers
-sexp                 Generate Lisp S-Expressions wrappers
-tcl                  Generate Tcl wrappers
-uffi                 Generate Common Lisp / UFFI wrappers
-xml                  Generate XML wrappers

-c++                  Enable C++ parsing
-Dsymbol              Define a preprocessor symbol
-Fstandard            Display error/warning messages in commonly used format
-Fmicrosoft           Display error/warning messages in Microsoft format
-help                 Display all options
-Idir                 Add a directory to the file include path
-lfile                Include a SWIG library file.
-module name          Set the name of the SWIG module
-o outfile            Name of output file
-outcurrentdir	      Set default output dir to current dir instead of input file's path
-outdir dir           Set language specific files output directory
-pcreversion          Display PCRE version information
-swiglib              Show location of SWIG library
-version              Show SWIG version number
As input, SWIG expects a file containing ANSI C/C++ declarations and special SWIG directives. More often than not, this is a special SWIG interface file which is usually denoted with a special .i or .swg suffix. In certain cases, SWIG can be used directly on raw header files or source files. However, this is not the most typical case and there are several reasons why you might not want to do this (described later).
The most common format of a SWIG interface is as follows:
%module mymodule
%{
#include "myheader.h"
%}
// Now list ANSI C/C++ declarations
int foo;
int bar(int x);
...
The module name is supplied using the special %module directive. Modules are described further in the Modules Introduction section.
Everything in the %{ ... %} block is simply copied verbatim to the resulting wrapper file created by SWIG. This section is almost always used to include header files and other declarations that are required to make the generated wrapper code compile. It is important to emphasize that just because you include a declaration in a SWIG input file, that declaration does not automatically appear in the generated wrapper code---therefore you need to make sure you include the proper header files in the %{ ... %} section. It should be noted that the text enclosed in %{ ... %} is not parsed or interpreted by SWIG. The %{...%} syntax and semantics in SWIG is analogous to that of the declarations section used in input files to parser generation tools such as yacc or bison.
The output of SWIG is a C/C++ file that contains all of the wrapper code needed to build an extension module. SWIG may generate some additional files depending on the target language. By default, an input file with the name file.i is transformed into a file file_wrap.c or file_wrap.cxx (depending on whether or not the -c++ option has been used). The name of the output file can be changed using the -o option. In certain cases, file suffixes are used by the compiler to determine the source language (C, C++, etc.). Therefore, you have to use the -o option to change the suffix of the SWIG-generated wrapper file if you want something different than the default. For example:
$ swig -c++ -python -o example_wrap.cpp example.i
The C/C++ output file created by SWIG often contains everything that is needed to construct a extension module for the target scripting language. SWIG is not a stub compiler nor is it usually necessary to edit the output file (and if you look at the output, you probably won't want to). To build the final extension module, the SWIG output file is compiled and linked with the rest of your C/C++ program to create a shared library.
Many target languages will also generate proxy class files in the target language. The default output directory for these language specific files is the same directory as the generated C/C++ file. This can be modified using the -outdir option. For example:
$ swig -c++ -python -outdir pyfiles -o cppfiles/example_wrap.cpp example.i
If the directories cppfiles and pyfiles exist, the following will be generated:
cppfiles/example_wrap.cpp
pyfiles/example.py
If the -outcurrentdir option is used (without -o) then SWIG behaves like a typical C/C++ compiler and the default output directory is then the current directory. Without this option the default output directory is the path to the input file. If -o and -outcurrentdir are used together, -outcurrentdir is effectively ignored as the output directory for the language files is the same directory as the generated C/C++ file if not overidden with -outdir.
C and C++ style comments may appear anywhere in interface files. In previous versions of SWIG, comments were used to generate documentation files. However, this feature is currently under repair and will reappear in a later SWIG release.
Like C, SWIG preprocesses all input files through an enhanced version of the C preprocessor. All standard preprocessor features are supported including file inclusion, conditional compilation and macros. However, #include statements are ignored unless the -includeall command line option has been supplied. The reason for disabling includes is that SWIG is sometimes used to process raw C header files. In this case, you usually only want the extension module to include functions in the supplied header file rather than everything that might be included by that header file (i.e., system headers, C library functions, etc.).
It should also be noted that the SWIG preprocessor skips all text enclosed inside a %{...%} block. In addition, the preprocessor includes a number of macro handling enhancements that make it more powerful than the normal C preprocessor. These extensions are described in the "Preprocessor" chapter.
Most of SWIG's operation is controlled by special directives that are always preceded by a "%" to distinguish them from normal C declarations. These directives are used to give SWIG hints or to alter SWIG's parsing behavior in some manner.
Since SWIG directives are not legal C syntax, it is generally not possible to include them in header files. However, SWIG directives can be included in C header files using conditional compilation like this:
/* header.h  --- Some header file */

/* SWIG directives -- only seen if SWIG is running */
#ifdef SWIG
%module foo
#endif
SWIG is a special preprocessing symbol defined by SWIG when it is parsing an input file.
Although SWIG can parse most C/C++ declarations, it does not provide a complete C/C++ parser implementation. Most of these limitations pertain to very complicated type declarations and certain advanced C++ features. Specifically, the following features are not currently supported:
Non-conventional type declarations. For example, SWIG does not support declarations such as the following (even though this is legal C):
/* Non-conventional placement of storage specifier (extern) */
const int extern Number;

/* Extra declarator grouping */
Matrix (foo);    // A global variable

/* Extra declarator grouping in parameters */
void bar(Spam (Grok)(Doh));
In practice, few (if any) C programmers actually write code like this since this style is never featured in programming books. However, if you're feeling particularly obfuscated, you can certainly break SWIG (although why would you want to?).
Running SWIG on C++ source files (the code in a .C, .cpp or .cxx file) is not recommended. The usual approach is to feed SWIG header files for parsing C++ definitions and declarations. The main reason is if SWIG parses a scoped definition or declaration (as is normal for C++ source files), it is ignored, unless a declaration for the symbol was parsed earlier. For example
/* bar not wrapped unless foo has been defined and
   the declaration of bar within foo has already been parsed */
int foo::bar(int) {
    ... whatever ...
}
Certain advanced features of C++ such as nested classes are not yet fully supported. Please see the C++ Nested classes section for more information.
In the event of a parsing error, conditional compilation can be used to skip offending code. For example:
#ifndef SWIG
... some bad declarations ...
#endif
Alternatively, you can just delete the offending code from the interface file.
One of the reasons why SWIG does not provide a full C++ parser implementation is that it has been designed to work with incomplete specifications and to be very permissive in its handling of C/C++ datatypes (e.g., SWIG can generate interfaces even when there are missing class declarations or opaque datatypes). Unfortunately, this approach makes it extremely difficult to implement certain parts of a C/C++ parser as most compilers use type information to assist in the parsing of more complex declarations (for the truly curious, the primary complication in the implementation is that the SWIG parser does not utilize a separate typedef-name terminal symbol as described on p. 234 of K&R).
SWIG wraps simple C declarations by creating an interface that closely matches the way in which the declarations would be used in a C program. For example, consider the following interface file:
%module example

%inline %{
extern double sin(double x);
extern int strcmp(const char *, const char *);
extern int Foo;
%}
#define STATUS 50
#define VERSION "1.1"
In this file, there are two functions sin() and strcmp(), a global variable Foo, and two constants STATUS and VERSION. When SWIG creates an extension module, these declarations are accessible as scripting language functions, variables, and constants respectively. For example, in Tcl:
% sin 3
5.2335956
% strcmp Dave Mike
-1
% puts $Foo
42
% puts $STATUS
50
% puts $VERSION
1.1
Or in Python:
>>> example.sin(3)
5.2335956
>>> example.strcmp('Dave','Mike')
-1
>>> print example.cvar.Foo
42
>>> print example.STATUS
50
>>> print example.VERSION
1.1
Whenever possible, SWIG creates an interface that closely matches the underlying C/C++ code. However, due to subtle differences between languages, run-time environments, and semantics, it is not always possible to do so. The next few sections describes various aspects of this mapping.
In order to build an interface, SWIG has to convert C/C++ datatypes to equivalent types in the target language. Generally, scripting languages provide a more limited set of primitive types than C. Therefore, this conversion process involves a certain amount of type coercion.
Most scripting languages provide a single integer type that is implemented using the int or long datatype in C. The following list shows all of the C datatypes that SWIG will convert to and from integers in the target language:
int
short
long
unsigned
signed
unsigned short
unsigned long
unsigned char
signed char
bool
When an integral value is converted from C, a cast is used to convert it to the representation in the target language. Thus, a 16 bit short in C may be promoted to a 32 bit integer. When integers are converted in the other direction, the value is cast back into the original C type. If the value is too large to fit, it is silently truncated.
unsigned char and signed char are special cases that are handled as small 8-bit integers. Normally, the char datatype is mapped as a one-character ASCII string.
The bool datatype is cast to and from an integer value of 0 and 1 unless the target language provides a special boolean type.
Some care is required when working with large integer values. Most scripting languages use 32-bit integers so mapping a 64-bit long integer may lead to truncation errors. Similar problems may arise with 32 bit unsigned integers (which may appear as large negative numbers). As a rule of thumb, the int datatype and all variations of char and short datatypes are safe to use. For unsigned int and long datatypes, you will need to carefully check the correct operation of your program after it has been wrapped with SWIG.
Although the SWIG parser supports the long long datatype, not all language modules support it. This is because long long usually exceeds the integer precision available in the target language. In certain modules such as Tcl and Perl5, long long integers are encoded as strings. This allows the full range of these numbers to be represented. However, it does not allow long long values to be used in arithmetic expressions. It should also be noted that although long long is part of the ISO C99 standard, it is not universally supported by all C compilers. Make sure you are using a compiler that supports long long before trying to use this type with SWIG.
SWIG recognizes the following floating point types :
float
double
Floating point numbers are mapped to and from the natural representation of floats in the target language. This is almost always a C double. The rarely used datatype of long double is not supported by SWIG.
The char datatype is mapped into a NULL terminated ASCII string with a single character. When used in a scripting language it shows up as a tiny string containing the character value. When converting the value back into C, SWIG takes a character string from the scripting language and strips off the first character as the char value. Thus if the value "foo" is assigned to a char datatype, it gets the value `f'.
The char * datatype is handled as a NULL-terminated ASCII string. SWIG maps this into a 8-bit character string in the target scripting language. SWIG converts character strings in the target language to NULL terminated strings before passing them into C/C++. The default handling of these strings does not allow them to have embedded NULL bytes. Therefore, the char * datatype is not generally suitable for passing binary data. However, it is possible to change this behavior by defining a SWIG typemap. See the chapter on Typemaps for details about this.
At this time, SWIG provides limited support for Unicode and wide-character strings (the C wchar_t type). Some languages provide typemaps for wchar_t, but bear in mind these might not be portable across different operating systems. This is a delicate topic that is poorly understood by many programmers and not implemented in a consistent manner across languages. For those scripting languages that provide Unicode support, Unicode strings are often available in an 8-bit representation such as UTF-8 that can be mapped to the char * type (in which case the SWIG interface will probably work). If the program you are wrapping uses Unicode, there is no guarantee that Unicode characters in the target language will use the same internal representation (e.g., UCS-2 vs. UCS-4). You may need to write some special conversion functions.
Whenever possible, SWIG maps C/C++ global variables into scripting language variables. For example,
%module example
double foo;
results in a scripting language variable like this:
# Tcl
set foo [3.5]                   ;# Set foo to 3.5
puts $foo                       ;# Print the value of foo

# Python
cvar.foo = 3.5                  # Set foo to 3.5
print cvar.foo                  # Print value of foo

# Perl
$foo = 3.5;                     # Set foo to 3.5
print $foo,"\n";                # Print value of foo

# Ruby
Module.foo = 3.5               # Set foo to 3.5
print Module.foo, "\n"         # Print value of foo
Whenever the scripting language variable is used, the underlying C global variable is accessed. Although SWIG makes every attempt to make global variables work like scripting language variables, it is not always possible to do so. For instance, in Python, all global variables must be accessed through a special variable object known as cvar (shown above). In Ruby, variables are accessed as attributes of the module. Other languages may convert variables to a pair of accessor functions. For example, the Java module generates a pair of functions double get_foo() and set_foo(double val) that are used to manipulate the value.
Finally, if a global variable has been declared as const, it only supports read-only access. Note: this behavior is new to SWIG-1.3. Earlier versions of SWIG incorrectly handled const and created constants instead.
Constants can be created using #define, enumerations, or a special %constant directive. The following interface file shows a few valid constant declarations :
#define I_CONST       5               // An integer constant
#define PI            3.14159         // A Floating point constant
#define S_CONST       "hello world"   // A string constant
#define NEWLINE       '\n'            // Character constant

enum boolean {NO=0, YES=1};
enum months {JAN, FEB, MAR, APR, MAY, JUN, JUL, AUG,
             SEP, OCT, NOV, DEC};
%constant double BLAH = 42.37;
#define PI_4 PI/4
#define FLAGS 0x04 | 0x08 | 0x40
In #define declarations, the type of a constant is inferred by syntax. For example, a number with a decimal point is assumed to be floating point. In addition, SWIG must be able to fully resolve all of the symbols used in a #define in order for a constant to actually be created. This restriction is necessary because #define is also used to define preprocessor macros that are definitely not meant to be part of the scripting language interface. For example:
#define EXTERN extern

EXTERN void foo();
In this case, you probably don't want to create a constant called EXTERN (what would the value be?). In general, SWIG will not create constants for macros unless the value can be completely determined by the preprocessor. For instance, in the above example, the declaration
#define PI_4 PI/4
defines a constant because PI was already defined as a constant and the value is known. However, for the same conservative reasons even a constant with a simple cast will be ignored, such as
#define F_CONST (double) 5 // A floating pointer constant with cast
The use of constant expressions is allowed, but SWIG does not evaluate them. Rather, it passes them through to the output file and lets the C compiler perform the final evaluation (SWIG does perform a limited form of type-checking however).
For enumerations, it is critical that the original enum definition be included somewhere in the interface file (either in a header file or in the %{,%} block). SWIG only translates the enumeration into code needed to add the constants to a scripting language. It needs the original enumeration declaration in order to get the correct enum values as assigned by the C compiler.
The %constant directive is used to more precisely create constants corresponding to different C datatypes. Although it is not usually not needed for simple values, it is more useful when working with pointers and other more complex datatypes. Typically, %constant is only used when you want to add constants to the scripting language interface that are not defined in the original header file.
A common confusion with C programming is the semantic meaning of the const qualifier in declarations--especially when it is mixed with pointers and other type modifiers. In fact, previous versions of SWIG handled const incorrectly--a situation that SWIG-1.3.7 and newer releases have fixed.
Starting with SWIG-1.3, all variable declarations, regardless of any use of const, are wrapped as global variables. If a declaration happens to be declared as const, it is wrapped as a read-only variable. To tell if a variable is const or not, you need to look at the right-most occurrence of the const qualifier (that appears before the variable name). If the right-most const occurs after all other type modifiers (such as pointers), then the variable is const. Otherwise, it is not.
Here are some examples of const declarations.
const char a;           // A constant character
char const b;           // A constant character (the same)
char *const c;          // A constant pointer to a character
const char *const d;    // A constant pointer to a constant character
Here is an example of a declaration that is not const:
const char *e;          // A pointer to a constant character.  The pointer
                        // may be modified.
In this case, the pointer e can change---it's only the value being pointed to that is read-only.
Please note that for const parameters or return types used in a function, SWIG pretty much ignores the fact that these are const, see the section on const-correctness for more information.
Compatibility Note: One reason for changing SWIG to handle const declarations as read-only variables is that there are many situations where the value of a const variable might change. For example, a library might export a symbol as const in its public API to discourage modification, but still allow the value to change through some other kind of internal mechanism. Furthermore, programmers often overlook the fact that with a constant declaration like char *const, the underlying data being pointed to can be modified--it's only the pointer itself that is constant. In an embedded system, a const declaration might refer to a read-only memory address such as the location of a memory-mapped I/O device port (where the value changes, but writing to the port is not supported by the hardware). Rather than trying to build a bunch of special cases into the const qualifier, the new interpretation of const as "read-only" is simple and exactly matches the actual semantics of const in C/C++. If you really want to create a constant as in older versions of SWIG, use the %constant directive instead. For example:
%constant double PI = 3.14159;
or
#ifdef SWIG
#define const %constant
#endif
const double foo = 3.4;
const double bar = 23.4;
const int    spam = 42;
#ifdef SWIG
#undef const
#endif
...
Before going any further, there is one bit of caution involving char * that must now be mentioned. When strings are passed from a scripting language to a C char *, the pointer usually points to string data stored inside the interpreter. It is almost always a really bad idea to modify this data. Furthermore, some languages may explicitly disallow it. For instance, in Python, strings are supposed be immutable. If you violate this, you will probably receive a vast amount of wrath when you unleash your module on the world.
The primary source of problems are functions that might modify string data in place. A classic example would be a function like this:
char *strcat(char *s, const char *t)
Although SWIG will certainly generate a wrapper for this, its behavior will be undefined. In fact, it will probably cause your application to crash with a segmentation fault or other memory related problem. This is because s refers to some internal data in the target language---data that you shouldn't be touching.
The bottom line: don't rely on char * for anything other than read-only input values. However, it must be noted that you could change the behavior of SWIG using typemaps.
Most C programs manipulate arrays, structures, and other types of objects. This section discusses the handling of these datatypes.
Pointers to primitive C datatypes such as
int *
double ***
char **
are fully supported by SWIG. Rather than trying to convert the data being pointed to into a scripting representation, SWIG simply encodes the pointer itself into a representation that contains the actual value of the pointer and a type-tag. Thus, the SWIG representation of the above pointers (in Tcl), might look like this:
_10081012_p_int
_1008e124_ppp_double
_f8ac_pp_char
A NULL pointer is represented by the string "NULL" or the value 0 encoded with type information.
All pointers are treated as opaque objects by SWIG. Thus, a pointer may be returned by a function and passed around to other C functions as needed. For all practical purposes, the scripting language interface works in exactly the same way as you would use the pointer in a C program. The only difference is that there is no mechanism for dereferencing the pointer since this would require the target language to understand the memory layout of the underlying object.
The scripting language representation of a pointer value should never be manipulated directly. Even though the values shown look like hexadecimal addresses, the numbers used may differ from the actual machine address (e.g., on little-endian machines, the digits may appear in reverse order). Furthermore, SWIG does not normally map pointers into high-level objects such as associative arrays or lists (for example, converting an int * into an list of integers). There are several reasons why SWIG does not do this:
By allowing pointers to be manipulated from a scripting language, extension modules effectively bypass compile-time type checking in the C/C++ compiler. To prevent errors, a type signature is encoded into all pointer values and is used to perform run-time type checking. This type-checking process is an integral part of SWIG and can not be disabled or modified without using typemaps (described in later chapters).
Like C, void * matches any kind of pointer. Furthermore, NULL pointers can be passed to any function that expects to receive a pointer. Although this has the potential to cause a crash, NULL pointers are also sometimes used as sentinel values or to denote a missing/empty value. Therefore, SWIG leaves NULL pointer checking up to the application.
For everything else (structs, classes, arrays, etc...) SWIG applies a very simple rule :
In other words, SWIG manipulates everything else by reference. This model makes sense because most C/C++ programs make heavy use of pointers and SWIG can use the type-checked pointer mechanism already present for handling pointers to basic datatypes.
Although this probably sounds complicated, it's really quite simple. Suppose you have an interface file like this :
%module fileio
FILE *fopen(char *, char *);
int fclose(FILE *);
unsigned fread(void *ptr, unsigned size, unsigned nobj, FILE *);
unsigned fwrite(void *ptr, unsigned size, unsigned nobj, FILE *);
void *malloc(int nbytes);
void free(void *);
In this file, SWIG doesn't know what a FILE is, but since it's used as a pointer, so it doesn't really matter what it is. If you wrapped this module into Python, you can use the functions just like you expect :
# Copy a file
def filecopy(source,target):
	f1 = fopen(source,"r")
	f2 = fopen(target,"w")
	buffer = malloc(8192)
	nbytes = fread(buffer,8192,1,f1)
	while (nbytes > 0):
		fwrite(buffer,8192,1,f2)
		nbytes = fread(buffer,8192,1,f1)
	free(buffer)
In this case f1, f2, and buffer are all opaque objects containing C pointers. It doesn't matter what value they contain--our program works just fine without this knowledge.
When SWIG encounters an undeclared datatype, it automatically assumes that it is a structure or class. For example, suppose the following function appeared in a SWIG input file:
void matrix_multiply(Matrix *a, Matrix *b, Matrix *c);
SWIG has no idea what a "Matrix" is. However, it is obviously a pointer to something so SWIG generates a wrapper using its generic pointer handling code.
Unlike C or C++, SWIG does not actually care whether Matrix has been previously defined in the interface file or not. This allows SWIG to generate interfaces from only partial or limited information. In some cases, you may not care what a Matrix really is as long as you can pass an opaque reference to one around in the scripting language interface.
An important detail to mention is that SWIG will gladly generate wrappers for an interface when there are unspecified type names. However, all unspecified types are internally handled as pointers to structures or classes! For example, consider the following declaration:
void foo(size_t num);
If size_t is undeclared, SWIG generates wrappers that expect to receive a type of size_t * (this mapping is described shortly). As a result, the scripting interface might behave strangely. For example:
foo(40);
TypeError: expected a _p_size_t.
The only way to fix this problem is to make sure you properly declare type names using typedef.
Like C, typedef can be used to define new type names in SWIG. For example:
typedef unsigned int size_t;
typedef definitions appearing in a SWIG interface are not propagated to the generated wrapper code. Therefore, they either need to be defined in an included header file or placed in the declarations section like this:
%{
/* Include in the generated wrapper file */
typedef unsigned int size_t;
%}
/* Tell SWIG about it */
typedef unsigned int size_t;
or
%inline %{
typedef unsigned int size_t;
%}
In certain cases, you might be able to include other header files to collect type information. For example:
%module example
%import "sys/types.h"
In this case, you might run SWIG as follows:
$ swig -I/usr/include -includeall example.i
It should be noted that your mileage will vary greatly here. System headers are notoriously complicated and may rely upon a variety of non-standard C coding extensions (e.g., such as special directives to GCC). Unless you exactly specify the right include directories and preprocessor symbols, this may not work correctly (you will have to experiment).
SWIG tracks typedef declarations and uses this information for run-time type checking. For instance, if you use the above typedef and had the following function declaration:
void foo(unsigned int *ptr);
The corresponding wrapper function will accept arguments of type unsigned int * or size_t *.
So far, this chapter has presented almost everything you need to know to use SWIG for simple interfaces. However, some C programs use idioms that are somewhat more difficult to map to a scripting language interface. This section describes some of these issues.
Sometimes a C function takes structure parameters that are passed by value. For example, consider the following function:
double dot_product(Vector a, Vector b);
To deal with this, SWIG transforms the function to use pointers by creating a wrapper equivalent to the following:
double wrap_dot_product(Vector *a, Vector *b) {
    Vector x = *a;
    Vector y = *b;
    return dot_product(x,y);
}
In the target language, the dot_product() function now accepts pointers to Vectors instead of Vectors. For the most part, this transformation is transparent so you might not notice.
C functions that return structures or classes datatypes by value are more difficult to handle. Consider the following function:
Vector cross_product(Vector v1, Vector v2);
This function wants to return Vector, but SWIG only really supports pointers. As a result, SWIG creates a wrapper like this:
Vector *wrap_cross_product(Vector *v1, Vector *v2) {
        Vector x = *v1;
        Vector y = *v2;
        Vector *result;
        result = (Vector *) malloc(sizeof(Vector));
        *(result) = cross(x,y);
        return result;
}
or if SWIG was run with the -c++ option:
Vector *wrap_cross(Vector *v1, Vector *v2) {
        Vector x = *v1;
        Vector y = *v2;
        Vector *result = new Vector(cross(x,y)); // Uses default copy constructor
        return result;
}
In both cases, SWIG allocates a new object and returns a reference to it. It is up to the user to delete the returned object when it is no longer in use. Clearly, this will leak memory if you are unaware of the implicit memory allocation and don't take steps to free the result. That said, it should be noted that some language modules can now automatically track newly created objects and reclaim memory for you. Consult the documentation for each language module for more details.
It should also be noted that the handling of pass/return by value in C++ has some special cases. For example, the above code fragments don't work correctly if Vector doesn't define a default constructor. The section on SWIG and C++ has more information about this case.
When global variables or class members involving structures are encountered, SWIG handles them as pointers. For example, a global variable like this
Vector unit_i;
gets mapped to an underlying pair of set/get functions like this :
Vector *unit_i_get() {
	return &unit_i;
}
void unit_i_set(Vector *value) {
	unit_i = *value;
}
Again some caution is in order. A global variable created in this manner will show up as a pointer in the target scripting language. It would be an extremely bad idea to free or destroy such a pointer. Also, C++ classes must supply a properly defined copy constructor in order for assignment to work correctly.
When a global variable of type char * appears, SWIG uses malloc() or new to allocate memory for the new value. Specifically, if you have a variable like this
char *foo;
SWIG generates the following code:
/* C mode */
void foo_set(char *value) {
   if (foo) free(foo);
   foo = (char *) malloc(strlen(value)+1);
   strcpy(foo,value);
}

/* C++ mode.  When -c++ option is used */
void foo_set(char *value) {
   if (foo) delete [] foo;
   foo = new char[strlen(value)+1];
   strcpy(foo,value);
}
If this is not the behavior that you want, consider making the variable read-only using the %immutable directive. Alternatively, you might write a short assist-function to set the value exactly like you want. For example:
%inline %{
  void set_foo(char *value) {
       strncpy(foo,value, 50);
   }
%}
Note: If you write an assist function like this, you will have to call it as a function from the target scripting language (it does not work like a variable). For example, in Python you will have to write:
>>> set_foo("Hello World")
A common mistake with char * variables is to link to a variable declared like this:
char *VERSION = "1.0";
In this case, the variable will be readable, but any attempt to change the value results in a segmentation or general protection fault. This is due to the fact that SWIG is trying to release the old value using free or delete when the string literal value currently assigned to the variable wasn't allocated using malloc() or new. To fix this behavior, you can either mark the variable as read-only, write a typemap (as described in Chapter 6), or write a special set function as shown. Another alternative is to declare the variable as an array:
char VERSION[64] = "1.0";
When variables of type const char * are declared, SWIG still generates functions for setting and getting the value. However, the default behavior does not release the previous contents (resulting in a possible memory leak). In fact, you may get a warning message such as this when wrapping such a variable:
example.i:20. Typemap warning. Setting const char * variable may leak memory
The reason for this behavior is that const char * variables are often used to point to string literals. For example:
const char *foo = "Hello World\n";
Therefore, it's a really bad idea to call free() on such a pointer. On the other hand, it is legal to change the pointer to point to some other value. When setting a variable of this type, SWIG allocates a new string (using malloc or new) and changes the pointer to point to the new value. However, repeated modifications of the value will result in a memory leak since the old value is not released.
Arrays are fully supported by SWIG, but they are always handled as pointers instead of mapping them to a special array object or list in the target language. Thus, the following declarations :
int foobar(int a[40]);
void grok(char *argv[]);
void transpose(double a[20][20]);
are processed as if they were really declared like this:
int foobar(int *a);
void grok(char **argv);
void transpose(double (*a)[20]);
Like C, SWIG does not perform array bounds checking. It is up to the user to make sure the pointer points a suitably allocated region of memory.
Multi-dimensional arrays are transformed into a pointer to an array of one less dimension. For example:
int [10];         // Maps to int *
int [10][20];     // Maps to int (*)[20]
int [10][20][30]; // Maps to int (*)[20][30]
It is important to note that in the C type system, a multidimensional array a[][] is NOT equivalent to a single pointer *a or a double pointer such as **a. Instead, a pointer to an array is used (as shown above) where the actual value of the pointer is the starting memory location of the array. The reader is strongly advised to dust off their C book and re-read the section on arrays before using them with SWIG.
Array variables are supported, but are read-only by default. For example:
int a[100][200];
In this case, reading the variable 'a' returns a pointer of type int (*)[200] that points to the first element of the array &a[0][0]. Trying to modify 'a' results in an error. This is because SWIG does not know how to copy data from the target language into the array. To work around this limitation, you may want to write a few simple assist functions like this:
%inline %{
void a_set(int i, int j, int val) {
   a[i][j] = val;
}
int a_get(int i, int j) {
   return a[i][j];
}
%}
To dynamically create arrays of various sizes and shapes, it may be useful to write some helper functions in your interface. For example:
// Some array helpers
%inline %{
  /* Create any sort of [size] array */
  int *int_array(int size) {
     return (int *) malloc(size*sizeof(int));
  }
  /* Create a two-dimension array [size][10] */
  int (*int_array_10(int size))[10] {
     return (int (*)[10]) malloc(size*10*sizeof(int));
  }
%}
Arrays of char are handled as a special case by SWIG. In this case, strings in the target language can be stored in the array. For example, if you have a declaration like this,
char pathname[256];
SWIG generates functions for both getting and setting the value that are equivalent to the following code:
char *pathname_get() {
   return pathname;
}
void pathname_set(char *value) {
   strncpy(pathname,value,256);
}
In the target language, the value can be set like a normal variable.
A read-only variable can be created by using the %immutable directive as shown :
// File : interface.i

int 	a; 			// Can read/write
%immutable;
int	b,c,d			// Read only variables
%mutable;
double	x,y			// read/write
The %immutable directive enables read-only mode until it is explicitly disabled using the %mutable directive. As an alternative to turning read-only mode off and on like this, individual declarations can also be tagged as immutable. For example:
%immutable x;                   // Make x read-only
...
double x;                       // Read-only (from earlier %immutable directive)
double y;                       // Read-write
...
The %mutable and %immutable directives are actually %feature directives defined like this:
#define %immutable   %feature("immutable")
#define %mutable     %feature("immutable","")
If you wanted to make all wrapped variables read-only, barring one or two, it might be easier to take this approach:
%immutable;                     // Make all variables read-only
%feature("immutable","0") x;    // except, make x read/write
...
double x;
double y;
double z;
...
Read-only variables are also created when declarations are declared as const. For example:
const int foo;               /* Read only variable */
char * const version="1.0";  /* Read only variable */
Compatibility note: Read-only access used to be controlled by a pair of directives %readonly and %readwrite. Although these directives still work, they generate a warning message. Simply change the directives to %immutable; and %mutable; to silence the warning. Don't forget the extra semicolon!
Normally, the name of a C declaration is used when that declaration is wrapped into the target language. However, this may generate a conflict with a keyword or already existing function in the scripting language. To resolve a name conflict, you can use the %rename directive as shown :
// interface.i

%rename(my_print) print;
extern void print(const char *);

%rename(foo) a_really_long_and_annoying_name;
extern int a_really_long_and_annoying_name;
SWIG still calls the correct C function, but in this case the function print() will really be called "my_print()" in the target language.
The placement of the %rename directive is arbitrary as long as it appears before the declarations to be renamed. A common technique is to write code for wrapping a header file like this:
// interface.i

%rename(my_print) print;
%rename(foo) a_really_long_and_annoying_name;

%include "header.h"
%rename applies a renaming operation to all future occurrences of a name. The renaming applies to functions, variables, class and structure names, member functions, and member data. For example, if you had two-dozen C++ classes, all with a member function named `print' (which is a keyword in Python), you could rename them all to `output' by specifying :
%rename(output) print; // Rename all `print' functions to `output'
SWIG does not normally perform any checks to see if the functions it wraps are already defined in the target scripting language. However, if you are careful about namespaces and your use of modules, you can usually avoid these problems.
Closely related to %rename is the %ignore directive. %ignore instructs SWIG to ignore declarations that match a given identifier. For example:
%ignore print;         // Ignore all declarations named print
%ignore MYMACRO;       // Ignore a macro
...
#define MYMACRO 123
void print(const char *);
...
Any function, variable etc which matches %ignore will not be wrapped and therefore will not be available from the target language. A common usage of %ignore is to selectively remove certain declarations from a header file without having to add conditional compilation to the header. However, it should be stressed that this only works for simple declarations. If you need to remove a whole section of problematic code, the SWIG preprocessor should be used instead.
Compatibility note: Older versions of SWIG provided a special %name directive for renaming declarations. For example:
%name(output) extern void print(const char *);
This directive is still supported, but it is deprecated and should probably be avoided. The %rename directive is more powerful and better supports wrapping of raw header file information.
While writing %rename for specific declarations is simple enough, sometimes the same renaming rule needs to be applied to many, maybe all, identifiers in the SWIG input. For example, it may be necessary to apply some transformation to all the names in the target language to better follow its naming conventions, like adding a specific prefix to all wrapped functions. Doing it individually for each function is impractical so SWIG supports applying a renaming rule to all declarations if the name of the identifier to be renamed is not specified:
%rename("myprefix_%s") ""; // print -> myprefix_print
This also shows that the argument of %rename doesn't have to be a literal string but can be a printf()-like format string. In the simplest form, "%s" is replaced with the name of the original declaration, as shown above. However this is not always enough and SWIG provides extensions to the usual format string syntax to allow applying a (SWIG-defined) function to the argument. For example, to wrap all C functions do_something_long() as more Java-like doSomethingLong() you can use the "lowercamelcase" extended format specifier like this:
%rename("%(lowercamelcase)s") ""; // foo_bar -> fooBar; FooBar -> fooBar
Some functions can be parametrized, for example the "strip" one strips the provided prefix from its argument. The prefix is specified as part of the format string, following a colon after the function name:
%rename("%(strip:[wx])s") ""; // wxHello -> Hello; FooBar -> FooBar
Below is the table summarizing all currently defined functions with an example of applying each one. Note that some of them have two names, a shorter one and a more descriptive one, but the two functions are otherwise equivalent:
| Function | Returns | Example (in/out) | |
|---|---|---|---|
| uppercase or upper | Upper case version of the string. | ||
| lowercase or lower | Lower case version of the string. | ||
| title | String with first letter capitalized and the rest in lower case. | ||
| firstuppercase | String with the first letter capitalized and the rest unchanged. | printIt | PrintIt |
| firstlowercase | String with the first letter in lower case and the rest unchanged. | PrintIt | printIt |
| camelcase or ctitle | String with capitalized first letter and any letter following an underscore (which are removed in the process) and rest in lower case. | print_it | PrintIt |
| lowercamelcase or lctitle | String with every letter following an underscore (which is removed in the process) capitalized and rest, including the first letter, in lower case. | print_it | printIt |
| undercase or utitle | Lower case string with underscores inserted before every upper case letter in the original string and any number not at the end of string. Logically, this is the reverse of camelcase. | PrintIt | print_it |
| schemify | String with all underscores replaced with dashes, resulting in more Lispers/Schemers-pleasing name. | print_it | print-it |
| strip:[prefix] | String without the given prefix or the original string if it doesn't start with this prefix. Note that square brackets should be used literally, e.g. %rename("strip:[wx]") | wxPrint | |
| regex:/pattern/subst/ | String after (Perl-like) regex substitution operation. This function allows to apply arbitrary regular expressions to the identifier names. The pattern part is a regular expression in Perl syntax (as supported by the Perl Compatible Regular Expressions (PCRE)) library and the subst string can contain back-references introduced by '\' or, as backslashes need to be escaped in C strings, rather by "\\". For example, to remove any alphabetic prefix before an underscore you could use the following directive: %rename("regex:/(\\w+)_(.*)/\\2/") | Prefix_Print | |
| command:cmd | Output of an external command cmd with the string passed to it as input. Notice that this function is extremely slow compared to all the other ones as it involves spawning a separate process and using it for many declarations is not recommended. The cmd is not enclosed in square brackets but must be terminated with a triple '<' sign, e.g. %rename("command:tr -d aeiou <<<") (nonsensical example removing all vowels) | Prnt | |
The most general function of all of the above ones (not counting command which is even more powerful in principle but which should generally be avoided because of performance considerations) is the regex one. Here are some more examples of its use:
// Strip the wx prefix from all identifiers except those starting with wxEVT
%rename("%(regex:/wx(?!EVT)(.*)/\\1/)s") ""; // wxSomeWidget -> SomeWidget
                                             // wxEVT_PAINT -> wxEVT_PAINT

// Apply a rule for renaming the enum elements to avoid the common prefixes
// which are redundant in C#/Java
%rename("%(regex:/^([A-Z][a-z]+)+_(.*)/\\2/)s", %$isenumitem) ""; // Colour_Red -> Red

// Remove all "Set/Get" prefixes.
%rename("%(regex:/^(Set|Get)(.*)/\\2/)s") ""; // SetValue -> Value
                                              // GetValue -> Value
As before, everything that was said above about %rename also applies to %ignore. In fact, the latter is just a special case of the former and ignoring an identifier is the same as renaming it to the special "$ignore" value. So the following snippets
%ignore print;
and
%rename("$ignore") print;
are exactly equivalent and %rename can be used to selectively ignore multiple declarations using the previously described matching possibilities.
As explained in the previous sections, it is possible to either rename individual declarations or apply a rename rule to all of them at once. In practice, the latter is however rarely appropriate as there are always some exceptions to the general rules. To deal with them, the scope of an unnamed %rename can be limited using subsequent match parameters. They can be applied to any of the attributes associated by SWIG with the declarations appearing in its input. For example:
%rename("foo", match$name="bar") "";
can be used to achieve the same effect as the simpler
%rename("foo") bar;
and so is not very interesting on its own. However match can also be applied to the declaration type, for example match="class" restricts the match to class declarations only (in C++) and match="enumitem" restricts it to the enum elements. SWIG also provides convenience macros for such match expressions, for example
%rename("%(title)s", %$isenumitem) "";
will capitalize the names of all the enum elements but not change the case of the other declarations. Similarly, %$isclass, %$isfunction, %$isconstructor, %$isunion, %$istemplate, and %$isvariable can be used. Many other checks are possible and this documentation is not exhaustive, see the "%rename predicates" section in swig.swg for the full list of supported match expressions.
In addition to literally matching some string with match you can also use regexmatch or notregexmatch to match a string against a regular expression. For example, to ignore all functions having "Old" as a suffix you could use
%rename("$ignore", regexmatch$name="Old$") "";
For simple cases like this, specifying the regular expression for the declaration name directly can be preferable and can also be done using regextarget:
%rename("$ignore", regextarget=1) "Old$";
Notice that the check is done only against the name of the declaration itself, if you need to match the full name of a C++ declaration you must use fullname attribute:
%rename("$ignore", regextarget=1, fullname=1) "NameSpace::ClassName::.*Old$";
As for notregexmatch, it restricts the match only to the strings not matching the specified regular expression. So to rename all declarations to lower case except those consisting of capital letters only:
%rename("$(lower)s", notregexmatch$name="^[A-Z]+$") "";
Finally, variants of %rename and %ignore directives can be used to help wrap C++ overloaded functions and methods or C++ methods which use default arguments. This is described in the Ambiguity resolution and renaming section in the C++ chapter.
Using the techniques described above it is possible to ignore everything in a header and then selectively wrap a few chosen methods or classes. For example, consider a header, myheader.h which has many classes in it and just the one class called Star is wanted within this header, the following approach could be taken:
%ignore ""; // Ignore everything

// Unignore chosen class 'Star'
%rename("%s") Star;

// As the ignore everything will include the constructor, destructor, methods etc
// in the class, these have to be explicitly unignored too:
%rename("%s") Star::Star;
%rename("%s") Star::~Star;
%rename("%s") Star::shine; // named method

%include "myheader.h"
Another approach which might be more suitable as it does not require naming all the methods in the chosen class is to begin by ignoring just the classes. This does not add an explicit ignore to any members of the class, so when the chosen class is unignored, all of its methods will be wrapped.
%rename($ignore, %$isclass) ""; // Only ignore all classes
%rename("%s") Star; // Unignore 'Star'
%include "myheader.h"
SWIG supports default arguments in both C and C++ code. For example:
int plot(double x, double y, int color=WHITE);
In this case, SWIG generates wrapper code where the default arguments are optional in the target language. For example, this function could be used in Tcl as follows :
% plot -3.4 7.5 				# Use default value
% plot -3.4 7.5 10				# set color to 10 instead
Although the ANSI C standard does not allow default arguments, default arguments specified in a SWIG interface work with both C and C++.
Note: There is a subtle semantic issue concerning the use of default arguments and the SWIG generated wrapper code. When default arguments are used in C code, the default values are emitted into the wrappers and the function is invoked with a full set of arguments. This is different to when wrapping C++ where an overloaded wrapper method is generated for each defaulted argument. Please refer to the section on default arguments in the C++ chapter for further details.
Occasionally, a C library may include functions that expect to receive pointers to functions--possibly to serve as callbacks. SWIG provides full support for function pointers provided that the callback functions are defined in C and not in the target language. For example, consider a function like this:
int binary_op(int a, int b, int (*op)(int,int));
When you first wrap something like this into an extension module, you may find the function to be impossible to use. For instance, in Python:
>>> def add(x,y):
...     return x+y
...
>>> binary_op(3,4,add)
Traceback (most recent call last):
  File "<stdin>", line 1, in ?
TypeError: Type error. Expected _p_f_int_int__int
>>>
The reason for this error is that SWIG doesn't know how to map a scripting language function into a C callback. However, existing C functions can be used as arguments provided you install them as constants. One way to do this is to use the %constant directive like this:
/* Function with a callback */
int binary_op(int a, int b, int (*op)(int,int));

/* Some callback functions */
%constant int add(int,int);
%constant int sub(int,int);
%constant int mul(int,int);
In this case, add, sub, and mul become function pointer constants in the target scripting language. This allows you to use them as follows:
>>> binary_op(3,4,add)
7
>>> binary_op(3,4,mul)
12
>>>
Unfortunately, by declaring the callback functions as constants, they are no longer accessible as functions. For example:
>>> add(3,4)
Traceback (most recent call last):
  File "<stdin>", line 1, in ?
TypeError: object is not callable: '_ff020efc_p_f_int_int__int'
>>>
If you want to make a function available as both a callback function and a function, you can use the %callback and %nocallback directives like this:
/* Function with a callback */
int binary_op(int a, int b, int (*op)(int,int));

/* Some callback functions */
%callback("%s_cb");
int add(int,int);
int sub(int,int);
int mul(int,int);
%nocallback;
The argument to %callback is a printf-style format string that specifies the naming convention for the callback constants (%s gets replaced by the function name). The callback mode remains in effect until it is explicitly disabled using %nocallback. When you do this, the interface now works as follows:
>>> binary_op(3,4,add_cb)
7
>>> binary_op(3,4,mul_cb)
12
>>> add(3,4)
7
>>> mul(3,4)
12
Notice that when the function is used as a callback, special names such as add_cb is used instead. To call the function normally, just use the original function name such as add().
SWIG provides a number of extensions to standard C printf formatting that may be useful in this context. For instance, the following variation installs the callbacks as all upper case constants such as ADD, SUB, and MUL:
/* Some callback functions */
%callback("%(uppercase)s");
int add(int,int);
int sub(int,int);
int mul(int,int);
%nocallback;
A format string of "%(lowercase)s" converts all characters to lower case. A string of "%(title)s" capitalizes the first character and converts the rest to lower case.
And now, a final note about function pointer support. Although SWIG does not normally allow callback functions to be written in the target language, this can be accomplished with the use of typemaps and other advanced SWIG features. See the Typemaps chapter for more about typemaps and individual target language chapters for more on callbacks and the 'director' feature.
This section describes the behavior of SWIG when processing ANSI C structures and union declarations. Extensions to handle C++ are described in the next section.
If SWIG encounters the definition of a structure or union, it creates a set of accessor functions. Although SWIG does not need structure definitions to build an interface, providing definitions make it possible to access structure members. The accessor functions generated by SWIG simply take a pointer to an object and allow access to an individual member. For example, the declaration :
struct Vector {
	double x,y,z;
}
gets transformed into the following set of accessor functions :
double Vector_x_get(struct Vector *obj) {
	return obj->x;
}
double Vector_y_get(struct Vector *obj) {
	return obj->y;
}
double Vector_z_get(struct Vector *obj) {
	return obj->z;
}
void Vector_x_set(struct Vector *obj, double value) {
	obj->x = value;
}
void Vector_y_set(struct Vector *obj, double value) {
	obj->y = value;
}
void Vector_z_set(struct Vector *obj, double value) {
	obj->z = value;
}
In addition, SWIG creates default constructor and destructor functions if none are defined in the interface. For example:
struct Vector *new_Vector() {
    return (Vector *) calloc(1,sizeof(struct Vector));
}
void delete_Vector(struct Vector *obj) {
    free(obj);
}
Using these low-level accessor functions, an object can be minimally manipulated from the target language using code like this:
v = new_Vector()
Vector_x_set(v,2)
Vector_y_set(v,10)
Vector_z_set(v,-5)
...
delete_Vector(v)
However, most of SWIG's language modules also provide a high-level interface that is more convenient. Keep reading.
SWIG supports the following construct which is quite common in C programs :
typedef struct {
	double x,y,z;
} Vector;
When encountered, SWIG assumes that the name of the object is `Vector' and creates accessor functions like before. The only difference is that the use of typedef allows SWIG to drop the struct keyword on its generated code. For example:
double Vector_x_get(Vector *obj) {
	return obj->x;
}
If two different names are used like this :
typedef struct vector_struct {
	double x,y,z;
} Vector;
the name Vector is used instead of vector_struct since this is more typical C programming style. If declarations defined later in the interface use the type struct vector_struct, SWIG knows that this is the same as Vector and it generates the appropriate type-checking code.
Structures involving character strings require some care. SWIG assumes that all members of type char * have been dynamically allocated using malloc() and that they are NULL-terminated ASCII strings. When such a member is modified, the previously contents will be released, and the new contents allocated. For example :
%module mymodule
...
struct Foo {
	char *name;
	...
}
This results in the following accessor functions :
char *Foo_name_get(Foo *obj) {
	return Foo->name;
}

char *Foo_name_set(Foo *obj, char *c) {
	if (obj->name) free(obj->name);
	obj->name = (char *) malloc(strlen(c)+1);
	strcpy(obj->name,c);
	return obj->name;
}
If this behavior differs from what you need in your applications, the SWIG "memberin" typemap can be used to change it. See the typemaps chapter for further details.
Note: If the -c++ option is used, new and delete are used to perform memory allocation.
Arrays may appear as the members of structures, but they will be read-only. SWIG will write an accessor function that returns the pointer to the first element of the array, but will not write a function to change the contents of the array itself. When this situation is detected, SWIG may generate a warning message such as the following :
interface.i:116. Warning. Array member will be read-only
To eliminate the warning message, typemaps can be used, but this is discussed in a later chapter. In many cases, the warning message is harmless.
Occasionally, a structure will contain data members that are themselves structures. For example:
typedef struct Foo {
   int x;
} Foo;

typedef struct Bar {
   int y;
   Foo f;           /* struct member */
} Bar;
When a structure member is wrapped, it is handled as a pointer, unless the %naturalvar directive is used where it is handled more like a C++ reference (see C++ Member data). The accessors to the member variable as a pointer is effectively wrapped as follows:
Foo *Bar_f_get(Bar *b) {
   return &b->f;
}
void Bar_f_set(Bar *b, Foo *value) {
   b->f = *value;
}
The reasons for this are somewhat subtle but have to do with the problem of modifying and accessing data inside the data member. For example, suppose you wanted to modify the value of f.x of a Bar object like this:
Bar *b;
b->f.x = 37;
Translating this assignment to function calls (as would be used inside the scripting language interface) results in the following code:
Bar *b;
Foo_x_set(Bar_f_get(b),37);
In this code, if the Bar_f_get() function were to return a Foo instead of a Foo *, then the resulting modification would be applied to a copy of f and not the data member f itself. Clearly that's not what you want!
It should be noted that this transformation to pointers only occurs if SWIG knows that a data member is a structure or class. For instance, if you had a structure like this,
struct Foo {
   WORD   w;
};
and nothing was known about WORD, then SWIG will generate more normal accessor functions like this:
WORD Foo_w_get(Foo *f) {
    return f->w;
}
void Foo_w_set(FOO *f, WORD value) {
    f->w = value;
}
Compatibility Note: SWIG-1.3.11 and earlier releases transformed all non-primitive member datatypes to pointers. Starting in SWIG-1.3.12, this transformation only occurs if a datatype is known to be a structure, class, or union. This is unlikely to break existing code. However, if you need to tell SWIG that an undeclared datatype is really a struct, simply use a forward struct declaration such as "struct Foo;".
When wrapping structures, it is generally useful to have a mechanism for creating and destroying objects. If you don't do anything, SWIG will automatically generate functions for creating and destroying objects using malloc() and free(). Note: the use of malloc() only applies when SWIG is used on C code (i.e., when the -c++ option is not supplied on the command line). C++ is handled differently.
If you don't want SWIG to generate default constructors for your interfaces, you can use the %nodefaultctor directive or the -nodefaultctor command line option. For example:
swig -nodefaultctor example.i
or
%module foo
...
%nodefaultctor;        // Don't create default constructors
... declarations ...
%clearnodefaultctor;   // Re-enable default constructors
If you need more precise control, %nodefaultctor can selectively target individual structure definitions. For example:
%nodefaultctor Foo;      // No default constructor for Foo
...
struct Foo {             // No default constructor generated.
};

struct Bar {             // Default constructor generated.
};
Since ignoring the implicit or default destructors most of the times produce memory leaks, SWIG will always try to generate them. If needed, however, you can selectively disable the generation of the default/implicit destructor by using %nodefaultdtor
%nodefaultdtor Foo; // No default/implicit destructor for Foo
...
struct Foo {              // No default destructor is generated.
};

struct Bar {              // Default destructor generated.
};
Compatibility note: Prior to SWIG-1.3.7, SWIG did not generate default constructors or destructors unless you explicitly turned them on using -make_default. However, it appears that most users want to have constructor and destructor functions so it has now been enabled as the default behavior.
Note: There are also the -nodefault option and %nodefault directive, which disable both the default or implicit destructor generation. This could lead to memory leaks across the target languages, and is highly recommended you don't use them.
Most languages provide a mechanism for creating classes and supporting object oriented programming. From a C standpoint, object oriented programming really just boils down to the process of attaching functions to structures. These functions normally operate on an instance of the structure (or object). Although there is a natural mapping of C++ to such a scheme, there is no direct mechanism for utilizing it with C code. However, SWIG provides a special %extend directive that makes it possible to attach methods to C structures for purposes of building an object oriented interface. Suppose you have a C header file with the following declaration :
/* file : vector.h */
...
typedef struct Vector {
	double x,y,z;
} Vector;
You can make a Vector look a lot like a class by writing a SWIG interface like this:
// file : vector.i
%module mymodule
%{
#include "vector.h"
%}

%include "vector.h"          // Just grab original C header file
%extend Vector {             // Attach these functions to struct Vector
	Vector(double x, double y, double z) {
		Vector *v;
		v = (Vector *) malloc(sizeof(Vector));
		v->x = x;
		v->y = y;
		v->z = z;
		return v;
	}
	~Vector() {
		free($self);
	}
	double magnitude() {
		return sqrt($self->x*$self->x+$self->y*$self->y+$self->z*$self->z);
	}
	void print() {
		printf("Vector [%g, %g, %g]\n", $self->x,$self->y,$self->z);
	}
};
Note the usage of the $self special variable. Its usage is identical to a C++ 'this' pointer and should be used whenever access to the struct instance is required. Also note that C++ constructor and destructor syntax has been used to simulate a constructor and destructor, even for C code. There is one subtle difference to a normal C++ constructor implementation though and that is although the constructor declaration is as per a normal C++ constructor, the newly constructed object must be returned as if the constructor declaration had a return value, a Vector * in this case.
Now, when used with proxy classes in Python, you can do things like this :
>>> v = Vector(3,4,0)                 # Create a new vector
>>> print v.magnitude()                # Print magnitude
5.0
>>> v.print()                  # Print it out
[ 3, 4, 0 ]
>>> del v                      # Destroy it
The %extend directive can also be used inside the definition of the Vector structure. For example:
// file : vector.i
%module mymodule
%{
#include "vector.h"
%}

typedef struct Vector {
	double x,y,z;
	%extend {
		Vector(double x, double y, double z) { ... }
		~Vector() { ... }
		...
	}
} Vector;
Note that %extend can be used to access externally written functions provided they follow the naming convention used in this example :
/* File : vector.c */
/* Vector methods */
#include "vector.h"
Vector *new_Vector(double x, double y, double z) {
	Vector *v;
	v = (Vector *) malloc(sizeof(Vector));
	v->x = x;
	v->y = y;
	v->z = z;
	return v;
}
void delete_Vector(Vector *v) {
	free(v);
}

double Vector_magnitude(Vector *v) {
	return sqrt(v->x*v->x+v->y*v->y+v->z*v->z);
}

// File : vector.i
// Interface file
%module mymodule
%{
#include "vector.h"
%}

typedef struct Vector {
	double x,y,z;
	%extend {
                Vector(int,int,int); // This calls new_Vector()
               ~Vector();            // This calls delete_Vector()
		double magnitude();  // This will call Vector_magnitude()
		...
	}
} Vector;
The name used for %extend should be the name of the struct and not the name of any typedef to the struct. For example:
typedef struct Integer {
	int value;
} Int;
%extend Integer { ...  } /* Correct name */
%extend Int { ...  } /* Incorrect name */

struct Float {
	float value;
};
typedef struct Float FloatValue;
%extend Float { ...  } /* Correct name */
%extend FloatValue { ...  } /* Incorrect name */
There is one exception to this rule and that is when the struct is anonymously named such as:
typedef struct {
	double value;
} Double;
%extend Double { ...  } /* Okay */
A little known feature of the %extend directive is that it can also be used to add synthesized attributes or to modify the behavior of existing data attributes. For example, suppose you wanted to make magnitude a read-only attribute of Vector instead of a method. To do this, you might write some code like this:
// Add a new attribute to Vector
%extend Vector {
    const double magnitude;
}
// Now supply the implementation of the Vector_magnitude_get function
%{
const double Vector_magnitude_get(Vector *v) {
  return (const double) sqrt(v->x*v->x+v->y*v->y+v->z*v->z);
}
%}
Now, for all practical purposes, magnitude will appear like an attribute of the object.
A similar technique can also be used to work with data members that you want to process. For example, consider this interface:
typedef struct Person {
  char name[50];
  ...
} Person;
Say you wanted to ensure name was always upper case, you can rewrite the interface as follows to ensure this occurs whenever a name is read or written to:
typedef struct Person {
  %extend {
    char name[50];
  }
  ...
} Person;

%{
#include <string.h>
#include <ctype.h>

void make_upper(char *name) {
  char *c;
  for (c = name; *c; ++c)
    *c = (char)toupper((int)*c);
}

/* Specific implementation of set/get functions forcing capitalization */

char *Person_name_get(Person *p) {
  make_upper(p->name);
  return p->name;
}

void Person_name_set(Person *p, char *val) {
  strncpy(p->name,val,50);
  make_upper(p->name);
}
%}
Finally, it should be stressed that even though %extend can be used to add new data members, these new members can not require the allocation of additional storage in the object (e.g., their values must be entirely synthesized from existing attributes of the structure or obtained elsewhere).
Compatibility note: The %extend directive is a new name for the %addmethods directive. Since %addmethods could be used to extend a structure with more than just methods, a more suitable directive name has been chosen.
Occasionally, a C program will involve structures like this :
typedef struct Object {
	int objtype;
	union {
		int 	ivalue;
		double	dvalue;
		char	*strvalue;
		void	*ptrvalue;
	} intRep;
} Object;
When SWIG encounters this, it performs a structure splitting operation that transforms the declaration into the equivalent of the following:
typedef union {
	int 		ivalue;
	double		dvalue;
	char		*strvalue;
	void		*ptrvalue;
} Object_intRep;

typedef struct Object {
	int objType;
	Object_intRep intRep;
} Object;
SWIG will then create an Object_intRep structure for use inside the interface file. Accessor functions will be created for both structures. In this case, functions like this would be created :
Object_intRep *Object_intRep_get(Object *o) {
	return (Object_intRep *) &o->intRep;
}
int Object_intRep_ivalue_get(Object_intRep *o) {
	return o->ivalue;
}
int Object_intRep_ivalue_set(Object_intRep *o, int value) {
	return (o->ivalue = value);
}
double Object_intRep_dvalue_get(Object_intRep *o) {
	return o->dvalue;
}
... etc ...
Although this process is a little hairy, it works like you would expect in the target scripting language--especially when proxy classes are used. For instance, in Perl:
# Perl5 script for accessing nested member
$o = CreateObject();                    # Create an object somehow
$o->{intRep}->{ivalue} = 7              # Change value of o.intRep.ivalue
If you have a lot of nested structure declarations, it is advisable to double-check them after running SWIG. Although, there is a good chance that they will work, you may have to modify the interface file in certain cases.
Finally, note that nesting is handled differently in C++ mode, see Nested classes.
SWIG doesn't care if the declaration of a structure in a .i file exactly matches that used in the underlying C code (except in the case of nested structures). For this reason, there are no problems omitting problematic members or simply omitting the structure definition altogether. If you are happy passing pointers around, this can be done without ever giving SWIG a structure definition.
Starting with SWIG1.3, a number of improvements have been made to SWIG's code generator. Specifically, even though structure access has been described in terms of high-level accessor functions such as this,
double Vector_x_get(Vector *v) {
   return v->x;
}
most of the generated code is actually inlined directly into wrapper functions. Therefore, no function Vector_x_get() actually exists in the generated wrapper file. For example, when creating a Tcl module, the following function is generated instead:
static int
_wrap_Vector_x_get(ClientData clientData, Tcl_Interp *interp,
                   int objc, Tcl_Obj *CONST objv[]) {
    struct Vector *arg1 ;
    double result ;

    if (SWIG_GetArgs(interp, objc, objv,"p:Vector_x_get self ",&arg0,
                     SWIGTYPE_p_Vector) == TCL_ERROR)
         return TCL_ERROR;
    result = (double ) (arg1->x);
    Tcl_SetObjResult(interp,Tcl_NewDoubleObj((double) result));
    return TCL_OK;
}
The only exception to this rule are methods defined with %extend . In this case, the added code is contained in a separate function.
Finally, it is important to note that most language modules may choose to build a more advanced interface. Although you may never use the low-level interface described here, most of SWIG's language modules use it in some way or another.
Sometimes it is necessary to insert special code into the resulting wrapper file generated by SWIG. For example, you may want to include additional C code to perform initialization or other operations. There are four common ways to insert code, but it's useful to know how the output of SWIG is structured first.
When SWIG creates its output file, it is broken up into five sections corresponding to runtime code, headers, wrapper functions, and module initialization code (in that order).
Code is inserted into the appropriate code section by using one of the code insertion directives listed below. The order of the sections in the wrapper file is as shown:
%begin %{
   ... code in begin section ...
%}

%runtime %{
   ... code in runtime section ...
%}

%header %{
   ... code in header section ...
%}

%wrapper %{
   ... code in wrapper section ...
%}

%init %{
   ... code in init section ...
%}
The bare %{ ... %} directive is a shortcut that is the same as %header %{ ... %}.
The %begin section is effectively empty as it just contains the SWIG banner by default. This section is provided as a way for users to insert code at the top of the wrapper file before any other code is generated. Everything in a code insertion block is copied verbatim into the output file and is not parsed by SWIG. Most SWIG input files have at least one such block to include header files and support C code. Additional code blocks may be placed anywhere in a SWIG file as needed.
%module mymodule
%{
#include "my_header.h"
%}
... Declare functions here
%{

void some_extra_function() {
  ...
}
%}
A common use for code blocks is to write "helper" functions. These are functions that are used specifically for the purpose of building an interface, but which are generally not visible to the normal C program. For example :
%{
/* Create a new vector */
static Vector *new_Vector() {
	return (Vector *) malloc(sizeof(Vector));
}

%}
// Now wrap it
Vector *new_Vector();
Since the process of writing helper functions is fairly common, there is a special inlined form of code block that is used as follows :
%inline %{
/* Create a new vector */
Vector *new_Vector() {
	return (Vector *) malloc(sizeof(Vector));
}
%}
The %inline directive inserts all of the code that follows verbatim into the header portion of an interface file. The code is then parsed by both the SWIG preprocessor and parser. Thus, the above example creates a new command new_Vector using only one declaration. Since the code inside an %inline %{ ... %} block is given to both the C compiler and SWIG, it is illegal to include any SWIG directives inside a %{ ... %} block.
When code is included in the %init section, it is copied directly into the module initialization function. For example, if you needed to perform some extra initialization on module loading, you could write this:
%init %{
	init_variables();
%}
This section describes the general approach for building interface with SWIG. The specifics related to a particular scripting language are found in later chapters.
SWIG doesn't require modifications to your C code, but if you feed it a collection of raw C header files or source code, the results might not be what you expect---in fact, they might be awful. Here's a series of steps you can follow to make an interface for a C program :
Although this may sound complicated, the process turns out to be fairly easy once you get the hang of it.
In the process of building an interface, SWIG may encounter syntax errors or other problems. The best way to deal with this is to simply copy the offending code into a separate interface file and edit it. However, the SWIG developers have worked very hard to improve the SWIG parser--you should report parsing errors to the swig-devel mailing list or to the SWIG bug tracker.
The preferred method of using SWIG is to generate separate interface file. Suppose you have the following C header file :
/* File : header.h */

#include <stdio.h>
#include <math.h>

extern int foo(double);
extern double bar(int, int);
extern void dump(FILE *f);
A typical SWIG interface file for this header file would look like the following :
/* File : interface.i */
%module mymodule
%{
#include "header.h"
%}
extern int foo(double);
extern double bar(int, int);
extern void dump(FILE *f);
Of course, in this case, our header file is pretty simple so we could use a simpler approach and use an interface file like this:
/* File : interface.i */
%module mymodule
%{
#include "header.h"
%}
%include "header.h"
The main advantage of this approach is minimal maintenance of an interface file for when the header file changes in the future. In more complex projects, an interface file containing numerous %include and #include statements like this is one of the most common approaches to interface file design due to lower maintenance overhead.
Although SWIG can parse many header files, it is more common to write a special .i file defining the interface to a package. There are several reasons why you might want to do this:
Sometimes, it is necessary to use certain header files in order for the code generated by SWIG to compile properly. Make sure you include certain header files by using a %{,%} block like this:
%module graphics
%{
#include <GL/gl.h>
#include <GL/glu.h>
%}

// Put rest of declarations here
...
If your program defines a main() function, you may need to get rid of it or rename it in order to use a scripting language. Most scripting languages define their own main() procedure that is called instead. main() also makes no sense when working with dynamic loading. There are a few approaches to solving the main() conflict :
Getting rid of main() may cause potential initialization problems of a program. To handle this problem, you may consider writing a special function called program_init() that initializes your program upon startup. This function could then be called either from the scripting language as the first operation, or when the SWIG generated module is loaded.
As a general note, many C programs only use the main() function to parse command line options and to set parameters. However, by using a scripting language, you are probably trying to create a program that is more interactive. In many cases, the old main() program can be completely replaced by a Perl, Python, or Tcl script.
Note: If some cases, you might be inclined to create a scripting language wrapper for main(). If you do this, the compilation will probably work and your module might even load correctly. The only trouble is that when you call your main() wrapper, you will find that it actually invokes the main() of the scripting language interpreter itself! This behavior is a side effect of the symbol binding mechanism used in the dynamic linker. The bottom line: don't do this.
This chapter describes SWIG's support for wrapping C++. As a prerequisite, you should first read the chapter SWIG Basics to see how SWIG wraps ANSI C. Support for C++ builds upon ANSI C wrapping and that material will be useful in understanding this chapter.
Because of its complexity and the fact that C++ can be difficult to integrate with itself let alone other languages, SWIG only provides support for a subset of C++ features. Fortunately, this is now a rather large subset.
In part, the problem with C++ wrapping is that there is no semantically obvious (or automatic ) way to map many of its advanced features into other languages. As a simple example, consider the problem of wrapping C++ multiple inheritance to a target language with no such support. Similarly, the use of overloaded operators and overloaded functions can be problematic when no such capability exists in a target language.
A more subtle issue with C++ has to do with the way that some C++ programmers think about programming libraries. In the world of SWIG, you are really trying to create binary-level software components for use in other languages. In order for this to work, a "component" has to contain real executable instructions and there has to be some kind of binary linking mechanism for accessing its functionality. In contrast, C++ has increasingly relied upon generic programming and templates for much of its functionality. Although templates are a powerful feature, they are largely orthogonal to the whole notion of binary components and libraries. For example, an STL vector does not define any kind of binary object for which SWIG can just create a wrapper. To further complicate matters, these libraries often utilize a lot of behind the scenes magic in which the semantics of seemingly basic operations (e.g., pointer dereferencing, procedure call, etc.) can be changed in dramatic and sometimes non-obvious ways. Although this "magic" may present few problems in a C++-only universe, it greatly complicates the problem of crossing language boundaries and provides many opportunities to shoot yourself in the foot. You will just have to be careful.
To wrap C++, SWIG uses a layered approach to code generation. At the lowest level, SWIG generates a collection of procedural ANSI-C style wrappers. These wrappers take care of basic type conversion, type checking, error handling, and other low-level details of the C++ binding. These wrappers are also sufficient to bind C++ into any target language that supports built-in procedures. In some sense, you might view this layer of wrapping as providing a C library interface to C++. On top of the low-level procedural (flattened) interface, SWIG generates proxy classes that provide a natural object-oriented (OO) interface to the underlying code. The proxy classes are typically written in the target language itself. For instance, in Python, a real Python class is used to provide a wrapper around the underlying C++ object.
It is important to emphasize that SWIG takes a deliberately conservative and non-intrusive approach to C++ wrapping. SWIG does not encapsulate C++ classes inside a special C++ adaptor, it does not rely upon templates, nor does it add in additional C++ inheritance when generating wrappers. The last thing that most C++ programs need is even more compiler magic. Therefore, SWIG tries to maintain a very strict and clean separation between the implementation of your C++ application and the resulting wrapper code. You might say that SWIG has been written to follow the principle of least surprise--it does not play sneaky tricks with the C++ type system, it doesn't mess with your class hierarchies, and it doesn't introduce new semantics. Although this approach might not provide the most seamless integration with C++, it is safe, simple, portable, and debuggable.
Some of this chapter focuses on the low-level procedural interface to C++ that is used as the foundation for all language modules. Keep in mind that the target languages also provide the high-level OO interface via proxy classes. More detailed coverage can be found in the documentation for each target language.
SWIG currently supports most C++ features including the following:
The following C++ features are not currently supported:
As a rule of thumb, SWIG should not be used on raw C++ source files, use header files only.
SWIG's C++ support is an ongoing project so some of these limitations may be lifted in future releases. However, we make no promises. Also, submitting a bug report is a very good way to get problems fixed (wink).
When wrapping C++ code, it is critical that SWIG be called with the `-c++' option. This changes the way a number of critical features such as memory management are handled. It also enables the recognition of C++ keywords. Without the -c++ flag, SWIG will either issue a warning or a large number of syntax errors if it encounters C++ code in an interface file.
When compiling and linking the resulting wrapper file, it is normal to use the C++ compiler. For example:
$ swig -c++ -tcl example.i
$ c++ -c example_wrap.cxx
$ c++ example_wrap.o $(OBJS) -o example.so
Unfortunately, the process varies slightly on each platform. Make sure you refer to the documentation on each target language for further details. The SWIG Wiki also has further details.
Compatibility Note: Early versions of SWIG generated just a flattened low-level C style API to C++ classes by default. The -noproxy commandline option is recognised by many target languages and will generate just this interface as in earlier versions.In order to provide a natural mapping from C++ classes to the target language classes, SWIG's target languages mostly wrap C++ classes with special proxy classes. These proxy classes are typically implemented in the target language itself. For example, if you're building a Python module, each C++ class is wrapped by a Python proxy class. Or if you're building a Java module, each C++ class is wrapped by a Java proxy class.
Proxy classes are always constructed as an extra layer of wrapping that uses low-level accessor functions. To illustrate, suppose you had a C++ class like this:
class Foo {
public:
      Foo();
     ~Foo();
      int  bar(int x);
      int  x;
};
Using C++ as pseudocode, a proxy class looks something like this:
class FooProxy {
private:
      Foo    *self;
public:
      FooProxy() {
            self = new_Foo();
      }
     ~FooProxy() {
            delete_Foo(self);
      }
      int bar(int x) {
            return Foo_bar(self,x);
      }
      int x_get() {
            return Foo_x_get(self);
      }
      void x_set(int x) {
            Foo_x_set(self,x);
      }
};
Of course, always keep in mind that the real proxy class is written in the target language. For example, in Python, the proxy might look roughly like this:
class Foo:
    def __init__(self):
         self.this = new_Foo()
    def __del__(self):
         delete_Foo(self.this)
    def bar(self,x):
         return Foo_bar(self.this,x)
    def __getattr__(self,name):
         if name == 'x':
              return Foo_x_get(self.this)
         ...
    def __setattr__(self,name,value):
         if name == 'x':
              Foo_x_set(self.this,value)
         ...
Again, it's important to emphasize that the low-level accessor functions are always used by the proxy classes. Whenever possible, proxies try to take advantage of language features that are similar to C++. This might include operator overloading, exception handling, and other features.
A major issue with proxies concerns the memory management of wrapped objects. Consider the following C++ code:
class Foo {
public:
      Foo();
     ~Foo();
      int bar(int x);
      int x;
};

class Spam {
public:
      Foo *value;
      ...
};
Consider some script code that uses these classes:
f = Foo()               # Creates a new Foo
s = Spam()              # Creates a new Spam
s.value = f             # Stores a reference to f inside s
g = s.value             # Returns stored reference
g = 4                   # Reassign g to some other value
del f                   # Destroy f
Now, ponder the resulting memory management issues. When objects are created in the script, the objects are wrapped by newly created proxy classes. That is, there is both a new proxy class instance and a new instance of the underlying C++ class. In this example, both f and s are created in this way. However, the statement s.value is rather curious---when executed, a pointer to f is stored inside another object. This means that the scripting proxy class AND another C++ class share a reference to the same object. To make matters even more interesting, consider the statement g = s.value. When executed, this creates a new proxy class g that provides a wrapper around the C++ object stored in s.value . In general, there is no way to know where this object came from---it could have been created by the script, but it could also have been generated internally. In this particular example, the assignment of g results in a second proxy class for f. In other words, a reference to f is now shared by two proxy classes and a C++ class.
Finally, consider what happens when objects are destroyed. In the statement, g=4, the variable g is reassigned. In many languages, this makes the old value of g available for garbage collection. Therefore, this causes one of the proxy classes to be destroyed. Later on, the statement del f destroys the other proxy class. Of course, there is still a reference to the original object stored inside another C++ object. What happens to it? Is the object still valid?
To deal with memory management problems, proxy classes provide an API for controlling ownership. In C++ pseudocode, ownership control might look roughly like this:
class FooProxy {
public:
      Foo    *self;
      int     thisown;

      FooProxy() {
            self = new_Foo();
            thisown = 1;       // Newly created object
      }
     ~FooProxy() {
            if (thisown) delete_Foo(self);
      }
      ...
      // Ownership control API
      void disown() {
           thisown = 0;
      }
      void acquire() {
           thisown = 1;
      }
};

class FooPtrProxy: public FooProxy {
public:
      FooPtrProxy(Foo *s) {
          self = s;
          thisown = 0;
      }
};

class SpamProxy {
     ...
     FooProxy *value_get() {
          return FooPtrProxy(Spam_value_get(self));
     }
     void value_set(FooProxy *v) {
          Spam_value_set(self,v->self);
          v->disown();
     }
     ...
};
Looking at this code, there are a few central features:
Given the tricky nature of C++ memory management, it is impossible for proxy classes to automatically handle every possible memory management problem. However, proxies do provide a mechanism for manual control that can be used (if necessary) to address some of the more tricky memory management problems.
Language specific details on proxy classes are contained in the chapters describing each target language. This chapter has merely introduced the topic in a very general way.
The following code shows a SWIG interface file for a simple C++ class.
%module list
%{
#include "list.h"
%}

// Very simple C++ example for linked list

class List {
public:
  List();
  ~List();
  int  search(char *value);
  void insert(char *);
  void remove(char *);
  char *get(int n);
  int  length;
static void print(List *l);
};
To generate wrappers for this class, SWIG first reduces the class to a collection of low-level C-style accessor functions which are then used by the proxy classes.
C++ constructors and destructors are translated into accessor functions such as the following :
List * new_List(void) {
	return new List;
}
void delete_List(List *l) {
	delete l;
}
Following the C++ rules for implicit constructor and destructors, SWIG will automatically assume there is one even when they are not explicitly declared in the class interface.
In general then:
And as in C++, a few rules that alters the previous behavior:
SWIG should never generate a default constructor, copy constructor or default destructor wrapper for a class in which it is illegal to do so. In some cases, however, it could be necessary (if the complete class declaration is not visible from SWIG, and one of the above rules is violated) or desired (to reduce the size of the final interface) by manually disabling the implicit constructor/destructor generation.
To manually disable these, the %nodefaultctor and %nodefaultdtor feature flag directives can be used. Note that these directives only affects the implicit generation, and they have no effect if the default/copy constructors or destructor are explicitly declared in the class interface.
For example:
%nodefaultctor Foo;  // Disable the default constructor for class Foo.
class Foo {          // No default constructor is generated, unless one is declared
...
};
class Bar {          // A default constructor is generated, if possible
...
};
The directive %nodefaultctor can also be applied "globally", as in:
%nodefaultctor; // Disable creation of default constructors
class Foo {     // No default constructor is generated, unless one is declared
...
};
class Bar {
public:
  Bar();        // The default constructor is generated, since one is declared
};
%clearnodefaultctor; // Enable the creation of default constructors again
The corresponding %nodefaultdtor directive can be used to disable the generation of the default or implicit destructor, if needed. Be aware, however, that this could lead to memory leaks in the target language. Hence, it is recommended to use this directive only in well known cases. For example:
%nodefaultdtor Foo;   // Disable the implicit/default destructor for class Foo.
class Foo {           // No destructor is generated, unless one is declared
...
};
Compatibility Note: The generation of default constructors/implicit destructors was made the default behavior in SWIG 1.3.7. This may break certain older modules, but the old behavior can be easily restored using %nodefault or the -nodefault command line option. Furthermore, in order for SWIG to properly generate (or not generate) default constructors, it must be able to gather information from both the private and protected sections (specifically, it needs to know if a private or protected constructor/destructor is defined). In older versions of SWIG, it was fairly common to simply remove or comment out the private and protected sections of a class due to parser limitations. However, this removal may now cause SWIG to erroneously generate constructors for classes that define a constructor in those sections. Consider restoring those sections in the interface or using %nodefault to fix the problem.
Note: The %nodefault directive/-nodefault options described above, which disable both the default constructor and the implicit destructors, could lead to memory leaks, and so it is strongly recommended to not use them.
If a class defines a constructor, SWIG normally tries to generate a wrapper for it. However, SWIG will not generate a constructor wrapper if it thinks that it will result in illegal wrapper code. There are really two cases where this might show up.
First, SWIG won't generate wrappers for protected or private constructors. For example:
class Foo {
protected:
     Foo();         // Not wrapped.
public:
      ...
};
Next, SWIG won't generate wrappers for a class if it appears to be abstract--that is, it has undefined pure virtual methods. Here are some examples:
class Bar {
public:
     Bar();               // Not wrapped.  Bar is abstract.
     virtual void spam(void) = 0;
};

class Grok : public Bar {
public:
      Grok();            // Not wrapped. No implementation of abstract spam().
};
Some users are surprised (or confused) to find missing constructor wrappers in their interfaces. In almost all cases, this is caused when classes are determined to be abstract. To see if this is the case, run SWIG with all of its warnings turned on:
% swig -Wall -python module.i
In this mode, SWIG will issue a warning for all abstract classes. It is possible to force a class to be non-abstract using this:
%feature("notabstract") Foo;

class Foo : public Bar {
public:
     Foo();    // Generated no matter what---not abstract.
     ...
};
More information about %feature can be found in the Customization features chapter.
If a class defines more than one constructor, its behavior depends on the capabilities of the target language. If overloading is supported, the copy constructor is accessible using the normal constructor function. For example, if you have this:
class List {
public:
    List();
    List(const List &);      // Copy constructor
    ...
};
then the copy constructor can be used as follows:
x = List()               # Create a list
y = List(x)              # Copy list x
If the target language does not support overloading, then the copy constructor is available through a special function like this:
List *copy_List(List *f) {
    return new List(*f);
}
Note: For a class X, SWIG only treats a constructor as a copy constructor if it can be applied to an object of type X or X *. If more than one copy constructor is defined, only the first definition that appears is used as the copy constructor--other definitions will result in a name-clash. Constructors such as X(const X &), X(X &), and X(X *) are handled as copy constructors in SWIG.
Note: SWIG does not generate a copy constructor wrapper unless one is explicitly declared in the class. This differs from the treatment of default constructors and destructors. However, copy constructor wrappers can be generated if using the copyctor feature flag. For example:
%copyctor List;

class List {
public:
    List();
};
Will generate a copy constructor wrapper for List.
Compatibility note: Special support for copy constructors was not added until SWIG-1.3.12. In previous versions, copy constructors could be wrapped, but they had to be renamed. For example:
class Foo {
public:
    Foo();
  %name(CopyFoo) Foo(const Foo &);
    ...
};
For backwards compatibility, SWIG does not perform any special copy-constructor handling if the constructor has been manually renamed. For instance, in the above example, the name of the constructor is set to new_CopyFoo(). This is the same as in older versions.
All member functions are roughly translated into accessor functions like this :
int List_search(List *obj, char *value) {
	return obj->search(value);
}
This translation is the same even if the member function has been declared as virtual.
It should be noted that SWIG does not actually create a C accessor function in the code it generates. Instead, member access such as obj->search(value) is directly inlined into the generated wrapper functions. However, the name and calling convention of the low-level procedural wrappers match the accessor function prototype described above.
Static member functions are called directly without making any special transformations. For example, the static member function print(List *l) directly invokes List::print(List *l) in the generated wrapper code.
Member data is handled in exactly the same manner as for C structures. A pair of accessor functions are effectively created. For example :
int List_length_get(List *obj) {
	return obj->length;
}
int List_length_set(List *obj, int value) {
	obj->length = value;
	return value;
}
A read-only member can be created using the %immutable and %mutable feature flag directive. For example, we probably wouldn't want the user to change the length of a list so we could do the following to make the value available, but read-only.
class List {
public:
...
%immutable;
	int length;
%mutable;
...
};
Alternatively, you can specify an immutable member in advance like this:
%immutable List::length;
...
class List {
   ...
   int length;         // Immutable by above directive
   ...
};
Similarly, all data attributes declared as const are wrapped as read-only members.
There are some subtle issues when wrapping data members that are themselves classes. For instance, if you had another class like this,
class Foo {
public:
    List items;
    ...
then the low-level accessor to the items member actually uses pointers. For example:
List *Foo_items_get(Foo *self) {
    return &self->items;
}
void Foo_items_set(Foo *self, List *value) {
    self->items = *value;
}
More information about this can be found in the SWIG Basics chapter, Structure data members section.
The wrapper code to generate the accessors for classes comes from the pointer typemaps. This can be somewhat unnatural for some types. For example, a user would expect the STL std::string class member variables to be wrapped as a string in the target language, rather than a pointer to this class. The const reference typemaps offer this type of marshalling, so there is a feature to tell SWIG to use the const reference typemaps rather than the pointer typemaps. It is the %naturalvar directive and is used as follows:
// All List variables will use const List& typemaps
%naturalvar List;

// Only Foo::myList will use const List& typemaps
%naturalvar Foo::myList;
struct Foo {
  List myList;
};

// All variables will use const reference typemaps
%naturalvar;
The observant reader will notice that %naturalvar works like any other feature flag directive, except it can also be attached to class types. The first of the example usages above show %naturalvar attaching to the List class. Effectively this feature changes the way accessors are generated to the following:
const List &Foo_items_get(Foo *self) {
    return self->items;
}
void Foo_items_set(Foo *self, const List &value) {
    self->items = value;
}
In fact it is generally a good idea to use this feature globally as the reference typemaps have extra NULL checking compared to the pointer typemaps. A pointer can be NULL, whereas a reference cannot, so the extra checking ensures that the target language user does not pass in a value that translates to a NULL pointer and thereby preventing any potential NULL pointer dereferences. The %naturalvar feature will apply to global variables in addition to member variables in some language modules, eg C# and Java.
Other alternatives for turning this feature on globally are to use the swig -naturalvar commandline option or the module mode option, %module(naturalvar=1)
Compatibility note: The %naturalvar feature was introduced in SWIG-1.3.28, prior to which it was necessary to manually apply the const reference typemaps, eg %apply const std::string & { std::string * }, but this example would also apply the typemaps to methods taking a std::string pointer.
Compatibility note: Read-only access used to be controlled by a pair of directives %readonly and %readwrite. Although these directives still work, they generate a warning message. Simply change the directives to %immutable; and %mutable; to silence the warning. Don't forget the extra semicolon!
Compatibility note: Prior to SWIG-1.3.12, all members of unknown type were wrapped into accessor functions using pointers. For example, if you had a structure like this
struct Foo {
   size_t  len;
};
and nothing was known about size_t, then accessors would be written to work with size_t *. Starting in SWIG-1.3.12, this behavior has been modified. Specifically, pointers will only be used if SWIG knows that a datatype corresponds to a structure or class. Therefore, the above code would be wrapped into accessors involving size_t. This change is subtle, but it smooths over a few problems related to structure wrapping and some of SWIG's customization features.
SWIG will wrap all types of functions that have default arguments. For example member functions:
class Foo {
public:
    void bar(int x, int y = 3, int z = 4);
};
SWIG handles default arguments by generating an extra overloaded method for each defaulted argument. SWIG is effectively handling methods with default arguments as if it was wrapping the equivalent overloaded methods. Thus for the example above, it is as if we had instead given the following to SWIG:
class Foo {
public:
    void bar(int x, int y, int z);
    void bar(int x, int y);
    void bar(int x);
};
The wrappers produced are exactly the same as if the above code was instead fed into SWIG. Details of this are covered later in the Wrapping Overloaded Functions and Methods section. This approach allows SWIG to wrap all possible default arguments, but can be verbose. For example if a method has ten default arguments, then eleven wrapper methods are generated.
Please see the Features and default arguments section for more information on using %feature with functions with default arguments. The Ambiguity resolution and renaming section also deals with using %rename and %ignore on methods with default arguments. If you are writing your own typemaps for types used in methods with default arguments, you may also need to write a typecheck typemap. See the Typemaps and overloading section for details or otherwise use the compactdefaultargs feature flag as mentioned below.
Compatibility note: Versions of SWIG prior to SWIG-1.3.23 wrapped default arguments slightly differently. Instead a single wrapper method was generated and the default values were copied into the C++ wrappers so that the method being wrapped was then called with all the arguments specified. If the size of the wrappers are a concern then this approach to wrapping methods with default arguments can be re-activated by using the compactdefaultargs feature flag.
%feature("compactdefaultargs") Foo::bar;
class Foo {
public:
    void bar(int x, int y = 3, int z = 4);
};
This is great for reducing the size of the wrappers, but the caveat is it does not work for the statically typed languages, such as C# and Java, which don't have optional arguments in the language, Another restriction of this feature is that it cannot handle default arguments that are not public. The following example illustrates this:
class Foo {
private:
   static const int spam;
public:
   void bar(int x, int y = spam);   // Won't work with %feature("compactdefaultargs") -
                                    // private default value
};
This produces uncompileable wrapper code because default values in C++ are evaluated in the same scope as the member function whereas SWIG evaluates them in the scope of a wrapper function (meaning that the values have to be public).
This feature is automatically turned on when wrapping C code with default arguments and whenever keyword arguments (kwargs) are specified for either C or C++ code. Keyword arguments are a language feature of some scripting languages, for example Ruby and Python. SWIG is unable to support kwargs when wrapping overloaded methods, so the default approach cannot be used.
SWIG wraps class members that are public following the C++ conventions, i.e., by explicit public declaration or by the use of the using directive. In general, anything specified in a private or protected section will be ignored, although the internal code generator sometimes looks at the contents of the private and protected sections so that it can properly generate code for default constructors and destructors. Directors could also modify the way non-public virtual protected members are treated.
By default, members of a class definition are assumed to be private until you explicitly give a `public:' declaration (This is the same convention used by C++).
Enumerations and constants are handled differently by the different language modules and are described in detail in the appropriate language chapter. However, many languages map enums and constants in a class definition into constants with the classname as a prefix. For example :
class Swig {
public:
	enum {ALE, LAGER, PORTER, STOUT};
};
Generates the following set of constants in the target scripting language :
Swig_ALE = Swig::ALE
Swig_LAGER = Swig::LAGER
Swig_PORTER = Swig::PORTER
Swig_STOUT = Swig::STOUT
Members declared as const are wrapped as read-only members and do not create constants.
Friend declarations are recognised by SWIG. For example, if you have this code:
class Foo {
public:
     ...
     friend void blah(Foo *f);
     ...
};
then the friend declaration does result in a wrapper code equivalent to one generated for the following declaration
class Foo {
public:
    ...
};

void blah(Foo *f);
A friend declaration, as in C++, is understood to be in the same scope where the class is declared, hence, you can have
%ignore bar::blah(Foo *f);

namespace bar {

  class Foo {
  public:
     ...
     friend void blah(Foo *f);
     ...
  };
}
and a wrapper for the method 'blah' will not be generated.
C++ references are supported, but SWIG transforms them back into pointers. For example, a declaration like this :
class Foo {
public:
	double bar(double &a);
}
has a low-level accessor
double Foo_bar(Foo *obj, double *a) {
	obj->bar(*a);
}
As a special case, most language modules pass const references to primitive datatypes (int, short, float, etc.) by value instead of pointers. For example, if you have a function like this,
void foo(const int &x);
it is called from a script as follows:
foo(3) # Notice pass by value
Functions that return a reference are remapped to return a pointer instead. For example:
class Bar {
public:
     Foo &spam();
};
Generates an accessor like this:
Foo *Bar_spam(Bar *obj) {
   Foo &result = obj->spam();
   return &result;
}
However, functions that return const references to primitive datatypes (int, short, etc.) normally return the result as a value rather than a pointer. For example, a function like this,
const int &bar();
will return integers such as 37 or 42 in the target scripting language rather than a pointer to an integer.
Don't return references to objects allocated as local variables on the stack. SWIG doesn't make a copy of the objects so this will probably cause your program to crash.
Note: The special treatment for references to primitive datatypes is necessary to provide more seamless integration with more advanced C++ wrapping applications---especially related to templates and the STL. This was first added in SWIG-1.3.12.
Occasionally, a C++ program will pass and return class objects by value. For example, a function like this might appear:
Vector cross_product(Vector a, Vector b);
If no information is supplied about Vector, SWIG creates a wrapper function similar to the following:
Vector *wrap_cross_product(Vector *a, Vector *b) {
   Vector x = *a;
   Vector y = *b;
   Vector r = cross_product(x,y);
   return new Vector(r);
}
In order for the wrapper code to compile, Vector must define a copy constructor and a default constructor.
If Vector is defined as a class in the interface, but it does not support a default constructor, SWIG changes the wrapper code by encapsulating the arguments inside a special C++ template wrapper class, through a process called the "Fulton Transform". This produces a wrapper that looks like this:
Vector cross_product(Vector *a, Vector *b) {
   SwigValueWrapper<Vector> x = *a;
   SwigValueWrapper<Vector> y = *b;
   SwigValueWrapper<Vector> r = cross_product(x,y);
   return new Vector(r);
}
This transformation is a little sneaky, but it provides support for pass-by-value even when a class does not provide a default constructor and it makes it possible to properly support a number of SWIG's customization options. The definition of SwigValueWrapper can be found by reading the SWIG wrapper code. This class is really nothing more than a thin wrapper around a pointer.
Although SWIG usually detects the classes to which the Fulton Transform should be applied, in some situations it's necessary to override it. That's done with %feature("valuewrapper") to ensure it is used and %feature("novaluewrapper") to ensure it is not used:
%feature("novaluewrapper") A;
class A;

%feature("valuewrapper") B;
struct B {
    B();
    // ....
};
It is well worth considering turning this feature on for classes that do have a default constructor. It will remove a redundant constructor call at the point of the variable declaration in the wrapper, so will generate notably better performance for large objects or for classes with expensive construction. Alternatively consider returning a reference or a pointer.
Note: this transformation has no effect on typemaps or any other part of SWIG---it should be transparent except that you may see this code when reading the SWIG output file.
Note: This template transformation is new in SWIG-1.3.11 and may be refined in future SWIG releases. In practice, it is only absolutely necessary to do this for classes that don't define a default constructor.
Note: The use of this template only occurs when objects are passed or returned by value. It is not used for C++ pointers or references.
SWIG supports C++ inheritance of classes and allows both single and multiple inheritance, as limited or allowed by the target language. The SWIG type-checker knows about the relationship between base and derived classes and allows pointers to any object of a derived class to be used in functions of a base class. The type-checker properly casts pointer values and is safe to use with multiple inheritance.
SWIG treats private or protected inheritance as close to the C++ spirit, and target language capabilities, as possible. In most cases, this means that SWIG will parse the non-public inheritance declarations, but that will have no effect in the generated code, besides the implicit policies derived for constructor and destructors.
The following example shows how SWIG handles inheritance. For clarity, the full C++ code has been omitted.
// shapes.i
%module shapes
%{
#include "shapes.h"
%}

class Shape {
public:
        double x,y;
	virtual double area() = 0;
	virtual double perimeter() = 0;
	void    set_location(double x, double y);
};
class Circle : public Shape {
public:
	Circle(double radius);
	~Circle();
	double area();
	double perimeter();
};
class Square : public Shape {
public:
	Square(double size);
	~Square();
	double area();
	double perimeter();
}
When wrapped into Python, we can perform the following operations (shown using the low level Python accessors):
$ python
>>> import shapes
>>> circle = shapes.new_Circle(7)
>>> square = shapes.new_Square(10)
>>> print shapes.Circle_area(circle)
153.93804004599999757
>>> print shapes.Shape_area(circle)
153.93804004599999757
>>> print shapes.Shape_area(square)
100.00000000000000000
>>> shapes.Shape_set_location(square,2,-3)
>>> print shapes.Shape_perimeter(square)
40.00000000000000000
>>>
In this example, Circle and Square objects have been created. Member functions can be invoked on each object by making calls to Circle_area, Square_area, and so on. However, the same results can be accomplished by simply using the Shape_area function on either object.
One important point concerning inheritance is that the low-level accessor functions are only generated for classes in which they are actually declared. For instance, in the above example, the method set_location() is only accessible as Shape_set_location() and not as Circle_set_location() or Square_set_location() . Of course, the Shape_set_location() function will accept any kind of object derived from Shape. Similarly, accessor functions for the attributes x and y are generated as Shape_x_get(), Shape_x_set(), Shape_y_get(), and Shape_y_set(). Functions such as Circle_x_get() are not available--instead you should use Shape_x_get().
Note that there is a one to one correlation between the low-level accessor functions and the proxy methods and therefore there is also a one to one correlation between the C++ class methods and the generated proxy class methods.
Note: For the best results, SWIG requires all base classes to be defined in an interface. Otherwise, you may get a warning message like this:
example.i:18: Warning 401: Nothing known about base class 'Foo'. Ignored.
If any base class is undefined, SWIG still generates correct type relationships. For instance, a function accepting a Foo * will accept any object derived from Foo regardless of whether or not SWIG actually wrapped the Foo class. If you really don't want to generate wrappers for the base class, but you want to silence the warning, you might consider using the %import directive to include the file that defines Foo. %import simply gathers type information, but doesn't generate wrappers. Alternatively, you could just define Foo as an empty class in the SWIG interface or use warning suppression .
Note: typedef-names can be used as base classes. For example:
class Foo {
...
};

typedef Foo FooObj;
class Bar : public FooObj {     // Ok.  Base class is Foo
...
};
Similarly, typedef allows unnamed structures to be used as base classes. For example:
typedef struct {
   ...
} Foo;

class Bar : public Foo {    // Ok.
...
};
Compatibility Note: Starting in version 1.3.7, SWIG only generates low-level accessor wrappers for the declarations that are actually defined in each class. This differs from SWIG1.1 which used to inherit all of the declarations defined in base classes and regenerate specialized accessor functions such as Circle_x_get(), Square_x_get(), Circle_set_location(), and Square_set_location(). This behavior resulted in huge amounts of replicated code for large class hierarchies and made it awkward to build applications spread across multiple modules (since accessor functions are duplicated in every single module). It is also unnecessary to have such wrappers when advanced features like proxy classes are used. Note: Further optimizations are enabled when using the -fvirtual option, which avoids the regenerating of wrapper functions for virtual members that are already defined in a base class.
When a target scripting language refers to a C++ object, it normally uses a tagged pointer object that contains both the value of the pointer and a type string. For example, in Tcl, a C++ pointer might be encoded as a string like this:
_808fea88_p_Circle
A somewhat common question is whether or not the type-tag could be safely removed from the pointer. For instance, to get better performance, could you strip all type tags and just use simple integers instead?
In general, the answer to this question is no. In the wrappers, all pointers are converted into a common data representation in the target language. Typically this is the equivalent of casting a pointer to void *. This means that any C++ type information associated with the pointer is lost in the conversion.
The problem with losing type information is that it is needed to properly support many advanced C++ features--especially multiple inheritance. For example, suppose you had code like this:
class A {
public:
   int x;
};

class B {
public:
   int y;
};

class C : public A, public B {
};

int A_function(A *a) {
   return a->x;
}

int B_function(B *b) {
   return b->y;
}
Now, consider the following code that uses void *.
C *c = new C();
void *p = (void *) c;
...
int x = A_function((A *) p);
int y = B_function((B *) p);
In this code, both A_function() and B_function() may legally accept an object of type C * (via inheritance). However, one of the functions will always return the wrong result when used as shown. The reason for this is that even though p points to an object of type C, the casting operation doesn't work like you would expect. Internally, this has to do with the data representation of C. With multiple inheritance, the data from each base class is stacked together. For example:
             ------------    <--- (C *),  (A *)
            |     A      |
            |------------|   <--- (B *)
            |     B      |
             ------------
Because of this stacking, a pointer of type C * may change value when it is converted to a A * or B *. However, this adjustment does not occur if you are converting from a void *.
The use of type tags marks all pointers with the real type of the underlying object. This extra information is then used by SWIG generated wrappers to correctly cast pointer values under inheritance (avoiding the above problem).
Some of the language modules are able to solve the problem by storing multiple instances of the pointer, for example, A *, in the A proxy class as well as C * in the C proxy class. The correct cast can then be made by choosing the correct void * pointer to use and is guaranteed to work as the cast to a void pointer and back to the same type does not lose any type information:
C *c = new C();
void *p = (void *) c;
void *pA = (void *) c;
void *pB = (void *) c;
...
int x = A_function((A *) pA);
int y = B_function((B *) pB);
In practice, the pointer is held as an integral number in the target language proxy class.
In many language modules, SWIG provides partial support for overloaded functions, methods, and constructors. For example, if you supply SWIG with overloaded functions like this:
void foo(int x) {
   printf("x is %d\n", x);
}
void foo(char *x) {
   printf("x is '%s'\n", x);
}
The function is used in a completely natural way. For example:
>>> foo(3)
x is 3
>>> foo("hello")
x is 'hello'
>>>
Overloading works in a similar manner for methods and constructors. For example if you have this code,
class Foo {
public:
     Foo();
     Foo(const Foo &);   // Copy constructor
     void bar(int x);
     void bar(char *s, int y);
};
it might be used like this
>>> f = Foo()          # Create a Foo
>>> f.bar(3)
>>> g = Foo(f)         # Copy Foo
>>> f.bar("hello",2)
The implementation of overloaded functions and methods is somewhat complicated due to the dynamic nature of scripting languages. Unlike C++, which binds overloaded methods at compile time, SWIG must determine the proper function as a runtime check for scripting language targets. This check is further complicated by the typeless nature of certain scripting languages. For instance, in Tcl, all types are simply strings. Therefore, if you have two overloaded functions like this,
void foo(char *x);
void foo(int x);
the order in which the arguments are checked plays a rather critical role.
For statically typed languages, SWIG uses the language's method overloading mechanism. To implement overloading for the scripting languages, SWIG generates a dispatch function that checks the number of passed arguments and their types. To create this function, SWIG first examines all of the overloaded methods and ranks them according to the following rules:
Argument type precedence. All C++ datatypes are assigned a numeric type precedence value (which is determined by the language module).
Type              Precedence
----------------  ----------
TYPE *            0     (High)
void *            20
Integers          40
Floating point    60
char              80
Strings           100   (Low)
Using these precedence values, overloaded methods with the same number of required arguments are sorted in increased order of precedence values.
This may sound very confusing, but an example will help. Consider the following collection of overloaded methods:
void foo(double);
void foo(int);
void foo(Bar *);
void foo();
void foo(int x, int y, int z, int w);
void foo(int x, int y, int z = 3);
void foo(double x, double y);
void foo(double x, Bar *z);
The first rule simply ranks the functions by required argument count. This would produce the following list:
rank
-----
[0]   foo()
[1]   foo(double);
[2]   foo(int);
[3]   foo(Bar *);
[4]   foo(int x, int y, int z = 3);
[5]   foo(double x, double y)
[6]   foo(double x, Bar *z)
[7]   foo(int x, int y, int z, int w);
The second rule, simply refines the ranking by looking at argument type precedence values.
rank
-----
[0]   foo()
[1]   foo(Bar *);
[2]   foo(int);
[3]   foo(double);
[4]   foo(int x, int y, int z = 3);
[5]   foo(double x, Bar *z)
[6]   foo(double x, double y)
[7]   foo(int x, int y, int z, int w);
Finally, to generate the dispatch function, the arguments passed to an overloaded method are simply checked in the same order as they appear in this ranking.
If you're still confused, don't worry about it---SWIG is probably doing the right thing.
Regrettably, SWIG is not able to support every possible use of valid C++ overloading. Consider the following example:
void foo(int x);
void foo(long x);
In C++, this is perfectly legal. However, in a scripting language, there is generally only one kind of integer object. Therefore, which one of these functions do you pick? Clearly, there is no way to truly make a distinction just by looking at the value of the integer itself ( int and long may even be the same precision). Therefore, when SWIG encounters this situation, it may generate a warning message like this for scripting languages:
example.i:4: Warning 509: Overloaded method foo(long) effectively ignored,
example.i:3: Warning 509: as it is shadowed by foo(int).
or for statically typed languages like Java:
example.i:4: Warning 516: Overloaded method foo(long) ignored,
example.i:3: Warning 516: using foo(int) instead.
at example.i:3 used.
This means that the second overloaded function will be inaccessible from a scripting interface or the method won't be wrapped at all. This is done as SWIG does not know how to disambiguate it from an earlier method.
Ambiguity problems are known to arise in the following situations:
When an ambiguity arises, methods are checked in the same order as they appear in the interface file. Therefore, earlier methods will shadow methods that appear later.
When wrapping an overloaded function, there is a chance that you will get an error message like this:
example.i:3: Warning 467: Overloaded foo(int) not supported (no type checking
rule for 'int').
This error means that the target language module supports overloading, but for some reason there is no type-checking rule that can be used to generate a working dispatch function. The resulting behavior is then undefined. You should report this as a bug to the SWIG bug tracking database.
If you get an error message such as the following,
foo.i:6. Overloaded declaration ignored.  Spam::foo(double )
foo.i:5. Previous declaration is Spam::foo(int )
foo.i:7. Overloaded declaration ignored.  Spam::foo(Bar *,Spam *,int )
foo.i:5. Previous declaration is Spam::foo(int )
it means that the target language module has not yet implemented support for overloaded functions and methods. The only way to fix the problem is to read the next section.
If an ambiguity in overload resolution occurs or if a module doesn't allow overloading, there are a few strategies for dealing with the problem. First, you can tell SWIG to ignore one of the methods. This is easy---simply use the %ignore directive. For example:
%ignore foo(long);

void foo(int);
void foo(long);       // Ignored.  Oh well.
The other alternative is to rename one of the methods. This can be done using %rename. For example:
%rename("foo_short") foo(short);
%rename(foo_long) foo(long);

void foo(int);
void foo(short);      // Accessed as foo_short()
void foo(long);       // Accessed as foo_long()
Note that the quotes around the new name are optional, however, should the new name be a C/C++ keyword they would be essential in order to avoid a parsing error. The %ignore and %rename directives are both rather powerful in their ability to match declarations. When used in their simple form, they apply to both global functions and methods. For example:
/* Forward renaming declarations */
%rename(foo_i) foo(int);
%rename(foo_d) foo(double);
...
void foo(int); // Becomes 'foo_i'
void foo(char *c); // Stays 'foo' (not renamed)
class Spam {
public:
void foo(int); // Becomes 'foo_i'
void foo(double); // Becomes 'foo_d'
...
};
If you only want the renaming to apply to a certain scope, the C++ scope resolution operator (::) can be used. For example:
%rename(foo_i) ::foo(int); // Only rename foo(int) in the global scope.
// (will not rename class members)
%rename(foo_i) Spam::foo(int); // Only rename foo(int) in class Spam
When a renaming operator is applied to a class as in Spam::foo(int), it is applied to that class and all derived classes. This can be used to apply a consistent renaming across an entire class hierarchy with only a few declarations. For example:
%rename(foo_i) Spam::foo(int);
%rename(foo_d) Spam::foo(double);
class Spam {
public:
virtual void foo(int); // Renamed to foo_i
virtual void foo(double); // Renamed to foo_d
...
};
class Bar : public Spam {
public:
virtual void foo(int); // Renamed to foo_i
virtual void foo(double); // Renamed to foo_d
...
};
class Grok : public Bar {
public:
virtual void foo(int); // Renamed to foo_i
virtual void foo(double); // Renamed to foo_d
...
};
It is also possible to include %rename specifications in the class definition itself. For example:
class Spam {
%rename(foo_i) foo(int);
%rename(foo_d) foo(double);
public:
virtual void foo(int); // Renamed to foo_i
virtual void foo(double); // Renamed to foo_d
...
};
class Bar : public Spam {
public:
virtual void foo(int); // Renamed to foo_i
virtual void foo(double); // Renamed to foo_d
...
};
In this case, the %rename directives still get applied across the entire inheritance hierarchy, but it's no longer necessary to explicitly specify the class prefix Spam::.
A special form of %rename can be used to apply a renaming just to class members (of all classes):
%rename(foo_i) *::foo(int); // Only rename foo(int) if it appears in a class.
Note: the *:: syntax is non-standard C++, but the '*' is meant to be a wildcard that matches any class name (we couldn't think of a better alternative so if you have a better idea, send email to the swig-devel mailing list.
Although this discussion has primarily focused on %rename all of the same rules also apply to %ignore. For example:
%ignore foo(double); // Ignore all foo(double) %ignore Spam::foo; // Ignore foo in class Spam %ignore Spam::foo(double); // Ignore foo(double) in class Spam %ignore *::foo(double); // Ignore foo(double) in all classes
When applied to a base class, %ignore forces all definitions in derived classes to disappear. For example, %ignore Spam::foo(double) will eliminate foo(double) in Spam and all classes derived from Spam.
Notes on %rename and %ignore:
Since, the %rename declaration is used to declare a renaming in advance, it can be placed at the start of an interface file. This makes it possible to apply a consistent name resolution without having to modify header files. For example:
%module foo /* Rename these overloaded functions */ %rename(foo_i) foo(int); %rename(foo_d) foo(double); %include "header.h"
The scope qualifier (::) can also be used on simple names. For example:
%rename(bar) ::foo; // Rename foo to bar in global scope only %rename(bar) Spam::foo; // Rename foo to bar in class Spam only %rename(bar) *::foo; // Rename foo in classes only
Name matching tries to find the most specific match that is defined. A qualified name such as Spam::foo always has higher precedence than an unqualified name foo. Spam::foo has higher precedence than *::foo and *::foo has higher precedence than foo. A parameterized name has higher precedence than an unparameterized name within the same scope level. However, an unparameterized name with a scope qualifier has higher precedence than a parameterized name in global scope (e.g., a renaming of Spam::foo takes precedence over a renaming of foo(int) ).
The order in which %rename directives are defined does not matter as long as they appear before the declarations to be renamed. Thus, there is no difference between saying:
%rename(bar) foo; %rename(foo_i) Spam::foo(int); %rename(Foo) Spam::foo;
and this
%rename(Foo) Spam::foo; %rename(bar) foo; %rename(foo_i) Spam::foo(int);
(the declarations are not stored in a linked list and order has no importance). Of course, a repeated %rename directive will change the setting for a previous %rename directive if exactly the same name, scope, and parameters are supplied.
The name matching rules strictly follow member qualification rules. For example, if you have a class like this:
class Spam {
public:
...
void bar() const;
...
};
the declaration
%rename(name) Spam::bar();
will not apply as there is no unqualified member bar(). The following will apply as the qualifier matches correctly:
%rename(name) Spam::bar() const;
An often overlooked C++ feature is that classes can define two different overloaded members that differ only in their qualifiers, like this:
class Spam {
public:
...
void bar(); // Unqualified member
void bar() const; // Qualified member
...
};
%rename can then be used to target each of the overloaded methods individually. For example we can give them separate names in the target language:
%rename(name1) Spam::bar(); %rename(name2) Spam::bar() const;
Similarly, if you merely wanted to ignore one of the declarations, use %ignore with the full qualification. For example, the following directive would tell SWIG to ignore the const version of bar() above:
%ignore Spam::bar() const; // Ignore bar() const, but leave other bar() alone
Currently no resolution is performed in order to match function parameters. This means function parameter types must match exactly. For example, namespace qualifiers and typedefs will not work. The following usage of typedefs demonstrates this:
typedef int Integer;
%rename(foo_i) foo(int);
class Spam {
public:
void foo(Integer); // Stays 'foo' (not renamed)
};
class Ham {
public:
void foo(int); // Renamed to foo_i
};
The name matching rules also use default arguments for finer control when wrapping methods that have default arguments. Recall that methods with default arguments are wrapped as if the equivalent overloaded methods had been parsed (Default arguments section). Let's consider the following example class:
class Spam {
public:
...
void bar(int i=-1, double d=0.0);
...
};
The following %rename will match exactly and apply to all the target language overloaded methods because the declaration with the default arguments exactly matches the wrapped method:
%rename(newbar) Spam::bar(int i=-1, double d=0.0);
The C++ method can then be called from the target language with the new name no matter how many arguments are specified, for example: newbar(2, 2.0), newbar(2) or newbar(). However, if the %rename does not contain the default arguments, it will only apply to the single equivalent target language overloaded method. So if instead we have:
%rename(newbar) Spam::bar(int i, double d);
The C++ method must then be called from the target language with the new name newbar(2, 2.0) when both arguments are supplied or with the original name as bar(2) (one argument) or bar() (no arguments). In fact it is possible to use %rename on the equivalent overloaded methods, to rename all the equivalent overloaded methods:
%rename(bar_2args) Spam::bar(int i, double d); %rename(bar_1arg) Spam::bar(int i); %rename(bar_default) Spam::bar();
Similarly, the extra overloaded methods can be selectively ignored using %ignore.
Compatibility note: The %rename directive introduced the default argument matching rules in SWIG-1.3.23 at the same time as the changes to wrapping methods with default arguments was introduced.
Support for overloaded methods was first added in SWIG-1.3.14. The implementation is somewhat unusual when compared to similar tools. For instance, the order in which declarations appear is largely irrelevant in SWIG. Furthermore, SWIG does not rely upon trial execution or exception handling to figure out which method to invoke.
Internally, the overloading mechanism is completely configurable by the target language module. Therefore, the degree of overloading support may vary from language to language. As a general rule, statically typed languages like Java are able to provide more support than dynamically typed languages like Perl, Python, Ruby, and Tcl.
C++ overloaded operator declarations can be wrapped. For example, consider a class like this:
class Complex {
private:
double rpart, ipart;
public:
Complex(double r = 0, double i = 0) : rpart(r), ipart(i) { }
Complex(const Complex &c) : rpart(c.rpart), ipart(c.ipart) { }
Complex &operator=(const Complex &c) {
rpart = c.rpart;
ipart = c.ipart;
return *this;
}
Complex operator+(const Complex &c) const {
return Complex(rpart+c.rpart, ipart+c.ipart);
}
Complex operator-(const Complex &c) const {
return Complex(rpart-c.rpart, ipart-c.ipart);
}
Complex operator*(const Complex &c) const {
return Complex(rpart*c.rpart - ipart*c.ipart,
rpart*c.ipart + c.rpart*ipart);
}
Complex operator-() const {
return Complex(-rpart, -ipart);
}
double re() const { return rpart; }
double im() const { return ipart; }
};
When operator declarations appear, they are handled in exactly the same manner as regular methods. However, the names of these methods are set to strings like "operator +" or "operator -". The problem with these names is that they are illegal identifiers in most scripting languages. For instance, you can't just create a method called "operator +" in Python--there won't be any way to call it.
Some language modules already know how to automatically handle certain operators (mapping them into operators in the target language). However, the underlying implementation of this is really managed in a very general way using the %rename directive. For example, in Python a declaration similar to this is used:
%rename(__add__) Complex::operator+;
This binds the + operator to a method called __add__ (which is conveniently the same name used to implement the Python + operator). Internally, the generated wrapper code for a wrapped operator will look something like this pseudocode:
_wrap_Complex___add__(args) {
... get args ...
obj->operator+(args);
...
}
When used in the target language, it may now be possible to use the overloaded operator normally. For example:
>>> a = Complex(3,4) >>> b = Complex(5,2) >>> c = a + b # Invokes __add__ method
It is important to realize that there is nothing magical happening here. The %rename directive really only picks a valid method name. If you wrote this:
%rename(add) operator+;
The resulting scripting interface might work like this:
a = Complex(3,4) b = Complex(5,2) c = a.add(b) # Call a.operator+(b)
All of the techniques described to deal with overloaded functions also apply to operators. For example:
%ignore Complex::operator=; // Ignore = in class Complex %ignore *::operator=; // Ignore = in all classes %ignore operator=; // Ignore = everywhere. %rename(__sub__) Complex::operator-; %rename(__neg__) Complex::operator-(); // Unary -
The last part of this example illustrates how multiple definitions of the operator- method might be handled.
Handling operators in this manner is mostly straightforward. However, there are a few subtle issues to keep in mind:
In C++, it is fairly common to define different versions of the operators to account for different types. For example, a class might also include a friend function like this:
class Complex {
public:
friend Complex operator+(Complex &, double);
};
Complex operator+(Complex &, double);
SWIG simply ignores all friend declarations. Furthermore, it doesn't know how to associate the associated operator+ with the class (because it's not a member of the class).
It's still possible to make a wrapper for this operator, but you'll have to handle it like a normal function. For example:
%rename(add_complex_double) operator+(Complex &, double);
Certain operators are ignored by default. For instance, new and delete operators are ignored as well as conversion operators.
New methods can be added to a class using the %extend directive. This directive is primarily used in conjunction with proxy classes to add additional functionality to an existing class. For example :
%module vector
%{
#include "vector.h"
%}
class Vector {
public:
double x,y,z;
Vector();
~Vector();
... bunch of C++ methods ...
%extend {
char *__str__() {
static char temp[256];
sprintf(temp,"[ %g, %g, %g ]", $self->x,$self->y,$self->z);
return &temp[0];
}
}
};
This code adds a __str__ method to our class for producing a string representation of the object. In Python, such a method would allow us to print the value of an object using the print command.
>>> >>> v = Vector(); >>> v.x = 3 >>> v.y = 4 >>> v.z = 0 >>> print(v) [ 3.0, 4.0, 0.0 ] >>>
The C++ 'this' pointer is often needed to access member variables, methods etc. The $self special variable should be used wherever you could use 'this'. The example above demonstrates this for accessing member variables. Note that the members dereferenced by $self must be public members as the code is ultimately generated into a global function and so will not have any access to non-public members. The implicit 'this' pointer that is present in C++ methods is not present in %extend methods. In order to access anything in the extended class or its base class, an explicit 'this' is required. The following example shows how one could access base class members:
struct Base {
virtual void method(int v) {
...
}
int value;
};
struct Derived : Base {
};
%extend Derived {
virtual void method(int v) {
$self->Base::method(v); // akin to this->Base::method(v);
$self->value = v; // akin to this->value = v;
...
}
}
The following special variables are expanded if used within a %extend block: $name, $symname, $overname, $decl, $fulldecl, $parentname and $parentsymname. The Special variables section provides more information each of these special variables.
The %extend directive follows all of the same conventions as its use with C structures. Please refer to the Adding member functions to C structures section for further details.
Compatibility note: The %extend directive is a new name for the %addmethods directive in SWIG1.1. Since %addmethods could be used to extend a structure with more than just methods, a more suitable directive name has been chosen.
Template type names may appear anywhere a type is expected in an interface file. For example:
void foo(vector<int> *a, int n); void bar(list<int,100> *x);
There are some restrictions on the use of non-type arguments. Simple literals are supported, and so are some constant expressions. However, use of '<' and '>' within a constant expressions currently is not supported by SWIG ('<=' and '>=' are though). For example:
void bar(list<int,100> *x); // OK void bar(list<int,2*50> *x); // OK void bar(list<int,(2>1 ? 100 : 50)> *x) // Not supported
The type system is smart enough to figure out clever games you might try to play with typedef. For instance, consider this code:
typedef int Integer; void foo(vector<int> *x, vector<Integer> *y);
In this case, vector<Integer> is exactly the same type as vector<int>. The wrapper for foo() will accept either variant.
Starting with SWIG-1.3.7, simple C++ template declarations can also be wrapped. SWIG-1.3.12 greatly expands upon the earlier implementation. Before discussing this any further, there are a few things you need to know about template wrapping. First, a bare C++ template does not define any sort of runnable object-code for which SWIG can normally create a wrapper. Therefore, in order to wrap a template, you need to give SWIG information about a particular template instantiation (e.g., vector<int>, array<double>, etc.). Second, an instantiation name such as vector<int> is generally not a valid identifier name in most target languages. Thus, you will need to give the template instantiation a more suitable name such as intvector when creating a wrapper.
To illustrate, consider the following template definition:
template<class T> class List {
private:
T *data;
int nitems;
int maxitems;
public:
List(int max) {
data = new T [max];
nitems = 0;
maxitems = max;
}
~List() {
delete [] data;
};
void append(T obj) {
if (nitems < maxitems) {
data[nitems++] = obj;
}
}
int length() {
return nitems;
}
T get(int n) {
return data[n];
}
};
By itself, this template declaration is useless--SWIG simply ignores it because it doesn't know how to generate any code until unless a definition of T is provided.
One way to create wrappers for a specific template instantiation is to simply provide an expanded version of the class directly like this:
%rename(intList) List<int>; // Rename to a suitable identifier
class List<int> {
private:
int *data;
int nitems;
int maxitems;
public:
List(int max);
~List();
void append(int obj);
int length();
int get(int n);
};
The %rename directive is needed to give the template class an appropriate identifier name in the target language (most languages would not recognize C++ template syntax as a valid class name). The rest of the code is the same as what would appear in a normal class definition.
Since manual expansion of templates gets old in a hurry, the %template directive can be used to create instantiations of a template class. Semantically, %template is simply a shortcut---it expands template code in exactly the same way as shown above. Here are some examples:
/* Instantiate a few different versions of the template */ %template(intList) List<int>; %template(doubleList) List<double>;
The argument to %template() is the name of the instantiation in the target language. The name you choose should not conflict with any other declarations in the interface file with one exception---it is okay for the template name to match that of a typedef declaration. For example:
%template(intList) List<int>; ... typedef List<int> intList; // OK
SWIG can also generate wrappers for function templates using a similar technique. For example:
// Function template
template<class T> T max(T a, T b) { return a > b ? a : b; }
// Make some different versions of this function
%template(maxint) max<int>;
%template(maxdouble) max<double>;
In this case, maxint and maxdouble become unique names for specific instantiations of the function.
The number of arguments supplied to %template should match that in the original template definition. Template default arguments are supported. For example:
template vector<typename T, int max=100> class vector {
...
};
%template(intvec) vector<int>; // OK
%template(vec1000) vector<int,1000>; // OK
The %template directive should not be used to wrap the same template instantiation more than once in the same scope. This will generate an error. For example:
%template(intList) List<int>; %template(Listint) List<int>; // Error. Template already wrapped.
This error is caused because the template expansion results in two identical classes with the same name. This generates a symbol table conflict. Besides, it probably more efficient to only wrap a specific instantiation only once in order to reduce the potential for code bloat.
Since the type system knows how to handle typedef, it is generally not necessary to instantiate different versions of a template for typenames that are equivalent. For instance, consider this code:
%template(intList) vector<int>; typedef int Integer; ... void foo(vector<Integer> *x);
In this case, vector<Integer> is exactly the same type as vector<int>. Any use of Vector<Integer> is mapped back to the instantiation of vector<int> created earlier. Therefore, it is not necessary to instantiate a new class for the type Integer (doing so is redundant and will simply result in code bloat).
When a template is instantiated using %template, information about that class is saved by SWIG and used elsewhere in the program. For example, if you wrote code like this,
...
%template(intList) List<int>;
...
class UltraList : public List<int> {
...
};
then SWIG knows that List<int> was already wrapped as a class called intList and arranges to handle the inheritance correctly. If, on the other hand, nothing is known about List<int> , you will get a warning message similar to this:
example.h:42: Warning 401. Nothing known about class 'List<int >'. Ignored. example.h:42: Warning 401. Maybe you forgot to instantiate 'List<int >' using %template.
If a template class inherits from another template class, you need to make sure that base classes are instantiated before derived classes. For example:
template<class T> class Foo {
...
};
template<class T> class Bar : public Foo<T> {
...
};
// Instantiate base classes first
%template(intFoo) Foo<int>;
%template(doubleFoo) Foo<double>;
// Now instantiate derived classes
%template(intBar) Bar<int>;
%template(doubleBar) Bar<double>;
The order is important since SWIG uses the instantiation names to properly set up the inheritance hierarchy in the resulting wrapper code (and base classes need to be wrapped before derived classes). Don't worry--if you get the order wrong, SWIG should generate a warning message.
Occasionally, you may need to tell SWIG about base classes that are defined by templates, but which aren't supposed to be wrapped. Since SWIG is not able to automatically instantiate templates for this purpose, you must do it manually. To do this, simply use the empty template instantiation, that is, %template with no name. For example:
// Instantiate traits<double,double>, but don't wrap it. %template() traits<double,double>;
If you have to instantiate a lot of different classes for many different types, you might consider writing a SWIG macro. For example:
%define TEMPLATE_WRAP(prefix, T...) %template(prefix ## Foo) Foo<T >; %template(prefix ## Bar) Bar<T >; ... %enddef TEMPLATE_WRAP(int, int) TEMPLATE_WRAP(double, double) TEMPLATE_WRAP(String, char *) TEMPLATE_WRAP(PairStringInt, std::pair<string, int>) ...
Note the use of a vararg macro for the type T. If this wasn't used, the comma in the templated type in the last example would not be possible.
The SWIG template mechanism does support specialization. For instance, if you define a class like this,
template<> class List<int> {
private:
int *data;
int nitems;
int maxitems;
public:
List(int max);
~List();
void append(int obj);
int length();
int get(int n);
};
then SWIG will use this code whenever the user expands List<int> . In practice, this may have very little effect on the underlying wrapper code since specialization is often used to provide slightly modified method bodies (which are ignored by SWIG). However, special SWIG directives such as %typemap, %extend, and so forth can be attached to a specialization to provide customization for specific types.
Partial template specialization is partially supported by SWIG. For example, this code defines a template that is applied when the template argument is a pointer.
template<class T> class List<T*> {
private:
T *data;
int nitems;
int maxitems;
public:
List(int max);
~List();
void append(int obj);
int length();
T get(int n);
};
SWIG supports both template explicit specialization and partial specialization. Consider:
template<class T1, class T2> class Foo { }; // (1) primary template
template<> class Foo<double *, int *> { }; // (2) explicit specialization
template<class T1, class T2> class Foo<T1, T2 *> { }; // (3) partial specialization
SWIG is able to properly match explicit instantiations:
Foo<double *, int *> // explicit specialization matching (2)
SWIG implements template argument deduction so that the following partial specialization examples work just like they would with a C++ compiler:
Foo<int *, int *> // partial specialization matching (3) Foo<int *, const int *> // partial specialization matching (3) Foo<int *, int **> // partial specialization matching (3)
Member function templates are supported. The underlying principle is the same as for normal templates--SWIG can't create a wrapper unless you provide more information about types. For example, a class with a member template might look like this:
class Foo {
public:
template<class T> void bar(T x, T y) { ... };
...
};
To expand the template, simply use %template inside the class.
class Foo {
public:
template<class T> void bar(T x, T y) { ... };
...
%template(barint) bar<int>;
%template(bardouble) bar<double>;
};
Or, if you want to leave the original class definition alone, just do this:
class Foo {
public:
template<class T> void bar(T x, T y) { ... };
...
};
...
%extend Foo {
%template(barint) bar<int>;
%template(bardouble) bar<double>;
};
or simply
class Foo {
public:
template<class T> void bar(T x, T y) { ... };
...
};
...
%template(bari) Foo::bar<int>;
%template(bard) Foo::bar<double>;
In this case, the %extend directive is not needed, and %template does exactly the same job, i.e., it adds two new methods to the Foo class.
Note: because of the way that templates are handled, the %template directive must always appear after the definition of the template to be expanded.
Now, if your target language supports overloading, you can even try
%template(bar) Foo::bar<int>; %template(bar) Foo::bar<double>;
and since the two new wrapped methods have the same name 'bar', they will be overloaded, and when called, the correct method will be dispatched depending on the argument type.
When used with members, the %template directive may be placed in another template class. Here is a slightly perverse example:
// A template
template<class T> class Foo {
public:
// A member template
template<class S> T bar(S x, S y) { ... };
...
};
// Expand a few member templates
%extend Foo {
%template(bari) bar<int>;
%template(bard) bar<double>;
}
// Create some wrappers for the template
%template(Fooi) Foo<int>;
%template(Food) Foo<double>;
Miraculously, you will find that each expansion of Foo has member functions bari() and bard() added.
A common use of member templates is to define constructors for copies and conversions. For example:
template<class T1, class T2> struct pair {
T1 first;
T2 second;
pair() : first(T1()), second(T2()) { }
pair(const T1 &x, const T2 &y) : first(x), second(y) { }
template<class U1, class U2> pair(const pair<U1,U2> &x)
: first(x.first),second(x.second) { }
};
This declaration is perfectly acceptable to SWIG, but the constructor template will be ignored unless you explicitly expand it. To do that, you could expand a few versions of the constructor in the template class itself. For example:
%extend pair {
%template(pair) pair<T1,T2>; // Generate default copy constructor
};
When using %extend in this manner, notice how you can still use the template parameters in the original template definition.
Alternatively, you could expand the constructor template in selected instantiations. For example:
// Instantiate a few versions
%template(pairii) pair<int,int>;
%template(pairdd) pair<double,double>;
// Create a default constructor only
%extend pair<int,int> {
%template(paird) pair<int,int>; // Default constructor
};
// Create default and conversion constructors
%extend pair<double,double> {
%template(paird) pair<double,dobule>; // Default constructor
%template(pairc) pair<int,int>; // Conversion constructor
};
And if your target language supports overloading, then you can try instead:
// Create default and conversion constructors
%extend pair<double,double> {
%template(pair) pair<double,dobule>; // Default constructor
%template(pair) pair<int,int>; // Conversion constructor
};
In this case, the default and conversion constructors have the same name. Hence, SWIG will overload them and define an unique visible constructor, that will dispatch the proper call depending on the argument type.
If all of this isn't quite enough and you really want to make someone's head explode, SWIG directives such as %rename, %extend, and %typemap can be included directly in template definitions. For example:
// File : list.h
template<class T> class List {
...
public:
%rename(__getitem__) get(int);
List(int max);
~List();
...
T get(int index);
%extend {
char *__str__() {
/* Make a string representation */
...
}
}
};
In this example, the extra SWIG directives are propagated to every template instantiation.
It is also possible to separate these declarations from the template class. For example:
%rename(__getitem__) List::get;
%extend List {
char *__str__() {
/* Make a string representation */
...
}
/* Make a copy */
T *__copy__() {
return new List<T>(*$self);
}
};
...
template<class T> class List {
...
public:
List() { };
T get(int index);
...
};
When %extend is decoupled from the class definition, it is legal to use the same template parameters as provided in the class definition. These are replaced when the template is expanded. In addition, the %extend directive can be used to add additional methods to a specific instantiation. For example:
%template(intList) List<int>;
%extend List<int> {
void blah() {
printf("Hey, I'm an List<int>!\n");
}
};
SWIG even supports overloaded templated functions. As usual the %template directive is used to wrap templated functions. For example:
template<class T> void foo(T x) { };
template<class T> void foo(T x, T y) { };
%template(foo) foo<int>;
This will generate two overloaded wrapper methods, the first will take a single integer as an argument and the second will take two integer arguments.
Needless to say, SWIG's template support provides plenty of opportunities to break the universe. That said, an important final point is that SWIG does not perform extensive error checking of templates! Specifically, SWIG does not perform type checking nor does it check to see if the actual contents of the template declaration make any sense. Since the C++ compiler will hopefully check this when it compiles the resulting wrapper file, there is no practical reason for SWIG to duplicate this functionality (besides, none of the SWIG developers are masochistic enough to want to implement this right now).
Compatibility Note: The first implementation of template support relied heavily on macro expansion in the preprocessor. Templates have been more tightly integrated into the parser and type system in SWIG-1.3.12 and the preprocessor is no longer used. Code that relied on preprocessing features in template expansion will no longer work. However, SWIG still allows the # operator to be used to generate a string from a template argument.
Compatibility Note: In earlier versions of SWIG, the %template directive introduced a new class name. This name could then be used with other directives. For example:
%template(vectori) vector<int>;
%extend vectori {
void somemethod() { }
};
This behavior is no longer supported. Instead, you should use the original template name as the class name. For example:
%template(vectori) vector<int>;
%extend vector<int> {
void somemethod() { }
};
Similar changes apply to typemaps and other customization features.
Support for C++ namespaces is comprehensive, but by default simple, however, some target languages can turn on more advanced namespace support via the nspace feature, described later. Code within unnamed namespaces is ignored as there is no external access to symbols declared within the unnamed namespace. Before detailing the default implementation for named namespaces, it is worth noting that the semantics of C++ namespaces is extremely non-trivial--especially with regard to the C++ type system and class machinery. At a most basic level, namespaces are sometimes used to encapsulate common functionality. For example:
namespace math {
double sin(double);
double cos(double);
class Complex {
double im,re;
public:
...
};
...
};
Members of the namespace are accessed in C++ by prepending the namespace prefix to names. For example:
double x = math::sin(1.0); double magnitude(math::Complex *c); math::Complex c; ...
At this level, namespaces are relatively easy to manage. However, things start to get very ugly when you throw in the other ways a namespace can be used. For example, selective symbols can be exported from a namespace with using.
using math::Complex; double magnitude(Complex *c); // Namespace prefix stripped
Similarly, the contents of an entire namespace can be made available like this:
using namespace math; double x = sin(1.0); double magnitude(Complex *c);
Alternatively, a namespace can be aliased:
namespace M = math; double x = M::sin(1.0); double magnitude(M::Complex *c);
Using combinations of these features, it is possible to write head-exploding code like this:
namespace A {
class Foo {
};
}
namespace B {
namespace C {
using namespace A;
}
typedef C::Foo FooClass;
}
namespace BIGB = B;
namespace D {
using BIGB::FooClass;
class Bar : public FooClass {
}
};
class Spam : public D::Bar {
};
void evil(A::Foo *a, B::FooClass *b, B::C::Foo *c, BIGB::FooClass *d,
BIGB::C::Foo *e, D::FooClass *f);
Given the possibility for such perversion, it's hard to imagine how every C++ programmer might want such code wrapped into the target language. Clearly this code defines three different classes. However, one of those classes is accessible under at least six different names!
SWIG fully supports C++ namespaces in its internal type system and class handling code. If you feed SWIG the above code, it will be parsed correctly, it will generate compilable wrapper code, and it will produce a working scripting language module. However, the default wrapping behavior is to flatten namespaces in the target language. This means that the contents of all namespaces are merged together in the resulting scripting language module. For example, if you have code like this,
%module foo
namespace foo {
void bar(int);
void spam();
}
namespace bar {
void blah();
}
then SWIG simply creates three wrapper functions bar(), spam(), and blah() in the target language. SWIG does not prepend the names with a namespace prefix nor are the functions packaged in any kind of nested scope.
There is some rationale for taking this approach. Since C++ namespaces are often used to define modules in C++, there is a natural correlation between the likely contents of a SWIG module and the contents of a namespace. For instance, it would not be unreasonable to assume that a programmer might make a separate extension module for each C++ namespace. In this case, it would be redundant to prepend everything with an additional namespace prefix when the module itself already serves as a namespace in the target language. Or put another way, if you want SWIG to keep namespaces separate, simply wrap each namespace with its own SWIG interface.
Because namespaces are flattened, it is possible for symbols defined in different namespaces to generate a name conflict in the target language. For example:
namespace A {
void foo(int);
}
namespace B {
void foo(double);
}
When this conflict occurs, you will get an error message that resembles this:
example.i:26. Error. 'foo' is multiply defined in the generated target language module. example.i:23. Previous declaration of 'foo'
To resolve this error, simply use %rename to disambiguate the declarations. For example:
%rename(B_foo) B::foo;
...
namespace A {
void foo(int);
}
namespace B {
void foo(double); // Gets renamed to B_foo
}
Similarly, %ignore can be used to ignore declarations.
using declarations do not have any effect on the generated wrapper code. They are ignored by SWIG language modules and they do not result in any code. However, these declarations are used by the internal type system to track type-names. Therefore, if you have code like this:
namespace A {
typedef int Integer;
}
using namespace A;
void foo(Integer x);
SWIG knows that Integer is the same as A::Integer which is the same as int.
Namespaces may be combined with templates. If necessary, the %template directive can be used to expand a template defined in a different namespace. For example:
namespace foo {
template<typename T> T max(T a, T b) { return a > b ? a : b; }
}
using foo::max;
%template(maxint) max<int>; // Okay.
%template(maxfloat) foo::max<float>; // Okay (qualified name).
namespace bar {
using namespace foo;
%template(maxdouble) max<double>; // Okay.
}
The combination of namespaces and other SWIG directives may introduce subtle scope-related problems. The key thing to keep in mind is that all SWIG generated wrappers are produced in the global namespace. Symbols from other namespaces are always accessed using fully qualified names---names are never imported into the global space unless the interface happens to do so with a using declaration. In almost all cases, SWIG adjusts typenames and symbols to be fully qualified. However, this is not done in code fragments such as function bodies, typemaps, exception handlers, and so forth. For example, consider the following:
namespace foo {
typedef int Integer;
class bar {
public:
...
};
}
%extend foo::bar {
Integer add(Integer x, Integer y) {
Integer r = x + y; // Error. Integer not defined in this scope
return r;
}
};
In this case, SWIG correctly resolves the added method parameters and return type to foo::Integer. However, since function bodies aren't parsed and such code is emitted in the global namespace, this code produces a compiler error about Integer. To fix the problem, make sure you use fully qualified names. For example:
%extend foo::bar {
Integer add(Integer x, Integer y) {
foo::Integer r = x + y; // Ok.
return r;
}
};
Note: SWIG does not propagate using declarations to the resulting wrapper code. If these declarations appear in an interface, they should also appear in any header files that might have been included in a %{ ... %} section. In other words, don't insert extra using declarations into a SWIG interface unless they also appear in the underlying C++ code.
Note: Code inclusion directives such as %{ ... %} or %inline %{ ... %} should not be placed inside a namespace declaration. The code emitted by these directives will not be enclosed in a namespace and you may get very strange results. If you need to use namespaces with these directives, consider the following:
// Good version
%inline %{
namespace foo {
void bar(int) { ... }
...
}
%}
// Bad version. Emitted code not placed in namespace.
namespace foo {
%inline %{
void bar(int) { ... } /* I'm bad */
...
%}
}
Note: When the %extend directive is used inside a namespace, the namespace name is included in the generated functions. For example, if you have code like this,
namespace foo {
class bar {
public:
%extend {
int blah(int x);
};
};
}
the added method blah() is mapped to a function int foo_bar_blah(foo::bar *self, int x). This function resides in the global namespace.
Note: Although namespaces are flattened in the target language, the SWIG generated wrapper code observes the same namespace conventions as used in the input file. Thus, if there are no symbol conflicts in the input, there will be no conflicts in the generated code.
Note: In the same way that no resolution is performed on parameters, a conversion operator name must match exactly to how it is defined. Do not change the qualification of the operator. For example, suppose you had an interface like this:
namespace foo {
class bar;
class spam {
public:
...
operator bar(); // Conversion of spam -> bar
...
};
}
The following is how the feature is expected to be written for a successful match:
%rename(tofoo) foo::spam::operator bar();
The following does not work as no namespace resolution is performed in the matching of conversion operator names:
%rename(tofoo) foo::spam::operator foo::bar();
Note, however, that if the operator is defined using a qualifier in its name, then the feature must use it too...
%rename(tofoo) foo::spam::operator bar(); // will not match
%rename(tofoo) foo::spam::operator foo::bar(); // will match
namespace foo {
class bar;
class spam {
public:
...
operator foo::bar();
...
};
}
Compatibility Note: Versions of SWIG prior to 1.3.32 were inconsistent in this approach. A fully qualified name was usually required, but would not work in some situations.
Note: The flattening of namespaces is only intended to serve as a basic namespace implementation. None of the target language modules are currently programmed with any namespace awareness. In the future, language modules may or may not provide more advanced namespace support.
Some target languages provide support for the nspace feature. The feature can be applied to any class, struct, union or enum declared within a named namespace. The feature wraps the type within the target language specific concept of a namespace, for example, a Java package or C# namespace. Please see the language specific sections to see if the target language you are interested in supports the nspace feature.
The feature is demonstrated below for C# using the following example:
%feature("nspace") MyWorld::Material::Color;
%nspace MyWorld::Wrapping::Color; // %nspace is a macro for %feature("nspace")
namespace MyWorld {
namespace Material {
class Color {
...
};
}
namespace Wrapping {
class Color {
...
};
}
}
Without the nspace feature directives above or %rename , you would get the following warning resulting in just one of the Color classes being available for use from the target language:
example.i:9: Error: 'Color' is multiply defined in the generated target language module. example.i:5: Error: Previous declaration of 'Color'
With the nspace feature the two Color classes are wrapped into the equivalent C# namespaces. A fully qualified constructor call of each these two types in C# is then:
MyWorld.Material.Color materialColor = new MyWorld.Material.Color(); MyWorld.Wrapping.Color wrappingColor = new MyWorld.Wrapping.Color();
Note that the nspace feature does not apply to variables and functions simply declared in a namespace. For example, the following symbols cannot co-exist in the target language without renaming. This may change in a future version.
namespace MyWorld {
namespace Material {
int quantity;
void dispatch();
}
namespace Wrapping {
int quantity;
void dispatch();
}
}
Compatibility Note: The nspace feature was first introduced in SWIG-2.0.0.
As has been mentioned, when %rename includes parameters, the parameter types must match exactly (no typedef or namespace resolution is performed). SWIG treats templated types slightly differently and has an additional matching rule so unlike non-templated types, an exact match is not always required. If the fully qualified templated type is specified, it will have a higher precedence over the generic template type. In the example below, the generic template type is used to rename to bbb and the fully qualified type is used to rename to ccc.
%rename(bbb) Space::ABC::aaa(T t); // will match but with lower precedence than ccc
%rename(ccc) Space::ABC<Space::XYZ>::aaa(Space::XYZ t);// will match but with higher precedence
// than bbb
namespace Space {
class XYZ {};
template<typename T> struct ABC {
void aaa(T t) {}
};
}
%template(ABCXYZ) Space::ABC<Space::XYZ>;
It should now be apparent that there are many ways to achieve a renaming with %rename. This is demonstrated by the following two examples, which are effectively the same as the above example. Below shows how %rename can be placed inside a namespace.
namespace Space {
%rename(bbb) ABC::aaa(T t); // will match but with lower precedence than ccc
%rename(ccc) ABC<Space::XYZ>::aaa(Space::XYZ t);// will match but with higher precedence than bbb
%rename(ddd) ABC<Space::XYZ>::aaa(XYZ t); // will not match
}
namespace Space {
class XYZ {};
template<typename T> struct ABC {
void aaa(T t) {}
};
}
%template(ABCXYZ) Space::ABC<Space::XYZ>;
Note that ddd does not match as there is no namespace resolution for parameter types and the fully qualified type must be specified for template type expansion. The following example shows how %rename can be placed within %extend.
namespace Space {
%extend ABC {
%rename(bbb) aaa(T t); // will match but with lower precedence than ccc
}
%extend ABC<Space::XYZ> {
%rename(ccc) aaa(Space::XYZ t);// will match but with higher precedence than bbb
%rename(ddd) aaa(XYZ t); // will not match
}
}
namespace Space {
class XYZ {};
template<typename T> struct ABC {
void aaa(T t) {}
};
}
%template(ABCXYZ) Space::ABC<Space::XYZ>;
When C++ programs utilize exceptions, exceptional behavior is sometimes specified as part of a function or method declaration. For example:
class Error { };
class Foo {
public:
...
void blah() throw(Error);
...
};
If an exception specification is used, SWIG automatically generates wrapper code for catching the indicated exception and, when possible, rethrowing it into the target language, or converting it into an error in the target language otherwise. For example, in Python, you can write code like this:
f = Foo()
try:
f.blah()
except Error,e:
# e is a wrapped instance of "Error"
Details of how to tailor code for handling the caught C++ exception and converting it into the target language's exception/error handling mechanism is outlined in the "throws" typemap section.
Since exception specifications are sometimes only used sparingly, this alone may not be enough to properly handle C++ exceptions. To do that, a different set of special SWIG directives are used. Consult the "Exception handling with %exception " section for details. The next section details a way of simulating an exception specification or replacing an existing one.
Exceptions are automatically handled for methods with an exception specification. Similar handling can be achieved for methods without exception specifications through the %catches feature. It is also possible to replace any declared exception specification using the %catches feature. In fact, %catches uses the same "throws" typemaps that SWIG uses for exception specifications in handling exceptions. The %catches feature must contain a list of possible types that can be thrown. For each type that is in the list, SWIG will generate a catch handler, in the same way that it would for types declared in the exception specification. Note that the list can also include the catch all specification "...". For example,
struct EBase { virtual ~EBase(); };
struct Error1 : EBase { };
struct Error2 : EBase { };
struct Error3 : EBase { };
struct Error4 : EBase { };
%catches(Error1,Error2,...) Foo::bar();
%catches(EBase) Foo::blah();
class Foo {
public:
...
void bar();
void blah() throw(Error1,Error2,Error3,Error4);
...
};
For the Foo::bar() method, which can throw anything, SWIG will generate catch handlers for Error1, Error2 as well as a catch all handler (...). Each catch handler will convert the caught exception and convert it into a target language error/exception. The catch all handler will convert the caught exception into an unknown error/exception.
Without the %catches feature being attached to Foo::blah(), SWIG will generate catch handlers for all of the types in the exception specification, that is, Error1, Error2, Error3, Error4. However, with the %catches feature above, just a single catch handler for the base class, EBase will be generated to convert the C++ exception into a target language error/exception.
Starting with SWIG-1.3.7, there is limited parsing support for pointers to C++ class members. For example:
double do_op(Object *o, double (Object::*callback)(double,double)); extern double (Object::*fooptr)(double,double); %constant double (Object::*FOO)(double,double) = &Object::foo;
Although these kinds of pointers can be parsed and represented by the SWIG type system, few language modules know how to handle them due to implementation differences from standard C pointers. Readers are strongly advised to consult an advanced text such as the "The Annotated C++ Manual" for specific details.
When pointers to members are supported, the pointer value might appear as a special string like this:
>>> print example.FOO _ff0d54a800000000_m_Object__f_double_double__double >>>
In this case, the hexadecimal digits represent the entire value of the pointer which is usually the contents of a small C++ structure on most machines.
SWIG's type-checking mechanism is also more limited when working with member pointers. Normally SWIG tries to keep track of inheritance when checking types. However, no such support is currently provided for member pointers.
In some C++ programs, objects are often encapsulated by smart-pointers or proxy classes. This is sometimes done to implement automatic memory management (reference counting) or persistence. Typically a smart-pointer is defined by a template class where the -> operator has been overloaded. This class is then wrapped around some other class. For example:
// Smart-pointer class
template<class T> class SmartPtr {
T *pointee;
public:
SmartPtr(T *p) : pointee(p) { ... }
T *operator->() {
return pointee;
}
...
};
// Ordinary class
class Foo_Impl {
public:
int x;
virtual void bar();
...
};
// Smart-pointer wrapper
typedef SmartPtr<Foo_Impl> Foo;
// Create smart pointer Foo
Foo make_Foo() {
return SmartPtr<Foo_Impl>(new Foo_Impl());
}
// Do something with smart pointer Foo
void do_something(Foo f) {
printf("x = %d\n", f->x);
f->bar();
}
// Call the wrapped smart pointer proxy class in the target language 'Foo'
%template(Foo) SmartPtr<Foo_Impl>;
A key feature of this approach is that by defining operator-> the methods and attributes of the object wrapped by a smart pointer are transparently accessible. For example, expressions such as these (from the previous example),
f->x f->bar()
are transparently mapped to the following
(f.operator->())->x; (f.operator->())->bar();
When generating wrappers, SWIG tries to emulate this functionality to the extent that it is possible. To do this, whenever operator->() is encountered in a class, SWIG looks at its returned type and uses it to generate wrappers for accessing attributes of the underlying object. For example, wrapping the above code produces wrappers like this:
int Foo_x_get(Foo *f) {
return (*f)->x;
}
void Foo_x_set(Foo *f, int value) {
(*f)->x = value;
}
void Foo_bar(Foo *f) {
(*f)->bar();
}
These wrappers take a smart-pointer instance as an argument, but dereference it in a way to gain access to the object returned by operator->(). You should carefully compare these wrappers to those in the first part of this chapter (they are slightly different).
The end result is that access looks very similar to C++. For example, you could do this in Python:
>>> f = make_Foo() >>> print f.x 0 >>> f.bar() >>>
When generating wrappers through a smart-pointer, SWIG tries to generate wrappers for all methods and attributes that might be accessible through operator->(). This includes any methods that might be accessible through inheritance. However, there are a number of restrictions:
If the smart-pointer class and the underlying object both define a method or variable of the same name, then the smart-pointer version has precedence. For example, if you have this code
class Foo {
public:
int x;
};
class Bar {
public:
int x;
Foo *operator->();
};
then the wrapper for Bar::x accesses the x defined in Bar, and not the x defined in Foo.
If your intent is to only expose the smart-pointer class in the interface, it is not necessary to wrap both the smart-pointer class and the class for the underlying object. However, you must still tell SWIG about both classes if you want the technique described in this section to work. To only generate wrappers for the smart-pointer class, you can use the %ignore directive. For example:
%ignore Foo;
class Foo { // Ignored
};
class Bar {
public:
Foo *operator->();
...
};
Alternatively, you can import the definition of Foo from a separate file using %import.
Note: When a class defines operator->(), the operator itself is wrapped as a method __deref__(). For example:
f = Foo() # Smart-pointer p = f.__deref__() # Raw pointer from operator->
Note: To disable the smart-pointer behavior, use %ignore to ignore operator->(). For example:
%ignore Bar::operator->;
Note: Smart pointer support was first added in SWIG-1.3.14.
Another similar idiom in C++ is the use of reference counted objects. Consider for example:
class RCObj {
// implement the ref counting mechanism
int add_ref();
int del_ref();
int ref_count();
public:
virtual ~RCObj() = 0;
int ref() const {
return add_ref();
}
int unref() const {
if (ref_count() == 0 || del_ref() == 0 ) {
delete this;
return 0;
}
return ref_count();
}
};
class A : RCObj {
public:
A();
int foo();
};
class B {
A *_a;
public:
B(A *a) : _a(a) {
a->ref();
}
~B() {
a->unref();
}
};
int main() {
A *a = new A(); // (count: 0)
a->ref(); // 'a' ref here (count: 1)
B *b1 = new B(a); // 'a' ref here (count: 2)
if (1 + 1 == 2) {
B *b2 = new B(a); // 'a' ref here (count: 3)
delete b2; // 'a' unref, but not deleted (count: 2)
}
delete b1; // 'a' unref, but not deleted (count: 1)
a->unref(); // 'a' unref and deleted (count: 0)
}
In the example above, the 'A' class instance 'a' is a reference counted object, which can't be deleted arbitrarily since it is shared between the objects 'b1' and 'b2'. 'A' is derived from a Reference Counted Object 'RCObj', which implements the ref/unref idiom.
To tell SWIG that 'RCObj' and all its derived classes are reference counted objects, use the "ref" and "unref" features. These are also available as %refobject and %unrefobject, respectively. For example:
%module example
...
%feature("ref") RCObj "$this->ref();"
%feature("unref") RCObj "$this->unref();"
%include "rcobj.h"
%include "A.h"
...
where the code passed to the "ref" and "unref" features will be executed as needed whenever a new object is passed to python, or when python tries to release the proxy object instance, respectively.
On the python side, the use of a reference counted object is no different to any other regular instance:
def create_A():
a = A() # SWIG ref 'a' - new object is passed to python (count: 1)
b1 = B(a) # C++ ref 'a (count: 2)
if 1 + 1 == 2:
b2 = B(a) # C++ ref 'a' (count: 3)
return a # 'b1' and 'b2' are released and deleted, C++ unref 'a' twice (count: 1)
a = create_A() # (count: 1)
exit # 'a' is released, SWIG unref 'a' called in the destructor wrapper (count: 0)
Note that the user doesn't explicitly need to call 'a->ref()' nor 'a->unref()' (and neither 'delete a'). Instead, SWIG takes cares of executing the "ref" and "unref" calls as needed. If the user doesn't specify the "ref/unref" feature for a type, SWIG will produce code equivalent to defining these features:
%feature("ref") ""
%feature("unref") "delete $this;"
In other words, SWIG will not do anything special when a new object is passed to python, and it will always 'delete' the underlying object when python releases the proxy instance.
The %newobject feature is designed to indicate to the target language that it should take ownership of the returned object. When used in conjunction with a type that has the "ref" feature associated with it, it additionally emits the code in the "ref" feature into the C++ wrapper. Consider wrapping the following factory function in addition to the above:
%newobject AFactory;
A *AFactory() {
return new A();
}
The AFactory function now acts much like a call to the A constructor with respect to memory handling:
a = AFactory() # SWIG ref 'a' due to %newobject (count: 1) exit # 'a' is released, SWIG unref 'a' called in the destructor wrapper (count: 0)
using declarations are sometimes used to adjust access to members of base classes. For example:
class Foo {
public:
int blah(int x);
};
class Bar {
public:
double blah(double x);
};
class FooBar : public Foo, public Bar {
public:
using Foo::blah;
using Bar::blah;
char *blah(const char *x);
};
In this example, the using declarations make different versions of the overloaded blah() method accessible from the derived class. For example:
FooBar *f;
f->blah(3); // Ok. Invokes Foo::blah(int)
f->blah(3.5); // Ok. Invokes Bar::blah(double)
f->blah("hello"); // Ok. Invokes FooBar::blah(const char *);
SWIG emulates the same functionality when creating wrappers. For example, if you wrap this code in Python, the module works just like you would expect:
>>> import example
>>> f = example.FooBar()
>>> f.blah(3)
>>> f.blah(3.5)
>>> f.blah("hello")
using declarations can also be used to change access when applicable. For example:
class Foo {
protected:
int x;
int blah(int x);
};
class Bar : public Foo {
public:
using Foo::x; // Make x public
using Foo::blah; // Make blah public
};
This also works in SWIG---the exposed declarations will be wrapped normally.
When using declarations are used as shown in these examples, declarations from the base classes are copied into the derived class and wrapped normally. When copied, the declarations retain any properties that might have been attached using %rename , %ignore, or %feature. Thus, if a method is ignored in a base class, it will also be ignored by a using declaration.
Because a using declaration does not provide fine-grained control over the declarations that get imported, it may be difficult to manage such declarations in applications that make heavy use of SWIG customization features. If you can't get using to work correctly, you can always change the interface to the following:
class FooBar : public Foo, public Bar {
public:
#ifndef SWIG
using Foo::blah;
using Bar::blah;
#else
int blah(int x); // explicitly tell SWIG about other declarations
double blah(double x);
#endif
char *blah(const char *x);
};
Notes:
If a derived class redefines a method defined in a base class, then a using declaration won't cause a conflict. For example:
class Foo {
public:
int blah(int );
double blah(double);
};
class Bar : public Foo {
public:
using Foo::blah; // Only imports blah(double);
int blah(int);
};
Resolving ambiguity in overloading may prevent declarations from being imported by using. For example:
%rename(blah_long) Foo::blah(long);
class Foo {
public:
int blah(int);
long blah(long); // Renamed to blah_long
};
class Bar : public Foo {
public:
using Foo::blah; // Only imports blah(int)
double blah(double x);
};
There is some support for nested structs and unions when wrapping C code, see Nested structures for further details. The added complexity of C++ compared to C means this approach does not work well for C++ code (when using the -c++ command line option). For C++, a nested class is treated much like an opaque pointer, so anything useful within the nested class, such as its methods and variables, are not accessible from the target language. True nested class support may be added to SWIG in the future, however, until then some of the following workarounds can be applied to improve the situation.
It might be possible to use partial class information as often you can accept that the nested class is not needed, especially if it is not actually used in any methods you need from the target language. Imagine you are wrapping the following Outer class which contains a nested class Inner. The easiest thing to do is turn a blind eye to the warning that SWIG generates, or simply suppress it:
%warnfilter(SWIGWARN_PARSE_NAMED_NESTED_CLASS) Outer::Inner;
class Outer {
public:
class Inner {
public:
...
};
Inner getInner();
void useInner(const Inner& inner);
...
};
Note that if Inner can be used as an opaque type, the default wrapping approach suffices. For example, if the nested class does not need to be created from the target language, but can be obtained via a method call, such as the getInner() method above, the returned value can then be passed around, such as passed into the useInner() method.
With some more effort the above situation can be improved somewhat and a nested class can be constructed and used from the target language much like any other non-nested class. Assuming we have the Outer class in a header file:
// File outer.h
class Outer {
public:
class Inner {
public:
int var;
Inner(int v = 0) : var(v) {}
};
Inner getInner();
void useInner(const Inner& inner);
};
The following interface file works around the nested class limitations by redefining the nested class as a global class. A typedef for the compiler and the nestedworkaround feature flag is also required in order for the generated wrappers to compile. This flag simply removes all the type information from SWIG, so SWIG treats the nested class as if it had not been parsed at all.
// File : example.i
%module example
// Redefine nested class in global scope in order for SWIG to generate
// a proxy class. Only SWIG parses this definition.
class Inner {
public:
int var;
Inner(int v = 0) : var(v) {}
};
%nestedworkaround Outer::Inner;
%{
#include "outer.h"
%}
%include "outer.h"
// We've fooled SWIG into thinking that Inner is a global class, so now we need
// to trick the C++ compiler into understanding this apparent global type.
%{
typedef Outer::Inner Inner;
%}
The downside to this approach is a more complex interface file and having to maintain two definitions of Inner, the real one and the one in the interface file that SWIG parses. However, the upside is that all the methods/variables in the nested class are available from the target language as a proxy class is generated instead of treating the nested class as an opaque type. The proxy class can be constructed from the target language and passed into any methods accepting the nested class. Also note that the original header file is parsed unmodified.
Finally, conditional compilation can be used as a workaround to comment out nested class definitions in the actual headers, assuming you are able to modify them.
// File outer.h
class Outer {
public:
#ifndef SWIG
class Inner {
public:
...
};
#endif
...
};
This workaround used to be common when SWIG could not deal with nested classes particulary well. This should just be a last resort for unusual corner cases now as SWIG can parse nested classes and even handle nested template classes fairly well.
Compatibility Note: SWIG-1.3.40 and earlier versions did not have the nestedworkaround feature and the generated code resulting from parsing nested classes did not always compile. Nested class warnings could also not be suppressed using %warnfilter.
A common issue when working with C++ programs is dealing with all possible ways in which the const qualifier (or lack thereof) will break your program, all programs linked against your program, and all programs linked against those programs.
Although SWIG knows how to correctly deal with const in its internal type system and it knows how to generate wrappers that are free of const-related warnings, SWIG does not make any attempt to preserve const-correctness in the target language. Thus, it is possible to pass const qualified objects to non-const methods and functions. For example, consider the following code in C++:
const Object * foo();
void bar(Object *);
...
// C++ code
void blah() {
bar(foo()); // Error: bar discards const
};
Now, consider the behavior when wrapped into a Python module:
>>> bar(foo()) # Okay >>>
Although this is clearly a violation of the C++ type-system, fixing the problem doesn't seem to be worth the added implementation complexity that would be required to support it in the SWIG run-time type system. There are no plans to change this in future releases (although we'll never rule anything out entirely).
The bottom line is that this particular issue does not appear to be a problem for most SWIG projects. Of course, you might want to consider using another tool if maintaining constness is the most important part of your project.
If you're wrapping serious C++ code, you might want to pick up a copy of "The Annotated C++ Reference Manual" by Ellis and Stroustrup. This is the reference document we use to guide a lot of SWIG's C++ support.
SWIG includes its own enhanced version of the C preprocessor. The preprocessor supports the standard preprocessor directives and macro expansion rules. However, a number of modifications and enhancements have been made. This chapter describes some of these modifications.
To include another file into a SWIG interface, use the %include directive like this:
%include "pointer.i"
Unlike, #include, %include includes each file once (and will not reload the file on subsequent %include declarations). Therefore, it is not necessary to use include-guards in SWIG interfaces.
By default, the #include is ignored unless you run SWIG with the -includeall option. The reason for ignoring traditional includes is that you often don't want SWIG to try and wrap everything included in standard header system headers and auxiliary files.
SWIG provides another file inclusion directive with the %import directive. For example:
%import "foo.i"
The purpose of %import is to collect certain information from another SWIG interface file or a header file without actually generating any wrapper code. Such information generally includes type declarations (e.g., typedef) as well as C++ classes that might be used as base-classes for class declarations in the interface. The use of %import is also important when SWIG is used to generate extensions as a collection of related modules. This is an advanced topic and is described in later in the Working with Modules chapter.
The -importall directive tells SWIG to follow all #include statements as imports. This might be useful if you want to extract type definitions from system header files without generating any wrappers.
SWIG fully supports the use of #if, #ifdef, #ifndef, #else, #endif to conditionally include parts of an interface. The following symbols are predefined by SWIG when it is parsing the interface:
SWIG Always defined when SWIG is processing a file
SWIGIMPORTED Defined when SWIG is importing a file with %import
SWIG_VERSION Hexadecimal (binary-coded decimal) number containing SWIG version,
such as 0x010311 (corresponding to SWIG-1.3.11).
SWIGALLEGROCL Defined when using Allegro CL
SWIGCFFI Defined when using CFFI
SWIGCHICKEN Defined when using CHICKEN
SWIGCLISP Defined when using CLISP
SWIGCSHARP Defined when using C#
SWIGGUILE Defined when using Guile
SWIGJAVA Defined when using Java
SWIGLUA Defined when using Lua
SWIGMODULA3 Defined when using Modula-3
SWIGMZSCHEME Defined when using Mzscheme
SWIGOCAML Defined when using Ocaml
SWIGOCTAVE Defined when using Octave
SWIGPERL Defined when using Perl
SWIGPHP Defined when using PHP
SWIGPIKE Defined when using Pike
SWIGPYTHON Defined when using Python
SWIGR Defined when using R
SWIGRUBY Defined when using Ruby
SWIGSEXP Defined when using S-expressions
SWIGTCL Defined when using Tcl
SWIGXML Defined when using XML
In addition, SWIG defines the following set of standard C/C++ macros:
__LINE__ Current line number __FILE__ Current file name __STDC__ Defined to indicate ANSI C __cplusplus Defined when -c++ option used
Interface files can look at these symbols as necessary to change the way in which an interface is generated or to mix SWIG directives with C code. These symbols are also defined within the C code generated by SWIG (except for the symbol `SWIG' which is only defined within the SWIG compiler).
Traditional preprocessor macros can be used in SWIG interfaces. Be aware that the #define statement is also used to try and detect constants. Therefore, if you have something like this in your file,
#ifndef _FOO_H 1 #define _FOO_H 1 ... #endif
you may get some extra constants such as _FOO_H showing up in the scripting interface.
More complex macros can be defined in the standard way. For example:
#define EXTERN extern #ifdef __STDC__ #define _ANSI(args) (args) #else #define _ANSI(args) () #endif
The following operators can appear in macro definitions:
SWIG provides an enhanced macro capability with the %define and %enddef directives. For example:
%define ARRAYHELPER(type,name)
%inline %{
type *new_ ## name (int nitems) {
return (type *) malloc(sizeof(type)*nitems);
}
void delete_ ## name(type *t) {
free(t);
}
type name ## _get(type *t, int index) {
return t[index];
}
void name ## _set(type *t, int index, type val) {
t[index] = val;
}
%}
%enddef
ARRAYHELPER(int, IntArray)
ARRAYHELPER(double, DoubleArray)
The primary purpose of %define is to define large macros of code. Unlike normal C preprocessor macros, it is not necessary to terminate each line with a continuation character (\)--the macro definition extends to the first occurrence of %enddef. Furthermore, when such macros are expanded, they are reparsed through the C preprocessor. Thus, SWIG macros can contain all other preprocessor directives except for nested %define statements.
The SWIG macro capability is a very quick and easy way to generate large amounts of code. In fact, many of SWIG's advanced features and libraries are built using this mechanism (such as C++ template support).
SWIG-1.3.12 and newer releases support variadic preprocessor macros. For example:
#define DEBUGF(fmt,...) fprintf(stderr,fmt,__VA_ARGS__)
When used, any extra arguments to ... are placed into the special variable __VA_ARGS__. This also works with special SWIG macros defined using %define.
SWIG allows a variable number of arguments to be empty. However, this often results in an extra comma (,) and syntax error in the resulting expansion. For example:
DEBUGF("hello"); --> fprintf(stderr,"hello",);
To get rid of the extra comma, use ## like this:
#define DEBUGF(fmt,...) fprintf(stderr,fmt, ##__VA_ARGS__)
SWIG also supports GNU-style variadic macros. For example:
#define DEBUGF(fmt, args...) fprintf(stdout,fmt,args)
Comment: It's not entirely clear how variadic macros might be useful to interface building. However, they are used internally to implement a number of SWIG directives and are provided to make SWIG more compatible with C99 code.
The preprocessor handles { }, " " and %{ %} delimiters differently.
The SWIG preprocessor does not process any text enclosed in a code block %{ ... %}. Therefore, if you write code like this,
%{
#ifdef NEED_BLAH
int blah() {
...
}
#endif
%}
the contents of the %{ ... %} block are copied without modification to the output (including all preprocessor directives).
SWIG always runs the preprocessor on text appearing inside { ... }. However, sometimes it is desirable to make a preprocessor directive pass through to the output file. For example:
%extend Foo {
void bar() {
#ifdef DEBUG
printf("I'm in bar\n");
#endif
}
}
By default, SWIG will interpret the #ifdef DEBUG statement. However, if you really wanted that code to actually go into the wrapper file, prefix the preprocessor directives with % like this:
%extend Foo {
void bar() {
%#ifdef DEBUG
printf("I'm in bar\n");
%#endif
}
}
SWIG will strip the extra % and leave the preprocessor directive in the code.
Typemaps support a special attribute called noblock where the { ... } delimiters can be used, but the delimiters are not actually generated into the code. The effect is then similar to using "" or %{ %} delimiters but the code is run through the preprocessor. For example:
#define SWIG_macro(CAST) (CAST)$input
%typemap(in) Int {$1= SWIG_macro(int);}
might generate
{
arg1=(int)jarg1;
}
whereas
#define SWIG_macro(CAST) (CAST)$input
%typemap(in,noblock=1) Int {$1= SWIG_macro(int);}
might generate
arg1=(int)jarg1;
and
#define SWIG_macro(CAST) (CAST)$input
%typemap(in) Int %{$1=SWIG_macro(int);%}
would generate
arg1=SWIG_macro(int);
Like many compilers, SWIG supports a -E command line option to display the output from the preprocessor. When the -E switch is used, SWIG will not generate any wrappers. Instead the results after the preprocessor has run are displayed. This might be useful as an aid to debugging and viewing the results of macro expansions.
SWIG supports the commonly used #warning and #error preprocessor directives. The #warning directive will cause SWIG to issue a warning then continue processing. The #error directive will cause SWIG to exit with a fatal error. Example usage:
#error "This is a fatal error message" #warning "This is a warning message"
The #error behaviour can be made to work like #warning if the -cpperraswarn commandline option is used. Alternatively, the #pragma directive can be used to the same effect, for example:
/* Modified behaviour: #error does not cause SWIG to exit with error */ #pragma SWIG cpperraswarn=1 /* Normal behaviour: #error does cause SWIG to exit with error */ #pragma SWIG cpperraswarn=0
To help build extension modules, SWIG is packaged with a library of support files that you can include in your own interfaces. These files often define new SWIG directives or provide utility functions that can be used to access parts of the standard C and C++ libraries. This chapter provides a reference to the current set of supported library files.
Compatibility note: Older versions of SWIG included a number of library files for manipulating pointers, arrays, and other structures. Most these files are now deprecated and have been removed from the distribution. Alternative libraries provide similar functionality. Please read this chapter carefully if you used the old libraries.
Library files are included using the %include directive. When searching for files, directories are searched in the following order:
Within directories mentioned in points 3-5, SWIG first looks for a subdirectory corresponding to a target language (e.g., python, tcl, etc.). If found, SWIG will search the language specific directory first. This allows for language-specific implementations of library files.
You can ignore the installed SWIG library by setting the SWIG_LIB environment variable. Set the environment variable to hold an alternative library directory.
The directories that are searched are displayed when using -verbose commandline option.
This section describes library modules for manipulating low-level C arrays and pointers. The primary use of these modules is in supporting C declarations that manipulate bare pointers such as int *, double *, or void *. The modules can be used to allocate memory, manufacture pointers, dereference memory, and wrap pointers as class-like objects. Since these functions provide direct access to memory, their use is potentially unsafe and you should exercise caution.
The cpointer.i module defines macros that can be used to used to generate wrappers around simple C pointers. The primary use of this module is in generating pointers to primitive datatypes such as int and double.
%pointer_functions(type,name)
Generates a collection of four functions for manipulating a pointer type *:
type *new_name()
Creates a new object of type type and returns a pointer to it. In C, the object is created using calloc(). In C++, new is used.
type *copy_name(type value)
Creates a new object of type type and returns a pointer to it. An initial value is set by copying it from value. In C, the object is created using calloc(). In C++, new is used.
type *delete_name(type *obj)
Deletes an object type type.
void name_assign(type *obj, type value)
Assigns *obj = value.
type name_value(type *obj)
Returns the value of *obj.
When using this macro, type may be any type and name must be a legal identifier in the target language. name should not correspond to any other name used in the interface file.
Here is a simple example of using %pointer_functions():
%module example %include "cpointer.i" /* Create some functions for working with "int *" */ %pointer_functions(int, intp); /* A function that uses an "int *" */ void add(int x, int y, int *result);
Now, in Python:
>>> import example >>> c = example.new_intp() # Create an "int" for storing result >>> example.add(3,4,c) # Call function >>> example.intp_value(c) # Dereference 7 >>> example.delete_intp(c) # Delete
%pointer_class(type,name)
Wraps a pointer of type * inside a class-based interface. This interface is as follows:
struct name {
name(); // Create pointer object
~name(); // Delete pointer object
void assign(type value); // Assign value
type value(); // Get value
type *cast(); // Cast the pointer to original type
static name *frompointer(type *); // Create class wrapper from existing
// pointer
};
When using this macro, type is restricted to a simple type name like int, float, or Foo. Pointers and other complicated types are not allowed. name must be a valid identifier not already in use. When a pointer is wrapped as a class, the "class" may be transparently passed to any function that expects the pointer.
If the target language does not support proxy classes, the use of this macro will produce the example same functions as %pointer_functions() macro.
It should be noted that the class interface does introduce a new object or wrap a pointer inside a special structure. Instead, the raw pointer is used directly.
Here is the same example using a class instead:
%module example %include "cpointer.i" /* Wrap a class interface around an "int *" */ %pointer_class(int, intp); /* A function that uses an "int *" */ void add(int x, int y, int *result);
Now, in Python (using proxy classes)
>>> import example >>> c = example.intp() # Create an "int" for storing result >>> example.add(3,4,c) # Call function >>> c.value() # Dereference 7
Of the two macros, %pointer_class is probably the most convenient when working with simple pointers. This is because the pointers are access like objects and they can be easily garbage collected (destruction of the pointer object destroys the underlying object).
%pointer_cast(type1, type2, name)
Creates a casting function that converts type1 to type2 . The name of the function is name. For example:
%pointer_cast(int *, unsigned int *, int_to_uint);
In this example, the function int_to_uint() would be used to cast types in the target language.
Note: None of these macros can be used to safely work with strings (char * or char **).
Note: When working with simple pointers, typemaps can often be used to provide more seamless operation.
This module defines macros that assist in wrapping ordinary C pointers as arrays. The module does not provide any safety or an extra layer of wrapping--it merely provides functionality for creating, destroying, and modifying the contents of raw C array data.
%array_functions(type,name)
Creates four functions.
type *new_name(int nelements)
Creates a new array of objects of type type. In C, the array is allocated using calloc(). In C++, new [] is used.
type *delete_name(type *ary)
Deletes an array. In C, free() is used. In C++, delete [] is used.
type name_getitem(type *ary, int index)
Returns the value ary[index].
void name_setitem(type *ary, int index, type value)
Assigns ary[index] = value.
When using this macro, type may be any type and name must be a legal identifier in the target language. name should not correspond to any other name used in the interface file.
Here is an example of %array_functions(). Suppose you had a function like this:
void print_array(double x[10]) {
int i;
for (i = 0; i < 10; i++) {
printf("[%d] = %g\n", i, x[i]);
}
}
To wrap it, you might write this:
%module example %include "carrays.i" %array_functions(double, doubleArray); void print_array(double x[10]);
Now, in a scripting language, you might write this:
a = new_doubleArray(10) # Create an array
for i in range(0,10):
doubleArray_setitem(a,i,2*i) # Set a value
print_array(a) # Pass to C
delete_doubleArray(a) # Destroy array
%array_class(type,name)
Wraps a pointer of type * inside a class-based interface. This interface is as follows:
struct name {
name(int nelements); // Create an array
~name(); // Delete array
type getitem(int index); // Return item
void setitem(int index, type value); // Set item
type *cast(); // Cast to original type
static name *frompointer(type *); // Create class wrapper from
// existing pointer
};
When using this macro, type is restricted to a simple type name like int or float. Pointers and other complicated types are not allowed. name must be a valid identifier not already in use. When a pointer is wrapped as a class, it can be transparently passed to any function that expects the pointer.
When combined with proxy classes, the %array_class() macro can be especially useful. For example:
%module example %include "carrays.i" %array_class(double, doubleArray); void print_array(double x[10]);
Allows you to do this:
import example
c = example.doubleArray(10) # Create double[10]
for i in range(0,10):
c[i] = 2*i # Assign values
example.print_array(c) # Pass to C
Note: These macros do not encapsulate C arrays inside a special data structure or proxy. There is no bounds checking or safety of any kind. If you want this, you should consider using a special array object rather than a bare pointer.
Note: %array_functions() and %array_class() should not be used with types of char or char *.
This module defines macros for wrapping the low-level C memory allocation functions malloc(), calloc(), realloc(), and free().
%malloc(type [,name=type])
Creates a wrapper around malloc() with the following prototype:
type *malloc_name(int nbytes = sizeof(type));
If type is void, then the size parameter nbytes is required. The name parameter only needs to be specified when wrapping a type that is not a valid identifier (e.g., " int *", "double **", etc.).
%calloc(type [,name=type])
Creates a wrapper around calloc() with the following prototype:
type *calloc_name(int nobj =1, int sz = sizeof(type));
If type is void, then the size parameter sz is required.
%realloc(type [,name=type])
Creates a wrapper around realloc() with the following prototype:
type *realloc_name(type *ptr, int nitems);
Note: unlike the C realloc(), the wrapper generated by this macro implicitly includes the size of the corresponding type. For example, realloc_int(p, 100) reallocates p so that it holds 100 integers.
%free(type [,name=type])
Creates a wrapper around free() with the following prototype:
void free_name(type *ptr);
%sizeof(type [,name=type])
Creates the constant:
%constant int sizeof_name = sizeof(type);
%allocators(type [,name=type])
Generates wrappers for all five of the above operations.
Here is a simple example that illustrates the use of these macros:
// SWIG interface %module example %include "cmalloc.i" %malloc(int); %free(int); %malloc(int *, intp); %free(int *, intp); %allocators(double);
Now, in a script:
>>> from example import * >>> a = malloc_int() >>> a '_000efa70_p_int' >>> free_int(a) >>> b = malloc_intp() >>> b '_000efb20_p_p_int' >>> free_intp(b) >>> c = calloc_double(50) >>> c '_000fab98_p_double' >>> c = realloc_double(100000) >>> free_double(c) >>> print sizeof_double 8 >>>
The cdata.i module defines functions for converting raw C data to and from strings in the target language. The primary applications of this module would be packing/unpacking of binary data structures---for instance, if you needed to extract data from a buffer. The target language must support strings with embedded binary data in order for this to work.
const char *cdata(void *ptr, size_t nbytes)
Converts nbytes of data at ptr into a string. ptr can be any pointer.
void memmove(void *ptr, const char *s)
Copies all of the string data in s into the memory pointed to by ptr. The string may contain embedded NULL bytes. This is actually a wrapper to the standard C library memmove function, which is declared as void memmove(void *ptr, const void *src, size_t n). The src and length n parameters are extracted from the language specific string s in the underlying wrapper code.
One use of these functions is packing and unpacking data from memory. Here is a short example:
// SWIG interface %module example %include "carrays.i" %include "cdata.i" %array_class(int, intArray);
Python example:
>>> a = intArray(10) >>> for i in range(0,10): ... a[i] = i >>> b = cdata(a,40) >>> b '\x00\x00\x00\x00\x00\x00\x00\x01\x00\x00\x00\x02\x00\x00\x00\x03\x00\x00\x00\x04 \x00\x00\x00\x05\x00\x00\x00\x06\x00\x00\x00\x07\x00\x00\x00\x08\x00\x00\x00\t' >>> c = intArray(10) >>> memmove(c,b) >>> print c[4] 4 >>>
Since the size of data is not always known, the following macro is also defined:
%cdata(type [,name=type])
Generates the following function for extracting C data for a given type.
char *cdata_name(type* ptr, int nitems)
nitems is the number of items of the given type to extract.
Note: These functions provide direct access to memory and can be used to overwrite data. Clearly they are unsafe.
A common problem when working with C programs is dealing with functions that manipulate raw character data using char *. In part, problems arise because there are different interpretations of char *---it could be a NULL-terminated string or it could point to binary data. Moreover, functions that manipulate raw strings may mutate data, perform implicit memory allocations, or utilize fixed-sized buffers.
The problems (and perils) of using char * are well-known. However, SWIG is not in the business of enforcing morality. The modules in this section provide basic functionality for manipulating raw C strings.
Suppose you have a C function with this prototype:
char *foo(char *s);
The default wrapping behavior for this function is to set s to a raw char * that refers to the internal string data in the target language. In other words, if you were using a language like Tcl, and you wrote this,
% foo Hello
then s would point to the representation of "Hello" inside the Tcl interpreter. When returning a char *, SWIG assumes that it is a NULL-terminated string and makes a copy of it. This gives the target language its own copy of the result.
There are obvious problems with the default behavior. First, since a char * argument points to data inside the target language, it is NOT safe for a function to modify this data (doing so may corrupt the interpreter and lead to a crash). Furthermore, the default behavior does not work well with binary data. Instead, strings are assumed to be NULL-terminated.
If you have a function that expects binary data,
size_t parity(char *str, size_t len, size_t initial);
you can wrap the parameters (char *str, size_t len) as a single argument using a typemap. Just do this:
%apply (char *STRING, size_t LENGTH) { (char *str, size_t len) };
...
size_t parity(char *str, size_t len, size_t initial);
Now, in the target language, you can use binary string data like this:
>>> s = "H\x00\x15eg\x09\x20" >>> parity(s,0)
In the wrapper function, the passed string will be expanded to a pointer and length parameter. The (char *STRING, int LENGTH) multi-argument typemap is also available in addition to (char *STRING, size_t LENGTH).
If you have a function that allocates memory like this,
char *foo() {
char *result = (char *) malloc(...);
...
return result;
}
then the SWIG generated wrappers will have a memory leak--the returned data will be copied into a string object and the old contents ignored.
To fix the memory leak, use the %newobject directive.
%newobject foo; ... char *foo();
This will release the result if the appropriate target language support is available. SWIG provides the appropriate "newfree" typemap for char * so that the memory is released, however, you may need to provide your own "newfree" typemap for other types. See Object ownership and %newobject for more details.
The cstring.i library file provides a collection of macros for dealing with functions that either mutate string arguments or which try to output string data through their arguments. An example of such a function might be this rather questionable implementation:
void get_path(char *s) {
// Potential buffer overflow---uh, oh.
sprintf(s,"%s/%s", base_directory, sub_directory);
}
...
// Somewhere else in the C program
{
char path[1024];
...
get_path(path);
...
}
(Off topic rant: If your program really has functions like this, you would be well-advised to replace them with safer alternatives involving bounds checking).
The macros defined in this module all expand to various combinations of typemaps. Therefore, the same pattern matching rules and ideas apply.
%cstring_bounded_output(parm, maxsize)
Turns parameter parm into an output value. The output string is assumed to be NULL-terminated and smaller than maxsize characters. Here is an example:
%cstring_bounded_output(char *path, 1024); ... void get_path(char *path);
In the target language:
>>> get_path() /home/beazley/packages/Foo/Bar >>>
Internally, the wrapper function allocates a small buffer (on the stack) of the requested size and passes it as the pointer value. Data stored in the buffer is then returned as a function return value. If the function already returns a value, then the return value and the output string are returned together (multiple return values). If more than maxsize bytes are written, your program will crash with a buffer overflow!
%cstring_chunk_output(parm, chunksize)
Turns parameter parm into an output value. The output string is always chunksize and may contain binary data. Here is an example:
%cstring_chunk_output(char *packet, PACKETSIZE); ... void get_packet(char *packet);
In the target language:
>>> get_packet() '\xa9Y:\xf6\xd7\xe1\x87\xdbH;y\x97\x7f\xd3\x99\x14V\xec\x06\xea\xa2\x88' >>>
This macro is essentially identical to %cstring_bounded_output . The only difference is that the result is always chunksize characters. Furthermore, the result can contain binary data. If more than maxsize bytes are written, your program will crash with a buffer overflow!
%cstring_bounded_mutable(parm, maxsize)
Turns parameter parm into a mutable string argument. The input string is assumed to be NULL-terminated and smaller than maxsize characters. The output string is also assumed to be NULL-terminated and less than maxsize characters.
%cstring_bounded_mutable(char *ustr, 1024); ... void make_upper(char *ustr);
In the target language:
>>> make_upper("hello world")
'HELLO WORLD'
>>>
Internally, this macro is almost exactly the same as %cstring_bounded_output. The only difference is that the parameter accepts an input value that is used to initialize the internal buffer. It is important to emphasize that this function does not mutate the string value passed---instead it makes a copy of the input value, mutates it, and returns it as a result. If more than maxsize bytes are written, your program will crash with a buffer overflow!
%cstring_mutable(parm [, expansion])
Turns parameter parm into a mutable string argument. The input string is assumed to be NULL-terminated. An optional parameter expansion specifies the number of extra characters by which the string might grow when it is modified. The output string is assumed to be NULL-terminated and less than the size of the input string plus any expansion characters.
%cstring_mutable(char *ustr); ... void make_upper(char *ustr); %cstring_mutable(char *hstr, HEADER_SIZE); ... void attach_header(char *hstr);
In the target language:
>>> make_upper("hello world")
'HELLO WORLD'
>>> attach_header("Hello world")
'header: Hello world'
>>>
This macro differs from %cstring_bounded_mutable() in that a buffer is dynamically allocated (on the heap using malloc/new ). This buffer is always large enough to store a copy of the input value plus any expansion bytes that might have been requested. It is important to emphasize that this function does not directly mutate the string value passed---instead it makes a copy of the input value, mutates it, and returns it as a result. If the function expands the result by more than expansion extra bytes, then the program will crash with a buffer overflow!
%cstring_output_maxsize(parm, maxparm)
This macro is used to handle bounded character output functions where both a char * and a maximum length parameter are provided. As input, a user simply supplies the maximum length. The return value is assumed to be a NULL-terminated string.
%cstring_output_maxsize(char *path, int maxpath); ... void get_path(char *path, int maxpath);
In the target language:
>>> get_path(1024) '/home/beazley/Packages/Foo/Bar' >>>
This macro provides a safer alternative for functions that need to write string data into a buffer. User supplied buffer size is used to dynamically allocate memory on heap. Results are placed into that buffer and returned as a string object.
%cstring_output_withsize(parm, maxparm)
This macro is used to handle bounded character output functions where both a char * and a pointer int * are passed. Initially, the int * parameter points to a value containing the maximum size. On return, this value is assumed to contain the actual number of bytes. As input, a user simply supplies the maximum length. The output value is a string that may contain binary data.
%cstring_output_withsize(char *data, int *maxdata); ... void get_data(char *data, int *maxdata);
In the target language:
>>> get_data(1024) 'x627388912' >>> get_data(1024) 'xyzzy' >>>
This macro is a somewhat more powerful version of %cstring_output_chunk(). Memory is dynamically allocated and can be arbitrary large. Furthermore, a function can control how much data is actually returned by changing the value of the maxparm argument.
%cstring_output_allocate(parm, release)
This macro is used to return strings that are allocated within the program and returned in a parameter of type char **. For example:
void foo(char **s) {
*s = (char *) malloc(64);
sprintf(*s, "Hello world\n");
}
The returned string is assumed to be NULL-terminated. release specifies how the allocated memory is to be released (if applicable). Here is an example:
%cstring_output_allocate(char **s, free(*$1)); ... void foo(char **s);
In the target language:
>>> foo() 'Hello world\n' >>>
%cstring_output_allocate_size(parm, szparm, release)
This macro is used to return strings that are allocated within the program and returned in two parameters of type char ** and int *. For example:
void foo(char **s, int *sz) {
*s = (char *) malloc(64);
*sz = 64;
// Write some binary data
...
}
The returned string may contain binary data. release specifies how the allocated memory is to be released (if applicable). Here is an example:
%cstring_output_allocate_size(char **s, int *slen, free(*$1)); ... void foo(char **s, int *slen);
In the target language:
>>> foo() '\xa9Y:\xf6\xd7\xe1\x87\xdbH;y\x97\x7f\xd3\x99\x14V\xec\x06\xea\xa2\x88' >>>
This is the safest and most reliable way to return binary string data in SWIG. If you have functions that conform to another prototype, you might consider wrapping them with a helper function. For example, if you had this:
char *get_data(int *len);
You could wrap it with a function like this:
void my_get_data(char **result, int *len) {
*result = get_data(len);
}
Comments:
The library modules in this section provide access to parts of the standard C++ library including the STL. SWIG support for the STL is an ongoing effort. Support is quite comprehensive for some language modules but some of the lesser used modules do not have quite as much library code written.
The following table shows which C++ classes are supported and the equivalent SWIG interface library file for the C++ library.
| C++ class | C++ Library file | SWIG Interface library file |
| std::deque | deque | std_deque.i |
| std::list | list | std_list.i |
| std::map | map | std_map.i |
| std::pair | utility | std_pair.i |
| std::set | set | std_set.i |
| std::string | string | std_string.i |
| std::vector | vector | std_vector.i |
| std::shared_ptr | shared_ptr | std_shared_ptr.i |
The list is by no means complete; some language modules support a subset of the above and some support additional STL classes. Please look for the library files in the appropriate language library directory.
The std_string.i library provides typemaps for converting C++ std::string objects to and from strings in the target scripting language. For example:
%module example %include "std_string.i" std::string foo(); void bar(const std::string &x);
In the target language:
x = foo(); # Returns a string object
bar("Hello World"); # Pass string as std::string
A common problem that people encounter is that of classes/structures containing a std::string. This can be overcome by defining a typemap. For example:
%module example
%include "std_string.i"
%apply const std::string& {std::string* foo};
struct my_struct
{
std::string foo;
};
In the target language:
x = my_struct(); x.foo="Hello World"; # assign with string print x.foo; # print as string
This module only supports types std::string and const std::string &. Pointers and non-const references are left unmodified and returned as SWIG pointers.
This library file is fully aware of C++ namespaces. If you export std::string or rename it with a typedef, make sure you include those declarations in your interface. For example:
%module example %include "std_string.i" using namespace std; typedef std::string String; ... void foo(string s, const String &t); // std_string typemaps still applied
The std_vector.i library provides support for the C++ std::vector class in the STL. Using this library involves the use of the %template directive. All you need to do is to instantiate different versions of vector for the types that you want to use. For example:
%module example
%include "std_vector.i"
namespace std {
%template(vectori) vector<int>;
%template(vectord) vector<double>;
};
When a template vector<X> is instantiated a number of things happen:
To illustrate the use of this library, consider the following functions:
/* File : example.h */
#include <vector>
#include <algorithm>
#include <functional>
#include <numeric>
double average(std::vector<int> v) {
return std::accumulate(v.begin(),v.end(),0.0)/v.size();
}
std::vector<double> half(const std::vector<double>& v) {
std::vector<double> w(v);
for (unsigned int i=0; i<w.size(); i++)
w[i] /= 2.0;
return w;
}
void halve_in_place(std::vector<double>& v) {
std::transform(v.begin(),v.end(),v.begin(),
std::bind2nd(std::divides<double>(),2.0));
}
To wrap with SWIG, you might write the following:
%module example
%{
#include "example.h"
%}
%include "std_vector.i"
// Instantiate templates used by example
namespace std {
%template(IntVector) vector<int>;
%template(DoubleVector) vector<double>;
}
// Include the header file with above prototypes
%include "example.h"
Now, to illustrate the behavior in the scripting interpreter, consider this Python example:
>>> from example import *
>>> iv = IntVector(4) # Create an vector<int>
>>> for i in range(0,4):
... iv[i] = i
>>> average(iv) # Call method
1.5
>>> average([0,1,2,3]) # Call with list
1.5
>>> half([1,2,3]) # Half a list
(0.5,1.0,1.5)
>>> halve_in_place([1,2,3]) # Oops
Traceback (most recent call last):
File "<stdin>", line 1, in ?
TypeError: Type error. Expected _p_std__vectorTdouble_t
>>> dv = DoubleVector(4)
>>> for i in range(0,4):
... dv[i] = i
>>> halve_in_place(dv) # Ok
>>> for i in dv:
... print i
...
0.0
0.5
1.0
1.5
>>> dv[20] = 4.5
Traceback (most recent call last):
File "<stdin>", line 1, in ?
File "example.py", line 81, in __setitem__
def __setitem__(*args): return apply(examplec.DoubleVector___setitem__,args)
IndexError: vector index out of range
>>>
This library module is fully aware of C++ namespaces. If you use vectors with other names, make sure you include the appropriate using or typedef directives. For example:
%include "std_vector.i"
namespace std {
%template(IntVector) vector<int>;
}
using namespace std;
typedef std::vector Vector;
void foo(vector<int> *x, const Vector &x);
Note: This module makes use of several advanced SWIG features including templatized typemaps and template partial specialization. If you are trying to wrap other C++ code with templates, you might look at the code contained in std_vector.i. Alternatively, you can show them the code if you want to make their head explode.
Note: This module is defined for all SWIG target languages. However argument conversion details and the public API exposed to the interpreter vary.
Many of the STL wrapper functions add parameter checking and will throw a language dependent error/exception should the values not be valid. The classic example is array bounds checking. The library wrappers are written to throw a C++ exception in the case of error. The C++ exception in turn gets converted into an appropriate error/exception for the target language. By and large this handling should not need customising, however, customisation can easily be achieved by supplying appropriate "throws" typemaps. For example:
%module example
%include "std_vector.i"
%typemap(throws) std::out_of_range {
// custom exception handler
}
%template(VectInt) std::vector<int>;
The custom exception handler might, for example, log the exception then convert it into a specific error/exception for the target language.
When using the STL it is advisable to add in an exception handler to catch all STL exceptions. The %exception directive can be used by placing the following code before any other methods or libraries to be wrapped:
%include "exception.i"
%exception {
try {
$action
} catch (const std::exception& e) {
SWIG_exception(SWIG_RuntimeError, e.what());
}
}
Any thrown STL exceptions will then be gracefully handled instead of causing a crash.
Some target languages have support for handling the widely used boost::shared_ptr smart pointer. This smart pointer is also available as std::tr1::shared_ptr before it becomes fully standardized as std::shared_ptr. The boost_shared_ptr.i library provides support for boost::shared_ptr and std_shared_ptr.i provides support for std::shared_ptr, but if the following macro is defined as shown, it can be used for std::tr1::shared_ptr:
#define SWIG_SHARED_PTR_SUBNAMESPACE tr1 %include <std_shared_ptr.i>
You can only use one of these variants of shared_ptr in your interface file at a time. and all three variants must be used in conjunction with the %shared_ptr(T) macro, where T is the underlying pointer type equating to usage shared_ptr<T>. The type T must be non-primitive. A simple example demonstrates usage:
%module example
%include <boost_shared_ptr.i>
%shared_ptr(IntValue)
%inline %{
#include <boost/shared_ptr.hpp>
struct IntValue {
int value;
IntValue(int v) : value(v) {}
};
static int extractValue(const IntValue &t) {
return t.value;
}
static int extractValueSmart(boost::shared_ptr<IntValue> t) {
return t->value;
}
%}
Note that the %shared_ptr(IntValue) declaration occurs after the inclusion of the boost_shared_ptr.i library which provides the macro and, very importantly, before any usage or declaration of the type, IntValue. The %shared_ptr macro provides, a few things for handling this smart pointer, but mostly a number of typemaps. These typemaps override the default typemaps so that the underlying proxy class is stored and passed around as a pointer to a shared_ptr instead of a plain pointer to the underlying type. This approach means that any instantiation of the type can be passed to methods taking the type by value, reference, pointer or as a smart pointer. The interested reader might want to look at the generated code, however, usage is simple and no different handling is required from the target language. For example, a simple use case of the above code from Java would be:
IntValue iv = new IntValue(1234); int val1 = example.extractValue(iv); int val2 = example.extractValueSmart(iv); System.out.println(val1 + " " + val2);
This shared_ptr library works quite differently to SWIG's normal, but somewhat limited, smart pointer handling. The shared_ptr library does not generate extra wrappers, just for smart pointer handling, in addition to the proxy class. The normal proxy class including inheritance relationships is generated as usual. The only real change introduced by the %shared_ptr macro is that the proxy class stores a pointer to the shared_ptr instance instead of a raw pointer to the instance. A proxy class derived from a base which is being wrapped with shared_ptr can and must be wrapped as a shared_ptr too. In other words all classes in an inheritance hierarchy must all be used with the %shared_ptr macro. For example the following code can be used with the base class shown earlier:
%shared_ptr(DerivedIntValue)
%inline %{
struct DerivedIntValue : IntValue {
DerivedIntValue(int value) : IntValue(value) {}
...
};
%}
A shared_ptr of the derived class can now be passed to a method where the base is expected in the target language, just as it can in C++:
DerivedIntValue div = new DerivedIntValue(5678); int val3 = example.extractValue(div); int val4 = example.extractValueSmart(div);
If the %shared_ptr macro is omitted for any class in the inheritance hierarchy, SWIG will warn about this and the generated code may or may not result in a C++ compilation error. For example, the following input:
%include "boost_shared_ptr.i"
%shared_ptr(Parent);
%inline %{
#include <boost/shared_ptr.hpp>
struct GrandParent {
virtual ~GrandParent() {}
};
struct Parent : GrandParent {
virtual ~Parent() {}
};
struct Child : Parent {
virtual ~Child() {}
};
%}
warns about the missing smart pointer information:
example.i:12: Warning 520: Base class 'GrandParent' of 'Parent' is not similarly marked as a smart pointer. example.i:16: Warning 520: Derived class 'Child' of 'Parent' is not similarly marked as a smart pointer.
Adding the missing %shared_ptr macros will fix this:
%include "boost_shared_ptr.i" %shared_ptr(GrandParent); %shared_ptr(Parent); %shared_ptr(Child); ... as before ...
The exception.i library provides a language-independent function for raising a run-time exception in the target language. This library is largely used by the SWIG library writers. If possible, use the error handling scheme available to your target language as there is greater flexibility in what errors/exceptions can be thrown.
SWIG_exception(int code, const char *message)
Raises an exception in the target language. code is one of the following symbolic constants:
SWIG_MemoryError SWIG_IOError SWIG_RuntimeError SWIG_IndexError SWIG_TypeError SWIG_DivisionByZero SWIG_OverflowError SWIG_SyntaxError SWIG_ValueError SWIG_SystemError
message is a string indicating more information about the problem.
The primary use of this module is in writing language-independent exception handlers. For example:
%include "exception.i"
%exception std::vector::getitem {
try {
$action
} catch (std::out_of_range& e) {
SWIG_exception(SWIG_IndexError,const_cast<char*>(e.what()));
}
}
In Chapter 3, SWIG's treatment of basic datatypes and pointers was described. In particular, primitive types such as int and double are mapped to corresponding types in the target language. For everything else, pointers are used to refer to structures, classes, arrays, and other user-defined datatypes. However, in certain applications it is desirable to change SWIG's handling of a specific datatype. For example, you might want to return multiple values through the arguments of a function. This chapter describes some of the techniques for doing this.
This section describes the typemaps.i library file--commonly used to change certain properties of argument conversion.
Suppose you had a C function like this:
void add(double a, double b, double *result) {
*result = a + b;
}
From reading the source code, it is clear that the function is storing a value in the double *result parameter. However, since SWIG does not examine function bodies, it has no way to know that this is the underlying behavior.
One way to deal with this is to use the typemaps.i library file and write interface code like this:
// Simple example using typemaps
%module example
%include "typemaps.i"
%apply double *OUTPUT { double *result };
%inline %{
extern void add(double a, double b, double *result);
%}
The %apply directive tells SWIG that you are going to apply a special type handling rule to a type. The "double *OUTPUT" specification is the name of a rule that defines how to return an output value from an argument of type double *. This rule gets applied to all of the datatypes listed in curly braces-- in this case " double *result".
When the resulting module is created, you can now use the function like this (shown for Python):
>>> a = add(3,4) >>> print a 7 >>>
In this case, you can see how the output value normally returned in the third argument has magically been transformed into a function return value. Clearly this makes the function much easier to use since it is no longer necessary to manufacture a special double * object and pass it to the function somehow.
Once a typemap has been applied to a type, it stays in effect for all future occurrences of the type and name. For example, you could write the following:
%module example
%include "typemaps.i"
%apply double *OUTPUT { double *result };
%inline %{
extern void add(double a, double b, double *result);
extern void sub(double a, double b, double *result);
extern void mul(double a, double b, double *result);
extern void div(double a, double b, double *result);
%}
...
In this case, the double *OUTPUT rule is applied to all of the functions that follow.
Typemap transformations can even be extended to multiple return values. For example, consider this code:
%include "typemaps.i"
%apply int *OUTPUT { int *width, int *height };
// Returns a pair (width,height)
void getwinsize(int winid, int *width, int *height);
In this case, the function returns multiple values, allowing it to be used like this:
>>> w,h = genwinsize(wid) >>> print w 400 >>> print h 300 >>>
It should also be noted that although the %apply directive is used to associate typemap rules to datatypes, you can also use the rule names directly in arguments. For example, you could write this:
// Simple example using typemaps
%module example
%include "typemaps.i"
%{
extern void add(double a, double b, double *OUTPUT);
%}
extern void add(double a, double b, double *OUTPUT);
Typemaps stay in effect until they are explicitly deleted or redefined to something else. To clear a typemap, the %clear directive should be used. For example:
%clear double *result; // Remove all typemaps for double *result
The following typemaps instruct SWIG that a pointer really only holds a single input value:
int *INPUT short *INPUT long *INPUT unsigned int *INPUT unsigned short *INPUT unsigned long *INPUT double *INPUT float *INPUT
When used, it allows values to be passed instead of pointers. For example, consider this function:
double add(double *a, double *b) {
return *a+*b;
}
Now, consider this SWIG interface:
%module example
%include "typemaps.i"
...
%{
extern double add(double *, double *);
%}
extern double add(double *INPUT, double *INPUT);
When the function is used in the scripting language interpreter, it will work like this:
result = add(3,4)
The following typemap rules tell SWIG that pointer is the output value of a function. When used, you do not need to supply the argument when calling the function. Instead, one or more output values are returned.
int *OUTPUT short *OUTPUT long *OUTPUT unsigned int *OUTPUT unsigned short *OUTPUT unsigned long *OUTPUT double *OUTPUT float *OUTPUT
These methods can be used as shown in an earlier example. For example, if you have this C function :
void add(double a, double b, double *c) {
*c = a+b;
}
A SWIG interface file might look like this :
%module example
%include "typemaps.i"
...
%inline %{
extern void add(double a, double b, double *OUTPUT);
%}
In this case, only a single output value is returned, but this is not a restriction. An arbitrary number of output values can be returned by applying the output rules to more than one argument (as shown previously).
If the function also returns a value, it is returned along with the argument. For example, if you had this:
extern int foo(double a, double b, double *OUTPUT);
The function will return two values like this:
iresult, dresult = foo(3.5, 2)
When a pointer serves as both an input and output value you can use the following typemaps :
int *INOUT short *INOUT long *INOUT unsigned int *INOUT unsigned short *INOUT unsigned long *INOUT double *INOUT float *INOUT
A C function that uses this might be something like this:
void negate(double *x) {
*x = -(*x);
}
To make x function as both and input and output value, declare the function like this in an interface file :
%module example
%include "typemaps.i"
...
%{
extern void negate(double *);
%}
extern void negate(double *INOUT);
Now within a script, you can simply call the function normally :
a = negate(3); # a = -3 after calling this
One subtle point of the INOUT rule is that many scripting languages enforce mutability constraints on primitive objects (meaning that simple objects like integers and strings aren't supposed to change). Because of this, you can't just modify the object's value in place as the underlying C function does in this example. Therefore, the INOUT rule returns the modified value as a new object rather than directly overwriting the value of the original input object.
Compatibility note : The INOUT rule used to be known as BOTH in earlier versions of SWIG. Backwards compatibility is preserved, but deprecated.
As previously shown, the %apply directive can be used to apply the INPUT, OUTPUT, and INOUT typemaps to different argument names. For example:
// Make double *result an output value
%apply double *OUTPUT { double *result };
// Make Int32 *in an input value
%apply int *INPUT { Int32 *in };
// Make long *x inout
%apply long *INOUT {long *x};
To clear a rule, the %clear directive is used:
%clear double *result; %clear Int32 *in, long *x;
Typemap declarations are lexically scoped so a typemap takes effect from the point of definition to the end of the file or a matching %clear declaration.
In addition to changing the handling of various input values, it is also possible to use typemaps to apply constraints. For example, maybe you want to insure that a value is positive, or that a pointer is non-NULL. This can be accomplished including the constraints.i library file.
The constraints library is best illustrated by the following interface file :
// Interface file with constraints %module example %include "constraints.i" double exp(double x); double log(double POSITIVE); // Allow only positive values double sqrt(double NONNEGATIVE); // Non-negative values only double inv(double NONZERO); // Non-zero values void free(void *NONNULL); // Non-NULL pointers only
The behavior of this file is exactly as you would expect. If any of the arguments violate the constraint condition, a scripting language exception will be raised. As a result, it is possible to catch bad values, prevent mysterious program crashes and so on.
The following constraints are currently available
POSITIVE Any number > 0 (not zero) NEGATIVE Any number < 0 (not zero) NONNEGATIVE Any number >= 0 NONPOSITIVE Any number <= 0 NONZERO Nonzero number NONNULL Non-NULL pointer (pointers only).
The constraints library only supports the primitive C datatypes, but it is easy to apply it to new datatypes using %apply. For example :
// Apply a constraint to a Real variable
%apply Number POSITIVE { Real in };
// Apply a constraint to a pointer type
%apply Pointer NONNULL { Vector * };
The special types of "Number" and "Pointer" can be applied to any numeric and pointer variable type respectively. To later remove a constraint, the %clear directive can be used :
%clear Real in; %clear Vector *;
Chances are, you are reading this chapter for one of two reasons; you either want to customize SWIG's behavior or you overheard someone mumbling some incomprehensible drivel about "typemaps" and you asked yourself "typemaps, what are those?" That said, let's start with a short disclaimer that "typemaps" are an advanced customization feature that provide direct access to SWIG's low-level code generator. Not only that, they are an integral part of the SWIG C++ type system (a non-trivial topic of its own). Typemaps are generally not a required part of using SWIG. Therefore, you might want to re-read the earlier chapters if you have found your way to this chapter with only a vague idea of what SWIG already does by default.
One of the most important problems in wrapper code generation is the conversion or marshalling of datatypes between programming languages. Specifically, for every C/C++ declaration, SWIG must somehow generate wrapper code that allows values to be passed back and forth between languages. Since every programming language represents data differently, this is not a simple of matter of simply linking code together with the C linker. Instead, SWIG has to know something about how data is represented in each language and how it can be manipulated.
To illustrate, suppose you had a simple C function like this:
int factorial(int n);
To access this function from Python, a pair of Python API functions are used to convert integer values. For example:
long PyInt_AsLong(PyObject *obj); /* Python --> C */ PyObject *PyInt_FromLong(long x); /* C --> Python */
The first function is used to convert the input argument from a Python integer object to C long. The second function is used to convert a value from C back into a Python integer object.
Inside the wrapper function, you might see these functions used like this:
PyObject *wrap_factorial(PyObject *self, PyObject *args) {
int arg1;
int result;
PyObject *obj1;
PyObject *resultobj;
if (!PyArg_ParseTuple("O:factorial", &obj1)) return NULL;
arg1 = PyInt_AsLong(obj1);
result = factorial(arg1);
resultobj = PyInt_FromLong(result);
return resultobj;
}
Every target language supported by SWIG has functions that work in a similar manner. For example, in Perl, the following functions are used:
IV SvIV(SV *sv); /* Perl --> C */ void sv_setiv(SV *sv, IV val); /* C --> Perl */
In Tcl:
int Tcl_GetLongFromObj(Tcl_Interp *interp, Tcl_Obj *obj, long *value); Tcl_Obj *Tcl_NewIntObj(long value);
The precise details are not so important. What is important is that all of the underlying type conversion is handled by collections of utility functions and short bits of C code like this---you simply have to read the extension documentation for your favorite language to know how it works (an exercise left to the reader).
Since type handling is so central to wrapper code generation, SWIG allows it to be completely defined (or redefined) by the user. To do this, a special %typemap directive is used. For example:
/* Convert from Python --> C */
%typemap(in) int {
$1 = PyInt_AsLong($input);
}
/* Convert from C --> Python */
%typemap(out) int {
$result = PyInt_FromLong($1);
}
At first glance, this code will look a little confusing. However, there is really not much to it. The first typemap (the "in" typemap) is used to convert a value from the target language to C. The second typemap (the "out" typemap) is used to convert in the other direction. The content of each typemap is a small fragment of code that is inserted directly into the SWIG generated wrapper functions. The code is usually C or C++ code which will be generated into the C/C++ wrapper functions. Note that this isn't always the case as some target language modules allow target language code within the typemaps which gets generated into target language specific files. Within this code, a number of special variables prefixed with a $ are expanded. These are really just placeholders for C/C++ variables that are generated in the course of creating the wrapper function. In this case, $input refers to an input object that needs to be converted to C/C++ and $result refers to an object that is going to be returned by a wrapper function. $1 refers to a C/C++ variable that has the same type as specified in the typemap declaration (an int in this example).
A short example might make this a little more clear. If you were wrapping a function like this:
int gcd(int x, int y);
A wrapper function would look approximately like this:
PyObject *wrap_gcd(PyObject *self, PyObject *args) {
int arg1;
int arg2;
int result;
PyObject *obj1;
PyObject *obj2;
PyObject *resultobj;
if (!PyArg_ParseTuple("OO:gcd", &obj1, &obj2)) return NULL;
/* "in" typemap, argument 1 */
{
arg1 = PyInt_AsLong(obj1);
}
/* "in" typemap, argument 2 */
{
arg2 = PyInt_AsLong(obj2);
}
result = gcd(arg1,arg2);
/* "out" typemap, return value */
{
resultobj = PyInt_FromLong(result);
}
return resultobj;
}
In this code, you can see how the typemap code has been inserted into the function. You can also see how the special $ variables have been expanded to match certain variable names inside the wrapper function. This is really the whole idea behind typemaps--they simply let you insert arbitrary code into different parts of the generated wrapper functions. Because arbitrary code can be inserted, it possible to completely change the way in which values are converted.
As the name implies, the purpose of a typemap is to "map" C datatypes to types in the target language. Once a typemap is defined for a C datatype, it is applied to all future occurrences of that type in the input file. For example:
/* Convert from Perl --> C */
%typemap(in) int {
$1 = SvIV($input);
}
...
int factorial(int n);
int gcd(int x, int y);
int count(char *s, char *t, int max);
The matching of typemaps to C datatypes is more than a simple textual match. In fact, typemaps are fully built into the underlying type system. Therefore, typemaps are unaffected by typedef, namespaces, and other declarations that might hide the underlying type. For example, you could have code like this:
/* Convert from Ruby--> C */
%typemap(in) int {
$1 = NUM2INT($input);
}
...
typedef int Integer;
namespace foo {
typedef Integer Number;
};
int foo(int x);
int bar(Integer y);
int spam(foo::Number a, foo::Number b);
In this case, the typemap is still applied to the proper arguments even though typenames don't always match the text "int". This ability to track types is a critical part of SWIG--in fact, all of the target language modules work merely define a set of typemaps for the basic types. Yet, it is never necessary to write new typemaps for typenames introduced by typedef.
In addition to tracking typenames, typemaps may also be specialized to match against a specific argument name. For example, you could write a typemap like this:
%typemap(in) double nonnegative {
$1 = PyFloat_AsDouble($input);
if ($1 < 0) {
PyErr_SetString(PyExc_ValueError,"argument must be nonnegative.");
return NULL;
}
}
...
double sin(double x);
double cos(double x);
double sqrt(double nonnegative);
typedef double Real;
double log(Real nonnegative);
...
For certain tasks such as input argument conversion, typemaps can be defined for sequences of consecutive arguments. For example:
%typemap(in) (char *str, int len) {
$1 = PyString_AsString($input); /* char *str */
$2 = PyString_Size($input); /* int len */
}
...
int count(char *str, int len, char c);
In this case, a single input object is expanded into a pair of C arguments. This example also provides a hint to the unusual variable naming scheme involving $1, $2, and so forth.
Typemaps are normally defined for specific type and argument name patterns. However, typemaps can also be copied and reused. One way to do this is to use assignment like this:
%typemap(in) Integer = int; %typemap(in) (char *buffer, int size) = (char *str, int len);
A more general form of copying is found in the %apply directive like this:
%typemap(in) int {
/* Convert an integer argument */
...
}
%typemap(out) int {
/* Return an integer value */
...
}
/* Apply all of the integer typemaps to size_t */
%apply int { size_t };
%apply merely takes all of the typemaps that are defined for one type and applies them to other types. Note: you can include a comma separated set of types in the { ... } part of %apply.
It should be noted that it is not necessary to copy typemaps for types that are related by typedef. For example, if you have this,
typedef int size_t;
then SWIG already knows that the int typemaps apply. You don't have to do anything.
The primary use of typemaps is for defining wrapper generation behavior at the level of individual C/C++ datatypes. There are currently six general categories of problems that typemaps address:
Argument handling
int foo(int x, double y, char *s);
Return value handling
int foo(int x, double y, char *s);
Exception handling
int foo(int x, double y, char *s) throw(MemoryError, IndexError);
Global variables
int foo;
Member variables
struct Foo {
int x[20];
};
Constant creation
#define FOO 3
%constant int BAR = 42;
enum { ALE, LAGER, STOUT };
Details of each of these typemaps will be covered shortly. Also, certain language modules may define additional typemaps that expand upon this list. For example, the Java module defines a variety of typemaps for controlling additional aspects of the Java bindings. Consult language specific documentation for further details.
Typemaps can't be used to define properties that apply to C/C++ declarations as a whole. For example, suppose you had a declaration like this,
Foo *make_Foo(int n);
and you wanted to tell SWIG that make_Foo(int n) returned a newly allocated object (for the purposes of providing better memory management). Clearly, this property of make_Foo(int n) is not a property that would be associated with the datatype Foo * by itself. Therefore, a completely different SWIG customization mechanism (%feature) is used for this purpose. Consult the Customization Features chapter for more information about that.
Typemaps also can't be used to rearrange or transform the order of arguments. For example, if you had a function like this:
void foo(int, char *);
you can't use typemaps to interchange the arguments, allowing you to call the function like this:
foo("hello",3) # Reversed arguments
If you want to change the calling conventions of a function, write a helper function instead. For example:
%rename(foo) wrap_foo;
%inline %{
void wrap_foo(char *s, int x) {
foo(x,s);
}
%}
SWIG has parallels to Aspect Oriented Software Development (AOP). The AOP terminology with respect to SWIG typemaps can be viewed as follows:
SWIG can also be viewed as has having a second set of aspects based around %feature. Features such as %exception are also cross-cutting concerns as they encapsulate code that can be used to add logging or exception handling to any function.
The rest of this chapter provides detailed information for people who want to write new typemaps. This information is of particular importance to anyone who intends to write a new SWIG target language module. Power users can also use this information to write application specific type conversion rules.
Since typemaps are strongly tied to the underlying C++ type system, subsequent sections assume that you are reasonably familiar with the basic details of values, pointers, references, arrays, type qualifiers (e.g., const), structures, namespaces, templates, and memory management in C/C++. If not, you would be well-advised to consult a copy of "The C Programming Language" by Kernighan and Ritchie or "The C++ Programming Language" by Stroustrup before going any further.
This section describes the behavior of the %typemap directive itself.
New typemaps are defined using the %typemap declaration. The general form of this declaration is as follows (parts enclosed in [ ... ] are optional):
%typemap(method [, modifiers]) typelist code ;
method is a simply a name that specifies what kind of typemap is being defined. It is usually a name like "in", "out", or "argout". The purpose of these methods is described later.
modifiers is an optional comma separated list of name="value" values. These are sometimes to attach extra information to a typemap and is often target-language dependent. They are also known as typemap attributes.
typelist is a list of the C++ type patterns that the typemap will match. The general form of this list is as follows:
typelist : typepattern [, typepattern, typepattern, ... ] ;
typepattern : type [ (parms) ]
| type name [ (parms) ]
| ( typelist ) [ (parms) ]
Each type pattern is either a simple type, a simple type and argument name, or a list of types in the case of multi-argument typemaps. In addition, each type pattern can be parameterized with a list of temporary variables (parms). The purpose of these variables will be explained shortly.
code specifies the code used in the typemap. Usually this is C/C++ code, but in the statically typed target languages, such as Java and C#, this can contain target language code for certain typemaps. It can take any one of the following forms:
code : { ... }
| " ... "
| %{ ... %}
Note that the preprocessor will expand code within the {} delimiters, but not in the last two styles of delimiters, see Preprocessor and Typemaps. Here are some examples of valid typemap specifications:
/* Simple typemap declarations */
%typemap(in) int {
$1 = PyInt_AsLong($input);
}
%typemap(in) int "$1 = PyInt_AsLong($input);";
%typemap(in) int %{
$1 = PyInt_AsLong($input);
%}
/* Typemap with extra argument name */
%typemap(in) int nonnegative {
...
}
/* Multiple types in one typemap */
%typemap(in) int, short, long {
$1 = SvIV($input);
}
/* Typemap with modifiers */
%typemap(in,doc="integer") int "$1 = scm_to_int($input);";
/* Typemap applied to patterns of multiple arguments */
%typemap(in) (char *str, int len),
(char *buffer, int size)
{
$1 = PyString_AsString($input);
$2 = PyString_Size($input);
}
/* Typemap with extra pattern parameters */
%typemap(in, numinputs=0) int *output (int temp),
long *output (long temp)
{
$1 = &temp;
}
Admittedly, it's not the most readable syntax at first glance. However, the purpose of the individual pieces will become clear.
Once defined, a typemap remains in effect for all of the declarations that follow. A typemap may be redefined for different sections of an input file. For example:
// typemap1
%typemap(in) int {
...
}
int fact(int); // typemap1
int gcd(int x, int y); // typemap1
// typemap2
%typemap(in) int {
...
}
int isprime(int); // typemap2
One exception to the typemap scoping rules pertains to the %extend declaration. %extend is used to attach new declarations to a class or structure definition. Because of this, all of the declarations in an %extend block are subject to the typemap rules that are in effect at the point where the class itself is defined. For example:
class Foo {
...
};
%typemap(in) int {
...
}
%extend Foo {
int blah(int x); // typemap has no effect. Declaration is attached to Foo which
// appears before the %typemap declaration.
};
A typemap is copied by using assignment. For example:
%typemap(in) Integer = int;
or this:
%typemap(in) Integer, Number, int32_t = int;
Types are often managed by a collection of different typemaps. For example:
%typemap(in) int { ... }
%typemap(out) int { ... }
%typemap(varin) int { ... }
%typemap(varout) int { ... }
To copy all of these typemaps to a new type, use %apply. For example:
%apply int { Integer }; // Copy all int typemaps to Integer
%apply int { Integer, Number }; // Copy all int typemaps to both Integer and Number
The patterns for %apply follow the same rules as for %typemap. For example:
%apply int *output { Integer *output }; // Typemap with name
%apply (char *buf, int len) { (char *buffer, int size) }; // Multiple arguments
A typemap can be deleted by simply defining no code. For example:
%typemap(in) int; // Clears typemap for int %typemap(in) int, long, short; // Clears typemap for int, long, short %typemap(in) int *output;
The %clear directive clears all typemaps for a given type. For example:
%clear int; // Removes all types for int %clear int *output, long *output;
Note: Since SWIG's default behavior is defined by typemaps, clearing a fundamental type like int will make that type unusable unless you also define a new set of typemaps immediately after the clear operation.
Typemap declarations can be declared in the global scope, within a C++ namespace, and within a C++ class. For example:
%typemap(in) int {
...
}
namespace std {
class string;
%typemap(in) string {
...
}
}
class Bar {
public:
typedef const int & const_reference;
%typemap(out) const_reference {
...
}
};
When a typemap appears inside a namespace or class, it stays in effect until the end of the SWIG input (just like before). However, the typemap takes the local scope into account. Therefore, this code
namespace std {
class string;
%typemap(in) string {
...
}
}
is really defining a typemap for the type std::string. You could have code like this:
namespace std {
class string;
%typemap(in) string { /* std::string */
...
}
}
namespace Foo {
class string;
%typemap(in) string { /* Foo::string */
...
}
}
In this case, there are two completely distinct typemaps that apply to two completely different types (std::string and Foo::string).
It should be noted that for scoping to work, SWIG has to know that string is a typename defined within a particular namespace. In this example, this is done using the forward class declaration class string.
The section describes the pattern matching rules by which C/C++ datatypes are associated with typemaps. The matching rules can be observed in practice by using the debugging options also described.
Typemaps are matched using both a type and a name (typically the name of a argument). For a given TYPE NAME pair, the following rules are applied, in order, to find a match. The first typemap found is used.
If TYPE includes qualifiers (const, volatile, etc.), each qualifier is stripped one at a time to form a new stripped type and the matching rules above are repeated on the stripped type. The left-most qualifier is stripped first, resulting in the right-most (or top-level) qualifier being stripped last. For example int const*const is first stripped to int *const then int *.
If TYPE is an array. The following transformation is made:
To illustrate, suppose that you had a function like this:
int foo(const char *s);
To find a typemap for the argument const char *s, SWIG will search for the following typemaps:
const char *s Exact type and name match const char * Exact type match char *s Type and name match (qualifier stripped) char * Type match (qualifier stripped)
When more than one typemap rule might be defined, only the first match found is actually used. Here is an example that shows how some of the basic rules are applied:
%typemap(in) int *x {
... typemap 1
}
%typemap(in) int * {
... typemap 2
}
%typemap(in) const int *z {
... typemap 3
}
%typemap(in) int [4] {
... typemap 4
}
%typemap(in) int [ANY] {
... typemap 5
}
void A(int *x); // int *x rule (typemap 1)
void B(int *y); // int * rule (typemap 2)
void C(const int *x); // int *x rule (typemap 1)
void D(const int *z); // const int *z rule (typemap 3)
void E(int x[4]); // int [4] rule (typemap 4)
void F(int x[1000]); // int [ANY] rule (typemap 5)
Compatibility note: SWIG-2.0.0 introduced stripping the qualifiers one step at a time. Prior versions stripped all qualifiers in one step.
If no match is found using the rules in the previous section, SWIG applies a typedef reduction to the type and repeats the typemap search for the reduced type. To illustrate, suppose you had code like this:
%typemap(in) int {
... typemap 1
}
typedef int Integer;
void blah(Integer x);
To find the typemap for Integer x, SWIG will first search for the following typemaps:
Integer x Integer
Finding no match, it then applies a reduction Integer -> int to the type and repeats the search.
int x int --> match: typemap 1
Even though two types might be the same via typedef, SWIG allows typemaps to be defined for each typename independently. This allows for interesting customization possibilities based solely on the typename itself. For example, you could write code like this:
typedef double pdouble; // Positive double
// typemap 1
%typemap(in) double {
... get a double ...
}
// typemap 2
%typemap(in) pdouble {
... get a positive double ...
}
double sin(double x); // typemap 1
pdouble sqrt(pdouble x); // typemap 2
When reducing the type, only one typedef reduction is applied at a time. The search process continues to apply reductions until a match is found or until no more reductions can be made.
For complicated types, the reduction process can generate a long list of patterns. Consider the following:
typedef int Integer; typedef Integer Row4[4]; void foo(Row4 rows[10]);
To find a match for the Row4 rows[10] argument, SWIG would check the following patterns, stopping only when it found a match:
Row4 rows[10] Row4 [10] Row4 rows[ANY] Row4 [ANY] # Reduce Row4 --> Integer[4] Integer rows[10][4] Integer [10][4] Integer rows[ANY][ANY] Integer [ANY][ANY] # Reduce Integer --> int int rows[10][4] int [10][4] int rows[ANY][ANY] int [ANY][ANY]
For parameterized types like templates, the situation is even more complicated. Suppose you had some declarations like this:
typedef int Integer; typedef foo<Integer,Integer> fooii; void blah(fooii *x);
In this case, the following typemap patterns are searched for the argument fooii *x:
fooii *x fooii * # Reduce fooii --> foo<Integer,Integer> foo<Integer,Integer> *x foo<Integer,Integer> * # Reduce Integer -> int foo<int, Integer> *x foo<int, Integer> * # Reduce Integer -> int foo<int, int> *x foo<int, int> *
Typemap reductions are always applied to the left-most type that appears. Only when no reductions can be made to the left-most type are reductions made to other parts of the type. This behavior means that you could define a typemap for foo<int,Integer>, but a typemap for foo<Integer,int> would never be matched. Admittedly, this is rather esoteric--there's little practical reason to write a typemap quite like that. Of course, you could rely on this to confuse your coworkers even more.
As a point of clarification, it is worth emphasizing that typedef matching is a typedef reduction process only, that is, SWIG does not search for every single possible typedef. Given a type in a declaration, it will only reduce the type, it won't build it up looking for typedefs. For example, given the type Struct, the typemap below will not be used for the aStruct parameter, because Struct is fully reduced:
struct Struct {...};
typedef Struct StructTypedef;
%typemap(in) StructTypedef {
...
}
void go(Struct aStruct);
If the basic pattern matching rules result in no match being made, even after typedef reductions, the default typemap matching rules are used to look for a suitable typemap match. These rules match a generic typemap based on the reserved SWIGTYPE base type. For example pointers will use SWIGTYPE * and references will use SWIGTYPE &. More precisely, the rules are based on the C++ class template partial specialization matching rules used by C++ compilers when looking for an appropriate partial template specialization. This means that a match is chosen from the most specialized set of generic typemap types available. For example, when looking for a match to int const *, the rules will prefer to match SWIGTYPE const * if available before matching SWIGTYPE *, before matching SWIGTYPE.
Most SWIG language modules use typemaps to define the default behavior of the C primitive types. This is entirely straightforward. For example, a set of typemaps for primitives marshalled by value or const reference are written like this:
%typemap(in) int "... convert to int ..."; %typemap(in) short "... convert to short ..."; %typemap(in) float "... convert to float ..."; ... %typemap(in) const int & "... convert ..."; %typemap(in) const short & "... convert ..."; %typemap(in) const float & "... convert ..."; ...
Since typemap matching follows all typedef declarations, any sort of type that is mapped to a primitive type by value or const reference through typedef will be picked up by one of these primitive typemaps. Most language modules also define typemaps for char pointers and char arrays to handle strings, so these non-default types will also be used in preference as the basic typemap matching rules provide a better match than the default typemap matching rules.
Below is a list of the typical default types supplied by language modules, showing what the "in" typemap would look like:
%typemap(in) SWIGTYPE & { ... default reference handling ... };
%typemap(in) SWIGTYPE * { ... default pointer handling ... };
%typemap(in) SWIGTYPE *const { ... default pointer const handling ... };
%typemap(in) SWIGTYPE *const& { ... default pointer const reference handling ... };
%typemap(in) SWIGTYPE[ANY] { ... 1D fixed size arrays handlling ... };
%typemap(in) SWIGTYPE [] { ... unknown sized array handling ... };
%typemap(in) enum SWIGTYPE { ... default handling for enum values ... };
%typemap(in) const enum SWIGTYPE & { ... default handling for const enum reference values ... };
%typemap(in) SWIGTYPE (CLASS::*) { ... default pointer member handling ... };
%typemap(in) SWIGTYPE { ... simple default handling ... };
If you wanted to change SWIG's default handling for simple pointers, you would simply redefine the rule for SWIGTYPE *. Note, the simple default typemap rule is used to match against simple types that don't match any other rules:
%typemap(in) SWIGTYPE { ... simple default handling ... }
This typemap is important because it is the rule that gets triggered when call or return by value is used. For instance, if you have a declaration like this:
double dot_product(Vector a, Vector b);
The Vector type will usually just get matched against SWIGTYPE. The default implementation of SWIGTYPE is to convert the value into pointers (as described in this earlier section).
By redefining SWIGTYPE it may be possible to implement other behavior. For example, if you cleared all typemaps for SWIGTYPE, SWIG simply won't wrap any unknown datatype (which might be useful for debugging). Alternatively, you might modify SWIGTYPE to marshal objects into strings instead of converting them to pointers.
Let's consider an example where the following typemaps are defined and SWIG is looking for the best match for the enum shown below:
%typemap(in) const Hello & { ... }
%typemap(in) const enum SWIGTYPE & { ... }
%typemap(in) enum SWIGTYPE & { ... }
%typemap(in) SWIGTYPE & { ... }
%typemap(in) SWIGTYPE { ... }
enum Hello {};
const Hello &hi;
The typemap at the top of the list will be chosen, not because it is defined first, but because it is the closest match for the type being wrapped. If any of the typemaps in the above list were not defined, then the next one on the list would have precedence.
The best way to explore the default typemaps is to look at the ones already defined for a particular language module. Typemap definitions are usually found in the SWIG library in a file such as java.swg , csharp.swg etc. However, for many of the target languages the typemaps are hidden behind complicated macros, so the best way to view the default typemaps, or any typemaps for that matter, is to look at the preprocessed output by running swig -E on any interface file. Finally the best way to view the typemap matching rules in action is via the debugging typemap pattern matching options covered later on.
Compatibility note: The default typemap matching rules were modified in SWIG-2.0.0 from a slightly simpler scheme to match the current C++ class template partial specialization matching rules.
When multi-argument typemaps are specified, they take precedence over any typemaps specified for a single type. For example:
%typemap(in) (char *buffer, int len) {
// typemap 1
}
%typemap(in) char *buffer {
// typemap 2
}
void foo(char *buffer, int len, int count); // (char *buffer, int len)
void bar(char *buffer, int blah); // char *buffer
Multi-argument typemaps are also more restrictive in the way that they are matched. Currently, the first argument follows the matching rules described in the previous section, but all subsequent arguments must match exactly.
For those intimately familiar with C++ templates, a comparison of the typemap matching rules and template type deduction is interesting. The two areas considered are firstly the default typemaps and their similarities to partial template specialization and secondly, non-default typemaps and their similarities to full template specialization.
For default (SWIGTYPE) typemaps the rules are inspired by C++ class template partial specialization. For example, given partial specialization for T const& :
template <typename T> struct X { void a(); };
template <typename T> struct X< T const& > { void b(); };
The full (unspecialized) template is matched with most types, such as:
X< int & > x1; x1.a();
and the following all match the T const& partial specialization:
X< int *const& > x2; x2.b(); X< int const*const& > x3; x3.b(); X< int const& > x4; x4.b();
Now, given just these two default typemaps, where T is analogous to SWIGTYPE:
%typemap(...) SWIGTYPE { ... }
%typemap(...) SWIGTYPE const& { ... }
The generic default typemap SWIGTYPE is used with most types, such as
int &
and the following all match the SWIGTYPE const& typemap, just like the partial template matching:
int *const& int const*const& int const&
Note that the template and typemap matching rules are not identical for all default typemaps though, for example, with arrays.
For non-default typemaps, one might expect SWIG to follow the fully specialized template rules. This is nearly the case, but not quite. Consider a very similar example to the earlier partially specialized template but this time there is a fully specialized template:
template <typename T> struct Y { void a(); };
template <> struct Y< int const & > { void b(); };
Only the one type matches the specialized template exactly:
Y< int & > y1; y1.a(); Y< int *const& > y2; y2.a(); Y< int const *const& > y3; y3.a(); Y< int const& > y4; y4.b(); // fully specialized match
Given typemaps with the same types used for the template declared above, where T is again analogous to SWIGTYPE:
%typemap(...) SWIGTYPE { ... }
%typemap(...) int const& { ... }
The comparison between non-default typemaps and fully specialized single parameter templates turns out to be the same, as just the one type will match the non-default typemap:
int & int *const& int const*const& int const& // matches non-default typemap int const&
However, if a non-const type is used instead:
%typemap(...) SWIGTYPE { ... }
%typemap(...) int & { ... }
then there is a clear difference to template matching as both the const and non-const types match the typemap:
int & // matches non-default typemap int & int *const& int const*const& int const& // matches non-default typemap int &
There are other subtle differences such as typedef handling, but at least it should be clear that the typemap matching rules are similar to those for specialized template handling.
There are two useful debug command line options available for debugging typemaps, -debug-tmsearch and -debug-tmused .
The -debug-tmsearch option is a verbose option for debugging typemap searches. This can be very useful for watching the pattern matching process in action and for debugging which typemaps are used. The option displays all the typemaps and types that are looked for until a successful pattern match is made. As the display includes searches for each and every type needed for wrapping, the amount of information displayed can be large. Normally you would manually search through the displayed information for the particular type that you are interested in.
For example, consider some of the code used in the Typedef reductions section already covered:
typedef int Integer; typedef Integer Row4[4]; void foo(Row4 rows[10]);
A sample of the debugging output is shown below for the "in" typemap:
swig -perl -debug-tmsearch example.i ... example.h:3: Searching for a suitable 'in' typemap for: Row4 rows[10] Looking for: Row4 rows[10] Looking for: Row4 [10] Looking for: Row4 rows[ANY] Looking for: Row4 [ANY] Looking for: Integer rows[10][4] Looking for: Integer [10][4] Looking for: Integer rows[ANY][ANY] Looking for: Integer [ANY][ANY] Looking for: int rows[10][4] Looking for: int [10][4] Looking for: int rows[ANY][ANY] Looking for: int [ANY][ANY] Looking for: SWIGTYPE rows[ANY][ANY] Looking for: SWIGTYPE [ANY][ANY] Looking for: SWIGTYPE rows[ANY][] Looking for: SWIGTYPE [ANY][] Looking for: SWIGTYPE *rows[ANY] Looking for: SWIGTYPE *[ANY] Looking for: SWIGTYPE rows[ANY] Looking for: SWIGTYPE [ANY] Looking for: SWIGTYPE rows[] Looking for: SWIGTYPE [] Using: %typemap(in) SWIGTYPE [] ...
showing that the best default match supplied by SWIG is the SWIGTYPE [] typemap. As the example shows, the successful match displays the used typemap source including typemap method, type and optional name in one of these simplified formats:
This information might meet your debugging needs, however, you might want to analyze further. If you next invoke SWIG with the -E option to display the preprocessed output, and search for the particular typemap used, you'll find the full typemap contents (example shown below for Python):
%typemap(in, noblock=1) SWIGTYPE [] (void *argp = 0, int res = 0) {
res = SWIG_ConvertPtr($input, &argp,$descriptor, $disown | 0 );
if (!SWIG_IsOK(res)) {
SWIG_exception_fail(SWIG_ArgError(res), "in method '" "$symname" "', argument "
"$argnum"" of type '" "$type""'");
}
$1 = ($ltype)(argp);
}
The generated code for the foo wrapper will then contain the snippets of the typemap with the special variables expanded. The rest of this chapter will need reading though to fully understand all of this, however, the relevant parts of the generated code for the above typemap can be seen below:
SWIGINTERN PyObject *_wrap_foo(PyObject *SWIGUNUSEDPARM(self), PyObject *args) {
...
void *argp1 = 0 ;
int res1 = 0 ;
...
res1 = SWIG_ConvertPtr(obj0, &argp1,SWIGTYPE_p_a_4__int, 0 | 0 );
if (!SWIG_IsOK(res1)) {
SWIG_exception_fail(SWIG_ArgError(res1), "in method '" "foo" "', argument "
"1"" of type '" "int [10][4]""'");
}
arg1 = (int (*)[4])(argp1);
...
}
Searches for multi-argument typemaps are not mentioned unless a matching multi-argument typemap does actually exist. For example, the output for the code in the earlier multi-arguments section is as follows:
... example.h:39: Searching for a suitable 'in' typemap for: char *buffer Looking for: char *buffer Multi-argument typemap found... Using: %typemap(in) (char *buffer,int len) ...
The second option for debugging is -debug-tmused and this displays the typemaps used. This option is a less verbose version of the -debug-tmsearch option as it only displays each successfully found typemap on a separate single line. The output displays the type, and name if present, the typemap method in brackets and then the actual typemap used in the same simplified format output by the -debug-tmsearch option. Below is the output for the example code at the start of this section on debugging.
$ swig -perl -debug-tmused example.i example.h:3: Typemap for Row4 rows[10] (in) : %typemap(in) SWIGTYPE [] example.h:3: Typemap for Row4 rows[10] (typecheck) : %typemap(typecheck) SWIGTYPE * example.h:3: Typemap for Row4 rows[10] (freearg) : %typemap(freearg) SWIGTYPE [] example.h:3: Typemap for void foo (out) : %typemap(out) void
Now, consider the following interface file:
%module example
%{
void set_value(const char* val) {}
%}
%typemap(check) char *NON_NULL {
if (!$1) {
/* ... error handling ... */
}
}
// use default pointer handling instead of strings
%apply SWIGTYPE * { const char* val, const char* another_value }
%typemap(check) const char* val = char* NON_NULL;
%typemap(arginit, noblock=1) const char* val {
$1 = "";
}
void set_value(const char* val);
and the output debug:
swig -perl5 -debug-tmused example.i
example.i:21: Typemap for char const *val (arginit) : %typemap(arginit) char const *val
example.i:21: Typemap for char const *val (in) : %apply SWIGTYPE * { char const *val }
example.i:21: Typemap for char const *val (typecheck) : %apply SWIGTYPE * { char const *val }
example.i:21: Typemap for char const *val (check) : %typemap(check) char const *val = char *NON_NULL
example.i:21: Typemap for char const *val (freearg) : %apply SWIGTYPE * { char const *val }
example.i:21: Typemap for void set_value (out) : %typemap(out) void
The following observations about what is displayed can be noted (the same applies for -debug-tmsearch):
This section describes rules by which typemap code is inserted into the generated wrapper code.
When a typemap is defined like this:
%typemap(in) int {
$1 = PyInt_AsLong($input);
}
the typemap code is inserted into the wrapper function using a new block scope. In other words, the wrapper code will look like this:
wrap_whatever() {
...
// Typemap code
{
arg1 = PyInt_AsLong(obj1);
}
...
}
Because the typemap code is enclosed in its own block, it is legal to declare temporary variables for use during typemap execution. For example:
%typemap(in) short {
long temp; /* Temporary value */
if (Tcl_GetLongFromObj(interp, $input, &temp) != TCL_OK) {
return TCL_ERROR;
}
$1 = (short) temp;
}
Of course, any variables that you declare inside a typemap are destroyed as soon as the typemap code has executed (they are not visible to other parts of the wrapper function or other typemaps that might use the same variable names).
Occasionally, typemap code will be specified using a few alternative forms. For example:
%typemap(in) int "$1 = PyInt_AsLong($input);";
%typemap(in) int %{
$1 = PyInt_AsLong($input);
%}
%typemap(in, noblock=1) int {
$1 = PyInt_AsLong($input);
}
These three forms are mainly used for cosmetics--the specified code is not enclosed inside a block scope when it is emitted. This sometimes results in a less complicated looking wrapper function. Note that only the third of the three typemaps have the typemap code passed through the SWIG preprocessor.
Sometimes it is useful to declare a new local variable that exists within the scope of the entire wrapper function. A good example of this might be an application in which you wanted to marshal strings. Suppose you had a C++ function like this
int foo(std::string *s);
and you wanted to pass a native string in the target language as an argument. For instance, in Perl, you wanted the function to work like this:
$x = foo("Hello World");
To do this, you can't just pass a raw Perl string as the std::string * argument. Instead, you have to create a temporary std::string object, copy the Perl string data into it, and then pass a pointer to the object. To do this, simply specify the typemap with an extra parameter like this:
%typemap(in) std::string * (std::string temp) {
unsigned int len;
char *s;
s = SvPV($input,len); /* Extract string data */
temp.assign(s,len); /* Assign to temp */
$1 = &temp; /* Set argument to point to temp */
}
In this case, temp becomes a local variable in the scope of the entire wrapper function. For example:
wrap_foo() {
std::string temp; <--- Declaration of temp goes here
...
/* Typemap code */
{
...
temp.assign(s,len);
...
}
...
}
When you set temp to a value, it persists for the duration of the wrapper function and gets cleaned up automatically on exit.
It is perfectly safe to use more than one typemap involving local variables in the same declaration. For example, you could declare a function as :
void foo(std::string *x, std::string *y, std::string *z);
This is safely handled because SWIG actually renames all local variable references by appending an argument number suffix. Therefore, the generated code would actually look like this:
wrap_foo() {
int *arg1; /* Actual arguments */
int *arg2;
int *arg3;
std::string temp1; /* Locals declared in the typemap */
std::string temp2;
std::string temp3;
...
{
char *s;
unsigned int len;
...
temp1.assign(s,len);
arg1 = *temp1;
}
{
char *s;
unsigned int len;
...
temp2.assign(s,len);
arg2 = &temp2;
}
{
char *s;
unsigned int len;
...
temp3.assign(s,len);
arg3 = &temp3;
}
...
}
Some typemaps do not recognize local variables (or they may simply not apply). At this time, only typemaps that apply to argument conversion support this (input typemaps such as the "in" typemap).
Note:
When declaring a typemap for multiple types, each type must have its own local variable declaration.
%typemap(in) const std::string *, std::string * (std::string temp) // NO! // only std::string * has a local variable // const std::string * does not (oops) .... %typemap(in) const std::string * (std::string temp), std::string * (std::string temp) // Correct ....
Within all typemaps, the following special variables are expanded. This is by no means a complete list as some target languages have additional special variables which are documented in the language specific chapters.
| Variable | Meaning |
|---|---|
| $n | A C local variable corresponding to type n in the typemap pattern. |
| $argnum | Argument number. Only available in typemaps related to argument conversion |
| $n_name | Argument name |
| $n_type | Real C datatype of type n. |
| $n_ltype | ltype of type n |
| $n_mangle | Mangled form of type n. For example _p_Foo |
| $n_descriptor | Type descriptor structure for type n. For example SWIGTYPE_p_Foo. This is primarily used when interacting with the run-time type checker (described later). |
| $*n_type | Real C datatype of type n with one pointer removed. |
| $*n_ltype | ltype of type n with one pointer removed. |
| $*n_mangle | Mangled form of type n with one pointer removed. |
| $*n_descriptor | Type descriptor structure for type n with one pointer removed. |
| $&n_type | Real C datatype of type n with one pointer added. |
| $&n_ltype | ltype of type n with one pointer added. |
| $&n_mangle | Mangled form of type n with one pointer added. |
| $&n_descriptor | Type descriptor structure for type n with one pointer added. |
| $n_basetype | Base typename with all pointers and qualifiers stripped. |
Within the table, $n refers to a specific type within the typemap specification. For example, if you write this
%typemap(in) int *INPUT {
}
then $1 refers to int *INPUT. If you have a typemap like this,
%typemap(in) (int argc, char *argv[]) {
...
}
then $1 refers to int argc and $2 refers to char *argv[].
Substitutions related to types and names always fill in values from the actual code that was matched. This is useful when a typemap might match multiple C datatype. For example:
%typemap(in) int, short, long {
$1 = ($1_ltype) PyInt_AsLong($input);
}
In this case, $1_ltype is replaced with the datatype that is actually matched.
When typemap code is emitted, the C/C++ datatype of the special variables $1 and $2 is always an "ltype." An "ltype" is simply a type that can legally appear on the left-hand side of a C assignment operation. Here are a few examples of types and ltypes:
type ltype ------ ---------------- int int const int int const int * int * int [4] int * int [4][5] int (*)[5]
In most cases a ltype is simply the C datatype with qualifiers stripped off. In addition, arrays are converted into pointers.
Variables such as $&1_type and $*1_type are used to safely modify the type by removing or adding pointers. Although not needed in most typemaps, these substitutions are sometimes needed to properly work with typemaps that convert values between pointers and values.
If necessary, type related substitutions can also be used when declaring locals. For example:
%typemap(in) int * ($*1_type temp) {
temp = PyInt_AsLong($input);
$1 = &temp;
}
There is one word of caution about declaring local variables in this manner. If you declare a local variable using a type substitution such as $1_ltype temp, it won't work like you expect for arrays and certain kinds of pointers. For example, if you wrote this,
%typemap(in) int [10][20] {
$1_ltype temp;
}
then the declaration of temp will be expanded as
int (*)[20] temp;
This is illegal C syntax and won't compile. There is currently no straightforward way to work around this problem in SWIG due to the way that typemap code is expanded and processed. However, one possible workaround is to simply pick an alternative type such as void * and use casts to get the correct type when needed. For example:
%typemap(in) int [10][20] {
void *temp;
...
(($1_ltype) temp)[i][j] = x; /* set a value */
...
}
Another approach, which only works for arrays is to use the $1_basetype substitution. For example:
%typemap(in) int [10][20] {
$1_basetype temp[10][20];
...
temp[i][j] = x; /* set a value */
...
}
Special variable macros are like macro functions in that they take one or more input arguments which are used for the macro expansion. They look like macro/function calls but use the special variable $ prefix to the macro name. Note that unlike normal macros, the expansion is not done by the preprocessor, it is done during the SWIG parsing/compilation stages. The following special variable macros are available across all language modules.
This macro expands into the type descriptor structure for any C/C++ type specified in type. It behaves like the $1_descriptor special variable described above except that the type to expand is taken from the macro argument rather than inferred from the typemap type. For example, $descriptor(std::vector<int> *) will expand into SWIGTYPE_p_std__vectorT_int_t. This macro is mostly used in the scripting target languages and is demonstrated later in the Run-time type checker usage section.
This macro uses the pattern matching rules described earlier to lookup and then substitute the special variable macro with the code in the matched typemap. The typemap to search for is specified by the arguments, where method is the typemap method name and typepattern is a type pattern as per the %typemap specification in the Defining a typemap section.
The special variables within the matched typemap are expanded into those for the matched typemap type, not the typemap within which the macro is called. In practice, there is little use for this macro in the scripting target languages. It is mostly used in the target languages that are statically typed as a way to obtain the target language type given the C/C++ type and more commonly only when the C++ type is a template parameter.
The example below is for C# only and uses some typemap method names documented in the C# chapter, but it shows some of the possible syntax variations.
%typemap(cstype) unsigned long "uint"
%typemap(cstype) unsigned long bb "bool"
%typemap(cscode) BarClass %{
void foo($typemap(cstype, unsigned long aa) var1,
$typemap(cstype, unsigned long bb) var2,
$typemap(cstype, (unsigned long bb)) var3,
$typemap(cstype, unsigned long) var4)
{
// do something
}
%}
The result is the following expansion
%typemap(cstype) unsigned long "uint"
%typemap(cstype) unsigned long bb "bool"
%typemap(cscode) BarClass %{
void foo(uint var1,
bool var2,
bool var3,
uint var4)
{
// do something
}
%}
The set of typemaps recognized by a language module may vary. However, the following typemap methods are nearly universal:
The "in" typemap is used to convert function arguments from the target language to C. For example:
%typemap(in) int {
$1 = PyInt_AsLong($input);
}
The following special variables are available:
$input - Input object holding value to be converted. $symname - Name of function/method being wrapped
This is probably the most commonly redefined typemap because it can be used to implement customized conversions.
In addition, the "in" typemap allows the number of converted arguments to be specified. The numinputs attributes facilitates this. For example:
// Ignored argument.
%typemap(in, numinputs=0) int *out (int temp) {
$1 = &temp;
}
At this time, only zero or one arguments may be converted. When numinputs is set to 0, the argument is effectively ignored and cannot be supplied from the target language. The argument is still required when making the C/C++ call and the above typemap shows the value used is instead obtained from a locally declared variable called temp. Usually numinputs is not specified, whereupon the default value is 1, that is, there is a one to one mapping of the number of arguments when used from the target language to the C/C++ call. Multi-argument typemaps provide a similar concept where the number of arguments mapped from the target language to C/C++ can be changed for multiple adjacent C/C++ arguments.
Compatibility note: Specifying numinputs=0 is the same as the old "ignore" typemap.
The "typecheck" typemap is used to support overloaded functions and methods. It merely checks an argument to see whether or not it matches a specific type. For example:
%typemap(typecheck,precedence=SWIG_TYPECHECK_INTEGER) int {
$1 = PyInt_Check($input) ? 1 : 0;
}
For typechecking, the $1 variable is always a simple integer that is set to 1 or 0 depending on whether or not the input argument is the correct type.
If you define new "in" typemaps and your program uses overloaded methods, you should also define a collection of "typecheck" typemaps. More details about this follow in the Typemaps and overloading section.
The "out" typemap is used to convert function/method return values from C into the target language. For example:
%typemap(out) int {
$result = PyInt_FromLong($1);
}
The following special variables are available.
$result - Result object returned to target language. $symname - Name of function/method being wrapped
The "out" typemap supports an optional attribute flag called "optimal". This is for code optimisation and is detailed in the Optimal code generation when returning by value section.
The "arginit" typemap is used to set the initial value of a function argument--before any conversion has occurred. This is not normally necessary, but might be useful in highly specialized applications. For example:
// Set argument to NULL before any conversion occurs
%typemap(arginit) int *data {
$1 = NULL;
}
The "default" typemap is used to turn an argument into a default argument. For example:
%typemap(default) int flags {
$1 = DEFAULT_FLAGS;
}
...
int foo(int x, int y, int flags);
The primary use of this typemap is to either change the wrapping of default arguments or specify a default argument in a language where they aren't supported (like C). Target languages that do not support optional arguments, such as Java and C#, effectively ignore the value specified by this typemap as all arguments must be given.
Once a default typemap has been applied to an argument, all arguments that follow must have default values. See the Default/optional arguments section for further information on default argument wrapping.
The "check" typemap is used to supply value checking code during argument conversion. The typemap is applied after arguments have been converted. For example:
%typemap(check) int positive {
if ($1 <= 0) {
SWIG_exception(SWIG_ValueError,"Expected positive value.");
}
}
The "argout" typemap is used to return values from arguments. This is most commonly used to write wrappers for C/C++ functions that need to return multiple values. The "argout" typemap is almost always combined with an "in" typemap---possibly to ignore the input value. For example:
/* Set the input argument to point to a temporary variable */
%typemap(in, numinputs=0) int *out (int temp) {
$1 = &temp;
}
%typemap(argout) int *out {
// Append output value $1 to $result
...
}
The following special variables are available.
$result - Result object returned to target language. $input - The original input object passed. $symname - Name of function/method being wrapped
The code supplied to the "argout" typemap is always placed after the "out" typemap. If multiple return values are used, the extra return values are often appended to return value of the function.
See the typemaps.i library file for examples.
The "freearg" typemap is used to cleanup argument data. It is only used when an argument might have allocated resources that need to be cleaned up when the wrapper function exits. The "freearg" typemap usually cleans up argument resources allocated by the "in" typemap. For example:
// Get a list of integers
%typemap(in) int *items {
int nitems = Length($input);
$1 = (int *) malloc(sizeof(int)*nitems);
}
// Free the list
%typemap(freearg) int *items {
free($1);
}
The "freearg" typemap inserted at the end of the wrapper function, just before control is returned back to the target language. This code is also placed into a special variable $cleanup that may be used in other typemaps whenever a wrapper function needs to abort prematurely.
The "newfree" typemap is used in conjunction with the %newobject directive and is used to deallocate memory used by the return result of a function. For example:
%typemap(newfree) string * {
delete $1;
}
%typemap(out) string * {
$result = PyString_FromString($1->c_str());
}
...
%newobject foo;
...
string *foo();
See Object ownership and %newobject for further details.
The "memberin" typemap is used to copy data from an already converted input value into a structure member. It is typically used to handle array members and other special cases. For example:
%typemap(memberin) int [4] {
memmove($1, $input, 4*sizeof(int));
}
It is rarely necessary to write "memberin" typemaps---SWIG already provides a default implementation for arrays, strings, and other objects.
The "varin" typemap is used to convert objects in the target language to C for the purposes of assigning to a C/C++ global variable. This is implementation specific.
The "varout" typemap is used to convert a C/C++ object to an object in the target language when reading a C/C++ global variable. This is implementation specific.
The "throws" typemap is only used when SWIG parses a C++ method with an exception specification or has the %catches feature attached to the method. It provides a default mechanism for handling C++ methods that have declared the exceptions they will throw. The purpose of this typemap is to convert a C++ exception into an error or exception in the target language. It is slightly different to the other typemaps as it is based around the exception type rather than the type of a parameter or variable. For example:
%typemap(throws) const char * %{
PyErr_SetString(PyExc_RuntimeError, $1);
SWIG_fail;
%}
void bar() throw (const char *);
As can be seen from the generated code below, SWIG generates an exception handler with the catch block comprising the "throws" typemap content.
...
try {
bar();
}
catch(char const *_e) {
PyErr_SetString(PyExc_RuntimeError, _e);
SWIG_fail;
}
...
Note that if your methods do not have an exception specification yet they do throw exceptions, SWIG cannot know how to deal with them. For a neat way to handle these, see the Exception handling with %exception section.
This section contains a few examples. Consult language module documentation for more examples.
A common use of typemaps is to provide support for C arrays appearing both as arguments to functions and as structure members.
For example, suppose you had a function like this:
void set_vector(int type, float value[4]);
If you wanted to handle float value[4] as a list of floats, you might write a typemap similar to this:
%typemap(in) float value[4] (float temp[4]) {
int i;
if (!PySequence_Check($input)) {
PyErr_SetString(PyExc_ValueError,"Expected a sequence");
return NULL;
}
if (PySequence_Length($input) != 4) {
PyErr_SetString(PyExc_ValueError,"Size mismatch. Expected 4 elements");
return NULL;
}
for (i = 0; i < 4; i++) {
PyObject *o = PySequence_GetItem($input,i);
if (PyNumber_Check(o)) {
temp[i] = (float) PyFloat_AsDouble(o);
} else {
PyErr_SetString(PyExc_ValueError,"Sequence elements must be numbers");
return NULL;
}
}
$1 = temp;
}
In this example, the variable temp allocates a small array on the C stack. The typemap then populates this array and passes it to the underlying C function.
When used from Python, the typemap allows the following type of function call:
>>> set_vector(type, [ 1, 2.5, 5, 20 ])
If you wanted to generalize the typemap to apply to arrays of all dimensions you might write this:
%typemap(in) float value[ANY] (float temp[$1_dim0]) {
int i;
if (!PySequence_Check($input)) {
PyErr_SetString(PyExc_ValueError,"Expected a sequence");
return NULL;
}
if (PySequence_Length($input) != $1_dim0) {
PyErr_SetString(PyExc_ValueError,"Size mismatch. Expected $1_dim0 elements");
return NULL;
}
for (i = 0; i < $1_dim0; i++) {
PyObject *o = PySequence_GetItem($input,i);
if (PyNumber_Check(o)) {
temp[i] = (float) PyFloat_AsDouble(o);
} else {
PyErr_SetString(PyExc_ValueError,"Sequence elements must be numbers");
return NULL;
}
}
$1 = temp;
}
In this example, the special variable $1_dim0 is expanded with the actual array dimensions. Multidimensional arrays can be matched in a similar manner. For example:
%typemap(in) float matrix[ANY][ANY] (float temp[$1_dim0][$1_dim1]) {
... convert a 2d array ...
}
For large arrays, it may be impractical to allocate storage on the stack using a temporary variable as shown. To work with heap allocated data, the following technique can be used.
%typemap(in) float value[ANY] {
int i;
if (!PySequence_Check($input)) {
PyErr_SetString(PyExc_ValueError,"Expected a sequence");
return NULL;
}
if (PySequence_Length($input) != $1_dim0) {
PyErr_SetString(PyExc_ValueError,"Size mismatch. Expected $1_dim0 elements");
return NULL;
}
$1 = (float *) malloc($1_dim0*sizeof(float));
for (i = 0; i < $1_dim0; i++) {
PyObject *o = PySequence_GetItem($input,i);
if (PyNumber_Check(o)) {
$1[i] = (float) PyFloat_AsDouble(o);
} else {
PyErr_SetString(PyExc_ValueError,"Sequence elements must be numbers");
free($1);
return NULL;
}
}
}
%typemap(freearg) float value[ANY] {
if ($1) free($1);
}
In this case, an array is allocated using malloc. The freearg typemap is then used to release the argument after the function has been called.
Another common use of array typemaps is to provide support for array structure members. Due to subtle differences between pointers and arrays in C, you can't just "assign" to a array structure member. Instead, you have to explicitly copy elements into the array. For example, suppose you had a structure like this:
struct SomeObject {
float value[4];
...
};
When SWIG runs, it won't produce any code to set the vec member. You may even get a warning message like this:
$ swig -python example.i example.i:10: Warning 462: Unable to set variable of type float [4].
These warning messages indicate that SWIG does not know how you want to set the vec field.
To fix this, you can supply a special "memberin" typemap like this:
%typemap(memberin) float [ANY] {
int i;
for (i = 0; i < $1_dim0; i++) {
$1[i] = $input[i];
}
}
The memberin typemap is used to set a structure member from data that has already been converted from the target language to C. In this case, $input is the local variable in which converted input data is stored. This typemap then copies this data into the structure.
When combined with the earlier typemaps for arrays, the combination of the "in" and "memberin" typemap allows the following usage:
>>> s = SomeObject() >>> s.x = [1, 2.5, 5, 10]
Related to structure member input, it may be desirable to return structure members as a new kind of object. For example, in this example, you will get very odd program behavior where the structure member can be set nicely, but reading the member simply returns a pointer:
>>> s = SomeObject() >>> s.x = [1, 2.5, 5, 10] >>> print s.x _1008fea8_p_float >>>
To fix this, you can write an "out" typemap. For example:
%typemap(out) float [ANY] {
int i;
$result = PyList_New($1_dim0);
for (i = 0; i < $1_dim0; i++) {
PyObject *o = PyFloat_FromDouble((double) $1[i]);
PyList_SetItem($result,i,o);
}
}
Now, you will find that member access is quite nice:
>>> s = SomeObject() >>> s.x = [1, 2.5, 5, 10] >>> print s.x [ 1, 2.5, 5, 10]
Compatibility Note: SWIG1.1 used to provide a special "memberout" typemap. However, it was mostly useless and has since been eliminated. To return structure members, simply use the "out" typemap.
One particularly interesting application of typemaps is the implementation of argument constraints. This can be done with the "check" typemap. When used, this allows you to provide code for checking the values of function arguments. For example:
%module math
%typemap(check) double posdouble {
if ($1 < 0) {
croak("Expecting a positive number");
}
}
...
double sqrt(double posdouble);
This provides a sanity check to your wrapper function. If a negative number is passed to this function, a Perl exception will be raised and your program terminated with an error message.
This kind of checking can be particularly useful when working with pointers. For example:
%typemap(check) Vector * {
if ($1 == 0) {
PyErr_SetString(PyExc_TypeError,"NULL Pointer not allowed");
return NULL;
}
}
will prevent any function involving a Vector * from accepting a NULL pointer. As a result, SWIG can often prevent a potential segmentation faults or other run-time problems by raising an exception rather than blindly passing values to the underlying C/C++ program.
The code within typemaps is usually language dependent, however, many target languages support the same typemaps. In order to distinguish typemaps across different languages, the preprocessor should be used. For example, the "in" typemap for Perl and Ruby could be written as:
#if defined(SWIGPERL) %typemap(in) int "$1 = ($1_ltype) SvIV($input);" #elif defined(SWIGRUBY) %typemap(in) int "$1 = NUM2INT($input);" #else #warning no "in" typemap defined #endif
The full set of language specific macros is defined in the Conditional Compilation section. The example above also shows a common approach of issuing a warning for an as yet unsupported language.
Compatibility note: In SWIG-1.1 different languages could be
distinguished with the language name being put within the %typemap
directive, for example,
%typemap(ruby,in) int "$1 = NUM2INT($input);".
The "out" typemap is the main typemap for return types. This typemap supports an optional attribute flag called "optimal", which is for reducing temporary variables and the amount of generated code, thereby giving the compiler the opportunity to use return value optimization for generating faster executing code. It only really makes a difference when returning objects by value and has some limitations on usage, as explained later on.
When a function returns an object by value, SWIG generates code that instantiates the default type on the stack then assigns the value returned by the function call to it. A copy of this object is then made on the heap and this is what is ultimately stored and used from the target language. This will be clearer considering an example. Consider running the following code through SWIG:
%typemap(out) SWIGTYPE %{
$result = new $1_ltype((const $1_ltype &)$1);
%}
%inline %{
#include <iostream>
using namespace std;
struct XX {
XX() { cout << "XX()" << endl; }
XX(int i) { cout << "XX(" << i << ")" << endl; }
XX(const XX &other) { cout << "XX(const XX &)" << endl; }
XX & operator =(const XX &other) { cout << "operator=(const XX &)" << endl; return *this; }
~XX() { cout << "~XX()" << endl; }
static XX create() {
return XX(0);
}
};
%}
The "out" typemap shown is the default typemap for C# when returning objects by value. When making a call to XX::create() from C#, the output is as follows:
XX() XX(0) operator=(const XX &) ~XX() XX(const XX &) ~XX() ~XX()
Note that three objects are being created as well as an assignment. Wouldn't it be great if the XX::create() method was the only time a constructor was called? As the method returns by value, this is asking a lot and the code that SWIG generates by default makes it impossible for the compiler to use return value optimisation (RVO) . However, this is where the "optimal" attribute in the "out" typemap can help out. If the typemap code is kept the same and just the "optimal" attribute specified like this:
%typemap(out, optimal="1") SWIGTYPE %{
$result = new $1_ltype((const $1_ltype &)$1);
%}
then when the code is run again, the output is simply:
XX(0) ~XX()
How the "optimal" attribute works is best explained using the generated code. Without "optimal", the generated code is:
SWIGEXPORT void * SWIGSTDCALL CSharp_XX_create() {
void * jresult ;
XX result;
result = XX::create();
jresult = new XX((const XX &)result);
return jresult;
}
With the "optimal" attribute, the code is:
SWIGEXPORT void * SWIGSTDCALL CSharp_XX_create() {
void * jresult ;
jresult = new XX((const XX &)XX::create());
return jresult;
}
The major difference is the result temporary variable holding the value returned from XX::create() is no longer generated and instead the copy constructor call is made directly from the value returned by XX::create(). With modern compilers implementing RVO, the copy is not actually done, in fact the object is never created on the stack in XX::create() at all, it is simply created directly on the heap. In the first instance, the $1 special variable in the typemap is expanded into result. In the second instance, $1 is expanded into XX::create() and this is essentially what the "optimal" attribute is telling SWIG to do.
The "optimal" attribute optimisation is not turned on by default as it has a number of restrictions. Firstly, some code cannot be condensed into a simple call for passing into the copy constructor. One common occurrence is when %exception is used. Consider adding the following %exception to the example:
%exception XX::create() %{
try {
$action
} catch(const std::exception &e) {
cout << e.what() << endl;
}
%}
SWIG can detect when the "optimal" attribute cannot be used and will ignore it and in this case will issue the following warning:
example.i:28: Warning 474: Method XX::create() usage of the optimal attribute ignored
example.i:14: Warning 474: in the out typemap as the following cannot be used to generate
optimal code:
try {
result = XX::create();
} catch(const std::exception &e) {
cout << e.what() << endl;
}
It should be clear that the above code cannot be used as the argument to the copy constructor call, that is, for the $1 substitution.
Secondly, if the typemaps uses $1 more than once, then multiple calls to the wrapped function will be made. Obviously that is not very optimal. In fact SWIG attempts to detect this and will issue a warning something like:
example.i:21: Warning 475: Multiple calls to XX::create() might be generated due to example.i:7: Warning 475: optimal attribute usage in the out typemap.
However, it doesn't always get it right, for example when $1 is within some commented out code.
So far, the typemaps presented have focused on the problem of dealing with single values. For example, converting a single input object to a single argument in a function call. However, certain conversion problems are difficult to handle in this manner. As an example, consider the example at the very beginning of this chapter:
int foo(int argc, char *argv[]);
Suppose that you wanted to wrap this function so that it accepted a single list of strings like this:
>>> foo(["ale","lager","stout"])
To do this, you not only need to map a list of strings to char *argv[], but the value of int argc is implicitly determined by the length of the list. Using only simple typemaps, this type of conversion is possible, but extremely painful. Multi-argument typemaps help in this situation.
A multi-argument typemap is a conversion rule that specifies how to convert a single object in the target language to a set of consecutive function arguments in C/C++. For example, the following multi-argument maps perform the conversion described for the above example:
%typemap(in) (int argc, char *argv[]) {
int i;
if (!PyList_Check($input)) {
PyErr_SetString(PyExc_ValueError, "Expecting a list");
return NULL;
}
$1 = PyList_Size($input);
$2 = (char **) malloc(($1+1)*sizeof(char *));
for (i = 0; i < $1; i++) {
PyObject *s = PyList_GetItem($input,i);
if (!PyString_Check(s)) {
free($2);
PyErr_SetString(PyExc_ValueError, "List items must be strings");
return NULL;
}
$2[i] = PyString_AsString(s);
}
$2[i] = 0;
}
%typemap(freearg) (int argc, char *argv[]) {
if ($2) free($2);
}
A multi-argument map is always specified by surrounding the arguments with parentheses as shown. For example:
%typemap(in) (int argc, char *argv[]) { ... }
Within the typemap code, the variables $1, $2, and so forth refer to each type in the map. All of the usual substitutions apply--just use the appropriate $1 or $2 prefix on the variable name (e.g., $2_type, $1_ltype, etc.)
Multi-argument typemaps always have precedence over simple typemaps and SWIG always performs longest-match searching. Therefore, you will get the following behavior:
%typemap(in) int argc { ... typemap 1 ... }
%typemap(in) (int argc, char *argv[]) { ... typemap 2 ... }
%typemap(in) (int argc, char *argv[], char *env[]) { ... typemap 3 ... }
int foo(int argc, char *argv[]); // Uses typemap 2
int bar(int argc, int x); // Uses typemap 1
int spam(int argc, char *argv[], char *env[]); // Uses typemap 3
It should be stressed that multi-argument typemaps can appear anywhere in a function declaration and can appear more than once. For example, you could write this:
%typemap(in) (int scount, char *swords[]) { ... }
%typemap(in) (int wcount, char *words[]) { ... }
void search_words(int scount, char *swords[], int wcount, char *words[], int maxcount);
Other directives such as %apply and %clear also work with multi-argument maps. For example:
%apply (int argc, char *argv[]) {
(int scount, char *swords[]),
(int wcount, char *words[])
};
...
%clear (int scount, char *swords[]), (int wcount, char *words[]);
...
Although multi-argument typemaps may seem like an exotic, little used feature, there are several situations where they make sense. First, suppose you wanted to wrap functions similar to the low-level read() and write() system calls. For example:
typedef unsigned int size_t; int read(int fd, void *rbuffer, size_t len); int write(int fd, void *wbuffer, size_t len);
As is, the only way to use the functions would be to allocate memory and pass some kind of pointer as the second argument---a process that might require the use of a helper function. However, using multi-argument maps, the functions can be transformed into something more natural. For example, you might write typemaps like this:
// typemap for an outgoing buffer
%typemap(in) (void *wbuffer, size_t len) {
if (!PyString_Check($input)) {
PyErr_SetString(PyExc_ValueError, "Expecting a string");
return NULL;
}
$1 = (void *) PyString_AsString($input);
$2 = PyString_Size($input);
}
// typemap for an incoming buffer
%typemap(in) (void *rbuffer, size_t len) {
if (!PyInt_Check($input)) {
PyErr_SetString(PyExc_ValueError, "Expecting an integer");
return NULL;
}
$2 = PyInt_AsLong($input);
if ($2 < 0) {
PyErr_SetString(PyExc_ValueError, "Positive integer expected");
return NULL;
}
$1 = (void *) malloc($2);
}
// Return the buffer. Discarding any previous return result
%typemap(argout) (void *rbuffer, size_t len) {
Py_XDECREF($result); /* Blow away any previous result */
if (result < 0) { /* Check for I/O error */
free($1);
PyErr_SetFromErrno(PyExc_IOError);
return NULL;
}
$result = PyString_FromStringAndSize($1,result);
free($1);
}
(note: In the above example, $result and result are two different variables. result is the real C datatype that was returned by the function. $result is the scripting language object being returned to the interpreter.).
Now, in a script, you can write code that simply passes buffers as strings like this:
>>> f = example.open("Makefile")
>>> example.read(f,40)
'TOP = ../..\nSWIG = $(TOP)/.'
>>> example.read(f,40)
'./swig\nSRCS = example.c\nTARGET '
>>> example.close(f)
0
>>> g = example.open("foo", example.O_WRONLY | example.O_CREAT, 0644)
>>> example.write(g,"Hello world\n")
12
>>> example.write(g,"This is a test\n")
15
>>> example.close(g)
0
>>>
A number of multi-argument typemap problems also arise in libraries that perform matrix-calculations--especially if they are mapped onto low-level Fortran or C code. For example, you might have a function like this:
int is_symmetric(double *mat, int rows, int columns);
In this case, you might want to pass some kind of higher-level object as an matrix. To do this, you could write a multi-argument typemap like this:
%typemap(in) (double *mat, int rows, int columns) {
MatrixObject *a;
a = GetMatrixFromObject($input); /* Get matrix somehow */
/* Get matrix properties */
$1 = GetPointer(a);
$2 = GetRows(a);
$3 = GetColumns(a);
}
This kind of technique can be used to hook into scripting-language matrix packages such as Numeric Python. However, it should also be stressed that some care is in order. For example, when crossing languages you may need to worry about issues such as row-major vs. column-major ordering (and perform conversions if needed). Note that multi-argument typemaps cannot deal with non-consecutive C/C++ arguments; a workaround such as a helper function re-ordering the arguments to make them consecutive will need to be written.
Warnings can be added to typemaps so that SWIG generates a warning message whenever the typemap is used. See the information in the issuing warnings section.
The primary purpose of fragments is to reduce code bloat that repeated use of typemap code can lead to. Fragments are snippets of code that can be thought of as code dependencies of a typemap. If a fragment is used by more than one typemap, then the snippet of code within the fragment is only generated once. Code bloat is typically reduced by moving typemap code into a support function and then placing the support function into a fragment.
For example, if you have a very long typemap
%typemap(in) MyClass * {
MyClass *value = 0;
... many lines of marshalling code ...
$result = value;
}
the same marshalling code is often repeated in several typemaps, such as "in", "varin", "directorout", etc. SWIG copies the code for each argument that requires the typemap code, easily leading to code bloat in the generated code. To eliminate this, define a fragment that includes the common marshalling code:
%fragment("AsMyClass", "header") {
MyClass *AsMyClass(PyObject *obj) {
MyClass *value = 0;
... many lines of marshalling code ...
return value;
}
}
%typemap(in, fragment="AsMyClass") MyClass * {
$result = AsMyClass($input);
}
%typemap(varin, fragment="AsMyClass") MyClass * {
$result = AsMyClass($input);
}
When the "in" or "varin" typemaps for MyClass are required, the contents of the fragment called "AsMyClass" is added to the "header" section within the generated code, and then the typemap code is emitted. Hence, the method AsMyClass will be generated into the wrapper code before any typemap code that calls it.
To define a fragment you need a fragment name, a section name for generating the fragment code into, and the code itself. See Code insertion blocks for a full list of section names. Usually the section name used is "header". Different delimiters can be used:
%fragment("my_name", "header") %{ ... %}
%fragment("my_name", "header") { ... }
%fragment("my_name", "header") " ... "
and these follow the usual preprocessing rules mentioned in the Preprocessing delimiters section. The following are some rules and guidelines for using fragments:
A fragment is added to the wrapping code only once. When using the MyClass * typemaps above and wrapping the method:
void foo(MyClass *a, MyClass *b);
the generated code will look something like:
MyClass *AsMyClass(PyObject *obj) {
...
}
void _wrap_foo(...) {
....
arg1 = AsMyClass(obj1);
arg2 = AsMyClass(obj2);
...
foo(arg1, arg2);
}
even as there is duplicated typemap code to process both a and b, the AsMyClass method will be defined only once.
A fragment should only be defined once. If there is more than one definition, the first definition is the one used. All other definitions are silently ignored. For example, if you have
%fragment("AsMyClass", "header") { ...definition 1... }
....
%fragment("AsMyClass", "header") { ...definition 2... }
only the first definition is used. In this way you can override the default fragments in a SWIG library by defining your fragment before the library %include. Note that this behavior is the opposite to typemaps, where the last typemap defined/applied prevails. Fragments follow the first-in-first-out convention since they are intended to be global, while typemaps are intended to be locally specialized.
Fragment names cannot contain commas.
A fragment can use one or more additional fragments, for example:
%fragment("<limits.h>", "header") {
%#include <limits.h>
}
%fragment("AsMyClass", "header", fragment="<limits.h>") {
MyClass *AsMyClass(PyObject *obj) {
MyClass *value = 0;
... some marshalling code ...
if (ival < CHAR_MIN /*defined in <limits.h>*/) {
...
} else {
...
}
...
return value;
}
}
in this case, when the "AsMyClass" fragment is emitted, it also triggers the inclusion of the "<limits.h>" fragment.
A fragment can have dependencies on a number of other fragments, for example:
%fragment("bigfragment", "header", fragment="frag1", fragment="frag2", fragment="frag3") "";
When the "bigfragment" is used, the three dependent fragments "frag1", "frag2" and "frag3" are also pulled in. Note that as "bigframent" is empty (the empty string - ""), it does not add any code itself, but merely triggers the inclusion of the other fragments.
A typemap can also use more than one fragment, but since the syntax is different, you need to specify the dependent fragments in a comma separated list. Consider:
%typemap(in, fragment="frag1,frag2,frag3") {...}
which is equivalent to:
%typemap(in, fragment="bigfragment") {...}
when used with the "bigfragment" defined above.
Finally, you can force the inclusion of a fragment at any point in the generated code as follows:
%fragment("bigfragment");
which is very useful inside a template class, for example.
Most readers will probably want to skip the next two sub-sections on advanced fragment usage unless a desire to really get to grips with some powerful but tricky macro and fragment usage that is used in parts of the SWIG typemap library.
Fragments can be type specialized. The syntax is as follows:
%fragment("name", "header") { ...a type independent fragment... }
%fragment("name"{type}, "header") { ...a type dependent fragment... }
where type is a C/C++ type. Like typemaps, fragments can also be used inside templates, for example:
template <class T>
struct A {
%fragment("incode"{A<T>}, "header") {
... 'incode' specialized fragment ...
}
%typemap(in, fragment="incode"{A<T>}) {
... here we use the 'type specialized' fragment "incode"{A<T>} ...
}
};
Since fragments can be type specialized, they can be elegantly used to specialize typemaps. For example, if you have something like:
%fragment("incode"{float}, "header") {
float in_method_float(PyObject *obj) {
...
}
}
%fragment("incode"{long}, "header") {
float in_method_long(PyObject *obj) {
...
}
}
// %my_typemaps macro definition
%define %my_typemaps(Type)
%typemap(in, fragment="incode"{Type}) Type {
value = in_method_##Type(obj);
}
%enddef
%my_typemaps(float);
%my_typemaps(long);
then the proper "incode"{float} or "incode"{long} fragment will be used, and the in_method_float and in_method_long methods will be called whenever the float or long types are used as input parameters.
This feature is used a lot in the typemaps shipped in the SWIG library for some scripting languages. The interested (or very brave) reader can take a look at the fragments.swg file shipped with SWIG to see this in action.
Most scripting languages need type information at run-time. This type information can include how to construct types, how to garbage collect types, and the inheritance relationships between types. If the language interface does not provide its own type information storage, the generated SWIG code needs to provide it.
Requirements for the type system:
The run-time type checker is used by many, but not all, of SWIG's supported target languages. The run-time type checker features are not required and are thus not used for statically typed languages such as Java and C#. The scripting and scheme based languages rely on it and it forms a critical part of SWIG's operation for these languages.
When pointers, arrays, and objects are wrapped by SWIG, they are normally converted into typed pointer objects. For example, an instance of Foo * might be a string encoded like this:
_108e688_p_Foo
At a basic level, the type checker simply restores some type-safety to extension modules. However, the type checker is also responsible for making sure that wrapped C++ classes are handled correctly---especially when inheritance is used. This is especially important when an extension module makes use of multiple inheritance. For example:
class Foo {
int x;
};
class Bar {
int y;
};
class FooBar : public Foo, public Bar {
int z;
};
When the class FooBar is organized in memory, it contains the contents of the classes Foo and Bar as well as its own data members. For example:
FooBar --> | -----------| <-- Foo
| int x |
|------------| <-- Bar
| int y |
|------------|
| int z |
|------------|
Because of the way that base class data is stacked together, the casting of a Foobar * to either of the base classes may change the actual value of the pointer. This means that it is generally not safe to represent pointers using a simple integer or a bare void * ---type tags are needed to implement correct handling of pointer values (and to make adjustments when needed).
In the wrapper code generated for each language, pointers are handled through the use of special type descriptors and conversion functions. For example, if you look at the wrapper code for Python, you will see code like this:
if ((SWIG_ConvertPtr(obj0,(void **) &arg1, SWIGTYPE_p_Foo,1)) == -1) return NULL;
In this code, SWIGTYPE_p_Foo is the type descriptor that describes Foo *. The type descriptor is actually a pointer to a structure that contains information about the type name to use in the target language, a list of equivalent typenames (via typedef or inheritance), and pointer value handling information (if applicable). The SWIG_ConvertPtr() function is simply a utility function that takes a pointer object in the target language and a type-descriptor objects and uses this information to generate a C++ pointer. However, the exact name and calling conventions of the conversion function depends on the target language (see language specific chapters for details).
The actual type code is in swigrun.swg, and gets inserted near the top of the generated swig wrapper file. The phrase "a type X that can cast into a type Y" means that given a type X, it can be converted into a type Y. In other words, X is a derived class of Y or X is a typedef of Y. The structure to store type information looks like this:
/* Structure to store information on one type */
typedef struct swig_type_info {
const char *name; /* mangled name of this type */
const char *str; /* human readable name for this type */
swig_dycast_func dcast; /* dynamic cast function down a hierarchy */
struct swig_cast_info *cast; /* Linked list of types that can cast into this type */
void *clientdata; /* Language specific type data */
} swig_type_info;
/* Structure to store a type and conversion function used for casting */
typedef struct swig_cast_info {
swig_type_info *type; /* pointer to type that is equivalent to this type */
swig_converter_func converter; /* function to cast the void pointers */
struct swig_cast_info *next; /* pointer to next cast in linked list */
struct swig_cast_info *prev; /* pointer to the previous cast */
} swig_cast_info;
Each swig_type_info stores a linked list of types that it is equivalent to. Each entry in this doubly linked list stores a pointer back to another swig_type_info structure, along with a pointer to a conversion function. This conversion function is used to solve the above problem of the FooBar class, correctly returning a pointer to the type we want.
The basic problem we need to solve is verifying and building arguments passed to functions. So going back to the SWIG_ConvertPtr() function example from above, we are expecting a Foo * and need to check if obj0 is in fact a Foo * . From before, SWIGTYPE_p_Foo is just a pointer to the swig_type_info structure describing Foo *. So we loop through the linked list of swig_cast_info structures attached to SWIGTYPE_p_Foo. If we see that the type of obj0 is in the linked list, we pass the object through the associated conversion function and then return a positive. If we reach the end of the linked list without a match, then obj0 can not be converted to a Foo * and an error is generated.
Another issue needing to be addressed is sharing type information between multiple modules. More explicitly, we need to have ONE swig_type_info for each type. If two modules both use the type, the second module loaded must lookup and use the swig_type_info structure from the module already loaded. Because no dynamic memory is used and the circular dependencies of the casting information, loading the type information is somewhat tricky, and not explained here. A complete description is in the Lib/swiginit.swg file (and near the top of any generated file).
Each module has one swig_module_info structure which looks like this:
/* Structure used to store module information
* Each module generates one structure like this, and the runtime collects
* all of these structures and stores them in a circularly linked list.*/
typedef struct swig_module_info {
swig_type_info **types; /* Array of pointers to swig_type_info structs in this module */
int size; /* Number of types in this module */
struct swig_module_info *next; /* Pointer to next element in circularly linked list */
swig_type_info **type_initial; /* Array of initially generated type structures */
swig_cast_info **cast_initial; /* Array of initially generated casting structures */
void *clientdata; /* Language specific module data */
} swig_module_info;
Each module stores an array of pointers to swig_type_info structures and the number of types in this module. So when a second module is loaded, it finds the swig_module_info structure for the first module and searches the array of types. If any of its own types are in the first module and have already been loaded, it uses those swig_type_info structures rather than creating new ones. These swig_module_info structures are chained together in a circularly linked list.
This section covers how to use these functions from typemaps. To learn how to call these functions from external files (not the generated _wrap.c file), see the External access to the run-time system section.
When pointers are converted in a typemap, the typemap code often looks similar to this:
%typemap(in) Foo * {
if ((SWIG_ConvertPtr($input, (void **) &$1, $1_descriptor)) == -1) return NULL;
}
The most critical part is the typemap is the use of the $1_descriptor special variable. When placed in a typemap, this is expanded into the SWIGTYPE_* type descriptor object above. As a general rule, you should always use $1_descriptor instead of trying to hard-code the type descriptor name directly.
There is another reason why you should always use the $1_descriptor variable. When this special variable is expanded, SWIG marks the corresponding type as "in use." When type-tables and type information is emitted in the wrapper file, descriptor information is only generated for those datatypes that were actually used in the interface. This greatly reduces the size of the type tables and improves efficiency.
Occasionally, you might need to write a typemap that needs to convert pointers of other types. To handle this, the special variable macro $descriptor(type) covered earlier can be used to generate the SWIG type descriptor name for any C datatype. For example:
%typemap(in) Foo * {
if ((SWIG_ConvertPtr($input, (void **) &$1, $1_descriptor)) == -1) {
Bar *temp;
if ((SWIG_ConvertPtr($input, (void **) &temp, $descriptor(Bar *)) == -1) {
return NULL;
}
$1 = (Foo *) temp;
}
}
The primary use of $descriptor(type) is when writing typemaps for container objects and other complex data structures. There are some restrictions on the argument---namely it must be a fully defined C datatype. It can not be any of the special typemap variables.
In certain cases, SWIG may not generate type-descriptors like you expect. For example, if you are converting pointers in some non-standard way or working with an unusual combination of interface files and modules, you may find that SWIG omits information for a specific type descriptor. To fix this, you may need to use the %types directive. For example:
%types(int *, short *, long *, float *, double *);
When %types is used, SWIG generates type-descriptor information even if those datatypes never appear elsewhere in the interface file.
Further details about the run-time type checking can be found in the documentation for individual language modules. Reading the source code may also help. The file Lib/swigrun.swg in the SWIG library contains all of the source of the generated code for type-checking. This code is also included in every generated wrapped file so you probably just look at the output of SWIG to get a better sense for how types are managed.
This section does not apply to the statically typed languages like Java and C#, where overloading of the types is handled much like C++ by generating overloaded methods in the target language. In many of the other target languages, SWIG still fully supports C++ overloaded methods and functions. For example, if you have a collection of functions like this:
int foo(int x); int foo(double x); int foo(char *s, int y);
You can access the functions in a normal way from the scripting interpreter:
# Python
foo(3) # foo(int)
foo(3.5) # foo(double)
foo("hello",5) # foo(char *, int)
# Tcl
foo 3 # foo(int)
foo 3.5 # foo(double)
foo hello 5 # foo(char *, int)
To implement overloading, SWIG generates a separate wrapper function for each overloaded method. For example, the above functions would produce something roughly like this:
// wrapper pseudocode
_wrap_foo_0(argc, args[]) { // foo(int)
int arg1;
int result;
...
arg1 = FromInteger(args[0]);
result = foo(arg1);
return ToInteger(result);
}
_wrap_foo_1(argc, args[]) { // foo(double)
double arg1;
int result;
...
arg1 = FromDouble(args[0]);
result = foo(arg1);
return ToInteger(result);
}
_wrap_foo_2(argc, args[]) { // foo(char *, int)
char *arg1;
int arg2;
int result;
...
arg1 = FromString(args[0]);
arg2 = FromInteger(args[1]);
result = foo(arg1,arg2);
return ToInteger(result);
}
Next, a dynamic dispatch function is generated:
_wrap_foo(argc, args[]) {
if (argc == 1) {
if (IsInteger(args[0])) {
return _wrap_foo_0(argc,args);
}
if (IsDouble(args[0])) {
return _wrap_foo_1(argc,args);
}
}
if (argc == 2) {
if (IsString(args[0]) && IsInteger(args[1])) {
return _wrap_foo_2(argc,args);
}
}
error("No matching function!\n");
}
The purpose of the dynamic dispatch function is to select the appropriate C++ function based on argument types---a task that must be performed at runtime in most of SWIG's target languages.
The generation of the dynamic dispatch function is a relatively tricky affair. Not only must input typemaps be taken into account (these typemaps can radically change the types of arguments accepted), but overloaded methods must also be sorted and checked in a very specific order to resolve potential ambiguity. A high-level overview of this ranking process is found in the "SWIG and C++ " chapter. What isn't mentioned in that chapter is the mechanism by which it is implemented---as a collection of typemaps.
To support dynamic dispatch, SWIG first defines a general purpose type hierarchy as follows:
Symbolic Name Precedence Value ------------------------------ ------------------ SWIG_TYPECHECK_POINTER 0 SWIG_TYPECHECK_VOIDPTR 10 SWIG_TYPECHECK_BOOL 15 SWIG_TYPECHECK_UINT8 20 SWIG_TYPECHECK_INT8 25 SWIG_TYPECHECK_UINT16 30 SWIG_TYPECHECK_INT16 35 SWIG_TYPECHECK_UINT32 40 SWIG_TYPECHECK_INT32 45 SWIG_TYPECHECK_UINT64 50 SWIG_TYPECHECK_INT64 55 SWIG_TYPECHECK_UINT128 60 SWIG_TYPECHECK_INT128 65 SWIG_TYPECHECK_INTEGER 70 SWIG_TYPECHECK_FLOAT 80 SWIG_TYPECHECK_DOUBLE 90 SWIG_TYPECHECK_COMPLEX 100 SWIG_TYPECHECK_UNICHAR 110 SWIG_TYPECHECK_UNISTRING 120 SWIG_TYPECHECK_CHAR 130 SWIG_TYPECHECK_STRING 140 SWIG_TYPECHECK_BOOL_ARRAY 1015 SWIG_TYPECHECK_INT8_ARRAY 1025 SWIG_TYPECHECK_INT16_ARRAY 1035 SWIG_TYPECHECK_INT32_ARRAY 1045 SWIG_TYPECHECK_INT64_ARRAY 1055 SWIG_TYPECHECK_INT128_ARRAY 1065 SWIG_TYPECHECK_FLOAT_ARRAY 1080 SWIG_TYPECHECK_DOUBLE_ARRAY 1090 SWIG_TYPECHECK_CHAR_ARRAY 1130 SWIG_TYPECHECK_STRING_ARRAY 1140
(These precedence levels are defined in swig.swg, a library file that's included by all target language modules.)
In this table, the precedence-level determines the order in which types are going to be checked. Low values are always checked before higher values. For example, integers are checked before floats, single values are checked before arrays, and so forth.
Using the above table as a guide, each target language defines a collection of "typecheck" typemaps. The follow excerpt from the Python module illustrates this:
/* Python type checking rules */
/* Note: %typecheck(X) is a macro for %typemap(typecheck,precedence=X) */
%typecheck(SWIG_TYPECHECK_INTEGER)
int, short, long,
unsigned int, unsigned short, unsigned long,
signed char, unsigned char,
long long, unsigned long long,
const int &, const short &, const long &,
const unsigned int &, const unsigned short &, const unsigned long &,
const long long &, const unsigned long long &,
enum SWIGTYPE,
bool, const bool &
{
$1 = (PyInt_Check($input) || PyLong_Check($input)) ? 1 : 0;
}
%typecheck(SWIG_TYPECHECK_DOUBLE)
float, double,
const float &, const double &
{
$1 = (PyFloat_Check($input) || PyInt_Check($input) || PyLong_Check($input)) ? 1 : 0;
}
%typecheck(SWIG_TYPECHECK_CHAR) char {
$1 = (PyString_Check($input) && (PyString_Size($input) == 1)) ? 1 : 0;
}
%typecheck(SWIG_TYPECHECK_STRING) char * {
$1 = PyString_Check($input) ? 1 : 0;
}
%typecheck(SWIG_TYPECHECK_POINTER) SWIGTYPE *, SWIGTYPE &, SWIGTYPE [] {
void *ptr;
if (SWIG_ConvertPtr($input, (void **) &ptr, $1_descriptor, 0) == -1) {
$1 = 0;
PyErr_Clear();
} else {
$1 = 1;
}
}
%typecheck(SWIG_TYPECHECK_POINTER) SWIGTYPE {
void *ptr;
if (SWIG_ConvertPtr($input, (void **) &ptr, $&1_descriptor, 0) == -1) {
$1 = 0;
PyErr_Clear();
} else {
$1 = 1;
}
}
%typecheck(SWIG_TYPECHECK_VOIDPTR) void * {
void *ptr;
if (SWIG_ConvertPtr($input, (void **) &ptr, 0, 0) == -1) {
$1 = 0;
PyErr_Clear();
} else {
$1 = 1;
}
}
%typecheck(SWIG_TYPECHECK_POINTER) PyObject *
{
$1 = ($input != 0);
}
It might take a bit of contemplation, but this code has merely organized all of the basic C++ types, provided some simple type-checking code, and assigned each type a precedence value.
Finally, to generate the dynamic dispatch function, SWIG uses the following algorithm:
If you haven't written any typemaps of your own, it is unnecessary to worry about the typechecking rules. However, if you have written new input typemaps, you might have to supply a typechecking rule as well. An easy way to do this is to simply copy one of the existing typechecking rules. Here is an example,
// Typemap for a C++ string
%typemap(in) std::string {
if (PyString_Check($input)) {
$1 = std::string(PyString_AsString($input));
} else {
SWIG_exception(SWIG_TypeError, "string expected");
}
}
// Copy the typecheck code for "char *".
%typemap(typecheck) std::string = char *;
The bottom line: If you are writing new typemaps and you are using overloaded methods, you will probably have to write typecheck code or copy existing code. Since this is a relatively new SWIG feature, there are few examples to work with. However, you might look at some of the existing library files likes 'typemaps.i' for a guide.
Notes:
In order to implement certain kinds of program behavior, it is sometimes necessary to write sets of typemaps. For example, to support output arguments, one often writes a set of typemaps like this:
%typemap(in,numinputs=0) int *OUTPUT (int temp) {
$1 = &temp;
}
%typemap(argout) int *OUTPUT {
// return value somehow
}
To make it easier to apply the typemap to different argument types and names, the %apply directive performs a copy of all typemaps from one type to another. For example, if you specify this,
%apply int *OUTPUT { int *retvalue, int32 *output };
then all of the int *OUTPUT typemaps are copied to int *retvalue and int32 *output.
However, there is a subtle aspect of %apply that needs more description. Namely, %apply does not overwrite a typemap rule if it is already defined for the target datatype. This behavior allows you to do two things:
For example:
%typemap(in) int *INPUT (int temp) {
temp = ... get value from $input ...;
$1 = &temp;
}
%typemap(check) int *POSITIVE {
if (*$1 <= 0) {
SWIG_exception(SWIG_ValueError,"Expected a positive number!\n");
return NULL;
}
}
...
%apply int *INPUT { int *invalue };
%apply int *POSITIVE { int *invalue };
Since %apply does not overwrite or replace any existing rules, the only way to reset behavior is to use the %clear directive. %clear removes all typemap rules defined for a specific datatype. For example:
%clear int *invalue;
It is also important to note that the primary use of local variables is to create stack-allocated objects for temporary use inside a wrapper function (this is faster and less-prone to error than allocating data on the heap). In general, the variables are not intended to pass information between different types of typemaps. However, this can be done if you realize that local names have the argument number appended to them. For example, you could do this:
%typemap(in) int *(int temp) {
temp = (int) PyInt_AsLong($input);
$1 = &temp;
}
%typemap(argout) int * {
PyObject *o = PyInt_FromLong(temp$argnum);
...
}
In this case, the $argnum variable is expanded into the argument number. Therefore, the code will reference the appropriate local such as temp1 and temp2. It should be noted that there are plenty of opportunities to break the universe here and that accessing locals in this manner should probably be avoided. At the very least, you should make sure that the typemaps sharing information have exactly the same types and names.
All the rules discussed for typemaps apply to C++ as well as C. However in addition C++ passes an extra parameter into every non-static class method -- the this pointer. Occasionally it can be useful to apply a typemap to this pointer (for example to check and make sure this is non-null before deferencing). Actually, C also has an the equivalent of the this pointer which is used when accessing variables in a C struct.
In order to customise the this pointer handling, target a variable named self in your typemaps. self is the name SWIG uses to refer to the extra parameter in wrapped functions.
For example, if wrapping for Java generation:
%typemap(check) SWIGTYPE *self %{
if (!$1) {
SWIG_JavaThrowException(jenv, SWIG_JavaNullPointerException,
"invalid native object; delete() likely already called");
return $null;
}
%}
In the above case, the $1 variable is expanded into the argument name that SWIG is using as the this pointer. SWIG will then insert the check code before the actual C++ class method is called, and will raise an exception rather than crash the Java virtual machine. The generated code will look something like:
if (!arg1) {
SWIG_JavaThrowException(jenv, SWIG_JavaNullPointerException,
"invalid native object; delete() likely already called");
return ;
}
(arg1)->wrappedFunction(...);
Note that if you have a parameter named self then it will also match the typemap. One work around is to create an interface file that wraps the method, but gives the argument a name other than self.
The best place to find out more information about writing typemaps is to look in the SWIG library. Most language modules define all of their default behavior using typemaps. These are found in files such as python.swg, perl5.swg, tcl8.swg and so forth. The typemaps.i file in the library also contains numerous examples. You should look at these files to get a feel for how to define typemaps of your own. Some of the language modules support additional typemaps and further information is available in the individual chapters for each target language. There you may also find more hands-on practical examples.
In many cases, it is desirable to change the default wrapping of particular declarations in an interface. For example, you might want to provide hooks for catching C++ exceptions, add assertions, or provide hints to the underlying code generator. This chapter describes some of these customization techniques. First, a discussion of exception handling is presented. Then, a more general-purpose customization mechanism known as "features" is described.
The %exception directive allows you to define a general purpose exception handler. For example, you can specify the following:
%exception {
try {
$action
}
catch (RangeError) {
... handle error ...
}
}
How the exception is handled depends on the target language, for example, Python:
%exception {
try {
$action
}
catch (RangeError) {
PyErr_SetString(PyExc_IndexError,"index out-of-bounds");
SWIG_fail;
}
}
When defined, the code enclosed in braces is inserted directly into the low-level wrapper functions. The special variable $action is one of a few %exception special variables supported and gets replaced with the actual operation to be performed (a function call, method invocation, attribute access, etc.). An exception handler remains in effect until it is explicitly deleted. This is done by using either %exception or %noexception with no code. For example:
%exception; // Deletes any previously defined handler
Compatibility note: Previous versions of SWIG used a special directive %except for exception handling. That directive is deprecated--%exception provides the same functionality, but is substantially more flexible.
C has no formal exception handling mechanism so there are several approaches that might be used. A somewhat common technique is to simply set a special error code. For example:
/* File : except.c */
static char error_message[256];
static int error_status = 0;
void throw_exception(char *msg) {
strncpy(error_message,msg,256);
error_status = 1;
}
void clear_exception() {
error_status = 0;
}
char *check_exception() {
if (error_status) return error_message;
else return NULL;
}
To use these functions, functions simply call throw_exception() to indicate an error occurred. For example :
double inv(double x) {
if (x != 0) return 1.0/x;
else {
throw_exception("Division by zero");
return 0;
}
}
To catch the exception, you can write a simple exception handler such as the following (shown for Perl5) :
%exception {
char *err;
clear_exception();
$action
if ((err = check_exception())) {
croak(err);
}
}
In this case, when an error occurs, it is translated into a Perl error. Each target language has its own approach to creating a runtime error/exception in and for Perl it is the croak method shown above.
Exception handling can also be added to C code using the <setjmp.h> library. Here is a minimalistic implementation that relies on the C preprocessor :
/* File : except.c Just the declaration of a few global variables we're going to use */ #include <setjmp.h> jmp_buf exception_buffer; int exception_status; /* File : except.h */ #include <setjmp.h> extern jmp_buf exception_buffer; extern int exception_status; #define try if ((exception_status = setjmp(exception_buffer)) == 0) #define catch(val) else if (exception_status == val) #define throw(val) longjmp(exception_buffer,val) #define finally else /* Exception codes */ #define RangeError 1 #define DivisionByZero 2 #define OutOfMemory 3
Now, within a C program, you can do the following :
double inv(double x) {
if (x) return 1.0/x;
else throw(DivisionByZero);
}
Finally, to create a SWIG exception handler, write the following :
%{
#include "except.h"
%}
%exception {
try {
$action
} catch(RangeError) {
croak("Range Error");
} catch(DivisionByZero) {
croak("Division by zero");
} catch(OutOfMemory) {
croak("Out of memory");
} finally {
croak("Unknown exception");
}
}
Note: This implementation is only intended to illustrate the general idea. To make it work better, you'll need to modify it to handle nested try declarations.
Handling C++ exceptions is also straightforward. For example:
%exception {
try {
$action
} catch(RangeError) {
croak("Range Error");
} catch(DivisionByZero) {
croak("Division by zero");
} catch(OutOfMemory) {
croak("Out of memory");
} catch(...) {
croak("Unknown exception");
}
}
The exception types need to be declared as classes elsewhere, possibly in a header file :
class RangeError {};
class DivisionByZero {};
class OutOfMemory {};
By default all variables will ignore %exception, so it is effectively turned off for all variables wrappers. This applies to global variables, member variables and static member variables. The approach is certainly a logical one when wrapping variables in C. However, in C++, it is quite possible for an exception to be thrown while the variable is being assigned. To ensure %exception is used when wrapping variables, it needs to be 'turned on' using the %allowexception feature. Note that %allowexception is just a macro for %feature("allowexcept"), that is, it is a feature called "allowexcept". Any variable which has this feature attached to it, will then use the %exception feature, but of course, only if there is a %exception attached to the variable in the first place. The %allowexception feature works like any other feature and so can be used globally or for selective variables.
%allowexception; // turn on globally %allowexception Klass::MyVar; // turn on for a specific variable %noallowexception Klass::MyVar; // turn off for a specific variable %noallowexception; // turn off globally
By default, the %exception directive creates an exception handler that is used for all wrapper functions that follow it. Unless there is a well-defined (and simple) error handling mechanism in place, defining one universal exception handler may be unwieldy and result in excessive code bloat since the handler is inlined into each wrapper function.
To fix this, you can be more selective about how you use the %exception directive. One approach is to only place it around critical pieces of code. For example:
%exception {
... your exception handler ...
}
/* Define critical operations that can throw exceptions here */
%exception;
/* Define non-critical operations that don't throw exceptions */
More precise control over exception handling can be obtained by attaching an exception handler to specific declaration name. For example:
%exception allocate {
try {
$action
}
catch (MemoryError) {
croak("Out of memory");
}
}
In this case, the exception handler is only attached to declarations named "allocate". This would include both global and member functions. The names supplied to %exception follow the same rules as for %rename described in the section on Ambiguity resolution and renaming. For example, if you wanted to define an exception handler for a specific class, you might write this:
%exception Object::allocate {
try {
$action
}
catch (MemoryError) {
croak("Out of memory");
}
}
When a class prefix is supplied, the exception handler is applied to the corresponding declaration in the specified class as well as for identically named functions appearing in derived classes.
%exception can even be used to pinpoint a precise declaration when overloading is used. For example:
%exception Object::allocate(int) {
try {
$action
}
catch (MemoryError) {
croak("Out of memory");
}
}
Attaching exceptions to specific declarations is a good way to reduce code bloat. It can also be a useful way to attach exceptions to specific parts of a header file. For example:
%module example
%{
#include "someheader.h"
%}
// Define a few exception handlers for specific declarations
%exception Object::allocate(int) {
try {
$action
}
catch (MemoryError) {
croak("Out of memory");
}
}
%exception Object::getitem {
try {
$action
}
catch (RangeError) {
croak("Index out of range");
}
}
...
// Read a raw header file
%include "someheader.h"
Compatibility note: The %exception directive replaces the functionality provided by the deprecated "except" typemap. The typemap would allow exceptions to be thrown in the target language based on the return type of a function and was intended to be a mechanism for pinpointing specific declarations. However, it never really worked that well and the new %exception directive is much better.
The %exception directive supports a few special variables which are placeholders for code substitution. The following table shows the available special variables and details what the special variables are replaced with.
| $action | The actual operation to be performed (a function call, method invocation, variable access, etc.) |
| $name | The C/C++ symbol name for the function. |
| $symname | The symbol name used internally by SWIG |
| $overname | The extra mangling used in the symbol name for overloaded method. Expands to nothing if the wrapped method is not overloaded. |
| $wrapname | The language specific wrapper name (usually a C function name exported from the shared object/dll) |
| $decl | The fully qualified C/C++ declaration of the method being wrapped without the return type |
| $fulldecl | The fully qualified C/C++ declaration of the method being wrapped including the return type |
| $parentname | The parent class name (if any) for a method. |
| $parentsymname | The target language parent class name (if any) for a method. |
The special variables are often used in situations where method calls are logged. Exactly which form of the method call needs logging is up to individual requirements, but the example code below shows all the possible expansions, plus how an exception message could be tailored to show the C++ method declaration:
%exception Special::something {
log("symname: $symname");
log("overname: $overname");
log("wrapname: $wrapname");
log("decl: $decl");
log("fulldecl: $fulldecl");
try {
$action
}
catch (MemoryError) {
croak("Out of memory in $decl");
}
}
void log(const char *message);
struct Special {
void something(const char *c);
void something(int i);
};
Below shows the expansions for the 1st of the overloaded something wrapper methods for Perl:
log("symname: Special_something");
log("overname: __SWIG_0");
log("wrapname: _wrap_Special_something__SWIG_0");
log("decl: Special::something(char const *)");
log("fulldecl: void Special::something(char const *)");
try {
(arg1)->something((char const *)arg2);
}
catch (MemoryError) {
croak("Out of memory in Special::something(char const *)");
}
The exception.i library file provides support for creating language independent exceptions in your interfaces. To use it, simply put an "%include exception.i" in your interface file. This creates a function SWIG_exception() that can be used to raise common scripting language exceptions in a portable manner. For example :
// Language independent exception handler
%include exception.i
%exception {
try {
$action
} catch(RangeError) {
SWIG_exception(SWIG_ValueError, "Range Error");
} catch(DivisionByZero) {
SWIG_exception(SWIG_DivisionByZero, "Division by zero");
} catch(OutOfMemory) {
SWIG_exception(SWIG_MemoryError, "Out of memory");
} catch(...) {
SWIG_exception(SWIG_RuntimeError,"Unknown exception");
}
}
As arguments, SWIG_exception() takes an error type code (an integer) and an error message string. The currently supported error types are :
SWIG_UnknownError SWIG_IOError SWIG_RuntimeError SWIG_IndexError SWIG_TypeError SWIG_DivisionByZero SWIG_OverflowError SWIG_SyntaxError SWIG_ValueError SWIG_SystemError SWIG_AttributeError SWIG_MemoryError SWIG_NullReferenceError
The SWIG_exception() function can also be used in typemaps.
A common problem in some applications is managing proper ownership of objects. For example, consider a function like this:
Foo *blah() {
Foo *f = new Foo();
return f;
}
If you wrap the function blah(), SWIG has no idea that the return value is a newly allocated object. As a result, the resulting extension module may produce a memory leak (SWIG is conservative and will never delete objects unless it knows for certain that the returned object was newly created).
To fix this, you can provide an extra hint to the code generator using the %newobject directive. For example:
%newobject blah; Foo *blah();
%newobject works exactly like %rename and %exception. In other words, you can attach it to class members and parameterized declarations as before. For example:
%newobject ::blah(); // Only applies to global blah %newobject Object::blah(int,double); // Only blah(int,double) in Object %newobject *::copy; // Copy method in all classes ...
When %newobject is supplied, many language modules will arrange to take ownership of the return value. This allows the value to be automatically garbage-collected when it is no longer in use. However, this depends entirely on the target language (a language module may also choose to ignore the %newobject directive).
Closely related to %newobject is a special typemap. The "newfree" typemap can be used to deallocate a newly allocated return value. It is only available on methods for which %newobject has been applied and is commonly used to clean-up string results. For example:
%typemap(newfree) char * "free($1);"; ... %newobject strdup; ... char *strdup(const char *s);
In this case, the result of the function is a string in the target language. Since this string is a copy of the original result, the data returned by strdup() is no longer needed. The "newfree" typemap in the example simply releases this memory.
As a complement to the %newobject, from SWIG 1.3.28, you can use the %delobject directive. For example, if you have two methods, one to create objects and one to destroy them, you can use:
%newobject create_foo; %delobject destroy_foo; ... Foo *create_foo(); void destroy_foo(Foo *foo);
or in a member method as:
%delobject Foo::destroy;
class Foo {
public:
void destroy() { delete this;}
private:
~Foo();
};
%delobject instructs SWIG that the first argument passed to the method will be destroyed, and therefore, the target language should not attempt to deallocate it twice. This is similar to use the DISOWN typemap in the first method argument, and in fact, it also depends on the target language on implementing the 'disown' mechanism properly.
The use of %newobject is also integrated with reference counting and is covered in the C++ reference counted objects section.
Compatibility note: Previous versions of SWIG had a special %new directive. However, unlike %newobject, it only applied to the next declaration. For example:
%new char *strdup(const char *s);
For now this is still supported but is deprecated.
How to shoot yourself in the foot: The %newobject directive is not a declaration modifier like the old %new directive. Don't write code like this:
%newobject char *strdup(const char *s);
The results might not be what you expect.
Both %exception and %newobject are examples of a more general purpose customization mechanism known as "features." A feature is simply a user-definable property that is attached to specific declarations. Features are attached using the %feature directive. For example:
%feature("except") Object::allocate {
try {
$action
}
catch (MemoryError) {
croak("Out of memory");
}
}
%feature("new","1") *::copy;
In fact, the %exception and %newobject directives are really nothing more than macros involving %feature:
#define %exception %feature("except")
#define %newobject %feature("new","1")
The name matching rules outlined in the Ambiguity resolution and renaming section applies to all %feature directives. In fact the %rename directive is just a special form of %feature. The matching rules mean that features are very flexible and can be applied with pinpoint accuracy to specific declarations if needed. Additionally, if no declaration name is given, a global feature is said to be defined. This feature is then attached to every declaration that follows. This is how global exception handlers are defined. For example:
/* Define a global exception handler */
%feature("except") {
try {
$action
}
...
}
... bunch of declarations ...
The %feature directive can be used with different syntax. The following are all equivalent:
%feature("except") Object::method { $action };
%feature("except") Object::method %{ $action %};
%feature("except") Object::method " $action ";
%feature("except","$action") Object::method;
The syntax in the first variation will generate the { } delimiters used whereas the other variations will not.
The %feature directive also accepts XML style attributes in the same way that typemaps do. Any number of attributes can be specified. The following is the generic syntax for features:
%feature("name","value", attribute1="AttributeValue1") symbol;
%feature("name", attribute1="AttributeValue1") symbol {value};
%feature("name", attribute1="AttributeValue1") symbol %{value%};
%feature("name", attribute1="AttributeValue1") symbol "value";
More than one attribute can be specified using a comma separated list. The Java module is an example that uses attributes in %feature("except"). The throws attribute specifies the name of a Java class to add to a proxy method's throws clause. In the following example, MyExceptionClass is the name of the Java class for adding to the throws clause.
%feature("except", throws="MyExceptionClass") Object::method {
try {
$action
} catch (...) {
... code to throw a MyExceptionClass Java exception ...
}
};
Further details can be obtained from the Java exception handling section.
Feature flags are used to enable or disable a particular feature. Feature flags are a common but simple usage of %feature and the feature value should be either 1 to enable or 0 to disable the feature.
%feature("featurename") // enables feature
%feature("featurename", "1") // enables feature
%feature("featurename", "x") // enables feature
%feature("featurename", "0") // disables feature
%feature("featurename", "") // clears feature
Actually any value other than zero will enable the feature. Note that if the value is omitted completely, the default value becomes 1, thereby enabling the feature. A feature is cleared by specifying no value, see Clearing features. The %immutable directive described in the Creating read-only variables section, is just a macro for %feature("immutable"), and can be used to demonstrates feature flags:
// features are disabled by default
int red; // mutable
%feature("immutable"); // global enable
int orange; // immutable
%feature("immutable","0"); // global disable
int yellow; // mutable
%feature("immutable","1"); // another form of global enable
int green; // immutable
%feature("immutable",""); // clears the global feature
int blue; // mutable
Note that features are disabled by default and must be explicitly enabled either globally or by specifying a targeted declaration. The above intersperses SWIG directives with C code. Of course you can target features explicitly, so the above could also be rewritten as:
%feature("immutable","1") orange;
%feature("immutable","1") green;
int red; // mutable
int orange; // immutable
int yellow; // mutable
int green; // immutable
int blue; // mutable
The above approach allows for the C declarations to be separated from the SWIG directives for when the C declarations are parsed from a C header file. The logic above can of course be inverted and rewritten as:
%feature("immutable","1");
%feature("immutable","0") red;
%feature("immutable","0") yellow;
%feature("immutable","0") blue;
int red; // mutable
int orange; // immutable
int yellow; // mutable
int green; // immutable
int blue; // mutable
As hinted above for %immutable, most feature flags can also be specified via alternative syntax. The alternative syntax is just a macro in the swig.swg Library file. The following shows the alternative syntax for the imaginary featurename feature:
%featurename // equivalent to %feature("featurename", "1") ie enables feature
%nofeaturename // equivalent to %feature("featurename", "0") ie disables feature
%clearfeaturename // equivalent to %feature("featurename", "") ie clears feature
The concept of clearing features is discussed next.
A feature stays in effect until it is explicitly cleared. A feature is cleared by supplying a %feature directive with no value. For example %feature("name",""). A cleared feature means that any feature exactly matching any previously defined feature is no longer used in the name matching rules. So if a feature is cleared, it might mean that another name matching rule will apply. To clarify, let's consider the except feature again (%exception):
// Define global exception handler
%feature("except") {
try {
$action
} catch (...) {
croak("Unknown C++ exception");
}
}
// Define exception handler for all clone methods to log the method calls
%feature("except") *::clone() {
try {
logger.info("$action");
$action
} catch (...) {
croak("Unknown C++ exception");
}
}
... initial set of class declarations with clone methods ...
// clear the previously defined feature
%feature("except","") *::clone();
... final set of class declarations with clone methods ...
In the above scenario, the initial set of clone methods will log all method invocations from the target language. This specific feature is cleared for the final set of clone methods. However, these clone methods will still have an exception handler (without logging) as the next best feature match for them is the global exception handler.
Note that clearing a feature is not always the same as disabling it. Clearing the feature above with %feature("except","") *::clone() is not the same as specifying %feature("except","0") *::clone() . The former will disable the feature for clone methods - the feature is still a better match than the global feature. If on the other hand, no global exception handler had been defined at all, then clearing the feature would be the same as disabling it as no other feature would have matched.
Note that the feature must match exactly for it to be cleared by any previously defined feature. For example the following attempt to clear the initial feature will not work:
%feature("except") clone() { logger.info("$action"); $action }
%feature("except","") *::clone();
but this will:
%feature("except") clone() { logger.info("$action"); $action }
%feature("except","") clone();
SWIG provides macros for disabling and clearing features. Many of these can be found in the swig.swg library file. The typical pattern is to define three macros; one to define the feature itself, one to disable the feature and one to clear the feature. The three macros below show this for the "except" feature:
#define %exception %feature("except")
#define %noexception %feature("except","0")
#define %clearexception %feature("except","")
SWIG treats methods with default arguments as separate overloaded methods as detailed in the default arguments section. Any %feature targeting a method with default arguments will apply to all the extra overloaded methods that SWIG generates if the default arguments are specified in the feature. If the default arguments are not specified in the feature, then the feature will match that exact wrapper method only and not the extra overloaded methods that SWIG generates. For example:
%feature("except") void hello(int i=0, double d=0.0) { ... }
void hello(int i=0, double d=0.0);
will apply the feature to all three wrapper methods, that is:
void hello(int i, double d); void hello(int i); void hello();
If the default arguments are not specified in the feature:
%feature("except") void hello(int i, double d) { ... }
void hello(int i=0, double d=0.0);
then the feature will only apply to this wrapper method:
void hello(int i, double d);
and not these wrapper methods:
void hello(int i); void hello();
If compactdefaultargs are being used, then the difference between specifying or not specifying default arguments in a feature is not applicable as just one wrapper is generated.
Compatibility note: The different behaviour of features specified with or without default arguments was introduced in SWIG-1.3.23 when the approach to wrapping methods with default arguments was changed.
As has been shown earlier, the intended use for the %feature directive is as a highly flexible customization mechanism that can be used to annotate declarations with additional information for use by specific target language modules. Another example is in the Python module. You might use %feature to rewrite proxy/shadow class code as follows:
%module example
%rename(bar_id) bar(int,double);
// Rewrite bar() to allow some nice overloading
%feature("shadow") Foo::bar(int) %{
def bar(*args):
if len(args) == 3:
return apply(examplec.Foo_bar_id,args)
return apply(examplec.Foo_bar,args)
%}
class Foo {
public:
int bar(int x);
int bar(int x, double y);
}
Further details of %feature usage is described in the documentation for specific language modules.
A common problem that arises when wrapping C libraries is that of maintaining reliability and checking for errors. The fact of the matter is that many C programs are notorious for not providing error checks. Not only that, when you expose the internals of an application as a library, it often becomes possible to crash it simply by providing bad inputs or using it in a way that wasn't intended.
This chapter describes SWIG's support for software contracts. In the context of SWIG, a contract can be viewed as a runtime constraint that is attached to a declaration. For example, you can easily attach argument checking rules, check the output values of a function and more. When one of the rules is violated by a script, a runtime exception is generated rather than having the program continue to execute.
Contracts are added to a declaration using the %contract directive. Here is a simple example:
%contract sqrt(double x) {
require:
x >= 0;
ensure:
sqrt >= 0;
}
...
double sqrt(double);
In this case, a contract is being added to the sqrt() function. The %contract directive must always appear before the declaration in question. Within the contract there are two sections, both of which are optional. The require: section specifies conditions that must hold before the function is called. Typically, this is used to check argument values. The ensure: section specifies conditions that must hold after the function is called. This is often used to check return values or the state of the program. In both cases, the conditions that must hold must be specified as boolean expressions.
In the above example, we're simply making sure that sqrt() returns a non-negative number (if it didn't, then it would be broken in some way).
Once a contract has been specified, it modifies the behavior of the resulting module. For example:
>>> example.sqrt(2) 1.4142135623730951 >>> example.sqrt(-2) Traceback (most recent call last): File "<stdin>", line 1, in ? RuntimeError: Contract violation: require: (arg1>=0) >>>
The %contract directive can also be applied to class methods and constructors. For example:
%contract Foo::bar(int x, int y) {
require:
x > 0;
ensure:
bar > 0;
}
%contract Foo::Foo(int a) {
require:
a > 0;
}
class Foo {
public:
Foo(int);
int bar(int, int);
};
The way in which %contract is applied is exactly the same as the %feature directive. Thus, any contract that you specified for a base class will also be attached to inherited methods. For example:
class Spam : public Foo {
public:
int bar(int,int); // Gets contract defined for Foo::bar(int,int)
};
In addition to this, separate contracts can be applied to both the base class and a derived class. For example:
%contract Foo::bar(int x, int) {
require:
x > 0;
}
%contract Spam::bar(int, int y) {
require:
y > 0;
}
class Foo {
public:
int bar(int,int); // Gets Foo::bar contract.
};
class Spam : public Foo {
public:
int bar(int,int); // Gets Foo::bar and Spam::bar contract
};
When more than one contract is applied, the conditions specified in a "require:" section are combined together using a logical-AND operation. In other words conditions specified for the base class and conditions specified for the derived class all must hold. In the above example, this means that both the arguments to Spam::bar must be positive.
Consider an interface file that contains the following code:
#define UP 1 #define DOWN 2 #define RIGHT 3 #define LEFT 4 void move(SomeObject *, int direction, int distance);
One thing you might want to do is impose a constraint on the direction parameter to make sure it's one of a few accepted values. To do that, SWIG provides an easy to use macro %aggregate_check() that works like this:
%aggregate_check(int, check_direction, UP, DOWN, LEFT, RIGHT);
This merely defines a utility function of the form
int check_direction(int x);
That checks the argument x to see if it is one of the values listed. This utility function can be used in contracts. For example:
%aggregate_check(int, check_direction, UP, DOWN, RIGHT, LEFT);
%contract move(SomeObject *, int direction, in) {
require:
check_direction(direction);
}
#define UP 1
#define DOWN 2
#define RIGHT 3
#define LEFT 4
void move(SomeObject *, int direction, int distance);
Alternatively, it can be used in typemaps and other directives. For example:
%aggregate_check(int, check_direction, UP, DOWN, RIGHT, LEFT);
%typemap(check) int direction {
if (!check_direction($1)) SWIG_exception(SWIG_ValueError, "Bad direction");
}
#define UP 1
#define DOWN 2
#define RIGHT 3
#define LEFT 4
void move(SomeObject *, int direction, int distance);
Regrettably, there is no automatic way to perform similar checks with enums values. Maybe in a future release.
Contract support was implemented by Songyan (Tiger) Feng and first appeared in SWIG-1.3.20.
(a.k.a, "The horror. The horror.")
This chapter describes the problem of wrapping functions that take a variable number of arguments. For instance, generating wrappers for the C printf() family of functions.
This topic is sufficiently advanced to merit its own chapter. In fact, support for varargs is an often requested feature that was first added in SWIG-1.3.12. Most other wrapper generation tools have wisely chosen to avoid this issue.
Some C and C++ programs may include functions that accept a variable number of arguments. For example, most programmers are familiar with functions from the C library such as the following:
int printf(const char *fmt, ...) int fprintf(FILE *, const char *fmt, ...); int sprintf(char *s, const char *fmt, ...);
Although there is probably little practical purpose in wrapping these specific C library functions in a scripting language (what would be the point?), a library may include its own set of special functions based on a similar API. For example:
int traceprintf(const char *fmt, ...);
In this case, you may want to have some kind of access from the target language.
Before describing the SWIG implementation, it is important to discuss the common uses of varargs that you are likely to encounter in real programs. Obviously, there are the printf() style output functions as shown. Closely related to this would be scanf() style input functions that accept a format string and a list of pointers into which return values are placed. However, variable length arguments are also sometimes used to write functions that accept a NULL-terminated list of pointers. A good example of this would be a function like this:
int execlp(const char *path, const char *arg1, ...);
...
/* Example */
execlp("ls","ls","-l",NULL);
In addition, varargs is sometimes used to fake default arguments in older C libraries. For instance, the low level open() system call is often declared as a varargs function so that it will accept two or three arguments:
int open(const char *path, int oflag, ...);
...
/* Examples */
f = open("foo", O_RDONLY);
g = open("bar", O_WRONLY | O_CREAT, 0644);
Finally, to implement a varargs function, recall that you have to use the C library functions defined in <stdarg.h>. For example:
List make_list(const char *s, ...) {
va_list ap;
List x;
...
va_start(ap, s);
while (s) {
x.append(s);
s = va_arg(ap, const char *);
}
va_end(ap);
return x;
}
Generating wrappers for a variable length argument function presents a number of special challenges. Although C provides support for implementing functions that receive variable length arguments, there are no functions that can go in the other direction. Specifically, you can't write a function that dynamically creates a list of arguments and which invokes a varargs function on your behalf.
Although it is possible to write functions that accept the special type va_list, this is something entirely different. You can't take a va_list structure and pass it in place of the variable length arguments to another varargs function. It just doesn't work.
The reason this doesn't work has to do with the way that function calls get compiled. For example, suppose that your program has a function call like this:
printf("Hello %s. Your number is %d\n", name, num);
When the compiler looks at this, it knows that you are calling printf() with exactly three arguments. Furthermore, it knows that the number of arguments as well are their types and sizes is never going to change during program execution. Therefore, this gets turned to machine code that sets up a three-argument stack frame followed by a call to printf().
In contrast, suppose you attempted to make some kind of wrapper around printf() using code like this:
int wrap_printf(const char *fmt, ...) {
va_list ap;
va_start(ap,fmt);
...
printf(fmt,ap);
...
va_end(ap);
};
Although this code might compile, it won't do what you expect. This is because the call to printf() is compiled as a procedure call involving only two arguments. However, clearly a two-argument configuration of the call stack is completely wrong if your intent is to pass an arbitrary number of arguments to the real printf(). Needless to say, it won't work.
Unfortunately, the situation just described is exactly the problem faced by wrapper generation tools. In general, the number of passed arguments will not be known until run-time. To make matters even worse, you won't know the types and sizes of arguments until run-time as well. Needless to say, there is no obvious way to make the C compiler generate code for a function call involving an unknown number of arguments of unknown types.
In theory, it is possible to write a wrapper that does the right thing. However, this involves knowing the underlying ABI for the target platform and language as well as writing special purpose code that manually constructed the call stack before making a procedure call. Unfortunately, both of these tasks require the use of inline assembly code. Clearly, that's the kind of solution you would much rather avoid.
With this nastiness in mind, SWIG provides a number of solutions to the varargs wrapping problem. Most of these solutions are compromises that provide limited varargs support without having to resort to assembly language. However, SWIG can also support real varargs wrapping (with stack-frame manipulation) if you are willing to get hands dirty. Keep reading.
When variable length arguments appear in an interface, the default behavior is to drop the variable argument list entirely, replacing them with a single NULL pointer. For example, if you had this function,
void traceprintf(const char *fmt, ...);
it would be wrapped as if it had been declared as follows:
void traceprintf(const char *fmt);
When the function is called inside the wrappers, it is called as follows:
traceprintf(arg1, NULL);
Arguably, this approach seems to defeat the whole point of variable length arguments. However, this actually provides enough support for many simple kinds of varargs functions to still be useful, however it does come with a caveat. For instance, you could make function calls like this (in Python):
>>> traceprintf("Hello World")
>>> traceprintf("Hello %s. Your number is %d\n" % (name, num))
>>> traceprintf("Your result is 90%%.")
Notice how string formatting is being done in Python instead of C. The caveat is the strings passed must be safe to use in C though. For example if name was to contain a "%" it should be double escaped in order to avoid unpredictable behaviour:
>>> traceprintf("Your result is 90%.\n") # unpredictable behaviour
>>> traceprintf("Your result is 90%%.\n") # good
Read on for further solutions.
Instead of dropping the variable length arguments, an alternative approach is to replace (...) with a set of suitable arguments. SWIG provides a special %varargs directive that can be used to do this. For example,
%varargs(int mode = 0) open; ... int open(const char *path, int oflags, ...);
is equivalent to this:
int open(const char *path, int oflags, int mode = 0);
In this case, %varargs is simply providing more specific information about the extra arguments that might be passed to a function. If the arguments to a varargs function are of uniform type, %varargs can also accept a numerical argument count as follows:
%varargs(3, char *str = NULL) execlp; ... int execlp(const char *path, const char *arg, ...);
and is effectively seen as:
int execlp(const char *path, const char *arg,
char *str1 = NULL,
char *str2 = NULL,
char *str3 = NULL);
This would wrap execlp() as a function that accepted up to 3 optional arguments. Depending on the application, this may be more than enough for practical purposes.
The handling of default arguments can be changed via the compactdefaultargs feature. If this feature is used, for example
%feature("compactdefaultargs") execlp;
%varargs(3, char *str = NULL) execlp;
...
int execlp(const char *path, const char *arg, ...);
a call from the target language which does not provide the maximum number of arguments, such as, execlp("a", "b", "c") will generate C code which includes the missing default values, that is, execlp("a", "b", "c", NULL, NULL). If compactdefaultargs is not used, then the generated code will be execlp("a", "b", "c") . The former is useful for helping providing a sentinel to terminate the argument list. However, this is not guaranteed, for example when a user passes a non-NULL value for all the parameters. When using compactdefaultargs it is possible to guarantee the NULL sentinel is passed through the, numinputs=0 'in' typemap attribute, naming the last parameter. For example,
%feature("compactdefaultargs") execlp;
%varargs(3, char *str = NULL) execlp;
%typemap(in, numinputs=0) char *str3 ""
...
int execlp(const char *path, const char *arg, ...);
Note that str3 is the name of the last argument, as we have used %varargs with 3. Now execlp("a", "b", "c", "d", "e") will result in an error as one too many arguments has been passed, as now only 2 additional 'str' arguments can be passed with the 3rd one always using the specified default NULL.
Argument replacement is most appropriate in cases where the types of the extra arguments are uniform and the maximum number of arguments are known. Argument replacement is not as useful when working with functions that accept mixed argument types such as printf(). Providing general purpose wrappers to such functions presents special problems (covered shortly).
Variable length arguments may be used in typemap specifications. For example:
%typemap(in) (...) {
// Get variable length arguments (somehow)
...
}
%typemap(in) (const char *fmt, ...) {
// Multi-argument typemap
}
However, this immediately raises the question of what "type" is actually used to represent (...). For lack of a better alternative, the type of (...) is set to void *. Since there is no way to dynamically pass arguments to a varargs function (as previously described), the void * argument value is intended to serve as a place holder for storing some kind of information about the extra arguments (if any). In addition, the default behavior of SWIG is to pass the void * value as an argument to the function. Therefore, you could use the pointer to hold a valid argument value if you wanted.
To illustrate, here is a safer version of wrapping printf() in Python:
%typemap(in) (const char *fmt, ...) {
$1 = "%s"; /* Fix format string to %s */
$2 = (void *) PyString_AsString($input); /* Get string argument */
};
...
int printf(const char *fmt, ...);
In this example, the format string is implicitly set to "%s" . This prevents a program from passing a bogus format string to the extension. Then, the passed input object is decoded and placed in the void * argument defined for the (...) argument. When the actual function call is made, the underlying wrapper code will look roughly like this:
wrap_printf() {
char *arg1;
void *arg2;
int result;
arg1 = "%s";
arg2 = (void *) PyString_AsString(arg2obj);
...
result = printf(arg1,arg2);
...
}
Notice how both arguments are passed to the function and it does what you would expect.
The next example illustrates a more advanced kind of varargs typemap. Disclaimer: this requires special support in the target language module and is not guaranteed to work with all SWIG modules at this time. It also starts to illustrate some of the more fundamental problems with supporting varargs in more generality.
If a typemap is defined for any form of (...), many SWIG modules will generate wrappers that accept a variable number of arguments as input and will make these arguments available in some form. The precise details of this depends on the language module being used (consult the appropriate chapter for more details). However, suppose that you wanted to create a Python wrapper for the execlp() function shown earlier. To do this using a typemap instead of using %varargs, you might first write a typemap like this:
%typemap(in) (...)(char *vargs[10]) {
int i;
int argc;
for (i = 0; i < 10; i++) vargs[i] = 0;
argc = PyTuple_Size(varargs);
if (argc > 10) {
PyErr_SetString(PyExc_ValueError, "Too many arguments");
return NULL;
}
for (i = 0; i < argc; i++) {
PyObject *pyobj = PyTuple_GetItem(varargs, i);
char *str = 0;
%#if PY_VERSION_HEX>=0x03000000
PyObject *pystr;
if (!PyUnicode_Check(pyobj)) {
PyErr_SetString(PyExc_ValueError, "Expected a string");
return NULL;
}
pystr = PyUnicode_AsUTF8String(pyobj);
str = strdup(PyBytes_AsString(pystr));
Py_XDECREF(pystr);
%#else
if (!PyString_Check(pyobj)) {
PyErr_SetString(PyExc_ValueError, "Expected a string");
return NULL;
}
str = PyString_AsString(pyobj);
%#endif
vargs[i] = str;
}
$1 = (void *)vargs;
}
%typemap(freearg) (...) {
%#if PY_VERSION_HEX>=0x03000000
int i;
for (i = 0; i < 10; i++) {
free(vargs$argnum[i]);
}
%#endif
}
In the 'in' typemap, the special variable varargs is a tuple holding all of the extra arguments passed (this is specific to the Python module). The typemap then pulls this apart and sticks the values into the array of strings args. Then, the array is assigned to $1 (recall that this is the void * variable corresponding to (...)). However, this assignment is only half of the picture----clearly this alone is not enough to make the function work. The 'freearg' typemap cleans up memory allocated in the 'in' typemap; this code is generated to be called after the execlp function is called. To patch everything up, you have to rewrite the underlying action code using the %feature directive like this:
%feature("action") execlp {
char **vargs = (char **) arg3;
result = execlp(arg1, arg2, vargs[0], vargs[1], vargs[2], vargs[3], vargs[4],
vargs[5], vargs[6], vargs[7], vargs[8], vargs[9], NULL);
}
int execlp(const char *path, const char *arg, ...);
This patches everything up and creates a function that more or less works. However, don't try explaining this to your coworkers unless you know for certain that they've had several cups of coffee. If you really want to elevate your guru status and increase your job security, continue to the next section.
All of the previous examples have relied on features of SWIG that are portable and which don't rely upon any low-level machine-level details. In many ways, they have all dodged the real issue of variable length arguments by recasting a varargs function into some weaker variation with a fixed number of arguments of known types. In many cases, this works perfectly fine. However, if you want more generality than this, you need to bring out some bigger guns.
One way to do this is to use a special purpose library such as libffi ( http://sources.redhat.com/libffi). libffi is a library that allows you to dynamically construct call-stacks and invoke procedures in a relatively platform independent manner. Details about the library can be found in the libffi distribution and are not repeated here.
To illustrate the use of libffi, suppose that you really wanted to create a wrapper for execlp() that accepted any number of arguments. To do this, you might make a few adjustments to the previous example. For example:
/* Take an arbitrary number of extra arguments and place into an array
of strings */
%typemap(in) (...) {
char **argv;
int argc;
int i;
argc = PyTuple_Size(varargs);
argv = (char **) malloc(sizeof(char *)*(argc+1));
for (i = 0; i < argc; i++) {
PyObject *o = PyTuple_GetItem(varargs,i);
if (!PyString_Check(o)) {
PyErr_SetString(PyExc_ValueError,"Expected a string");
free(argv);
return NULL;
}
argv[i] = PyString_AsString(o);
}
argv[i] = NULL;
$1 = (void *) argv;
}
/* Rewrite the function call, using libffi */
%feature("action") execlp {
int i, vc;
ffi_cif cif;
ffi_type **types;
void **values;
char **args;
vc = PyTuple_Size(varargs);
types = (ffi_type **) malloc((vc+3)*sizeof(ffi_type *));
values = (void **) malloc((vc+3)*sizeof(void *));
args = (char **) arg3;
/* Set up path parameter */
types[0] = &ffi_type_pointer;
values[0] = &arg1;
/* Set up first argument */
types[1] = &ffi_type_pointer;
values[1] = &arg2;
/* Set up rest of parameters */
for (i = 0; i <= vc; i++) {
types[2+i] = &ffi_type_pointer;
values[2+i] = &args[i];
}
if (ffi_prep_cif(&cif, FFI_DEFAULT_ABI, vc+3,
&ffi_type_uint, types) == FFI_OK) {
ffi_call(&cif, (void (*)()) execlp, &result, values);
} else {
PyErr_SetString(PyExc_RuntimeError, "Whoa!!!!!");
free(types);
free(values);
free(arg3);
return NULL;
}
free(types);
free(values);
free(arg3);
}
/* Declare the function. Whew! */
int execlp(const char *path, const char *arg1, ...);
Looking at this example, you may start to wonder if SWIG is making life any easier. Given the amount of code involved, you might also wonder why you didn't just write a hand-crafted wrapper! Either that or you're wondering "why in the hell am I trying to wrap this varargs function in the first place?!?" Obviously, those are questions you'll have to answer for yourself.
As a more extreme example of libffi, here is some code that attempts to wrap printf(),
/* A wrapper for printf() using libffi */
%{
/* Structure for holding passed arguments after conversion */
typedef struct {
int type;
union {
int ivalue;
double dvalue;
void *pvalue;
} val;
} vtype;
enum { VT_INT, VT_DOUBLE, VT_POINTER };
%}
%typemap(in) (const char *fmt, ...) {
vtype *argv;
int argc;
int i;
/* Format string */
$1 = PyString_AsString($input);
/* Variable length arguments */
argc = PyTuple_Size(varargs);
argv = (vtype *) malloc(argc*sizeof(vtype));
for (i = 0; i < argc; i++) {
PyObject *o = PyTuple_GetItem(varargs,i);
if (PyInt_Check(o)) {
argv[i].type = VT_INT;
argv[i].val.ivalue = PyInt_AsLong(o);
} else if (PyFloat_Check(o)) {
argv[i].type = VT_DOUBLE;
argv[i].val.dvalue = PyFloat_AsDouble(o);
} else if (PyString_Check(o)) {
argv[i].type = VT_POINTER;
argv[i].val.pvalue = (void *) PyString_AsString(o);
} else {
PyErr_SetString(PyExc_ValueError,"Unsupported argument type");
free(argv);
return NULL;
}
}
$2 = (void *) argv;
}
/* Rewrite the function call using libffi */
%feature("action") printf {
int i, vc;
ffi_cif cif;
ffi_type **types;
void **values;
vtype *args;
vc = PyTuple_Size(varargs);
types = (ffi_type **) malloc((vc+1)*sizeof(ffi_type *));
values = (void **) malloc((vc+1)*sizeof(void *));
args = (vtype *) arg2;
/* Set up fmt parameter */
types[0] = &ffi_type_pointer;
values[0] = &arg1;
/* Set up rest of parameters */
for (i = 0; i < vc; i++) {
switch(args[i].type) {
case VT_INT:
types[1+i] = &ffi_type_uint;
values[1+i] = &args[i].val.ivalue;
break;
case VT_DOUBLE:
types[1+i] = &ffi_type_double;
values[1+i] = &args[i].val.dvalue;
break;
case VT_POINTER:
types[1+i] = &ffi_type_pointer;
values[1+i] = &args[i].val.pvalue;
break;
default:
abort(); /* Whoa! We're seriously hosed */
break;
}
}
if (ffi_prep_cif(&cif, FFI_DEFAULT_ABI, vc+1,
&ffi_type_uint, types) == FFI_OK) {
ffi_call(&cif, (void (*)()) printf, &result, values);
} else {
PyErr_SetString(PyExc_RuntimeError, "Whoa!!!!!");
free(types);
free(values);
free(args);
return NULL;
}
free(types);
free(values);
free(args);
}
/* The function */
int printf(const char *fmt, ...);
Much to your amazement, it even seems to work if you try it:
>>> import example
>>> example.printf("Grade: %s %d/60 = %0.2f%%\n", "Dave", 47, 47.0*100/60)
Grade: Dave 47/60 = 78.33%
>>>
Of course, there are still some limitations to consider:
>>> example.printf("la de da de da %s", 42)
Segmentation fault (core dumped)
And, on this note, we leave further exploration of libffi to the reader as an exercise. Although Python has been used as an example, most of the techniques in this section can be extrapolated to other language modules with a bit of work. The only details you need to know is how the extra arguments are accessed in each target language. For example, in the Python module, we used the special varargs variable to get these arguments. Modules such as Tcl8 and Perl5 simply provide an argument number for the first extra argument. This can be used to index into an array of passed arguments to get values. Please consult the chapter on each language module for more details.
Closely related to variable length argument wrapping, you may encounter functions that accept a parameter of type va_list. For example:
int vprintf(const char *fmt, va_list ap);
As far as we know, there is no obvious way to wrap these functions with SWIG. This is because there is no documented way to assemble the proper va_list structure (there are no C library functions to do it and the contents of va_list are opaque). Not only that, the contents of a va_list structure are closely tied to the underlying call-stack. It's not clear that exporting a va_list would have any use or that it would work at all.
A workaround can be implemented by writing a simple varargs C wrapper and then using the techniques discussed earlier in this chapter for varargs. Below is a simple wrapper for vprintf renamed so that it can still be called as vprintf from your target language. The %varargs used in the example restricts the function to taking one string argument.
%{
int vprintf(const char *fmt, va_list ap);
%}
%varargs(const char *) my_vprintf;
%rename(vprintf) my_vprintf;
%inline %{
int my_vprintf(const char *fmt, ...) {
va_list ap;
int result;
va_start(ap, fmt);
result = vprintf(fmt, ap);
va_end(ap);
return result;
}
%}
Wrapping of C++ member functions that accept a variable number of arguments presents a number of challenges. By far, the easiest way to handle this is to use the %varargs directive. This is portable and it fully supports classes much like the %rename directive. For example:
%varargs (10, char * = NULL) Foo::bar;
class Foo {
public:
virtual void bar(char *arg, ...); // gets varargs above
};
class Spam: public Foo {
public:
virtual void bar(char *arg, ...); // gets varargs above
};
%varargs also works with constructors, operators, and any other C++ programming construct that accepts variable arguments.
Doing anything more advanced than this is likely to involve a serious world of pain. In order to use a library like libffi, you will need to know the underlying calling conventions and details of the C++ ABI. For instance, the details of how this is passed to member functions as well as any hidden arguments that might be used to pass additional information. These details are implementation specific and may differ between compilers and even different versions of the same compiler. Also, be aware that invoking a member function is further complicated if it is a virtual method. In this case, invocation might require a table lookup to obtain the proper function address (although you might be able to obtain an address by casting a bound pointer to a pointer to function as described in the C++ ARM section 18.3.4).
If you do decide to change the underlying action code, be aware that SWIG always places the this pointer in arg1. Other arguments are placed in arg2, arg3, and so forth. For example:
%feature("action") Foo::bar {
...
result = arg1->bar(arg2, arg3, etc.);
...
}
Given the potential to shoot yourself in the foot, it is probably easier to reconsider your design or to provide an alternative interface using a helper function than it is to create a fully general wrapper to a varargs C++ member function.
This chapter has provided a number of techniques that can be used to address the problem of variable length argument wrapping. If you care about portability and ease of use, the %varargs directive is probably the easiest way to tackle the problem. However, using typemaps, it is possible to do some very advanced kinds of wrapping.
One point of discussion concerns the structure of the libffi examples in the previous section. Looking at that code, it is not at all clear that this is the easiest way to solve the problem. However, there are a number of subtle aspects of the solution to consider--mostly concerning the way in which the problem has been decomposed. First, the example is structured in a way that tries to maintain separation between wrapper-specific information and the declaration of the function itself. The idea here is that you might structure your interface like this:
%typemap(const char *fmt, ...) {
...
}
%feature("action") traceprintf {
...
}
/* Include some header file with traceprintf in it */
%include "someheader.h"
Second, careful scrutiny will reveal that the typemaps involving (...) have nothing whatsoever to do with the libffi library. In fact, they are generic with respect to the way in which the function is actually called. This decoupling means that it will be much easier to consider other library alternatives for making the function call. For instance, if libffi wasn't supported on a certain platform, you might be able to use something else instead. You could use conditional compilation to control this:
#ifdef USE_LIBFFI
%feature("action") printf {
...
}
#endif
#ifdef USE_OTHERFFI
%feature("action") printf {
...
}
#endif
Finally, even though you might be inclined to just write a hand-written wrapper for varargs functions, the techniques used in the previous section have the advantage of being compatible with all other features of SWIG such as exception handling.
As a final word, some C programmers seem to have the assumption that the wrapping of variable length argument functions is an easily solved problem. However, this section has hopefully dispelled some of these myths. All things being equal, you are better off avoiding variable length arguments if you can. If you can't avoid them, please consider some of the simple solutions first. If you can't live with a simple solution, proceed with caution. At the very least, make sure you carefully read the section "A7.3.2 Function Calls" in Kernighan and Ritchie and make sure you fully understand the parameter passing conventions used for varargs. Also, be aware of the platform dependencies and reliability issues that this will introduce. Good luck.
During compilation, SWIG may generate a variety of warning messages. For example:
example.i:16: Warning 501: Overloaded declaration ignored. bar(double) example.i:15: Warning 501: Previous declaration is bar(int)
Typically, warning messages indicate non-fatal problems with the input where the generated wrapper code will probably compile, but it may not work like you expect.
All warning messages have a numeric code that is shown in the warning message itself. To suppress the printing of a warning message, a number of techniques can be used. First, you can run SWIG with the -w command line option. For example:
% swig -python -w501 example.i % swig -python -w501,505,401 example.i
Alternatively, warnings can be suppressed by inserting a special preprocessor pragma into the input file:
%module example #pragma SWIG nowarn=501 #pragma SWIG nowarn=501,505,401
Finally, code-generation warnings can be disabled on a declaration by declaration basis using the %warnfilter directive. For example:
%module example %warnfilter(501) foo; ... int foo(int); int foo(double); // Silently ignored.
The %warnfilter directive has the same semantics as other declaration modifiers like %rename, %ignore and %feature, see the %feature directive section. For example, if you wanted to suppress a warning for a method in a class hierarchy, you could do this:
%warnfilter(501) Object::foo;
class Object {
public:
int foo(int);
int foo(double); // Silently ignored
...
};
class Derived : public Object {
public:
int foo(int);
int foo(double); // Silently ignored
...
};
Warnings can be suppressed for an entire class by supplying a class name. For example:
%warnfilter(501) Object;
class Object {
public:
... // All 501 warnings ignored in class
};
There is no option to suppress all SWIG warning messages. The warning messages are there for a reason---to tell you that something may be broken in your interface. Ignore the warning messages at your own peril.
Some warning messages are disabled by default and are generated only to provide additional diagnostics. These warnings can be turned on using the -Wextra option. For example:
% swig -Wextra -python example.i
To selectively turn on extra warning messages, you can use the directives and options in the previous section--simply add a "+" to all warning numbers. For example:
% swig -w+309,+452 example.i
or in your interface file use either
#pragma SWIG nowarn=+309,+452
or
%warnfilter(+309,+452) foo;
Note: selective enabling of warnings with %warnfilter overrides any global settings you might have made using -w or #pragma.
You can of course also enable all warnings and suppress a select few, for example:
% swig -Wextra -w309,452 example.i
The warnings on the right take precedence over the warnings on the left, so in the above example -Wextra adds numerous warnings including 452, but then -w309,452 overrides this and so 452 is suppressesed.
If you would like all warnings to appear, regardless of the warning filters used, then use the -Wall option. The -Wall option also turns on the extra warnings that -Wextra adds, however, it is subtely different. When -Wall is used, it also disables all other warning filters, that is, any warnings suppressed or added in %warnfilter, #pragma SWIG nowarn or the -w option.
Warning messages can be issued from an interface file using a number of directives. The %warn directive is the most simple:
%warn "900:This is your last warning!"
All warning messages are optionally prefixed by the warning number to use. If you are generating your own warnings, make sure you don't use numbers defined in the table at the end of this section.
The %ignorewarn directive is the same as %ignore except that it issues a warning message whenever a matching declaration is found. For example:
%ignorewarn("362:operator= ignored") operator=;
Warning messages can be associated with typemaps using the warning attribute of a typemap declaration. For example:
%typemap(in, warning="901:You are really going to regret this usage of $1_type $1_name") blah * {
...
}
In this case, the warning message will be printed whenever the typemap is actually used and the special variables will be expanded as appropriate, for example:
example.i:23: Warning 901: You are really going to regret this usage of blah * self example.i:24: Warning 901: You are really going to regret this usage of blah * stuff
The swigwarn.swg file that is installed with SWIG contains symbol constants that could also be used in %warnfilter and #pragma SWIG nowarn. For example this file contains the following line:
%define SWIGWARN_TYPE_UNDEFINED_CLASS 401 %enddef
so SWIGWARN_TYPE_UNDEFINED_CLASS could be used instead of 401, for example:
#pragma SWIG nowarn=SWIGWARN_TYPE_UNDEFINED_CLASS
or
%warnfilter(SWIGWARN_TYPE_UNDEFINED_CLASS) Foo;
The ability to suppress warning messages is really only provided for advanced users and is not recommended in normal use. You are advised to modify your interface to fix the problems highlighted by the warnings wherever possible instead of suppressing warnings.
Certain types of SWIG problems are errors. These usually arise due to parsing errors (bad syntax) or semantic problems for which there is no obvious recovery. There is no mechanism for suppressing error messages.
Warnings can be handled as errors by using the -Werror command line option. This will cause SWIG to exit with a non successful exit code if a warning is encountered.
The output format for both warnings and errors can be selected for integration with your favourite IDE/editor. Editors and IDEs can usually parse error messages and if in the appropriate format will easily take you directly to the source of the error. The standard format is used by default except on Windows where the Microsoft format is used by default. These can be overridden using command line options, for example:
$ swig -python -Fstandard example.i example.i:4: Syntax error in input. $ swig -python -Fmicrosoft example.i example.i(4) : Syntax error in input.
These numbers can be used by your own application.
The ability to control warning messages was first added to SWIG-1.3.12.
Each invocation of SWIG requires a module name to be specified. The module name is used to name the resulting target language extension module. Exactly what this means and what the name is used for depends on the target language, for example the name can define a target language namespace or merely be a useful name for naming files or helper classes. Essentially, a module comprises target language wrappers for a chosen collection of global variables/functions, structs/classes and other C/C++ types.
The module name can be supplied in one of two ways. The first is to specify it with the special %module directive. This directive must appear at the beginning of the interface file. The general form of this directive is:
%module(option1="value1",option2="value2",...) modulename
where the modulename is mandatory and the options add one or more optional additional features. Typically no options are specified, for example:
%module mymodule
The second way to specify the module name is with the -module command line option, for example -module mymodule. If the module name is supplied on the command line, it overrides the name specified by the %module directive.
When first working with SWIG, users commonly start by creating a single module. That is, you might define a single SWIG interface that wraps some set of C/C++ code. You then compile all of the generated wrapper code together and use it. For large applications, however, this approach is problematic---the size of the generated wrapper code can be rather large. Moreover, it is probably easier to manage the target language interface when it is broken up into smaller pieces.
This chapter describes the problem of using SWIG in programs where you want to create a collection of modules. Each module in the collection is created via separate invocations of SWIG.
The basic usage case with multiple modules is when modules do not have cross-references (ie. when wrapping multiple independent C APIs). In that case, swig input files should just work out of the box - you simply create multiple wrapper .cxx files, link them into your application, and insert/load each in the scripting language runtime as you would do for the single module case.
A bit more complex is the case in which modules need to share information. For example, when one module extends the class of another by deriving from it:
// File: base.h
class base {
public:
int foo();
};
// File: base_module.i
%module base_module
%{
#include "base.h"
%}
%include "base.h"
// File: derived_module.i
%module derived_module
%import "base_module.i"
%inline %{
class derived : public base {
public:
int bar();
};
%}
To create the wrapper properly, module derived_module needs to know about the base class and that its interface is covered in another module. The line %import "base_module.i" lets SWIG know exactly that. Oftentimes the .h file is passed to %import instead of the .i, which unfortunately doesn't work for all language modules. For example, Python requires the name of module that the base class exists in so that the proxy classes can fully inherit the base class's methods. Typically you will get a warning when the module name is missing, eg:
derived_module.i:8: Warning 401: Base class 'base' ignored - unknown module name for base. Either import the appropriate module interface file or specify the name of the module in the %import directive.
It is sometimes desirable to import the header file rather than the interface file and overcome the above warning. For example in the case of the imported interface being quite large, it may be desirable to simplify matters and just import a small header file of dependent types. This can be done by specifying the optional module attribute in the %import directive. The derived_module.i file shown above could be replaced with the following:
// File: derived_module.i
%module derived_module
%import(module="base_module") "base.h"
%inline %{
class derived : public base {
public:
int bar();
};
Note that "base_module" is the module name and is the same as that specified in %module in base_module.i as well as the %import in derived_module.i.
Another issue to beware of is that multiple dependent wrappers should not be linked/loaded in parallel from multiple threads as SWIG provides no locking - for more on that issue, read on.
Many of SWIG's target languages generate a set of functions commonly known as the "SWIG runtime." These functions are primarily related to the runtime type system which checks pointer types and performs other tasks such as proper casting of pointer values in C++. As a general rule, the statically typed target languages, such as Java, use the language's built in static type checking and have no need for a SWIG runtime. All the dynamically typed / interpreted languages rely on the SWIG runtime.
The runtime functions are private to each SWIG-generated module. That is, the runtime functions are declared with "static" linkage and are visible only to the wrapper functions defined in that module. The only problem with this approach is that when more than one SWIG module is used in the same application, those modules often need to share type information. This is especially true for C++ programs where SWIG must collect and share information about inheritance relationships that cross module boundaries.
To solve the problem of sharing information across modules, a pointer to the type information is stored in a global variable in the target language namespace. During module initialization, type information is loaded into the global data structure of type information from all modules.
There are a few trade offs with this approach. This type information is global across all SWIG modules loaded, and can cause type conflicts between modules that were not designed to work together. To solve this approach, the SWIG runtime code uses a define SWIG_TYPE_TABLE to provide a unique type table. This behavior can be enabled when compiling the generated _wrap.cxx or _wrap.c file by adding -DSWIG_TYPE_TABLE=myprojectname to the command line argument.
Then, only modules compiled with SWIG_TYPE_TABLE set to myprojectname will share type information. So if your project has three modules, all three should be compiled with -DSWIG_TYPE_TABLE=myprojectname, and then these three modules will share type information. But any other project's types will not interfere or clash with the types in your module.
Another issue relating to the global type table is thread safety. If two modules try and load at the same time, the type information can become corrupt. SWIG currently does not provide any locking, and if you use threads, you must make sure that modules are loaded serially. Be careful if you use threads and the automatic module loading that some scripting languages provide. One solution is to load all modules before spawning any threads, or use SWIG_TYPE_TABLE to separate type tables so they do not clash with each other.
Lastly, SWIG uses a #define SWIG_RUNTIME_VERSION, located in Lib/swigrun.swg and near the top of every generated module. This number gets incremented when the data structures change, so that SWIG modules generated with different versions can peacefully coexist. So the type structures are separated by the (SWIG_TYPE_TABLE, SWIG_RUNTIME_VERSION) pair, where by default SWIG_TYPE_TABLE is empty. Only modules compiled with the same pair will share type information.
As described in The run-time type checker, the functions SWIG_TypeQuery, SWIG_NewPointerObj, and others sometimes need to be called. Calling these functions from a typemap is supported, since the typemap code is embedded into the _wrap.c file, which has those declarations available. If you need to call the SWIG run-time functions from another C file, there is one header you need to include. To generate the header that needs to be included, run the following command:
$ swig -python -external-runtime <filename>
The filename argument is optional and if it is not passed, then the default filename will be something like swigpyrun.h, depending on the language. This header file should be treated like any of the other _wrap.c output files, and should be regenerated when the _wrap files are. After including this header, your code will be able to call SWIG_TypeQuery, SWIG_NewPointerObj, SWIG_ConvertPtr and others. The exact argument parameters for these functions might differ between language modules; please check the language module chapters for more information.
Inside this header the functions are declared static and are included inline into the file, and thus the file does not need to be linked against any SWIG libraries or code (you might still need to link against the language libraries like libpython-2.3). Data is shared between this file and the _wrap.c files through a global variable in the scripting language. It is also possible to copy this header file along with the generated wrapper files into your own package, so that you can distribute a package that can be compiled without SWIG installed (this works because the header file is self-contained, and does not need to link with anything).
This header will also use the -DSWIG_TYPE_TABLE described above, so when compiling any code which includes the generated header file should define the SWIG_TYPE_TABLE to be the same as the module whose types you are trying to access.
When working with multiple SWIG modules, you should take care not to use static libraries. For example, if you have a static library libfoo.a and you link a collection of SWIG modules with that library, each module will get its own private copy of the library code inserted into it. This is very often NOT what you want and it can lead to unexpected or bizarre program behavior. When working with dynamically loadable modules, you should try to work exclusively with shared libraries.
Due to the complexity of working with shared libraries and multiple modules, it might be a good idea to consult an outside reference. John Levine's "Linkers and Loaders" is highly recommended.
Using multiple modules with the %import directive is the most common approach to modularising large projects. In this way a number of different wrapper files can be generated, thereby avoiding the generation of a single large wrapper file. There are a couple of alternative solutions for reducing the size of a wrapper file through the use of command line options and features.
-fcompact
This command line option will compact the size of the wrapper file
without changing the code generated into the wrapper file. It simply
removes blank lines and joins lines of code together. This is useful
for compilers that have a maximum file size that can be handled.
-fvirtual
This command line option will remove the generation of superfluous
virtual method wrappers. Consider the following inheritance hierarchy:
struct Base {
virtual void method();
...
};
struct Derived : Base {
virtual void method();
...
};
Normally wrappers are generated for both methods, whereas this command line option will suppress the generation of a wrapper for Derived::method. Normal polymorphic behaviour remains as Derived::method will still be called should you have a Derived instance and call the wrapper for Base::method.
%feature("compactdefaultargs")
This feature can reduce the number of wrapper methods when wrapping
methods with default arguments. The section on
default arguments discusses the feature and its limitations.
ccache-swig - a fast compiler cache
ccache-swig [OPTION]
ccache-swig <compiler> [COMPILER OPTIONS]
<compiler> [COMPILER OPTIONS]
ccache-swig is a compiler cache. It speeds up re-compilation of C/C++/SWIG code by caching previous compiles and detecting when the same compile is being done again. ccache-swig is ccache plus support for SWIG. ccache and ccache-swig are used interchangeably in this document.
Here is a summary of the options to ccache-swig.
-s show statistics summary -z zero statistics -c run a cache cleanup -C clear the cache completely -F <n> set maximum files in cache -M <n> set maximum size of cache (use G, M or K) -h this help page -V print version number
These options only apply when you invoke ccache as "ccache-swig". When invoked as a compiler none of these options apply. In that case your normal compiler options apply and you should refer to your compilers documentation.
There are two ways to use ccache. You can either prefix your compile commands with "ccache-swig" or you can create a symbolic link between ccache-swig and the names of your compilers. The first method is most convenient if you just want to try out ccache or wish to use it for some specific projects. The second method is most useful for when you wish to use ccache for all your compiles.
To install for usage by the first method just copy ccache-swig to somewhere in your path.
To install for the second method do something like this:
cp ccache-swig /usr/local/bin/ ln -s /usr/local/bin/ccache-swig /usr/local/bin/gcc ln -s /usr/local/bin/ccache-swig /usr/local/bin/g++ ln -s /usr/local/bin/ccache-swig /usr/local/bin/cc ln -s /usr/local/bin/ccache-swig /usr/local/bin/swigThis will work as long as /usr/local/bin comes before the path to gcc (which is usually in /usr/bin). After installing you may wish to run "which gcc" to make sure that the correct link is being used.
Note! Do not use a hard link, use a symbolic link. A hardlink will cause "interesting" problems.
When run as a compiler front end ccache usually just takes the same command line options as the compiler you are using. The only exception to this is the option '--ccache-skip'. That option can be used to tell ccache that the next option is definitely not a input filename, and should be passed along to the compiler as-is.
The reason this can be important is that ccache does need to parse the command line and determine what is an input filename and what is a compiler option, as it needs the input filename to determine the name of the resulting object file (among other things). The heuristic ccache uses in this parse is that any string on the command line that exists as a file is treated as an input file name (usually a C file). By using --ccache-skip you can force an option to not be treated as an input file name and instead be passed along to the compiler as a command line option.
ccache uses a number of environment variables to control operation. In most cases you won't need any of these as the defaults will be fine.
By default ccache has a one gigabyte limit on the cache size and no maximum number of files. You can set a different limit using the "ccache -M" and "ccache -F" options, which set the size and number of files limits.
When these limits are reached ccache will reduce the cache to 20% below the numbers you specified in order to avoid doing the cache clean operation too often.
By default on most platforms ccache will compress all files it puts into the cache using the zlib compression. While this involves a negligible performance slowdown, it significantly increases the number of files that fit in the cache. You can turn off compression setting the CCACHE_NOCOMPRESS environment variable.
The basic idea is to detect when you are compiling exactly the same code a 2nd time and use the previously compiled output. You detect that it is the same code by forming a hash of:
These are hashed using md4 (a strong hash) and a cache file is formed based on that hash result. When the same compilation is done a second time ccache is able to supply the correct compiler output (including all warnings etc) from the cache.
ccache has been carefully written to always produce exactly the same compiler output that you would get without the cache. If you ever discover a case where ccache changes the output of your compiler then please let me know.
distcc is a very useful program for distributing compilation across a range of compiler servers. It is often useful to combine distcc with ccache, so that compiles that are done are sped up by distcc, but that ccache avoids the compile completely where possible.
To use distcc with ccache I recommend using the CCACHE_PREFIX option. You just need to set the environment variable CCACHE_PREFIX to 'distcc' and ccache will prefix the command line used with the compiler with the command 'distcc'.
A group of developers can increase the cache hit rate by sharing a cache directory. The hard links however cause unwanted side effects, as all links to a cached file share the file's modification timestamp. This results in false dependencies to be triggered by timestamp-based build systems whenever another user links to an existing file. Typically, users will see that their libraries and binaries are relinked without reason. To share a cache without side effects, the following conditions need to be met:
ccache was inspired by the compilercache shell script script written by Erik Thiele and I would like to thank him for an excellent piece of work. See http://www.erikyyy.de/compilercache/ for the Erik's scripts. ccache-swig is a port of the original ccache with support added for use with SWIG.
I wrote ccache because I wanted to get a bit more speed out of a compiler cache and I wanted to remove some of the limitations of the shell-script version.
The biggest differences between Erik's compilercache script and ccache are:
Thanks to the following people for their contributions to ccache
ccache was written by Andrew Tridgell http://samba.org/~tridge/. ccache was adapted to create ccache-swig for use with SWIG by William Fulton.
If you wish to report a problem or make a suggestion then please email the SWIG developers on the swig-devel mailing list, see http://www.swig.org/mail.html
ccache is released under the GNU General Public License version 2 or later. Please see the file COPYING for license details.
This chapter describes SWIG's support of Allegro Common Lisp. Allegro CL is a full-featured implementation of the Common Lisp language standard that includes many vendor-specific enhancements and add-on modules for increased usability.
One such module included in Allegro CL is the Foreign Functions Interface (FFI). This module, tailored primarily toward interfacing with C/C++ and, historically, Fortran, provides a means by which compiled foreign code can be loaded into a running lisp environment and executed. The interface supports the calling of foreign functions and methods, allows for executing lisp routines from foreign code (callbacks), and the passing of data between foreign and lisp code.
The goal of this module is to make it possible to quickly generate the necessary foreign function definitions so one can make use of C/C++ foreign libraries directly from lisp without the tedium of having to code them by hand. When necessary, it will also generate further C/C++ code that will need to be linked with the intended library for proper interfacing from lisp. It has been designed with an eye toward flexibility. Some foreign function calls may release the heap, while other should not. Some foreign functions should automatically convert lisp strings into native strings, while others should not. These adjustments and many more are possible with the current module.
It is significant to note that, while this is a vendor-specific module, we would like to acknowledge the current and ongoing work by developers in the open source lisp community that are working on similar interfaces to implementation-independent foreign function interfaces (UFFI or CFFI, for example). Such work can only benefit the lisp community, and we would not be unhappy to see some enterprising folk use this work to add to it.
If you're reading this, you must have some library you need to generate an interface for. In order for SWIG to do this work, however, it needs a bit of information about how it should go about creating your interface, and what you are interfacing to.
SWIG expects a description of what in the foreign interface you wish to connect to. It must consisting of C/C++ declarations and special SWIG directives. SWIG can be furnished with a header file, but an interface can also be generated without library headers by supplying a simple text file--called the interface file, which is typically named with a .i extension--containing any foreign declarations of identifiers you wish to use. The most common approach is to use a an interface file with directives to parse the needed headers. A straight parse of library headers will result in usable code, but SWIG directives provides much freedom in how a user might tailor the generated code to their needs or style of coding.
Note that SWIG does not require any function definitions; the declarations of those functions is all that is necessary. Be careful when tuning the interface as it is quite possible to generate code that will not load or compile.
An example interface file is shown below. It makes use of two SWIG directives, one of which requests that the declarations in a header file be used to generate part of the interface, and also includes an additional declaration to be added.
%module example %include "header.h" int fact(int n);
The contents of header.h are very simple:
int fact(char *statement); // pass it a fact, and it will rate it.
The contents of example.cl will look like this:
(defpackage :example
(:use :common-lisp :swig :ff :excl))
... helper routines for defining the interface ...
(swig-in-package ())
(swig-defun ("fact")
((PARM0_statement cl:string (* :char) ))
(:returning (:int )
:strings-convert t)
(let ((SWIG_arg0 PARM0_statement))
(swig-ff-call SWIG_arg0)))
(swig-defun ("fact")
((PARM0_n cl:integer :int ))
(:returning (:int )
:strings-convert t)
(let ((SWIG_arg0 PARM0_n))
(swig-ff-call SWIG_arg0)))
(swig-dispatcher ("fact" :type :function :arities (1)))
The generated file contains calls to internal swig helper functions. In this case there are two calls to swig-defun. These calls will expand into code that will make the appropriate definitions using the Allegro FFI. Note also, that this code is erroneous. Function overloading is not supported in C, and this code will not compile even though SWIG did not complain.
In order to generate a C interface to Allegro CL using this code run swig using the -allegrocl option, as below:
% swig -allegrocl example.i
When building an interface to C++ code, include the -c++ option:
% swig -allegrocl -c++ example.i
As a result of running one of the above commands, a file named example.cl will be generated containing the lisp side of the interface. As well, a file example_wrap.cxx is also generated, containing C/C++ wrapper code to facilitate access to C++ methods, enumeration values, and constant values. Wrapper functions are necessary in C++ due to the lack of a standard for mangling the names of symbols across all C++ compilers. These wrapper functions are exported from the shared library as appropriate, using the C name mangling convention. The lisp code that is generated will interface to your foreign library through these wrappers.
It is possible to disable the creation of the .cxx file when generating a C interface by using the -nocwrap command-line argument. For interfaces that don't contain complex enum or constant expressions, contain nested struct/union declarations, or doesn't need to use many of the SWIG customization featuers, this will result in a more streamlined, direct interface to the intended module.
The generated wrapper file is below. It contains very simple wrappers by default, that simply pass the arguments to the actual function.
... lots of SWIG internals ...
EXPORT int ACL___fact__SWIG_0 (char *larg1) {
int lresult = (int)0 ;
char *arg1 = (char *) 0 ;
int result;
arg1 = larg1;
try {
result = (int)fact(arg1);
lresult = result;
return lresult;
} catch (...) {
return (int)0;
}
}
EXPORT int ACL___fact__SWIG_1 (int larg1) {
int lresult = (int)0 ;
int arg1 ;
int result;
arg1 = larg1;
try {
result = (int)fact(arg1);
lresult = result;
return lresult;
} catch (...) {
return (int)0;
}
}
And again, the generated lisp code. Note that it differs from what is generated when parsing C code:
...
(swig-in-package ())
(swig-defmethod ("fact" "ACL___fact__SWIG_0" :type :function :arity 1)
((PARM0_statement cl:string (* :char) ))
(:returning (:int )
:strings-convert t)
(let ((SWIG_arg0 PARM0_statement))
(swig-ff-call SWIG_arg0)))
(swig-defmethod ("fact" "ACL___fact__SWIG_1" :type :function :arity 1)
((PARM0_n cl:integer :int ))
(:returning (:int )
:strings-convert t)
(let ((SWIG_arg0 PARM0_n))
(swig-ff-call SWIG_arg0)))
(swig-dispatcher ("fact" :type :function :arities (1)))
In this case, the interface generates two swig-defmethod forms and a swig-dispatcher form. This provides a single functional interface for all overloaded routines. A more detailed description of this features is to be found in the section titled Function overloading/Parameter defaulting.
In order to load a C++ interface, you will need to build a shared library from example_wrap.cxx. Be sure to link in the actual library you created the interface for, as well as any other dependent shared libraries. For example, if you intend to be able to call back into lisp, you will also need to link in the Allegro shared library. The library you create from the C++ wrapper will be what you then load into Allegro CL.
There are three Allegro CL specific command-line option:
swig -allegrocl [ options ] filename
-identifier-converter [name] - Binds the variable swig:*swig-identifier-convert*
in the generated .cl file to name.
This function is used to generate symbols
for the lisp side of the interface.
-cwrap - [default] Generate a .cxx file containing C wrapper function when
wrapping C code. The interface generated is similar to what is
done for C++ code.
-nocwrap - Explicitly turn off generation of .cxx wrappers for C code. Reasonable
for modules with simple interfaces. Can not handle all legal enum
and constant constructs, or take advantage of SWIG customization features.
-isolate - With this command-line argument, all lisp helper functions are defined
in a unique package named swig.<module-name> rather than
swig. This prevents conflicts when the module is
intended to be used with other swig generated interfaces that may,
for instance, make use of different identifier converters.
See Section 17.5 Identifier converter functions for more details.
It is often necessary to include user-defined code into the automatically generated interface files. For example, when building a C++ interface, example_wrap.cxx will likely not compile unless you add a #include "header.h" directive. This can be done using the SWIG %insert(section) %{ ...code... %} directive:
%module example
%{
#include "header.h"
%}
%include "header.h"
int fact(int n);
Additional sections have been added for inserting into the generated lisp interface file
Note that the block %{ ... %} is effectively a shortcut for %insert("header") %{ ... %}.
New users to SWIG are encouraged to read SWIG Basics , and SWIG and C++, for those interested in generating an interface to C++.
Writing lisp code that directly invokes functions at the foreign function interface level can be cumbersome. Data must often be translated between lisp and foreign types, data extracted from objects, foreign objects allocated and freed upon completion of the foreign call. Dealing with pointers can be unwieldy when it comes to keeping them distinct from other valid integer values.
We make an attempt to ease some of these burdens by making the interface to foreign code much more lisp-like, rather than C like. How this is done is described in later chapters. The layers themselves, appear as follows:
______________
| | (foreign side)
| Foreign Code | What we're generating an interface to.
|______________|
|
|
_______v______
| | (foreign side)
| Wrapper code | extern "C" wrappers calling C++
|______________| functions and methods.
|
. . . - - + - - . . .
_______v______
| | (lisp side)
| FFI Layer | Low level lisp interface. ff:def-foreign-call,
|______________| ff:def-foreign-variable
|
+----------------------------
_______v______ _______v______
| | | | (lisp side)
| Defuns | | Defmethods | wrapper for overloaded
|______________| |______________| functions or those with
(lisp side) | defaulted arguments
Wrapper for non-overloaded |
functions and methods _______v______
| | (lisp side)
| Defuns | dispatch function
|______________| to overloads based
on arity
These wrappers are as generated by SWIG default. The types of function parameters can be transformed in place using the CTYPE typemap. This is use for converting pass-by-value parameters to pass-by-reference where necessary. All wrapper parameters are then bound to local variables for possible transformation of values (see LIN typemap). Return values can be transformed via the OUT typemap.
These are the generated ff:def-foreign-call forms. No typemaps are applicable to this layer, but the %ffargs directive is available for use in .i files, to specify which keyword arguments should be specified for a given function.
%module ffargs %ffargs(strings_convert="nil",call_direct="t") foo; %ffargs(strings_convert="nil",release_heap=":never",optimize_for_space="t") bar; int foo(float f1, float f2); int foo(float f1, char c2); void bar(void *lisp_fn); char *xxx();
Generates:
(swig-in-package ())
(swig-defmethod ("foo" "ACL___foo__SWIG_0" :type :function :arity 2)
((PARM0_f1 cl:single-float :float )
(PARM1_f2 cl:single-float :float ))
(:returning (:int )
:call-direct t
:strings-convert nil)
(let ((SWIG_arg0 PARM0_f1))
(let ((SWIG_arg1 PARM1_f2))
(swig-ff-call SWIG_arg0 SWIG_arg1))))
(swig-defmethod ("foo" "ACL___foo__SWIG_1" :type :function :arity 2)
((PARM0_f1 cl:single-float :float )
(PARM1_c2 cl:character :char character))
(:returning (:int )
:call-direct t
:strings-convert nil)
(let ((SWIG_arg0 PARM0_f1))
(let ((SWIG_arg1 PARM1_c2))
(swig-ff-call SWIG_arg0 SWIG_arg1))))
(swig-dispatcher ("foo" :type :function :arities (2)))
(swig-defun ("bar" "ACL___bar__SWIG_0" :type :function)
((PARM0_lisp_fn (* :void) ))
(:returning (:void )
:release-heap :never
:optimize-for-space t
:strings-convert nil)
(let ((SWIG_arg0 PARM0_lisp_fn))
(swig-ff-call SWIG_arg0)))
(swig-defun ("xxx" "ACL___xxx__SWIG_0" :type :function)
(:void)
(:returning ((* :char) )
:strings-convert t)
(swig-ff-call))
%ffargs(strings_convert="t");
Is the only default value specified in allegrocl.swg to force the muffling of warnings about automatic string conversion when defining ff:def-foreign-call's.
These are simple defuns. There is no typechecking of arguments. Parameters are bound to local variables for possible transformation of values, such as pulling values out of instance slots or allocating temporary stack allocated structures, via the lin typemap. These arguments are then passed to the foreign-call (where typechecking may occur). The return value from this function can be manipulated via the lout typemap.
In the case of overloaded functions, mulitple layers are generated. First, all the overloads for a given name are separated out into groups based on arity, and are wrapped in defmethods. Each method calls a distinct wrapper function, but are themselves distinguished by the types of their arguments (see lispclass typemap). These are further wrapped in a dispatching function (defun) which will invoke the appropriate generic-function based on arity. This provides a single functional interface to all overloads. The return value from this function can be manipulated via the lout typemap.
Along with the described functional layering, when creating a .cxx wrapper, this module will generate getter and--if not immutable--setter, functions for variables and constants. If the -nocwrap option is used, defconstant and ff:def-foreign-variable forms will be generated for accessing constants and global variables. These, along with the defuns listed above are the intended API for calling into the foreign module.
All non-primitive types (Classes, structs, unions, and typedefs involving same) have a corresponding foreign-type defined on the lisp side via ff:def-foreign-type.
All non-primitive types are further represented by a CLOS class, created via defclass. An attempt is made to create the same class hierarchy, with all classes inheriting directly or indirectly from ff:foreign-pointer. Further, wherever it is apparent, all pointers returned from foreign code are wrapped in a CLOS instance of the appropriate class. For ff:def-foreign-calls that have been defined to expect a :foreign-address type as argument, these CLOS instances can legally be passed and the pointer to the C++ object automatically extracted. This is a natural feature of Allegro's foreign function interface.
In this section is described how particular C/C++ constructs are translated into lisp.
C++ namespaces are translated into Lisp packages by SWIG. The Global namespace is mapped to a package named by the %module directive or the -module command-line argument. Further namespaces are generated by the swig-defpackage utility function and given names based on Allegro CLs nested namespace convention. For example:
%module foo
%{
#include "foo.h"
%}
%include "foo.h"
namespace car {
...
namespace tires {
int do_something(int n);
}
}
Generates the following code.
(defpackage :foo
(:use :common-lisp :swig :ff :excl))
...
(swig-defpackage ("car"))
(swig-defpackage ("car" "tires"))
...
(swig-in-package ("car" "tires"))
(swig-defun ("do_something" "ACL_car_tires__do_something__SWIG_0" :type :function)
((PARM0_n :int ))
(:returning (:int )
:strings-convert t)
(let ((SWIG_arg0 PARM0_n))
(swig-ff-call SWIG_arg0)))
The above interface file would cause packages foo, foo.car, and foo.car.tires to be created. One would find the function wrapper for do_something defined in the foo.car.tires package(*).
(*) Except for the package named by the module, all namespace names are passed to the identifier-converter-function as strings with a :type of :namespace. It is the job of this function to generate the desired symbol, accounting for case preferences, additional naming cues, etc.
Note that packages created by swig-defpackage do not use the COMMON-LISP or EXCL package. This reduces possible conflicts when defining foreign types via the SWIG interface in all but the toplevel modules package. This may lead to confusion if, for example, the current package is foo.car.tires and you attempt to use a common-lisp function such as (car '(1 2 3).
Constants, as declared by the preprocessor #define macro or SWIG %constant directive, are included in SWIGs parse tree when it can be determined that they are, or could be reduced to, a literal value. Such values are translated into defconstant forms in the generated lisp wrapper when the -nocwrap command-line options is used. Else, wrapper functions are generated as in the case of variable access (see section below).
Here are examples of simple preprocessor constants when using -nocwrap.
#define A 1 => (swig-defconstant "A" 1)
#define B 'c' => (swig-defconstant "B" #\c)
#define C B => (swig-defconstant "C" #\c)
#define D 1.0e2 => (swig-defconstant "D" 1.0d2)
#define E 2222 => (swig-defconstant "E" 2222)
#define F (unsigned int)2222 => no code generated
#define G 1.02e2f => (swig-defconstant "G" 1.02f2)
#define H foo => no code generated
Note that where SWIG is unable to determine if a constant is a literal, no node is added to the SWIG parse tree, and so no values can be generated.
For preprocessor constants containing expressions which can be reduced to literal values, nodes are created, but with no simplification of the constant value. A very very simple infix to prefix converter has been implemented that tries to do the right thing for simple cases, but does not for more complex expressions. If the literal parser determines that something is wrong, a warning will be generated and the literal expression will be included in the generated code, but commented out.
#define I A + E => (swig-defconstant "I" (+ 1 2222))
#define J 1|2 => (swig-defconstant "J" (logior 1 2))
#define Y 1 + 2 * 3 + 4 => (swig-defconstant "Y" (* (+ 1 2) (+ 3 4)))
#define Y1 (1 + 2) * (3 + 4) => (swig-defconstant "Y1" (* (+ 1 2) (+ 3 4)))
#define Y2 1 * 2 + 3 * 4 => (swig-defconstant "Y2" (* 1 (+ 2 3) 4)) ;; WRONG
#define Y3 (1 * 2) + (3 * 4) => (swig-defconstant "Y3" (* 1 (+ 2 3) 4)) ;; WRONG
#define Z 1 + 2 - 3 + 4 * 5 => (swig-defconstant "Z" (* (+ 1 (- 2 3) 4) 5)) ;; WRONG
Users are cautioned to get to know their constants before use, or not use the -nocwrap command-line option.
For C wrapping, a def-foreign-variable call is generated for access to global variables.
When wrapping C++ code, both global and member variables, getter wrappers are generated for accessing their value, and if not immutable, setter wrappers as well. In the example below, note the lack of a setter wrapper for global_var, defined as const.
namespace nnn {
int const global_var = 2;
float glob_float = 2.0;
}
Generated code:
(swig-in-package ("nnn"))
(swig-defun ("global_var" "ACL_nnn__global_var_get__SWIG_0" :type :getter)
(:void)
(:returning (:int )
:strings-convert t)
(swig-ff-call))
(swig-defun ("glob_float" "ACL_nnn__glob_float_set__SWIG_0" :type :setter)
((PARM0_glob_float :float ))
(:returning (:void )
:strings-convert t)
(let ((SWIG_arg0 PARM0_glob_float))
(swig-ff-call SWIG_arg0)))
(swig-defun ("glob_float" "ACL_nnn__glob_float_get__SWIG_0" :type :getter)
(:void)
(:returning (:float )
:strings-convert t)
(swig-ff-call))
Note also, that where applicable, setter wrappers are implemented as setf methods on the getter function, providing a lispy interface to the foreign code.
user> (load "globalvar.dll")
; Foreign loading globalvar.dll.
t
user> (load "globalvar.cl")
; Loading c:\mikel\src\swig\test\globalvar.cl
t
user>
globalvar> (globalvar.nnn::global_var)
2
globalvar> (globalvar.nnn::glob_float)
2.0
globalvar> (setf (globalvar.nnn::glob_float) 3.0)
3.0
globalvar> (globalvar.nnn::glob_float)
3.0
In C, an enumeration value is an integer value, while in C++ an enumeration value is implicitly convertible to an integer value, but can also be distinguished by it's enum type. For each enum declaration a def-foreign-type is generated, assigning the enum a default type of :int. Users may adjust the foreign type of enums via SWIG typemaps .
Enum values are a bit trickier as they can be initialized using any valid C/C++ expression. In C with the -nocwrap command-line option, we handle the typical cases (simple integer initialization) and generate a defconstant form for each enum value. This has the advantage of it not being necessary to probe into foreign space to retrieve enum values. When generating a .cxx wrapper file, a more general solution is employed. A wrapper variable is created in the module_wrap.cxx file, and a ff:def-foreign-variable call is generated to retrieve it's value into lisp.
For example, the following header file
enum COL { RED, GREEN, BLUE };
enum FOO { FOO1 = 10, FOO2, FOO3 };
In -nocwrap mode, generates
(swig-def-foreign-type "COL" :int)
(swig-defconstant "RED" 0)
(swig-defconstant "GREEN" (+ #.(swig-insert-id "RED" () :type :constant) 1))
(swig-defconstant "BLUE" (+ #.(swig-insert-id "GREEN" () :type :constant) 1))
(swig-def-foreign-type "FOO" :int)
(swig-defconstant "FOO1" 10)
(swig-defconstant "FOO2" (+ #.(swig-insert-id "FOO1" () :type :constant) 1))
(swig-defconstant "FOO3" (+ #.(swig-insert-id "FOO2" () :type :constant) 1))
And when generating a .cxx wrapper
EXPORT const int ACL_ENUM___RED__SWIG_0 = RED;
EXPORT const int ACL_ENUM___GREEN__SWIG_0 = GREEN;
EXPORT const int ACL_ENUM___BLUE__SWIG_0 = BLUE;
EXPORT const int ACL_ENUM___FOO1__SWIG_0 = FOO1;
EXPORT const int ACL_ENUM___FOO2__SWIG_0 = FOO2;
EXPORT const int ACL_ENUM___FOO3__SWIG_0 = FOO3;
and
(swig-def-foreign-type "COL" :int)
(swig-defvar "RED" "ACL_ENUM___RED__SWIG_0" :type :constant)
(swig-defvar "GREEN" "ACL_ENUM___GREEN__SWIG_0" :type :constant)
(swig-defvar "BLUE" "ACL_ENUM___BLUE__SWIG_0" :type :constant)
(swig-def-foreign-type "FOO" :int)
(swig-defvar "FOO1" "ACL_ENUM___FOO1__SWIG_0" :type :constant)
(swig-defvar "FOO2" "ACL_ENUM___FOO2__SWIG_0" :type :constant)
(swig-defvar "FOO3" "ACL_ENUM___FOO3__SWIG_0" :type :constant)
One limitation in the Allegro CL foreign-types module, is that, without macrology, expressions may not be used to specify the dimensions of an array declaration. This is not a horrible drawback unless it is necessary to allocate foreign structures based on the array declaration using ff:allocate-fobject. When it can be determined that an array bound is a valid numeric value, SWIG will include this in the generated array declaration on the lisp side, otherwise the value will be included, but commented out.
Below is a comprehensive example, showing a number of legal C/C++ array declarations and how they are translated into foreign-type specifications in the generated lisp code.
#define MAX_BUF_SIZE 1024
namespace FOO {
int global_var1[13];
float global_var2[MAX_BUF_SIZE];
}
enum COLOR { RED = 10, GREEN = 20, BLUE, PURPLE = 50, CYAN };
namespace BAR {
char global_var3[MAX_BUF_SIZE + 1];
float global_var4[MAX_BUF_SIZE][13];
signed short global_var5[MAX_BUF_SIZE + MAX_BUF_SIZE];
int enum_var5[GREEN];
int enum_var6[CYAN];
COLOR enum_var7[CYAN][MAX_BUF_SIZE];
}
Generates:
(in-package #.*swig-module-name*)
(swig-defpackage ("FOO"))
(swig-defpackage ("BAR"))
(swig-in-package ())
(swig-def-foreign-type "COLOR" :int)
(swig-defvar "RED" "ACL_ENUM___RED__SWIG_0" :type :constant)
(swig-defvar "GREEN" "ACL_ENUM___GREEN__SWIG_0" :type :constant)
(swig-defvar "BLUE" "ACL_ENUM___BLUE__SWIG_0" :type :constant)
(swig-defvar "PURPLE" "ACL_ENUM___PURPLE__SWIG_0" :type :constant)
(swig-defvar "CYAN" "ACL_ENUM___CYAN__SWIG_0" :type :constant)
(swig-in-package ())
(swig-defconstant "MAX_BUF_SIZE" 1024)
(swig-in-package ("FOO"))
(swig-defun ("global_var1" "ACL_FOO__global_var1_get__SWIG_0" :type :getter)
(:void)
(:returning ((* :int) )
:strings-convert t)
(make-instance 'ff:foreign-pointer :foreign-address (swig-ff-call)))
(swig-defun ("global_var2" "ACL_FOO__global_var2_set__SWIG_0" :type :setter)
((global_var2 (:array :float 1024) ))
(:returning (:void )
:strings-convert t)
(let ((SWIG_arg0 global_var2))
(swig-ff-call SWIG_arg0)))
(swig-in-package ())
(swig-in-package ("BAR"))
(swig-defun ("global_var3" "ACL_BAR__global_var3_set__SWIG_0" :type :setter)
((global_var3 (:array :char #|1024+1|#) ))
(:returning (:void )
:strings-convert t)
(let ((SWIG_arg0 global_var3))
(swig-ff-call SWIG_arg0)))
(swig-defun ("global_var4" "ACL_BAR__global_var4_set__SWIG_0" :type :setter)
((global_var4 (:array (:array :float 13) 1024) ))
(:returning (:void )
:strings-convert t)
(let ((SWIG_arg0 global_var4))
(swig-ff-call SWIG_arg0)))
(swig-defun ("global_var4" "ACL_BAR__global_var4_get__SWIG_0" :type :getter)
(:void)
(:returning ((* (:array :float 13)) )
:strings-convert t)
(make-instance 'ff:foreign-pointer :foreign-address (swig-ff-call)))
(swig-defun ("global_var5" "ACL_BAR__global_var5_set__SWIG_0" :type :setter)
((global_var5 (:array :short #|1024+1024|#) ))
(:returning (:void )
:strings-convert t)
(let ((SWIG_arg0 global_var5))
(swig-ff-call SWIG_arg0)))
(swig-defun ("enum_var5" "ACL_BAR__enum_var5_set__SWIG_0" :type :setter)
((enum_var5 (:array :int #|GREEN|#) ))
(:returning (:void )
:strings-convert t)
(let ((SWIG_arg0 enum_var5))
(swig-ff-call SWIG_arg0)))
(swig-defun ("enum_var6" "ACL_BAR__enum_var6_set__SWIG_0" :type :setter)
((enum_var6 (:array :int #|CYAN|#) ))
(:returning (:void )
:strings-convert t)
(let ((SWIG_arg0 enum_var6))
(swig-ff-call SWIG_arg0)))
(swig-defun ("enum_var7" "ACL_BAR__enum_var7_set__SWIG_0" :type :setter)
((enum_var7 (:array (:array #.(swig-insert-id "COLOR" ()) 1024) #|CYAN|#) ))
(:returning (:void )
:strings-convert t)
(let ((SWIG_arg0 enum_var7))
(swig-ff-call SWIG_arg0)))
(swig-defun ("enum_var7" "ACL_BAR__enum_var7_get__SWIG_0" :type :getter)
(:void)
(:returning ((* (:array #.(swig-insert-id "COLOR" ()) 1024)) )
:strings-convert t)
(make-instance 'ff:foreign-pointer :foreign-address (swig-ff-call)))
Classes, unions, and structs are all treated the same way by the interface generator. For any of these objects, a def-foreign-type and a defclass form are generated. For every function that returns an object (or pointer/reference) of C/C++ type X, the wrapping defun (or defmethod) on the Lisp side will automatically wrap the pointer returned in an instance of the appropriate class. This makes it much easier to write and debug code than if pointers were passed around as a jumble of integer values.
The CLOS class schema generated by the interface mirrors the inheritance of the classes in foreign code, with the ff:foreign-pointer class at its root. ff:foreign-pointer is a thin wrapper for pointers that is made available by the foreign function interface. It's key benefit is that it may be passed as an argument to any ff:def-foreign-call that is expecting a pointer as the parameter.
All public fields will have accessor getter/setter functions generated for them, as appropriate. All public member functions will have wrapper functions generated.
We currently ignore anything that isn't public (i.e. private or protected), because the C++ compiler won't allow the wrapper functions to access such fields. Likewise, the interface does nothing for friend directives,
The def-foreign-type generated by the SWIG interface is currently incomplete. We can reliably generate the object layout of simple structs and unions; they can be allocated via ff:allocate-fobject, and their member variables accessed directly using the various ff:fslot-value-* functions. However, the layout of C++ classes is more complicated. Different compilers adjust class layout based on inheritance patterns, and the presence of virtual member functions. The size of member function pointers vary across compilers as well. As a result, it is recommended that users of any generated interface not attempt to access C++ instances via the foreign type system, but instead use the more robust wrapper functions.
SWIG provides support for dealing with templates, but by default, it will not generate any member variable or function wrappers for templated classes. In order to create these wrappers, you need to explicitly tell SWIG to instantiate them. This is done via the %template directive.
While no wrapper code is generated for accessing member variables, or calling member functions, type code is generated to include these templated classes in the foreign-type and CLOS class schema.
In C/C++ it is possible, via typedef, to have many names refer to the same type. In general, this is not a problem, though it can lead to confusion. Assume the below C++ header file:
class A {
int x;
int y;
};
typedef A Foo;
A *xxx(int i); /* sets A->x = A->y = i */
Foo *yyy(int i); /* sets Foo->x = Foo->y = i */
int zzz(A *inst = 0); /* return inst->x + inst->y */
The function zzz is an overloaded functions; the foreign function call to it will be wrapped in a generic-function whose argument will be checked against a type of A. Assuming a simple implementation, a call to xxx(1) will return a pointer to an A object, which will be wrapped in a CLOS instance of class A , and a call to yyy(1) will result in a CLOS instance of type Foo being returned. Without establishing a clear type relationship between Foo and A, an attempt to call zzz(yyy(1)) will result in an error.
We resolve this issue, by noting synonym relationships between types while generating the interface. A Primary type is selected (more on this below) from the candidate list of synonyms. For all other synonyms, intead of generating a distinct CLOS class definition, we generate a form that expands to:
The result is that all references to synonym types in foreign code, are wrapped in the same CLOS wrapper, and, in particular, method specialization in wrapping generic functions works as expected.
Given the above header file, synonym.h, a Lisp session would appear as follows:
CL-USER> (load "synonym.dll")
; Foreign loading synonym.dll.
t
CL-USER> (load "synonym.cl")
; Loading c:\mikel\src\swig\test\synonym.cl
t
CL-USER>
synonym> (setf a (xxx 3))
#<A nil #x3261a0 @ #x207299da>
synonym> (setf foo (yyy 10))
#<A nil #x3291d0 @ #x2072e982>
synonym> (zzz a)
6
synonym> (zzz foo)
20
synonym>
The choice of a primary type is selected by the following criteria from a set of synonym types.
For each possible argument combination, a distinct wrapper function is created in the .cxx file. On the Lisp side, a generic functions is defined for each possible arity the overloaded/defaulted call may have. Each distinct wrapper is then called from within a defmethod on the appropriate generic function. These are further wrapped inside a dispatch function that checks the number of arguments it is called with and passes them via apply to the appropriate generic-function. This allows for a single entry point to overloaded functions on the lisp side.
Example:
class A {
public:
int x;
int y;
};
float xxx(int i, int x = 0); /* return i * x */
float xxx(A *inst, int x); /* return x + A->x + A->y */
Creates the following three wrappers, for each of the possible argument combinations
EXPORT void ACL___delete_A__SWIG_0 (A *larg1) {
A *arg1 = (A *) 0 ;
arg1 = larg1;
try {
delete arg1;
} catch (...) {
}
}
EXPORT float ACL___xxx__SWIG_0 (int larg1, int larg2) {
float lresult = (float)0 ;
int arg1 ;
int arg2 ;
float result;
arg1 = larg1;
arg2 = larg2;
try {
result = (float)xxx(arg1,arg2);
lresult = result;
return lresult;
} catch (...) {
return (float)0;
}
}
EXPORT float ACL___xxx__SWIG_1 (int larg1) {
float lresult = (float)0 ;
int arg1 ;
float result;
arg1 = larg1;
try {
result = (float)xxx(arg1);
lresult = result;
return lresult;
} catch (...) {
return (float)0;
}
}
EXPORT float ACL___xxx__SWIG_2 (A *larg1, int larg2) {
float lresult = (float)0 ;
A *arg1 = (A *) 0 ;
int arg2 ;
float result;
arg1 = larg1;
arg2 = larg2;
try {
result = (float)xxx(arg1,arg2);
lresult = result;
return lresult;
} catch (...) {
return (float)0;
}
}
And the following foreign-function-call and method definitions on the lisp side:
(swig-defmethod ("xxx" "ACL___xxx__SWIG_0" :type :function :arity 2)
((PARM0_i cl:integer :int )
(PARM1_x cl:integer :int ))
(:returning (:float )
:strings-convert t)
(let ((SWIG_arg0 PARM0_i))
(let ((SWIG_arg1 PARM1_x))
(swig-ff-call SWIG_arg0 SWIG_arg1))))
(swig-defmethod ("xxx" "ACL___xxx__SWIG_1" :type :function :arity 1)
((PARM0_i cl:integer :int ))
(:returning (:float )
:strings-convert t)
(let ((SWIG_arg0 PARM0_i))
(swig-ff-call SWIG_arg0)))
(swig-defmethod ("xxx" "ACL___xxx__SWIG_2" :type :function :arity 2)
((PARM0_inst #.(swig-insert-id "A" () :type :class) (* #.(swig-insert-id "A" ())) )
(PARM1_x cl:integer :int ))
(:returning (:float )
:strings-convert t)
(let ((SWIG_arg0 PARM0_inst))
(let ((SWIG_arg1 PARM1_x))
(swig-ff-call SWIG_arg0 SWIG_arg1))))
(swig-dispatcher ("xxx" :type :function :arities (1 2)))
And their usage in a sample lisp session:
overload> (setf a (new_A))
#<A nil #x329268 @ #x206cf612>
overload> (setf (A_x a) 10)
10
overload> (setf (A_y a) 20)
20
overload> (xxx 1)
0.0
overload> (xxx 3 10)
30.0
overload> (xxx a 1)
31.0
overload> (xxx a 2)
32.0
overload>
Wrappers to defined C++ Operators are automatically renamed, using %rename, to the following defaults:
/* name conversion for overloaded operators. */
#ifdef __cplusplus
%rename(__add__) *::operator+;
%rename(__pos__) *::operator+();
%rename(__pos__) *::operator+() const;
%rename(__sub__) *::operator-;
%rename(__neg__) *::operator-() const;
%rename(__neg__) *::operator-();
%rename(__mul__) *::operator*;
%rename(__deref__) *::operator*();
%rename(__deref__) *::operator*() const;
%rename(__div__) *::operator/;
%rename(__mod__) *::operator%;
%rename(__logxor__) *::operator^;
%rename(__logand__) *::operator&;
%rename(__logior__) *::operator|;
%rename(__lognot__) *::operator~();
%rename(__lognot__) *::operator~() const;
%rename(__not__) *::operator!();
%rename(__not__) *::operator!() const;
%rename(__assign__) *::operator=;
%rename(__add_assign__) *::operator+=;
%rename(__sub_assign__) *::operator-=;
%rename(__mul_assign__) *::operator*=;
%rename(__div_assign__) *::operator/=;
%rename(__mod_assign__) *::operator%=;
%rename(__logxor_assign__) *::operator^=;
%rename(__logand_assign__) *::operator&=;
%rename(__logior_assign__) *::operator|=;
%rename(__lshift__) *::operator<<;
%rename(__lshift_assign__) *::operator<<=;
%rename(__rshift__) *::operator>>;
%rename(__rshift_assign__) *::operator>>=;
%rename(__eq__) *::operator==;
%rename(__ne__) *::operator!=;
%rename(__lt__) *::operator<;
%rename(__gt__) *::operator>;
%rename(__lte__) *::operator<=;
%rename(__gte__) *::operator>=;
%rename(__and__) *::operator&&;
%rename(__or__) *::operator||;
%rename(__preincr__) *::operator++();
%rename(__postincr__) *::operator++(int);
%rename(__predecr__) *::operator--();
%rename(__postdecr__) *::operator--(int);
%rename(__comma__) *::operator,();
%rename(__comma__) *::operator,() const;
%rename(__member_ref__) *::operator->;
%rename(__member_func_ref__) *::operator->*;
%rename(__funcall__) *::operator();
%rename(__aref__) *::operator[];
Name mangling occurs on all such renamed identifiers, so that wrapper name generated by B::operator= will be B___eq__ , i.e. <class-or-namespace>_ has been added. Users may modify these default names by adding %rename directives in their own .i files.
Operator overloading can be achieved by adding functions based on the mangled names of the function. In the following example, a class B is defined with a Operator== method defined. The swig %extend directive is used to add an overload method on Operator==.
class B {
public:
int x;
int y;
bool operator==(B const& other) const;
};
and
%module opoverload
%{
#include <fstream>
#include "opoverload.h"
%}
%{
bool B___eq__(B const *inst, int const x)
{
// insert the function definition into the wrapper code before
// the wrapper for it.
// ... do stuff ...
}
%}
%include "opoverload.h"
%extend B {
public:
bool __eq__(int const x) const;
};
Either operator can be called via a single call to the dispatch function:
opoverload> (B___eq__ x1 x2)
nil
opoverload> (B___eq__ x1 3)
nil
opoverload>
Variable length argument lists are not supported, by default. If such a function is encountered, a warning will generated to stderr. Varargs are supported via the SWIG %varargs directive. This directive allows you to specify a (finite) argument list which will be inserted into the wrapper in place of the variable length argument indicator. As an example, consider the function printf(). It's declaration would appear as follows:
See the following section on Variable Length arguments provides examples on how %varargs can be used, along with other ways such functions can be wrapped.
Each C++ wrapper includes a handler to catch any exceptions that may be thrown while in foreign code. This helps prevent simple C++ errors from killing the entire lisp process. There is currently no mechanism to have these exceptions forwarded to the lisp condition system, nor has any explicit support of the exception related SWIG typemaps been implemented.
Allegro CL does not support the passing of non-primitive foreign structures by value. As a result, SWIG must automatically detect and convert function parameters and return values to pointers whenever necessary. This is done via the use of typemaps, and should not require any fine tuning by the user, even for newly defined types.
SWIG Typemaps provide a powerful tool for automatically generating code to handle various menial tasks required of writing an interface to foreign code. The purpose of this section is to describe each of the typemaps used by the Allegro CL module. Please read the chapter on Typemaps for more information.
Every C++ wrapper generated by SWIG takes the following form:
return-val wrapper-name(parm0, parm1, ..., parmN)
{
return-val lresult; /* return value from wrapper */
<local-declaration>
... results; /* return value from function call */
<binding locals to parameters>
try {
result = function-name(local0, local1, ..., localN);
<convert and bind result to lresult>
return lresult;
catch (...) {
return (int)0;
}
the in typemap is used to generate code to convert parameters passed to C++ wrapper functions into the arguments desired for the call being wrapped. That is, it fills in the code for the <binding locals to parameters> section above. We use this map to automatically convert parameters passed by reference to the wrapper function into by-value arguments for the wrapped call, and also to convert boolean values, which are passed as integers from lisp (by default), into the appropriate type for the language of code being wrapped.
These are the default specifications for the IN typemap. Here, $input refers to the parameter code is being generated for, and $1 is the local variable to which it is being assigned. The default settings of this typemap are as follows:
%typemap(in) bool "$1 = (bool)$input;";
%typemap(in) char, unsigned char, signed char,
short, signed short, unsigned short,
int, signed int, unsigned int,
long, signed long, unsigned long,
float, double, long double, char *, void *, void,
enum SWIGTYPE, SWIGTYPE *,
SWIGTYPE[ANY], SWIGTYPE & "$1 = $input;";
%typemap(in) SWIGTYPE "$1 = *$input;";
The out typemap is used to generate code to form the return value of the wrapper from the return value of the wrapped function. This code is placed in the <convert and bind result to lresult> section of the above code diagram. It's default mapping is as follows:
%typemap(out) bool "$result = (int)$1;";
%typemap(out) char, unsigned char, signed char,
short, signed short, unsigned short,
int, signed int, unsigned int,
long, signed long, unsigned long,
float, double, long double, char *, void *, void,
enum SWIGTYPE, SWIGTYPE *,
SWIGTYPE[ANY], SWIGTYPE & "$result = $1;";
%typemap(out) SWIGTYPE "$result = new $1_type($1);";
This typemap is not used for code generation, but purely for the transformation of types in the parameter list of the wrapper function. It's primary use is to handle by-value to by-reference conversion in the wrappers parameter list. Its default settings are:
%typemap(ctype) bool "int";
%typemap(ctype) char, unsigned char, signed char,
short, signed short, unsigned short,
int, signed int, unsigned int,
long, signed long, unsigned long,
float, double, long double, char *, void *, void,
enum SWIGTYPE, SWIGTYPE *,
SWIGTYPE[ANY], SWIGTYPE & "$1_ltype";
%typemap(ctype) SWIGTYPE "$&1_type";
These three typemaps are specifically employed by the Allegro CL interface generator. SWIG also implements a number of other typemaps that can be used for generating code in the C/C++ wrappers. You can read about these common typemaps here.
A number of custom typemaps have also been added to facilitate the generation of code in the lisp side of the interface. These are described below. The basic code generation structure is applied as a series of nested expressions, one for each parameter, then one for manipulating the return value, and last, the foreign function call itself.
Note that the typemaps below use fully qualified symbols where necessary. Users writing their own typemaps should do likewise. See the explanation in the last paragraph of 16.3.1 Namespaces for details.
The LIN typemap allows for the manipulating the lisp objects passed as arguments to the wrapping defun before passing them to the foreign function call. For example, when passing lisp strings to foreign code, it is often necessary to copy the string into a foreign structure of type (:char *) of appropriate size, and pass this copy to the foreign call. Using the LIN typemap, one could arrange for the stack-allocation of a foreign char array, copy your string into it, and not have to worry about freeing the copy after the function returns.
The LIN typemap accepts the following $variable references.
%typemap(lin) SWIGTYPE "(cl:let (($out $in))\n $body)";
The LOUT typemap is the means by which we effect the wrapping of foreign pointers in CLOS instances. It is applied after all LIN typemaps, and immediately before the actual foreign-call.
The LOUT typemap uses the following $variable
%typemap(lout) bool, char, unsigned char, signed char,
short, signed short, unsigned short,
int, signed int, unsigned int,
long, signed long, unsigned long,
float, double, long double, char *, void *, void,
enum SWIGTYPE "$body";
%typemap(lout) SWIGTYPE[ANY], SWIGTYPE *,
SWIGTYPE & "(cl:make-instance '$lclass :foreign-address $body)";
%typemap(lout) SWIGTYPE "(cl:let* ((address $body)\n
(ACL_result (cl:make-instance '$lclass :foreign-address address)))\n
(cl:unless (cl::zerop address)\n
(excl:schedule-finalization ACL_result #'$ldestructor))\n
ACL_result)";
The FFITYPE typemap works as a helper for a body of code that converts C/C++ type specifications into Allegro CL foreign-type specifications. These foreign-type specifications appear in ff:def-foreing-type declarations, and in the argument list and return values of ff:def-foreign-calls. You would modify this typemap if you want to change how the FFI passes through arguments of a given type. For example, if you know that a particular compiler represents booleans as a single byte, you might add an entry for:
%typemap(ffitype) bool ":unsigned-char";
Note that this typemap is pure type transformation, and is not used in any code generations step the way the LIN and LOUT typemaps are. The default mappings for this typemap are:
%typemap(ffitype) bool ":int";
%typemap(ffitype) char ":char";
%typemap(ffitype) unsigned char ":unsigned-char";
%typemap(ffitype) signed char ":char";
%typemap(ffitype) short, signed short ":short";
%typemap(ffitype) unsigned short ":unsigned-short";
%typemap(ffitype) int, signed int ":int";
%typemap(ffitype) unsigned int ":unsigned-int";
%typemap(ffitype) long, signed long ":long";
%typemap(ffitype) unsigned long ":unsigned-long";
%typemap(ffitype) float ":float";
%typemap(ffitype) double ":double";
%typemap(ffitype) char * "(* :char)";
%typemap(ffitype) void * "(* :void)";
%typemap(ffitype) void ":void";
%typemap(ffitype) enum SWIGTYPE ":int";
%typemap(ffitype) SWIGTYPE & "(* :void)";
This is another type only transformation map, and is used to provide the lisp-type, which is the optional third argument in argument specifier in a ff:def-foreign-call form. Specifying a lisp-type allows the foreign call to perform type checking on the arguments passed in. The default entries in this typemap are:
%typemap(lisptype) bool "cl:boolean";
%typemap(lisptype) char "cl:character";
%typemap(lisptype) unsigned char "cl:integer";
%typemap(lisptype) signed char "cl:integer";
The LISPCLASS typemap is used to generate the method signatures for the generic-functions which wrap overloaded functions and functions with defaulted arguments. The default entries are:
%typemap(lispclass) bool "t";
%typemap(lispclass) char "cl:character";
%typemap(lispclass) unsigned char, signed char,
short, signed short, unsigned short,
int, signed int, unsigned int,
long, signed long, unsigned long,
enum SWIGTYPE "cl:integer";
%typemap(lispclass) float "cl:single-float";
%typemap(lispclass) double "cl:double-float";
%typemap(lispclass) char * "cl:string";
The following example shows how we made use of the above typemaps to add support for the wchar_t type.
%typecheck(SWIG_TYPECHECK_UNICHAR) wchar_t { $1 = 1; };
%typemap(in) wchar_t "$1 = $input;";
%typemap(lin) wchar_t "(cl:let (($out (cl:char-code $in)))\n $body)";
%typemap(lin) wchar_t* "(excl:with-native-string
($out $in
:external-format #+little-endian :fat-le
#-little-endian :fat)\n
$body)"
%typemap(out) wchar_t "$result = $1;";
%typemap(lout) wchar_t "(cl:code-char $body)";
%typemap(lout) wchar_t* "(excl:native-to-string $body
:external-format #+little-endian :fat-le
#-little-endian :fat)";
%typemap(ffitype) wchar_t ":unsigned-short";
%typemap(lisptype) wchar_t "";
%typemap(ctype) wchar_t "wchar_t";
%typemap(lispclass) wchar_t "cl:character";
%typemap(lispclass) wchar_t* "cl:string";
Various symbols must be generated in the lisp environment to which class definitions, functions, constants, variables, etc. must be bound. Rather than force a particular convention for naming these symbols, an identifier (to symbol) conversion function is used. A user-defined identifier-converter can then implement any symbol naming, case-modifying, scheme desired.
In generated SWIG code, whenever some interface object must be referenced by its lisp symbol, a macro is inserted that calls the identifier-converter function to generate the appropriate symbol reference. It is therefore expected that the identifier-converter function reliably return the same (eq) symbol given the same set of arguments.
Two basic identifier routines have been defined.
No modification of the identifier string is performed. Based on other arguments, the identifier may be concatenated with other strings, from which a symbol will be created.
All underscores in the identifier string are converted to hyphens. Otherwise, identifier-convert-lispify performs the same symbol transformations.
Check the definitions of the above two default identifier-converters in Lib/allegrocl/allegrocl.swg for default naming conventions.
A user-defined identifier-converter function should conform to the following specification:
(defun identifier-convert-fn (id &key type class arity) ...body...) result ==> symbol or (setf symbol)
The ID argument is a string representing an identifier in the foreign environment.
The :type keyword argument provides more information on the type of identifier. It's value is a symbol. This allows the identifier-converter to apply different heuristics when mapping different types of identifiers to symbols. SWIG will generate calls to your identifier-converter using the following types.
The :class keyword argument is a string naming a foreign class. When non-nil, it indicates that the current identifier has scope in the specified class.
The :arity keyword argument only appears in swig:swig-defmethod forms generated for overloaded functions. It's value is an integer indicating the number of arguments passed to the routine indicated by this identifier.
By default, SWIG will use identifier-converter-null. To specify another convert function, use the -identifier-converter command-line argument. The value should be a string naming the function you wish the interface to use instead, when generating symbols. ex:
% swig -allegrocl -c++ -module mymodule -identifier-converter my-identifier-converter
This chapter describes SWIG's support of Android.
The Android chapter is fairly short as support for Android is the same as for Java, where the Java Native Interface (JNI) is used to call from Android Java into C or C++ compiled code. Everything in the Java chapter applies to generating code for access from Android Java code. This chapter contains a few Android specific notes and examples.
The examples require the Android SDK and Android NDK which can be installed as per instructions in the links. The Eclipse version is not required for these examples as just the command line tools are used (shown for Linux as the host, but Windows will be very similar, if not identical in most places). Add the SDK tools and NDK tools to your path and create a directory somewhere for your Android projects (adjust PATH as necessary to where you installed the tools):
$ export PATH=$HOME/android/android-sdk-linux_x86/tools:$HOME/android/android-sdk-linux_x86/platform-tools:$HOME/android/android-ndk-r6b:$PATH $ mkdir AndroidApps $ cd AnrdoidApps
The examples use a target id of 1. This might need changing depending on your setup. After installation of the Android SDK, the available target ids can be viewed by running the command below. Please adjust the id to suit your target device.
$ android list targets
The following examples are shipped with SWIG under the Examples/android directory and include a Makefile to build and install each example.
This simple C example shows how to call a C function as well as read and modify a global variable. First we'll create and build a pure Java Android app. Afterwards the JNI code will be generated by SWIG and built into the app. First create and build an app called SwigSimple in a subdirectory called simple using the commands below. Adjust the --target id as mentioned earlier in the Examples introduction. Managing Projects from the Command Line on the Android developer's site is a useful reference for these steps.
$ android create project --target 1 --name SwigSimple --path ./simple --activity SwigSimple --package org.swig.simple $ cd simple $ ant debug
Modify src/org/swig/simple/SwigSimple.java from the default to:
package org.swig.simple;
import android.app.Activity;
import android.os.Bundle;
import android.view.View;
import android.widget.Button;
import android.widget.TextView;
import android.widget.ScrollView;
import android.text.method.ScrollingMovementMethod;
public class SwigSimple extends Activity
{
TextView outputText = null;
ScrollView scroller = null;
/** Called when the activity is first created. */
@Override
public void onCreate(Bundle savedInstanceState)
{
super.onCreate(savedInstanceState);
setContentView(R.layout.main);
outputText = (TextView)findViewById(R.id.OutputText);
outputText.setText("Press 'Run' to start...\n");
outputText.setMovementMethod(new ScrollingMovementMethod());
scroller = (ScrollView)findViewById(R.id.Scroller);
}
public void onRunButtonClick(View view)
{
outputText.append("Started...\n");
nativeCall();
outputText.append("Finished!\n");
// Ensure scroll to end of text
scroller.post(new Runnable() {
public void run() {
scroller.fullScroll(ScrollView.FOCUS_DOWN);
}
});
}
/** Calls into C/C++ code */
public void nativeCall()
{
// TODO
}
}
The above simply adds a Run button and scrollable text view as the GUI aspects of the program. The associated resources need to be created, modify res/layout/main.xml as follows:
<?xml version="1.0" encoding="utf-8"?>
<LinearLayout xmlns:android="http://schemas.android.com/apk/res/android"
android:orientation="vertical"
android:layout_width="fill_parent"
android:layout_height="fill_parent"
>
<Button
android:id="@+id/RunButton"
android:layout_width="wrap_content"
android:layout_height="wrap_content"
android:text="Run..."
android:onClick="onRunButtonClick"
/>
<ScrollView
android:id="@+id/Scroller"
android:layout_width="fill_parent"
android:layout_height="fill_parent"
>
<TextView
android:id="@+id/OutputText"
android:layout_width="wrap_content"
android:layout_height="wrap_content"
/>
</ScrollView>
</LinearLayout>
Rebuild the project with your changes:
$ ant debug
Although there are no native function calls in the code, yet, you may want to check that this simple pure Java app runs before adding in the native calls. First, set up your Android device for hardware debugging, see Using hardware devices on the Android developer's site. When complete your device should be listed in those attached, something like:
$ adb devices List of devices attached A32-6DBE0001-9FF80000-015D62C3-02018028 device
This means you are now ready to install the application...
$ adb install bin/SwigSimple-debug.apk 95 KB/s (4834 bytes in 0.049s) pkg: /data/local/tmp/SwigSimple-debug.apk Success
The newly installed 'SwigSimple' app will be amongst all your other applications on the home screen. Run the app and it will show a Run button text box below it. Press the Run button to see the simple text output.
The application can be uninstalled like any other application and in fact must be uninstalled before installing an updated version. Uninstalling is quite easy too from your host computer:
$ adb uninstall org.swig.simple Success
Now that you have a pure Java Android app working, let's add some JNI code generated from SWIG.
First create a jni subdirectory and then create some C source code in jni/example.c:
/* File : example.c */
/* A global variable */
double Foo = 3.0;
/* Compute the greatest common divisor of positive integers */
int gcd(int x, int y) {
int g;
g = y;
while (x > 0) {
g = x;
x = y % x;
y = g;
}
return g;
}
Create a SWIG interface file for this C code, jni/example.i :
/* File : example.i */
%module example
%inline %{
extern int gcd(int x, int y);
extern double Foo;
%}
Invoke SWIG as follows:
$ swig -java -package org.swig.simple -outdir src/org/swig/simple -o jni/example_wrap.c jni/example.i
SWIG generates the following files:
Next we need to create a standard Android NDK build system file jni/Android.mk:
# File: Android.mk LOCAL_PATH := $(call my-dir) include $(CLEAR_VARS) LOCAL_MODULE := example LOCAL_SRC_FILES := example_wrap.c example.c include $(BUILD_SHARED_LIBRARY)
See the Android NDK documentation for more on the NDK build system and getting started with the NDK. A simple invocation of ndk-build will compile the .c files and generate a shared object/system library. Output will be similar to:
$ ndk-build Compile thumb : example <= example_wrap.c Compile thumb : example <= example.c SharedLibrary : libexample.so Install : libexample.so => libs/armeabi/libexample.so
Now that the C JNI layer has been built, we can write Java code to call into the this layer. Modify the nativeCall method in src/org/swig/simple/SwigSimple.java to call the JNI code as follows and add the static constructor to load the system library containing the compiled JNI C code:
/** Calls into C/C++ code */
public void nativeCall()
{
// Call our gcd() function
int x = 42;
int y = 105;
int g = example.gcd(x,y);
outputText.append("The greatest common divisor of " + x + " and " + y + " is " + g + "\n");
// Manipulate the Foo global variable
// Output its current value
double foo = example.getFoo();
outputText.append("Foo = " + foo + "\n");
// Change its value
example.setFoo(3.1415926);
// See if the change took effect
outputText.append("Foo = " + example.getFoo() + "\n");
// Restore value
example.setFoo(foo);
}
/** static constructor */
static {
System.loadLibrary("example");
}
Compile the Java code as usual, uninstall the old version of the app if still installed and re-install the new app:
$ ant debug $ adb uninstall org.swig.simple $ adb install bin/SwigSimple-debug.apk
Run the app again and this time you will see the output pictured below, showing the result of calls into the C code:
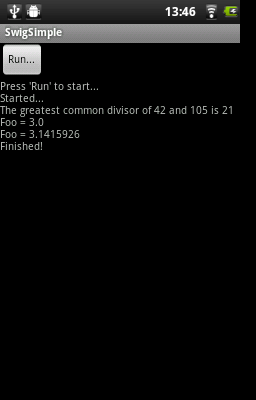
The steps for calling C++ code are almost identical to those in the previous C code example. All the steps required to compile and use a simple hierarchy of classes for shapes are shown in this example.
First create an Android project called SwigClass in a subdirectory called class. The steps below create and build a the JNI C++ app. Adjust the --target id as mentioned earlier in the Examples introduction.
$ android create project --target 1 --name SwigClass --path ./class --activity SwigClass --package org.swig.classexample $ cd class
Now create a jni subdirectory and then create a C++ header file jni/example.h which defines our hierarchy of shape classes:
/* File : example.h */
class Shape {
public:
Shape() {
nshapes++;
}
virtual ~Shape() {
nshapes--;
};
double x, y;
void move(double dx, double dy);
virtual double area(void) = 0;
virtual double perimeter(void) = 0;
static int nshapes;
};
class Circle : public Shape {
private:
double radius;
public:
Circle(double r) : radius(r) { };
virtual double area(void);
virtual double perimeter(void);
};
class Square : public Shape {
private:
double width;
public:
Square(double w) : width(w) { };
virtual double area(void);
virtual double perimeter(void);
};
and create the implementation in the jni/example.cpp file:
/* File : example.cpp */
#include "example.h"
#define M_PI 3.14159265358979323846
/* Move the shape to a new location */
void Shape::move(double dx, double dy) {
x += dx;
y += dy;
}
int Shape::nshapes = 0;
double Circle::area(void) {
return M_PI*radius*radius;
}
double Circle::perimeter(void) {
return 2*M_PI*radius;
}
double Square::area(void) {
return width*width;
}
double Square::perimeter(void) {
return 4*width;
}
Create a SWIG interface file for this C++ code in jni/example.i :
/* File : example.i */
%module example
%{
#include "example.h"
%}
/* Let's just grab the original header file here */
%include "example.h"
Invoke SWIG as follows, note that the -c++ option is required for C++ code:
$ swig -c++ -java -package org.swig.classexample -outdir src/org/swig/classexample -o jni/example_wrap.cpp jni/example.i
SWIG generates the following files:
Next we need to create an Android NDK build system file for compiling the C++ code jni/Android.mk. The -frtti compiler flag isn't strictly needed for this example, but is needed for any code that uses C++ RTTI:
# File: Android.mk LOCAL_PATH := $(call my-dir) include $(CLEAR_VARS) LOCAL_MODULE := example LOCAL_SRC_FILES := example_wrap.cpp example.cpp LOCAL_CFLAGS := -frtti include $(BUILD_SHARED_LIBRARY)
A simple invocation of ndk-build will compile the .cpp files and generate a shared object/system library. Output will be similar to:
$ ndk-build Compile++ thumb : example <= example_wrap.cpp Compile++ thumb : example <= example.cpp StaticLibrary : libstdc++.a SharedLibrary : libexample.so Install : libexample.so => libs/armeabi/libexample.so
Now that the C JNI layer has been built, we can write Java code to call into this layer. Modify src/org/swig/classexample/SwigClass.java from the default to:
package org.swig.classexample;
import android.app.Activity;
import android.os.Bundle;
import android.view.View;
import android.widget.Button;
import android.widget.TextView;
import android.widget.ScrollView;
import android.text.method.ScrollingMovementMethod;
public class SwigClass extends Activity
{
TextView outputText = null;
ScrollView scroller = null;
/** Called when the activity is first created. */
@Override
public void onCreate(Bundle savedInstanceState)
{
super.onCreate(savedInstanceState);
setContentView(R.layout.main);
outputText = (TextView)findViewById(R.id.OutputText);
outputText.setText("Press 'Run' to start...\n");
outputText.setMovementMethod(new ScrollingMovementMethod());
scroller = (ScrollView)findViewById(R.id.Scroller);
}
public void onRunButtonClick(View view)
{
outputText.append("Started...\n");
nativeCall();
outputText.append("Finished!\n");
// Ensure scroll to end of text
scroller.post(new Runnable() {
public void run() {
scroller.fullScroll(ScrollView.FOCUS_DOWN);
}
});
}
/** Calls into C/C++ code */
public void nativeCall()
{
// ----- Object creation -----
outputText.append( "Creating some objects:\n" );
Circle c = new Circle(10);
outputText.append( " Created circle " + c + "\n");
Square s = new Square(10);
outputText.append( " Created square " + s + "\n");
// ----- Access a static member -----
outputText.append( "\nA total of " + Shape.getNshapes() + " shapes were created\n" );
// ----- Member data access -----
// Notice how we can do this using functions specific to
// the 'Circle' class.
c.setX(20);
c.setY(30);
// Now use the same functions in the base class
Shape shape = s;
shape.setX(-10);
shape.setY(5);
outputText.append( "\nHere is their current position:\n" );
outputText.append( " Circle = (" + c.getX() + " " + c.getY() + ")\n" );
outputText.append( " Square = (" + s.getX() + " " + s.getY() + ")\n" );
// ----- Call some methods -----
outputText.append( "\nHere are some properties of the shapes:\n" );
Shape[] shapes = {c,s};
for (int i=0; i<shapes.length; i++)
{
outputText.append( " " + shapes[i].toString() + "\n" );
outputText.append( " area = " + shapes[i].area() + "\n" );
outputText.append( " perimeter = " + shapes[i].perimeter() + "\n" );
}
// Notice how the area() and perimeter() functions really
// invoke the appropriate virtual method on each object.
// ----- Delete everything -----
outputText.append( "\nGuess I'll clean up now\n" );
// Note: this invokes the virtual destructor
// You could leave this to the garbage collector
c.delete();
s.delete();
outputText.append( Shape.getNshapes() + " shapes remain\n" );
outputText.append( "Goodbye\n" );
}
/** static constructor */
static {
System.loadLibrary("example");
}
}
Note the static constructor and the interesting JNI code is in the nativeCall method. The remaining code deals with the GUI aspects which are identical to the previous C simple example. Modify res/layout/main.xml to contain the xml for the 'Run' button and scrollable text view:
<?xml version="1.0" encoding="utf-8"?>
<LinearLayout xmlns:android="http://schemas.android.com/apk/res/android"
android:orientation="vertical"
android:layout_width="fill_parent"
android:layout_height="fill_parent"
>
<Button
android:id="@+id/RunButton"
android:layout_width="wrap_content"
android:layout_height="wrap_content"
android:text="Run..."
android:onClick="onRunButtonClick"
/>
<ScrollView
android:id="@+id/Scroller"
android:layout_width="fill_parent"
android:layout_height="fill_parent"
>
<TextView
android:id="@+id/OutputText"
android:layout_width="wrap_content"
android:layout_height="wrap_content"
/>
</ScrollView>
</LinearLayout>
Compile the Java code as usual, uninstall the old version of the app if installed and re-install the new app:
$ ant debug $ adb uninstall org.swig.classexample $ adb install bin/SwigClass-debug.apk
Run the app to see the result of calling the C++ code from Java:
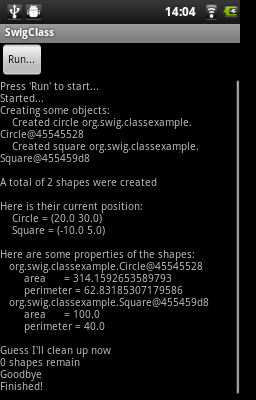
The Examples/android directory contains further examples which can be run and installed in a similar manner to the previous two examples.
Note that the 'extend' example is demonstrates the directors feature. Normally C++ exception handling and the STL is not available by default in the version of g++ shipped with Android, but this example turns these features on as described in the next section.
Should the C++ Standard Template Library (STL) be required, an Application.mk file needs to be created in the same directory as the Android.mk directory containing information about the STL to use. See the NDK documentation in the $NDKROOT/docs folder especially CPLUSPLUS-SUPPORT.html. Below is an example of the Application.mk file to make the STLport static library available for use:
# File: Application.mk APP_STL := gnustl_static
The purpose of the C# module is to offer an automated way of accessing existing C/C++ code from .NET languages. The wrapper code implementation uses C# and the Platform Invoke (PInvoke) interface to access natively compiled C/C++ code. The PInvoke interface has been chosen over Microsoft's Managed C++ interface as it is portable to both Microsoft Windows and non-Microsoft platforms. PInvoke is part of the ECMA/ISO C# specification. It is also better suited for robust production environments due to the Managed C++ flaw called the Mixed DLL Loading Problem. SWIG C# works equally well on non-Microsoft operating systems such as Linux, Solaris and Apple Mac using Mono and Portable.NET.
To get the most out of this chapter an understanding of interop is required. The Microsoft Developer Network (MSDN) has a good reference guide in a section titled "Interop Marshaling". Monodoc, available from the Mono project, has a very useful section titled Interop with native libraries.
The C# module is very similar to the Java module, so until some more complete documentation has been written, please use the Java documentation as a guide to using SWIG with C#. The C# module has the same major SWIG features as the Java module. The rest of this section should be read in conjunction with the Java documentation as it lists the main differences. The most notable differences to Java are the following:
namespace com.bloggs.widget {
...
}
Typemap equivalent names:
jni -> ctype jtype -> imtype jstype -> cstype javain -> csin javaout -> csout javadirectorin -> csdirectorin javadirectorout -> csdirectorout javainterfaces -> csinterfaces and csinterfaces_derived javabase -> csbase javaclassmodifiers -> csclassmodifiers javacode -> cscode javaimports -> csimports javabody -> csbody javafinalize -> csfinalize javadestruct -> csdestruct javadestruct_derived -> csdestruct_derived
Typemap macros:
SWIG_JAVABODY_PROXY -> SWIG_CSBODY_PROXY SWIG_JAVABODY_TYPEWRAPPER -> SWIG_CSBODY_TYPEWRAPPER
Additional typemaps:
csvarin C# code property set typemap csvarout C# code property get typemap csattributes C# attributes for attaching to proxy classes/enums
Additional typemap attributes:
The "null" attribute in the "out" typemap can be specified to provide a value for $null to expand into for wrapped functions that return non-void. Normally the default value of 0 is used. For example this is needed if you change the return type to void:
%typemap(ctype) Status "void"
%typemap(out, null="") Status { ... }
Feature equivalent names:
%javaconst -> %csconst %javaconstvalue -> %csconstvalue %javamethodmodifiers -> %csmethodmodifiers
Pragma equivalent names:
%pragma(java) -> %pragma(csharp) jniclassbase -> imclassbase jniclassclassmodifiers -> imclassclassmodifiers jniclasscode -> imclasscode jniclassimports -> imclassimports jniclassinterfaces -> imclassinterfaces
Special variable equivalent names:
$javaclassname -> $csclassname $&javaclassname -> $&csclassname $*javaclassname -> $*csclassname $javaclazzname -> $csclazzname $javainput -> $csinput $jnicall -> $imcall
Unlike the "javain" typemap, the "csin" typemap does not support the 'pgcpp' attribute as the C# module does not have a premature garbage collection prevention parameter. The "csin" typemap supports additional optional attributes called 'cshin' and 'terminator'. The "csdirectorin" typemap supports additional optional attributes called 'terminator'. The 'cshin' attribute should contain the parameter type and name whenever a constructor helper function is generated due to the 'pre' or 'post' attributes. The 'terminator' attribute normally just contains a closing brace for when the 'pre' attribute contains an opening brace, such as when a C# using or fixed block is started. Note that 'pre', 'post', 'terminator' and 'cshin' attributes are not used for marshalling the property set. Please see the Date marshalling example and Date marshalling of properties example for further understanding of these "csin" applicable attributes. Please see the Date marshalling director example for further understanding of the "csdirectorin" attributes.
Support for asymmetric type marshalling. The 'ctype', 'imtype' and 'cstype' typemaps support an optional out attribute which is used for output types. If this typemap attribute is specified, then the type specified in the attribute is used for output types and the type specified in the typemap itself is used for the input type. If this typemap attribute is not specified, then the type used for both input and output is the type specified in the typemap. An example shows that char * could be marshalled in different ways,
%typemap(imtype, out="IntPtr") char * "string" char * function(char *);
The output type is thus IntPtr and the input type is string. The resulting intermediary C# code is:
public static extern IntPtr function(string jarg1);
Support for type attributes. The 'imtype' and 'cstype' typemaps can have an optional inattributes and outattributes typemap attribute. The 'imtype' typemap can also have an optional directorinattributes and directoroutattributes typemap attribute which attaches to director delegates, an implementation detail of directors, see directors implementation. Note that there are C# attributes and typemap attributes, don't get confused between the two!! The C# attributes specified in these typemap attributes are generated wherever the type is used in the C# wrappers. These can be used to specify any C# attribute associated with a C/C++ type, but are more typically used for the C# MarshalAs attribute. For example:
%typemap(imtype,
inattributes="[MarshalAs(UnmanagedType.LPStr)]",
outattributes="[return: MarshalAs(UnmanagedType.LPStr)]") const char * "String"
const char * GetMsg() {}
void SetMsg(const char *msg) {}
The intermediary class will then have the marshalling as specified by everything in the 'imtype' typemap:
class examplePINVOKE {
...
[DllImport("example", EntryPoint="CSharp_GetMsg")]
[return: MarshalAs(UnmanagedType.LPStr)]
public static extern String GetMsg();
[DllImport("example", EntryPoint="CSharp_SetMsg")]
public static extern void SetMsg([MarshalAs(UnmanagedType.LPStr)]String jarg1);
}
Note that the DllImport attribute is always generated, irrespective of any additional attributes specified.
These attributes are associated with the C/C++ parameter type or return type, which is subtly different to the attribute features and typemaps covered next. Note that all these different C# attributes can be combined so that a method has more than one attribute.
The directorinattributes and directoroutattributes typemap attribute are attached to the delegates in the director class, for example, the SwigDelegateBase_0
Support for attaching C# attributes to wrapped methods, variables and enum values. This is done using the %csattributes feature, see %feature directives. Note that C# attributes are attached to proxy classes and enums using the csattributes typemap. For example, imagine we have a custom attribute class, ThreadSafeAttribute, for labelling thread safety. The following SWIG code shows how to attach this C# attribute to some methods and the class declaration itself:
%typemap(csattributes) AClass "[ThreadSafe]"
%csattributes AClass::AClass(double d) "[ThreadSafe(false)]"
%csattributes AClass::AMethod() "[ThreadSafe(true)]"
%inline %{
class AClass {
public:
AClass(double a) {}
void AMethod() {}
};
%}
will generate a C# proxy class:
[ThreadSafe]
public class AClass : IDisposable {
...
[ThreadSafe(false)]
public AClass(double a) ...
[ThreadSafe(true)]
public void AMethod() ...
}
If C# attributes need adding to the set or get part of C# properties, when wrapping C/C++ variables, they can be added using the 'csvarin' and 'csvarout' typemaps respectively. Note that the type used for the property is specified in the 'cstype' typemap. If the 'out' attribute exists in this typemap, then the type used is from the 'out' attribute.
An example for attaching attributes to the enum and enum values is shown below.
%typemap(csattributes) Couleur "[System.ComponentModel.Description(\"Colours\")]"
%csattributes Rouge "[System.ComponentModel.Description(\"Red\")]"
%csattributes Vert "[System.ComponentModel.Description(\"Green\")]"
%inline %{
enum Couleur { Rouge, Orange, Vert };
%}
which will result in the following C# enum:
[System.ComponentModel.Description("Colours")]
public enum Couleur {
[System.ComponentModel.Description("Red")]
Rouge,
Orange,
[System.ComponentModel.Description("Green")]
Vert
}
The intermediary classname has PINVOKE appended after the module name instead of JNI, for example modulenamePINVOKE .
The %csmethodmodifiers feature can also be applied to variables as well as methods. In addition to the default public modifier that SWIG generates when %csmethodmodifiers is not specified, the feature will also replace the virtual/new /override modifiers that SWIG thinks is appropriate. This feature is useful for some obscure cases where SWIG might get the virtual/new/override modifiers incorrect, for example with multiple inheritance.
The name of the intermediary class can be changed from its default, that is, the module name with PINVOKE appended after it. The module directive attribute imclassname is used to achieve this:
%module (imclassname="name") modulename
If name is the same as modulename then the module class name gets changed from modulename to modulenameModule.
$dllimport
This is a C# only special variable that can be used in typemaps,
pragmas, features etc. The special variable will get translated into
the value specified by the -dllimport commandline option if
specified, otherwise it is equivalent to the $module special
variable.
$imclassname
This special variable expands to the intermediary class name. For
C# this is usually the same as '$modulePINVOKE' ('$moduleJNI' for
Java), unless the imclassname attribute is specified in the
%module directive.
The directory Examples/csharp has a number of simple examples. Visual Studio .NET 2003 solution and project files are available for compiling with the Microsoft .NET C# compiler on Windows. If your SWIG installation went well on a Unix environment and your C# compiler was detected, you should be able to type make in each example directory, then ilrun runme.exe (Portable.NET C# compiler) or mono runme.exe (Mono C# compiler) to run the examples. Windows users can also get the examples working using a Cygwin or MinGW environment for automatic configuration of the example makefiles. Any one of the three C# compilers (Portable.NET, Mono or Microsoft) can be detected from within a Cygwin or Mingw environment if installed in your path.
By default SWIG treats void * as any other pointer and hence marshalls it as a type wrapper class called SWIGTYPE_p_void . If you want to marshall with the .NET System.IntPtr type instead, there is a simple set of named typemaps called void *VOID_INT_PTR that can be used. They can be applied like any other named typemaps:
%apply void *VOID_INT_PTR { void * }
void * f(void *v);
There are various ways to pass arrays from C# to C/C++. The default wrapping treats arrays as pointers and as such simple type wrapper classes are generated, eg SWIGTYPE_p_int when wrapping the C type int [] or int *. This gives a rather restricted use of the underlying unmanaged code and the most practical way to use arrays is to enhance or customise with one of the following three approaches; namely the SWIG C arrays library, P/Invoke default array marshalling or pinned arrays.
The C arrays library keeps all the array memory in the unmanaged layer. The library is available to all language modules and is documented in the carrays.i library section. Please refer to this section for details, but for convenience, the C# usage for the two examples outlined there is shown below.
For the %array_functions example, the equivalent usage would be:
SWIGTYPE_p_double a = example.new_doubleArray(10); // Create an array for (int i=0; i<10; i++) example.doubleArray_setitem(a,i,2*i); // Set a value example.print_array(a); // Pass to C example.delete_doubleArray(a); // Destroy array
and for the %array_class example, the equivalent usage would be:
doubleArray c = new doubleArray(10); // Create double[10] for (int i=0; i<10; i++) c.setitem(i, 2*i); // Assign values example.print_array(c.cast()); // Pass to C
In the P/Invoke default marshalling scheme, one needs to designate whether the invoked function will treat a managed array parameter as input, output, or both. When the function is invoked, the CLR allocates a separate chunk of memory as big as the given managed array, which is automatically released at the end of the function call. If the array parameter is marked as being input, the content of the managed array is copied into this buffer when the call is made. Correspondingly, if the array parameter is marked as being output, the contents of the reserved buffer are copied back into the managed array after the call returns. A pointer to this buffer is passed to the native function.
The reason for allocating a separate buffer is to leave the CLR free to relocate the managed array object during garbage collection. If the overhead caused by the copying is causing a significant performance penalty, consider pinning the managed array and passing a direct reference as described in the next section.
For more information on the subject, see the Default Marshaling for Arrays article on MSDN.
The P/Invoke default marshalling is supported by the arrays_csharp.i library via the INPUT, OUTPUT and INOUT typemaps. Let's look at some example usage. Consider the following C function:
void myArrayCopy(int *sourceArray, int *targetArray, int nitems);
We can now instruct SWIG to use the default marshalling typemaps by
%include "arrays_csharp.i"
%apply int INPUT[] {int *sourceArray}
%apply int OUTPUT[] {int *targetArray}
As a result, we get the following method in the module class:
public static void myArrayCopy(int[] sourceArray, int[] targetArray, int nitems) {
examplePINVOKE.myArrayCopy(sourceArray, targetArray, nitems);
}
If we look beneath the surface at the corresponding intermediary class code, we see that SWIG has generated code that uses attributes (from the System.Runtime.InteropServices namespace) to tell the CLR to use default marshalling for the arrays:
[DllImport("example", EntryPoint="CSharp_myArrayCopy")]
public static extern void myArrayCopy([In, MarshalAs(UnmanagedType.LPArray)]int[] jarg1,
[Out, MarshalAs(UnmanagedType.LPArray)]int[] jarg2,
int jarg3);
As an example of passing an inout array (i.e. the target function will both read from and write to the array), consider this C function that swaps a given number of elements in the given arrays:
void myArraySwap(int *array1, int *array2, int nitems);
Now, we can instruct SWIG to wrap this by
%include "arrays_csharp.i"
%apply int INOUT[] {int *array1}
%apply int INOUT[] {int *array2}
This results in the module class method
public static void myArraySwap(int[] array1, int[] array2, int nitems) {
examplePINVOKE.myArraySwap(array1, array2, nitems);
}
and intermediary class method
[DllImport("example", EntryPoint="CSharp_myArraySwap")]
public static extern void myArraySwap([In, Out, MarshalAs(UnmanagedType.LPArray)]int[] jarg1,
[In, Out, MarshalAs(UnmanagedType.LPArray)]int[] jarg2,
int jarg3);
It is also possible to pin a given array in memory (i.e. fix its location in memory), obtain a direct pointer to it, and then pass this pointer to the wrapped C/C++ function. This approach involves no copying, but it makes the work of the garbage collector harder as the managed array object can not be relocated before the fix on the array is released. You should avoid fixing arrays in memory in cases where the control may re-enter the managed side via a callback and/or another thread may produce enough garbage to trigger garbage collection.
For more information, see the fixed statement in the C# language reference.
Now let's look at an example using pinning, thus avoiding the CLR making copies of the arrays passed as parameters. The arrays_csharp.i library file again provides the required support via the FIXED typemaps. Let's use the same function from the previous section:
void myArrayCopy(int *sourceArray, int *targetArray, int nitems);
We now need to declare the module class method unsafe, as we are using pointers:
%csmethodmodifiers myArrayCopy "public unsafe";
Apply the appropriate typemaps to the array parameters:
%include "arrays_csharp.i"
%apply int FIXED[] {int *sourceArray}
%apply int FIXED[] {int *targetArray}
Notice that there is no need for separate in, out or inout typemaps as is the case when using P/Invoke default marshalling.
As a result, we get the following method in the module class:
public unsafe static void myArrayCopy(int[] sourceArray, int[] targetArray, int nitems) {
fixed ( int *swig_ptrTo_sourceArray = sourceArray ) {
fixed ( int *swig_ptrTo_targetArray = targetArray ) {
{
examplePINVOKE.myArrayCopy((IntPtr)swig_ptrTo_sourceArray, (IntPtr)swig_ptrTo_targetArray,
nitems);
}
}
}
}
On the method signature level the only difference to the version using P/Invoke default marshalling is the "unsafe" quantifier, which is required because we are handling pointers.
Also the intermediary class method looks a little different from the default marshalling example - the method is expecting an IntPtr as the parameter type.
[DllImport("example", EntryPoint="CSharp_myArrayCopy")]
public static extern void myArrayCopy(IntPtr jarg1, IntPtr jarg2, int jarg3);
It is possible to throw a C# Exception from C/C++ code. SWIG already provides the framework for throwing C# exceptions if it is able to detect that a C++ exception could be thrown. Automatically detecting that a C++ exception could be thrown is only possible when a C++ exception specification is used, see Exception specifications. The Exception handling with %exception section details the %exception feature. Customised code for handling exceptions with or without a C++ exception specification is possible and the details follow. However anyone wishing to do this should be familiar with the contents of the sections referred to above.
Unfortunately a C# exception cannot simply be thrown from unmanaged code for a variety of reasons. Most notably being that throwing a C# exception results in exceptions being thrown across the C PInvoke interface and C does not understand exceptions. The design revolves around a C# exception being constructed and stored as a pending exception, to be thrown only when the unmanaged code has completed. Implementing this is a tad involved and there are thus some unusual typemap constructs. Some practical examples follow and they should be read in conjunction with the rest of this section.
First some details about the design that must be followed. Each typemap or feature that generates unmanaged code supports an attribute called canthrow. This is simply a flag which when set indicates that the code in the typemap/feature has code which might want to throw a C# exception. The code in the typemap/feature can then raise a C# exception by calling one of the C functions, SWIG_CSharpSetPendingException() or SWIG_CSharpSetPendingExceptionArgument(). When called, the function makes a callback into the managed world via a delegate. The callback creates and stores an exception ready for throwing when the unmanaged code has finished. The typemap/feature unmanaged code is then expected to force an immediate return from the unmanaged wrapper function, so that the pending managed exception can then be thrown. The support code has been carefully designed to be efficient as well as thread-safe. However to achieve the goal of efficiency requires some optional code generation in the managed code typemaps. Code to check for pending exceptions is generated if and only if the unmanaged code has code to set a pending exception, that is if the canthrow attribute is set. The optional managed code is generated using the excode typemap attribute and $excode special variable in the relevant managed code typemaps. Simply, if any relevant unmanaged code has the canthrow attribute set, then any occurrences of $excode is replaced with the code in the excode attribute. If the canthrow attribute is not set, then any occurrences of $excode are replaced with nothing.
The prototypes for the SWIG_CSharpSetPendingException() and SWIG_CSharpSetPendingExceptionArgument() functions are
static void SWIG_CSharpSetPendingException(SWIG_CSharpExceptionCodes code,
const char *msg);
static void SWIG_CSharpSetPendingExceptionArgument(SWIG_CSharpExceptionArgumentCodes code,
const char *msg,
const char *param_name);
The first parameter defines which .NET exceptions can be thrown:
typedef enum {
SWIG_CSharpApplicationException,
SWIG_CSharpArithmeticException,
SWIG_CSharpDivideByZeroException,
SWIG_CSharpIndexOutOfRangeException,
SWIG_CSharpInvalidCastException,
SWIG_CSharpInvalidOperationException,
SWIG_CSharpIOException,
SWIG_CSharpNullReferenceException,
SWIG_CSharpOutOfMemoryException,
SWIG_CSharpOverflowException,
SWIG_CSharpSystemException
} SWIG_CSharpExceptionCodes;
typedef enum {
SWIG_CSharpArgumentException,
SWIG_CSharpArgumentNullException,
SWIG_CSharpArgumentOutOfRangeException,
} SWIG_CSharpExceptionArgumentCodes;
where, for example, SWIG_CSharpApplicationException corresponds to the .NET exception, ApplicationException. The msg and param_name parameters contain the C# exception message and parameter name associated with the exception.
The %exception feature in C# has the canthrow attribute set. The %csnothrowexception feature is like %exception, but it does not have the canthrow attribute set so should only be used when a C# exception is not created.
Lets say we have the following simple C++ method:
void positivesonly(int number);
and we want to check that the input number is always positive and if not throw a C# ArgumentOutOfRangeException. The "check" typemap is designed for checking input parameters. Below you will see the canthrow attribute is set because the code contains a call to SWIG_CSharpSetPendingExceptionArgument(). The full example follows:
%module example
%typemap(check, canthrow=1) int number %{
if ($1 < 0) {
SWIG_CSharpSetPendingExceptionArgument(SWIG_CSharpArgumentOutOfRangeException,
"only positive numbers accepted", "number");
return $null;
}
// SWIGEXCODE is a macro used by many other csout typemaps
%define SWIGEXCODE
"\n if ($modulePINVOKE.SWIGPendingException.Pending)"
"\n throw $modulePINVOKE.SWIGPendingException.Retrieve();"
%enddef
%typemap(csout, excode=SWIGEXCODE) void {
$imcall;$excode
}
%}
%inline %{
void positivesonly(int number) {
}
%}
When the following C# code is executed:
public class runme {
static void Main() {
example.positivesonly(-1);
}
}
The exception is thrown:
Unhandled Exception: System.ArgumentOutOfRangeException: only positive numbers accepted Parameter name: number in <0x00034> example:positivesonly (int) in <0x0000c> runme:Main ()
Now let's analyse the generated code to gain a fuller understanding of the typemaps. The generated unmanaged C++ code is:
SWIGEXPORT void SWIGSTDCALL CSharp_positivesonly(int jarg1) {
int arg1 ;
arg1 = (int)jarg1;
if (arg1 < 0) {
SWIG_CSharpSetPendingExceptionArgument(SWIG_CSharpArgumentOutOfRangeException,
"only positive numbers accepted", "number");
return ;
}
positivesonly(arg1);
}
This largely comes from the "check" typemap. The managed code in the module class is:
public class example {
public static void positivesonly(int number) {
examplePINVOKE.positivesonly(number);
if (examplePINVOKE.SWIGPendingException.Pending)
throw examplePINVOKE.SWIGPendingException.Retrieve();
}
}
This comes largely from the "csout" typemap.
The "csout" typemap is the same as the default void "csout" typemap so is not strictly necessary for the example. However, it is shown to demonstrate what managed output code typemaps should contain, that is, a $excode special variable and an excode attribute. Also note that $excode is expanded into the code held in the excode attribute. The $imcall as always expands into examplePINVOKE.positivesonly(number). The exception support code in the intermediary class, examplePINVOKE, is not shown, but is contained within the inner classes, SWIGPendingException and SWIGExceptionHelper and is always generated. These classes can be seen in any of the generated wrappers. However, all that is required of a user is as demonstrated in the "csin" typemap above. That is, is to check SWIGPendingException.Pending and to throw the exception returned by SWIGPendingException.Retrieve().
If the "check" typemap did not exist, then the following module class would instead be generated:
public class example {
public static void positivesonly(int number) {
examplePINVOKE.positivesonly(number);
}
}
Here we see the pending exception checking code is omitted. In fact, the code above would be generated if the canthrow attribute was not in the "check" typemap, such as:
%typemap(check) int number %{
if ($1 < 0) {
SWIG_CSharpSetPendingExceptionArgument(SWIG_CSharpArgumentOutOfRangeException,
"only positive numbers accepted", "number");
return $null;
}
%}
Note that if SWIG detects you have used SWIG_CSharpSetPendingException() or SWIG_CSharpSetPendingExceptionArgument() without setting the canthrow attribute you will get a warning message similar to
example.i:21: Warning 845: Unmanaged code contains a call to a SWIG_CSharpSetPendingException method and C# code does not handle pending exceptions via the canthrow attribute.
Actually it will issue this warning for any function beginning with SWIG_CSharpSetPendingException.
Let's consider a similar, but more common example that throws a C++ exception from within a wrapped function. We can use %exception as mentioned in Exception handling with %exception.
%exception negativesonly(int value) %{
try {
$action
} catch (std::out_of_range e) {
SWIG_CSharpSetPendingException(SWIG_CSharpApplicationException, e.what());
}
%}
%inline %{
#include <stdexcept>
void negativesonly(int value) {
if (value >= 0)
throw std::out_of_range("number should be negative");
}
%}
The generated unmanaged code this time catches the C++ exception and converts it into a C# ApplicationException.
SWIGEXPORT void SWIGSTDCALL CSharp_negativesonly(int jarg1) {
int arg1 ;
arg1 = (int)jarg1;
try {
negativesonly(arg1);
} catch (std::out_of_range e) {
SWIG_CSharpSetPendingException(SWIG_CSharpApplicationException, e.what());
return ;
}
}
The managed code generated does check for the pending exception as mentioned earlier as the C# version of %exception has the canthrow attribute set by default:
public static void negativesonly(int value) {
examplePINVOKE.negativesonly(value);
if (examplePINVOKE.SWIGPendingException.Pending)
throw examplePINVOKE.SWIGPendingException.Retrieve();
}
When C++ exception specifications are used, SWIG is able to detect that the method might throw an exception. By default SWIG will automatically generate code to catch the exception and convert it into a managed ApplicationException, as defined by the default "throws" typemaps. The following example has a user supplied "throws" typemap which is used whenever an exception specification contains a std::out_of_range, such as the evensonly method below.
%typemap(throws, canthrow=1) std::out_of_range {
SWIG_CSharpSetPendingExceptionArgument(SWIG_CSharpArgumentException, $1.what(), NULL);
return $null;
}
%inline %{
#include <stdexcept>
void evensonly(int input) throw (std::out_of_range) {
if (input%2 != 0)
throw std::out_of_range("number is not even");
}
%}
Note that the type for the throws typemap is the type in the exception specification. SWIG generates a try catch block with the throws typemap code in the catch handler.
SWIGEXPORT void SWIGSTDCALL CSharp_evensonly(int jarg1) {
int arg1 ;
arg1 = (int)jarg1;
try {
evensonly(arg1);
}
catch(std::out_of_range &_e) {
{
SWIG_CSharpSetPendingExceptionArgument(SWIG_CSharpArgumentException, (&_e)->what(), NULL);
return ;
}
}
}
Multiple catch handlers are generated should there be more than one exception specifications declared.
This example involves a user defined exception. The conventional .NET exception handling approach is to create a custom ApplicationException and throw it in your application. The goal in this example is to convert the STL std::out_of_range exception into one of these custom .NET exceptions.
The default exception handling is quite easy to use as the SWIG_CSharpSetPendingException() and SWIG_CSharpSetPendingExceptionArgument() methods are provided by SWIG. However, for a custom C# exception, the boiler plate code that supports these functions needs replicating. In essence this consists of some C/C++ code and C# code. The C/C++ code can be generated into the wrapper file using the %insert(runtime) directive and the C# code can be generated into the intermediary class using the imclasscode pragma as follows:
%insert(runtime) %{
// Code to handle throwing of C# CustomApplicationException from C/C++ code.
// The equivalent delegate to the callback, CSharpExceptionCallback_t, is CustomExceptionDelegate
// and the equivalent customExceptionCallback instance is customDelegate
typedef void (SWIGSTDCALL* CSharpExceptionCallback_t)(const char *);
CSharpExceptionCallback_t customExceptionCallback = NULL;
extern "C" SWIGEXPORT
void SWIGSTDCALL CustomExceptionRegisterCallback(CSharpExceptionCallback_t customCallback) {
customExceptionCallback = customCallback;
}
// Note that SWIG detects any method calls named starting with
// SWIG_CSharpSetPendingException for warning 845
static void SWIG_CSharpSetPendingExceptionCustom(const char *msg) {
customExceptionCallback(msg);
}
%}
%pragma(csharp) imclasscode=%{
class CustomExceptionHelper {
// C# delegate for the C/C++ customExceptionCallback
public delegate void CustomExceptionDelegate(string message);
static CustomExceptionDelegate customDelegate =
new CustomExceptionDelegate(SetPendingCustomException);
[DllImport("$dllimport", EntryPoint="CustomExceptionRegisterCallback")]
public static extern
void CustomExceptionRegisterCallback(CustomExceptionDelegate customCallback);
static void SetPendingCustomException(string message) {
SWIGPendingException.Set(new CustomApplicationException(message));
}
static CustomExceptionHelper() {
CustomExceptionRegisterCallback(customDelegate);
}
}
static CustomExceptionHelper exceptionHelper = new CustomExceptionHelper();
%}
The method stored in the C# delegate instance, customDelegate is what gets called by the C/C++ callback. However, the equivalent to the C# delegate, that is the C/C++ callback, needs to be assigned before any unmanaged code is executed. This is achieved by putting the initialisation code in the intermediary class. Recall that the intermediary class contains all the PInvoke methods, so the static variables in the intermediary class will be initialised before any of the PInvoke methods in this class are called. The exceptionHelper static variable ensures the C/C++ callback is initialised with the value in customDelegate by calling the CustomExceptionRegisterCallback method in the CustomExceptionHelper static constructor. Once this has been done, unmanaged code can make callbacks into the managed world as customExceptionCallback will be initialised with a valid callback/delegate. Any calls to SWIG_CSharpSetPendingExceptionCustom() will make the callback to create the pending exception in the same way that SWIG_CSharpSetPendingException() and SWIG_CSharpSetPendingExceptionArgument() does. In fact the method has been similarly named so that SWIG can issue the warning about missing canthrow attributes as discussed earlier. It is an invaluable warning as it is easy to forget the canthrow attribute when writing typemaps/features.
The SWIGPendingException helper class is not shown, but is generated as an inner class into the intermediary class. It stores the pending exception in Thread Local Storage so that the exception handling mechanism is thread safe.
The boiler plate code above must be used in addition to a handcrafted CustomApplicationException:
// Custom C# Exception
class CustomApplicationException : System.ApplicationException {
public CustomApplicationException(string message)
: base(message) {
}
}
and the SWIG interface code:
%typemap(throws, canthrow=1) std::out_of_range {
SWIG_CSharpSetPendingExceptionCustom($1.what());
return $null;
}
%inline %{
void oddsonly(int input) throw (std::out_of_range) {
if (input%2 != 1)
throw std::out_of_range("number is not odd");
}
%}
The "throws" typemap now simply calls our new SWIG_CSharpSetPendingExceptionCustom() function so that the exception can be caught, as such:
try {
example.oddsonly(2);
} catch (CustomApplicationException e) {
...
}
The SWIG directors feature adds extra code to the generated C# proxy classes that enable these classes to be used in cross-language polymorphism. Essentially, it enables unmanaged C++ code to call back into managed code for virtual methods so that a C# class can derive from a wrapped C++ class.
The following sections provide information on the C# director implementation and contain most of the information required to use the C# directors. However, the Java directors section should also be read in order to gain more insight into directors.
Imagine we are wrapping a C++ base class, Base, from which we would like to inherit in C#. Such a class is shown below as well as another class, Caller, which calls the virtual method UIntMethod from pure unmanaged C++ code.
// file: example.h
class Base {
public:
virtual ~Base() {}
virtual unsigned int UIntMethod(unsigned int x) {
std::cout << "Base - UIntMethod(" << x << ")" << std::endl;
return x;
}
virtual void BaseBoolMethod(const Base &b, bool flag) {}
};
class Caller {
public:
Caller(): m_base(0) {}
~Caller() { delBase(); }
void set(Base *b) { delBase(); m_base = b; }
void reset() { m_base = 0; }
unsigned int UIntMethodCall(unsigned int x) { return m_base->UIntMethod(x); }
private:
Base *m_base;
void delBase() { delete m_base; m_base = 0; }
};
The director feature is turned off by default and the following simple interface file shows how directors are enabled for the class Base.
/* File : example.i */
%module(directors="1") example
%{
#include "example.h"
%}
%feature("director") Base;
%include "example.h"
The following is a C# class inheriting from Base:
public class CSharpDerived : Base
{
public override uint UIntMethod(uint x)
{
Console.WriteLine("CSharpDerived - UIntMethod({0})", x);
return x;
}
}
The Caller class can demonstrate the UIntMethod method being called from unmanaged code using the following C# code:
public class runme
{
static void Main()
{
Caller myCaller = new Caller();
// Test pure C++ class
using (Base myBase = new Base())
{
makeCalls(myCaller, myBase);
}
// Test director / C# derived class
using (Base myBase = new CSharpDerived())
{
makeCalls(myCaller, myBase);
}
}
static void makeCalls(Caller myCaller, Base myBase)
{
myCaller.set(myBase);
myCaller.UIntMethodCall(123);
myCaller.reset();
}
}
If the above is run, the output is then:
Base - UIntMethod(123) CSharpDerived - UIntMethod(123)
The previous section demonstrated a simple example where the virtual UIntMethod method was called from C++ code, even when the overridden method is implemented in C#. The intention of this section is to gain an insight into how the director feature works. It shows the generated code for the two virtual methods, UIntMethod and BaseBoolMethod, when the director feature is enabled for the Base class.
Below is the generated C# Base director class.
using System;
using System.Runtime.InteropServices;
public class Base : IDisposable {
private HandleRef swigCPtr;
protected bool swigCMemOwn;
internal Base(IntPtr cPtr, bool cMemoryOwn) {
swigCMemOwn = cMemoryOwn;
swigCPtr = new HandleRef(this, cPtr);
}
internal static HandleRef getCPtr(Base obj) {
return (obj == null) ? new HandleRef(null, IntPtr.Zero) : obj.swigCPtr;
}
~Base() {
Dispose();
}
public virtual void Dispose() {
lock(this) {
if(swigCPtr.Handle != IntPtr.Zero && swigCMemOwn) {
swigCMemOwn = false;
examplePINVOKE.delete_Base(swigCPtr);
}
swigCPtr = new HandleRef(null, IntPtr.Zero);
GC.SuppressFinalize(this);
}
}
public virtual uint UIntMethod(uint x) {
uint ret = examplePINVOKE.Base_UIntMethod(swigCPtr, x);
return ret;
}
public virtual void BaseBoolMethod(Base b, bool flag) {
examplePINVOKE.Base_BaseBoolMethod(swigCPtr, Base.getCPtr(b), flag);
if (examplePINVOKE.SWIGPendingException.Pending)
throw examplePINVOKE.SWIGPendingException.Retrieve();
}
public Base() : this(examplePINVOKE.new_Base(), true) {
SwigDirectorConnect();
}
private void SwigDirectorConnect() {
if (SwigDerivedClassHasMethod("UIntMethod", swigMethodTypes0))
swigDelegate0 = new SwigDelegateBase_0(SwigDirectorUIntMethod);
if (SwigDerivedClassHasMethod("BaseBoolMethod", swigMethodTypes1))
swigDelegate1 = new SwigDelegateBase_1(SwigDirectorBaseBoolMethod);
examplePINVOKE.Base_director_connect(swigCPtr, swigDelegate0, swigDelegate1);
}
private bool SwigDerivedClassHasMethod(string methodName, Type[] methodTypes) {
System.Reflection.MethodInfo methodInfo = this.GetType().GetMethod(methodName, methodTypes);
bool hasDerivedMethod = methodInfo.DeclaringType.IsSubclassOf(typeof(Base));
return hasDerivedMethod;
}
private uint SwigDirectorUIntMethod(uint x) {
return UIntMethod(x);
}
private void SwigDirectorBaseBoolMethod(IntPtr b, bool flag) {
BaseBoolMethod(new Base(b, false), flag);
}
internal delegate uint SwigDelegateBase_0(uint x);
internal delegate void SwigDelegateBase_1(IntPtr b, bool flag);
private SwigDelegateBase_0 swigDelegate0;
private SwigDelegateBase_1 swigDelegate1;
private static Type[] swigMethodTypes0 = new Type[] { typeof(uint) };
private static Type[] swigMethodTypes1 = new Type[] { typeof(Base), typeof(bool) };
}
Everything from the SwigDirectorConnect() method and below is code that is only generated when directors are enabled. The design comprises a C# delegate being initialised for each virtual method on construction of the class. Let's examine the BaseBoolMethod.
In the Base constructor a call is made to SwigDirectorConnect() which contains the initialisation code for all the virtual methods. It uses a support method, SwigDerivedClassHasMethod(), which simply uses reflection to determine if the named method, BaseBoolMethod, with the list of required parameter types, exists in a subclass. If it does not exist, the delegate is not initialised as there is no need for unmanaged code to call back into managed C# code. However, if there is an overridden method in any subclass, the delegate is required. It is then initialised to the SwigDirectorBaseBoolMethod which in turn will call BaseBoolMethod if invoked. The delegate is not initialised to the BaseBoolMethod directly as quite often types will need marshalling from the unmanaged type to the managed type in which case an intermediary method (SwigDirectorBaseBoolMethod ) is required for the marshalling. In this case, the C# Base class needs to be created from the unmanaged IntPtr type.
The last thing that SwigDirectorConnect() does is to pass the delegates to the unmanaged code. It calls the intermediary method Base_director_connect() which is really a call to the C function CSharp_Base_director_connect(). This method simply maps each C# delegate onto a C function pointer.
SWIGEXPORT void SWIGSTDCALL CSharp_Base_director_connect(void *objarg,
SwigDirector_Base::SWIG_Callback0_t callback0,
SwigDirector_Base::SWIG_Callback1_t callback1) {
Base *obj = (Base *)objarg;
SwigDirector_Base *director = dynamic_cast<SwigDirector_Base *>(obj);
if (director) {
director->swig_connect_director(callback0, callback1);
}
}
class SwigDirector_Base : public Base, public Swig::Director {
public:
SwigDirector_Base();
virtual unsigned int UIntMethod(unsigned int x);
virtual ~SwigDirector_Base();
virtual void BaseBoolMethod(Base const &b, bool flag);
typedef unsigned int (SWIGSTDCALL* SWIG_Callback0_t)(unsigned int);
typedef void (SWIGSTDCALL* SWIG_Callback1_t)(void *, unsigned int);
void swig_connect_director(SWIG_Callback0_t callbackUIntMethod,
SWIG_Callback1_t callbackBaseBoolMethod);
private:
SWIG_Callback0_t swig_callbackUIntMethod;
SWIG_Callback1_t swig_callbackBaseBoolMethod;
void swig_init_callbacks();
};
void SwigDirector_Base::swig_connect_director(SWIG_Callback0_t callbackUIntMethod,
SWIG_Callback1_t callbackBaseBoolMethod) {
swig_callbackUIntMethod = callbackUIntMethod;
swig_callbackBaseBoolMethod = callbackBaseBoolMethod;
}
Note that for each director class SWIG creates an unmanaged director class for making the callbacks. For example Base has SwigDirector_Base and SwigDirector_Base is derived from Base. Should a C# class be derived from Base, the underlying C++ SwigDirector_Base is created rather than Base. The SwigDirector_Base class then implements all the virtual methods, redirecting calls up to managed code if the callback/delegate is non-zero. The implementation of SwigDirector_Base::BaseBoolMethod shows this - the callback is made by invoking the swig_callbackBaseBoolMethod function pointer:
void SwigDirector_Base::BaseBoolMethod(Base const &b, bool flag) {
void * jb = 0 ;
unsigned int jflag ;
if (!swig_callbackBaseBoolMethod) {
Base::BaseBoolMethod(b,flag);
return;
} else {
jb = (Base *) &b;
jflag = flag;
swig_callbackBaseBoolMethod(jb, jflag);
}
}
There is a subtle gotcha with directors. If default parameters are used, it is recommended to follow a pattern of always calling a single method in any C# derived class. An example will clarify this and the reasoning behind the recommendation. Consider the following C++ class wrapped as a director class:
class Defaults {
public:
virtual ~Defaults();
virtual void DefaultMethod(int a=-100);
};
Recall that C++ methods with default parameters generate overloaded methods for each defaulted parameter, so a C# derived class can be created with two DefaultMethod override methods:
public class CSharpDefaults : Defaults
{
public override void DefaultMethod()
{
DefaultMethod(-100); // note C++ default value used
}
public override void DefaultMethod(int x)
{
}
}
It may not be clear at first, but should a user intend to call CSharpDefaults.DefaultMethod() from C++, a call is actually made to CSharpDefaults.DefaultMethod(int). This is because the initial call is made in C++ and therefore the DefaultMethod(int) method will be called as is expected with C++ calls to methods with defaults, with the default being set to -100. The callback/delegate matching this method is of course the overloaded method DefaultMethod(int). However, a call from C# to CSharpDefaults.DefaultMethod() will of course call this exact method and in order for behaviour to be consistent with calls from C++, the implementation should pass the call on to CSharpDefaults.DefaultMethod(int)using the C++ default value, as shown above.
When using multiple modules it is is possible to compile each SWIG generated wrapper into a different assembly. However, by default the generated code may not compile if generated classes in one assembly use generated classes in another assembly. The visibility of the getCPtr() and pointer constructor generated from the csbody typemaps needs changing. The default visibility is internal but it needs to be public for access from a different assembly. Just changing 'internal' to 'public' in the typemap achieves this. Two macros are available in csharp.swg to make this easier and using them is the preferred approach over simply copying the typemaps and modifying as this is forward compatible with any changes in the csbody typemap in future versions of SWIG. The macros are for the proxy and typewrapper classes and can respectively be used to to make the method and constructor public:
SWIG_CSBODY_PROXY(public, public, SWIGTYPE) SWIG_CSBODY_TYPEWRAPPER(public, public, public, SWIGTYPE)
Alternatively, instead of exposing these as public, consider using the [assembly:InternalsVisibleTo("Name")] attribute available in the .NET framework when you know which assemblies these can be exposed to. Another approach would be to make these public, but also to hide them from intellisense by using the [System.ComponentModel.EditorBrowsable(System.ComponentModel.EditorBrowsableState.Never)] attribute if you don't want users to easily stumble upon these so called 'internal workings' of the wrappers.
This example shows how to prevent premature garbage collection of objects when the underlying C++ class returns a pointer or reference to a member variable. The example is a direct equivalent to this Java equivalent.
Consider the following C++ code:
struct Wheel {
int size;
Wheel(int sz) : size(sz) {}
};
class Bike {
Wheel wheel;
public:
Bike(int val) : wheel(val) {}
Wheel& getWheel() { return wheel; }
};
and the following usage from C# after running the code through SWIG:
Wheel wheel = new Bike(10).getWheel();
Console.WriteLine("wheel size: " + wheel.size);
// Simulate a garbage collection
System.GC.Collect();
System.GC.WaitForPendingFinalizers();
Console.WriteLine("wheel size: " + wheel.size);
Don't be surprised that if the resulting output gives strange results such as...
wheel size: 10 wheel size: 135019664
What has happened here is the garbage collector has collected the Bike instance as it doesn't think it is needed any more. The proxy instance, wheel, contains a reference to memory that was deleted when the Bike instance was collected. In order to prevent the garbage collector from collecting the Bike instance a reference to the Bike must be added to the wheel instance. You can do this by adding the reference when the getWheel() method is called using the following typemaps.
%typemap(cscode) Wheel %{
// Ensure that the GC doesn't collect any Bike instance set from C#
private Bike bikeReference;
internal void addReference(Bike bike) {
bikeReference = bike;
}
%}
// Add a C# reference to prevent premature garbage collection and resulting use
// of dangling C++ pointer. Intended for methods that return pointers or
// references to a member variable.
%typemap(csout, excode=SWIGEXCODE) Wheel& getWheel {
IntPtr cPtr = $imcall;$excode
$csclassname ret = null;
if (cPtr != IntPtr.Zero) {
ret = new $csclassname(cPtr, $owner);
ret.addReference(this);
}
return ret;
}
The code in the first typemap gets added to the Wheel proxy class. The code in the second typemap constitutes the bulk of the code in the generated getWheel() function:
public class Wheel : IDisposable {
...
// Ensure that the GC doesn't collect any Bike instance set from C#
private Bike bikeReference;
internal void addReference(Bike bike) {
bikeReference = bike;
}
}
public class Bike : IDisposable {
...
public Wheel getWheel() {
IntPtr cPtr = examplePINVOKE.Bike_getWheel(swigCPtr);
Wheel ret = null;
if (cPtr != IntPtr.Zero) {
ret = new Wheel(cPtr, false);
ret.addReference(this);
}
return ret;
}
}
Note the addReference call.
The example is a direct equivalent to this Java equivalent. Managing memory can be tricky when using C++ and C# proxy classes. The previous example shows one such case and this example looks at memory management for a class passed to a C++ method which expects the object to remain in scope after the function has returned. Consider the following two C++ classes:
struct Element {
int value;
Element(int val) : value(val) {}
};
class Container {
Element* element;
public:
Container() : element(0) {}
void setElement(Element* e) { element = e; }
Element* getElement() { return element; }
};
and usage from C++
Container container;
Element element(20);
container.setElement(&element);
cout << "element.value: " << container.getElement()->value << endl;
and more or less equivalent usage from C#
Container container = new Container();
Element element = new Element(20);
container.setElement(element);
The C++ code will always print out 20, but the value printed out may not be this in the C# equivalent code. In order to understand why, consider a garbage collection occuring...
Container container = new Container();
Element element = new Element(20);
container.setElement(element);
Console.WriteLine("element.value: " + container.getElement().value);
// Simulate a garbage collection
System.GC.Collect();
System.GC.WaitForPendingFinalizers();
Console.WriteLine("element.value: " + container.getElement().value);
The temporary element created with new Element(20) could get garbage collected which ultimately means the container variable is holding a dangling pointer, thereby printing out any old random value instead of the expected value of 20. One solution is to add in the appropriate references in the C# layer...
public class Container : IDisposable {
...
// Ensure that the GC doesn't collect any Element set from C#
// as the underlying C++ class stores a shallow copy
private Element elementReference;
private HandleRef getCPtrAndAddReference(Element element) {
elementReference = element;
return Element.getCPtr(element);
}
public void setElement(Element e) {
examplePINVOKE.Container_setElement(swigCPtr, getCPtrAndAddReference(e));
}
}
The following typemaps will generate the desired code. The 'csin' typemap matches the input parameter type for the setElement method. The 'cscode' typemap simply adds in the specified code into the C# proxy class.
%typemap(csin) Element *e "getCPtrAndAddReference($csinput)"
%typemap(cscode) Container %{
// Ensure that the GC doesn't collect any Element set from C#
// as the underlying C++ class stores a shallow copy
private Element elementReference;
private HandleRef getCPtrAndAddReference(Element element) {
elementReference = element;
return Element.getCPtr(element);
}
%}
The NaN Exception example is a simple example of the "javain" typemap and its 'pre' attribute. This example demonstrates how a C++ date class, say CDate, can be mapped onto the standard .NET date class, System.DateTime by using the 'pre', 'post' and 'pgcppname' attributes of the "csin" typemap (the C# equivalent to the "javain" typemap). The example is an equivalent to the Java Date marshalling example. The idea is that the System.DateTime is used wherever the C++ API uses a CDate. Let's assume the code being wrapped is as follows:
class CDate {
public:
CDate();
CDate(int year, int month, int day);
int getYear();
int getMonth();
int getDay();
...
};
struct Action {
static int doSomething(const CDate &dateIn, CDate &dateOut);
Action(const CDate &date, CDate &dateOut);
};
Note that dateIn is const and therefore read only and dateOut is a non-const output type.
First let's look at the code that is generated by default, where the C# proxy class CDate is used in the proxy interface:
public class Action : IDisposable {
...
public Action(CDate dateIn, CDate dateOut)
: this(examplePINVOKE.new_Action(CDate.getCPtr(dateIn), CDate.getCPtr(dateOut)), true) {
if (examplePINVOKE.SWIGPendingException.Pending)
throw examplePINVOKE.SWIGPendingException.Retrieve();
}
public int doSomething(CDate dateIn, CDate dateOut) {
int ret = examplePINVOKE.Action_doSomething(swigCPtr,
CDate.getCPtr(dateIn),
CDate.getCPtr(dateOut));
if (examplePINVOKE.SWIGPendingException.Pending)
throw examplePINVOKE.SWIGPendingException.Retrieve();
return ret;
}
}
The CDate & and const CDate & C# code is generated from the following two default typemaps:
%typemap(cstype) SWIGTYPE & "$csclassname" %typemap(csin) SWIGTYPE & "$csclassname.getCPtr($csinput)"
where '$csclassname' is translated into the proxy class name, CDate and '$csinput' is translated into the name of the parameter, eg dateIn. From C#, the intention is then to call into a modifed API with something like:
System.DateTime dateIn = new System.DateTime(2011, 4, 13); System.DateTime dateOut = new System.DateTime(); // Note in calls below, dateIn remains unchanged and dateOut // is set to a new value by the C++ call Action action = new Action(dateIn, out dateOut); dateIn = new System.DateTime(2012, 7, 14);
To achieve this mapping, we need to alter the default code generation slightly so that at the C# layer, a System.DateTime is converted into a CDate. The intermediary layer will still take a pointer to the underlying CDate class. The typemaps to achieve this are shown below.
%typemap(cstype) const CDate & "System.DateTime"
%typemap(csin,
pre=" CDate temp$csinput = new CDate($csinput.Year, $csinput.Month, $csinput.Day);"
) const CDate &
"$csclassname.getCPtr(temp$csinput)"
%typemap(cstype) CDate & "out System.DateTime"
%typemap(csin,
pre=" CDate temp$csinput = new CDate();",
post=" $csinput = new System.DateTime(temp$csinput.getYear(),"
" temp$csinput.getMonth(), temp$csinput.getDay(), 0, 0, 0);",
cshin="out $csinput"
) CDate &
"$csclassname.getCPtr(temp$csinput)"
The resulting generated proxy code in the Action class follows:
public class Action : IDisposable {
...
public int doSomething(System.DateTime dateIn, out System.DateTime dateOut) {
CDate tempdateIn = new CDate(dateIn.Year, dateIn.Month, dateIn.Day);
CDate tempdateOut = new CDate();
try {
int ret = examplePINVOKE.Action_doSomething(swigCPtr,
CDate.getCPtr(tempdateIn),
CDate.getCPtr(tempdateOut));
if (examplePINVOKE.SWIGPendingException.Pending)
throw examplePINVOKE.SWIGPendingException.Retrieve();
return ret;
} finally {
dateOut = new System.DateTime(tempdateOut.getYear(),
tempdateOut.getMonth(), tempdateOut.getDay(), 0, 0, 0);
}
}
static private IntPtr SwigConstructAction(System.DateTime dateIn, out System.DateTime dateOut) {
CDate tempdateIn = new CDate(dateIn.Year, dateIn.Month, dateIn.Day);
CDate tempdateOut = new CDate();
try {
return examplePINVOKE.new_Action(CDate.getCPtr(tempdateIn), CDate.getCPtr(tempdateOut));
} finally {
dateOut = new System.DateTime(tempdateOut.getYear(),
tempdateOut.getMonth(), tempdateOut.getDay(), 0, 0, 0);
}
}
public Action(System.DateTime dateIn, out System.DateTime dateOut)
: this(Action.SwigConstructAction(dateIn, out dateOut), true) {
if (examplePINVOKE.SWIGPendingException.Pending)
throw examplePINVOKE.SWIGPendingException.Retrieve();
}
}
A few things to note:
So far we have considered the date as an input only and an output only type. Now let's consider CDate * used as an input/output type. Consider the following C++ function which modifies the date passed in:
void addYears(CDate *pDate, int years) {
*pDate = CDate(pDate->getYear() + years, pDate->getMonth(), pDate->getDay());
}
If usage of CDate * commonly follows this input/output pattern, usage from C# like the following
System.DateTime christmasEve = new System.DateTime(2000, 12, 24); example.addYears(ref christmasEve, 10); // christmasEve now contains 2010-12-24
will be possible with the following CDate * typemaps
%typemap(cstype, out="System.DateTime") CDate * "ref System.DateTime"
%typemap(csin,
pre=" CDate temp$csinput = new CDate($csinput.Year, $csinput.Month, $csinput.Day);",
post=" $csinput = new System.DateTime(temp$csinput.getYear(),"
" temp$csinput.getMonth(), temp$csinput.getDay(), 0, 0, 0);",
cshin="ref $csinput"
) CDate *
"$csclassname.getCPtr(temp$csinput)"
Globals are wrapped by the module class and for a module called example, the typemaps result in the following code:
public class example {
public static void addYears(ref System.DateTime pDate, int years) {
CDate temppDate = new CDate(pDate.Year, pDate.Month, pDate.Day);
try {
examplePINVOKE.addYears(CDate.getCPtr(temppDate), years);
} finally {
pDate = new System.DateTime(temppDate.getYear(), temppDate.getMonth(), temppDate.getDay(),
0, 0, 0);
}
}
...
}
The following typemap is the same as the previous but demonstrates how a using block can be used for the temporary variable. The only change to the previous typemap is the introduction of the 'terminator' attribute to terminate the using block. The subtractYears method is nearly identical to the above addYears method.
%typemap(csin,
pre=" using (CDate temp$csinput = new CDate($csinput.Year, $csinput.Month, $csinput.Day)) {",
post=" $csinput = new System.DateTime(temp$csinput.getYear(),"
" temp$csinput.getMonth(), temp$csinput.getDay(), 0, 0, 0);",
terminator=" } // terminate temp$csinput using block",
cshin="ref $csinput"
) CDate *
"$csclassname.getCPtr(temp$csinput)"
void subtractYears(CDate *pDate, int years) {
*pDate = CDate(pDate->getYear() - years, pDate->getMonth(), pDate->getDay());
}
The resulting generated code shows the termination of the using block:
public class example {
public static void subtractYears(ref System.DateTime pDate, int years) {
using (CDate temppDate = new CDate(pDate.Year, pDate.Month, pDate.Day)) {
try {
examplePINVOKE.subtractYears(CDate.getCPtr(temppDate), years);
} finally {
pDate = new System.DateTime(temppDate.getYear(), temppDate.getMonth(), temppDate.getDay(),
0, 0, 0);
}
} // terminate temppDate using block
}
...
}
The previous section looked at converting a C++ date class to System.DateTime for parameters. This section extends this idea so that the correct marshalling is obtained when wrapping C++ variables. Consider the same CDate class from the previous section and a global variable:
CDate ImportantDate = CDate(1999, 12, 31);
The aim is to use System.DateTime from C# when accessing this date as shown in the following usage where the module name is 'example':
example.ImportantDate = new System.DateTime(2000, 11, 22);
System.DateTime importantDate = example.ImportantDate;
Console.WriteLine("Important date: " + importantDate);
When SWIG wraps a variable that is a class/struct/union, it is wrapped using a pointer to the type for the reasons given in Structure data members. The typemap type required is thus CDate *. Given that the previous section already designed CDate * typemaps, we'll use those same typemaps plus the 'csvarin' and 'csvarout' typemaps.
%typemap(cstype, out="System.DateTime") CDate * "ref System.DateTime"
%typemap(csin,
pre=" CDate temp$csinput = new CDate($csinput.Year, $csinput.Month, $csinput.Day);",
post=" $csinput = new System.DateTime(temp$csinput.getYear(),"
" temp$csinput.getMonth(), temp$csinput.getDay(), 0, 0, 0);",
cshin="ref $csinput"
) CDate *
"$csclassname.getCPtr(temp$csinput)"
%typemap(csvarin, excode=SWIGEXCODE2) CDate * %{
/* csvarin typemap code */
set {
CDate temp$csinput = new CDate($csinput.Year, $csinput.Month, $csinput.Day);
$imcall;$excode
} %}
%typemap(csvarout, excode=SWIGEXCODE2) CDate * %{
/* csvarout typemap code */
get {
IntPtr cPtr = $imcall;
CDate tempDate = (cPtr == IntPtr.Zero) ? null : new CDate(cPtr, $owner);$excode
return new System.DateTime(tempDate.getYear(), tempDate.getMonth(), tempDate.getDay(),
0, 0, 0);
} %}
For a module called example, the typemaps result in the following code:
public class example {
public static System.DateTime ImportantDate {
/* csvarin typemap code */
set {
CDate tempvalue = new CDate(value.Year, value.Month, value.Day);
examplePINVOKE.ImportantDate_set(CDate.getCPtr(tempvalue));
}
/* csvarout typemap code */
get {
IntPtr cPtr = examplePINVOKE.ImportantDate_get();
CDate tempDate = (cPtr == IntPtr.Zero) ? null : new CDate(cPtr, false);
return new System.DateTime(tempDate.getYear(), tempDate.getMonth(), tempDate.getDay(),
0, 0, 0);
}
}
...
}
Some points to note:
The 'pre' and 'post' attributes in the "csdirectorin" typemap act like the attributes of the same name in the "csin" typemap. For example if we modify the Date marshalling example like this:
class CDate {
...
void setYear(int);
void setMonth(int);
void setDay(int);
};
struct Action {
virtual void someCallback(CDate &date);
virtual ~Action();
...
};
and declare %feature ("director") for the Action class, we would have to define additional marshalling rules for CDate & parameter. The typemap may look like this:
%typemap(csdirectorin,
pre="System.DateTime temp$iminput = new System.DateTime();",
post="CDate temp2$iminput = new CDate($iminput, false);\n"
"temp2$iminput.setYear(tempdate.Year);\n"
"temp2$iminput.setMonth(tempdate.Month);\n"
"temp2$iminput.setDay(tempdate.Day);"
) CDate &date "out temp$iminput"
The generated proxy class code will then contain the following wrapper for calling user-overloaded someCallback():
...
private void SwigDirectorsomeCallback(IntPtr date) {
System.DateTime tempdate = new System.DateTime();
try {
someCallback(out tempdate);
} finally {
// we create a managed wrapper around the existing C reference, just for convenience
CDate temp2date = new CDate(date, false);
temp2date.setYear(tempdate.Year);
temp2date.setMonth(tempdate.Month);
temp2date.setDay(tempdate.Day);
}
}
...
Pay special attention to the memory management issues, using these attributes.
C# supports the notion of partial classes whereby a class definition can be split into more than one file. It is possible to turn the wrapped C++ class into a partial C# class using the csclassmodifiers typemap. Consider a C++ class called ExtendMe :
class ExtendMe {
public:
int Part1() { return 1; }
};
The default C# proxy class generated is:
public class ExtendMe : IDisposable {
...
public int Part1() {
...
}
}
The default csclassmodifiers typemap shipped with SWIG is
%typemap(csclassmodifiers) SWIGTYPE "public class"
Note that the type used is the special catch all type SWIGTYPE . If instead we use the following typemap to override this for just the ExtendMe class:
%typemap(csclassmodifiers) ExtendMe "public partial class"
The C# proxy class becomes a partial class:
public partial class ExtendMe : IDisposable {
...
public int Part1() {
...
}
}
You can then of course declare another part of the partial class elsewhere, for example:
public partial class ExtendMe : IDisposable {
public int Part2() {
return 2;
}
}
and compile the following code:
ExtendMe em = new ExtendMe();
Console.WriteLine("part1: {0}", em.Part1());
Console.WriteLine("part2: {0}", em.Part2());
demonstrating that the class contains methods calling both unmanaged code - Part1() and managed code - Part2(). The following example is an alternative approach to adding managed code to the generated proxy class.
The previous example showed how to use partial classes to add functionality to a generated C# proxy class. It is also possible to extend a wrapped struct/class with C/C++ code by using the %extend directive. A third approach is to add some C# methods into the generated proxy class with the cscode typemap. If we declare the following typemap before SWIG parses the ExtendMe class used in the previous example
%typemap(cscode) ExtendMe %{
public int Part3() {
return 3;
}
%}
The generated C# proxy class will instead be:
public class ExtendMe : IDisposable {
...
public int Part3() {
return 3;
}
public int Part1() {
...
}
}
C# enums use int as the underlying type for each enum item. If you wish to change the underlying type to something else, then use the csbase typemap. For example when your C++ code uses a value larget than int, this is necessary as the C# compiler will not compile values which are too large to fit into an int. Here is an example:
%typemap(csbase) BigNumbers "uint"
%inline %{
enum BigNumbers { big=0x80000000, bigger };
%}
The generated enum will then use the given underlying type and compile correctly:
public enum BigNumbers : uint {
big = 0x80000000,
bigger
}
This chapter describes SWIG's support of CHICKEN. CHICKEN is a Scheme-to-C compiler supporting most of the language features as defined in the Revised^5 Report on Scheme. Its main attributes are that it
When confronted with a large C library, CHICKEN users can use SWIG to generate CHICKEN wrappers for the C library. However, the real advantages of using SWIG with CHICKEN are its support for C++ -- object-oriented code is difficult to wrap by hand in CHICKEN -- and its typed pointer representation, essential for C and C++ libraries involving structures or classes.
CHICKEN support was introduced to SWIG in version 1.3.18. SWIG relies on some recent additions to CHICKEN, which are only present in releases of CHICKEN with version number greater than or equal to 1.89. To use a chicken version between 1.40 and 1.89, see the Garbage collection section below.
You may want to look at any of the examples in Examples/chicken/ directory for the basic steps to run SWIG CHICKEN.
To run SWIG CHICKEN in C mode, use the -chicken option.
% swig -chicken example.i
To allow the wrapper to take advantage of future CHICKEN code generation improvements, part of the wrapper is direct CHICKEN function calls (example_wrap.c) and part is CHICKEN Scheme ( example.scm). The basic Scheme code must be compiled to C using your system's CHICKEN compiler or both files can be compiled directly using the much simpler csc.
% chicken example.scm -output-file oexample.c
So for the C mode of SWIG CHICKEN, example_wrap.c and oexample.c are the files that must be compiled to object files and linked into your project.
To run SWIG CHICKEN in C++ mode, use the -chicken -c++ option.
% swig -chicken -c++ example.i
This will generate example_wrap.cxx and example.scm . The basic Scheme code must be compiled to C using your system's CHICKEN compiler or both files can be compiled directly using the much simpler csc.
% chicken example.scm -output-file oexample.c
So for the C++ mode of SWIG CHICKEN, example_wrap.cxx and oexample.c are the files that must be compiled to object files and linked into your project.
Given a C variable, function or constant declaration named Foo_Bar, the declaration will be available in CHICKEN as an identifier ending with Foo-Bar. That is, an underscore is converted to a dash.
You may control what the CHICKEN identifier will be by using the %rename SWIG directive in the SWIG interface file.
The name of the module must be declared one of two ways:
The generated example.scm file then exports (declare (unit
modulename)). If you do not want SWIG to export the
(declare (unit modulename)), pass the -nounit option to SWIG.
CHICKEN will be able to access the module using the (declare
(uses modulename)) CHICKEN Scheme form.
Constants may be created using any of the four constructs in the interface file:
#define MYCONSTANT1 ...%constant int MYCONSTANT2 = ...const int MYCONSTANT3 = ...enum { MYCONSTANT4 = ... };In all cases, the constants may be accessed from within CHICKEN using the form (MYCONSTANT1); that is, the constants may be accessed using the read-only parameter form.
Variables are accessed using the full parameter form. For example, to set the C variable "int my_variable;", use the Scheme form (my-variable 2345). To get the C variable, use (my-variable) .
The %feature("constasvar") can be applied to any constant or immutable variable. Instead of exporting the constant as a function that must be called, the constant will appear as a scheme variable. This causes the generated .scm file to just contain the code (set! MYCONSTANT1 (MYCONSTANT1)). See Features and the %feature directive for info on how to apply the %feature.
C functions declared in the SWIG interface file will have
corresponding CHICKEN Scheme procedures. For example, the C function
"int sqrt(double x);" will be available using the Scheme form (sqrt
2345.0). A void return value will give
C_SCHEME_UNDEFINED as a result.
A function may return more than one value by using the OUTPUT
specifier (see Lib/chicken/typemaps.i). They will be returned as
multiple values using (values) if there is more than one
result (that is, a non-void return value and at least one argout
parameter, or a void return value and at least two argout parameters).
The return values can then be accessed with (call-with-values)
.
The SWIG chicken module has support for exceptions thrown from C or C++ code to be caught in scheme. See Exception handling with %exception for more information about declaring exceptions in the interface file.
Chicken supports both the SWIG_exception(int code, const char
*msg) interface as well as a SWIG_ThrowException(C_word
val) function for throwing exceptions from inside the %exception
blocks. SWIG_exception will throw a list consisting of the
code (as an integer) and the message. Both of these will throw an
exception using (abort), which can be handled by
(handle-exceptions). See the Chicken manual on Exceptions and
SFRI-12. Since the exception values are thrown directly, if
(condition-case) is used to catch an exception the exception will
come through in the val () case.
The following simple module
%module exception_test
%inline %{
void test_throw(int i) throws (int) {
if (i == 1) throw 15;
}
%}
could be run with
(handle-exceptions exvar
(if (= exvar 15)
(print "Correct!")
(print "Threw something else " exvar))
(test-throw 1))
The author of TinyCLOS, Gregor Kiczales, describes TinyCLOS as: "Tiny CLOS is a Scheme implementation of a `kernelized' CLOS, with a metaobject protocol. The implementation is even simpler than the simple CLOS found in `The Art of the Metaobject Protocol,' weighing in at around 850 lines of code, including (some) comments and documentation."
Almost all good Scheme books describe how to use metaobjects and generic procedures to implement an object-oriented Scheme system. Please consult a Scheme book if you are unfamiliar with the concept.
CHICKEN has a modified version of TinyCLOS, which SWIG CHICKEN uses if the -proxy argument is given. If -proxy is passed, then the generated example.scm file will contain TinyCLOS class definitions. A class named Foo is declared as <Foo>, and each member variable is allocated a slot. Member functions are exported as generic functions.
Primitive symbols and functions (the interface that would be presented if -proxy was not passed) are hidden and no longer accessible. If the -unhideprimitive command line argument is passed to SWIG, then the primitive symbols will be available, but each will be prefixed by the string "primitive:"
The exported symbol names can be controlled with the -closprefix and -useclassprefix arguments. If -useclassprefix is passed to SWIG, every member function will be generated with the class name as a prefix. If the -closprefix mymod: argument is passed to SWIG, then the exported functions will be prefixed by the string "mymod:". If -useclassprefix is passed, -closprefix is ignored.
Please refer to CHICKEN - A practical and portable Scheme system - User's manual for detailed help on how to link object files to create a CHICKEN Scheme program. Briefly, to link object files, be sure to add `chicken-config -extra-libs -libs` or `chicken-config -shared -extra-libs -libs`to your linker options. Use the -shared option if you want to create a dynamically loadable module. You might also want to use the much simpler csc or csc.bat.
Each scheme file that is generated by SWIG contains (declare
(uses modname)). This means that to load the module from
scheme code, the code must include (declare (uses modname
)).
We can easily use csc to build a static binary.
$ swig -chicken example.i $ csc -v example.scm example_impl.c example_wrap.c test_script.scm -o example $ ./example
Similar to the above, any number of module.scm files could be compiled into a shared library, and then that shared library linked when compiling the main application.
$ swig -chicken example.i $ csc -sv example.scm example_wrap.c example_impl.c -o example.so
The example.so file can then linked with test_script.scm
when it is compiled, in which case test_script.scm must have
(declare (uses example)). Multiple SWIG modules could have been
linked into example.so and each one accessed with a
(declare (uses ... )).
$ csc -v test_script.scm -lexample
An alternative is that the test_script.scm can have the code
(load-library 'example "example.so"), in which case the test
script does not need to be linked with example.so. The test_script.scm
file can then be run with csi.
Building a shared library like in the above section only works if the
library is linked at compile time with a script containing
(declare (uses ...)) or is loaded explicitly with
(load-library 'example "example.so"). It is not the format that
CHICKEN expects for extension libraries and eggs. The problem is the
(declare (unit modname)) inside the modname.scm
file. There are two possible solutions to this.
First, SWIG accepts a -nounit argument, in which case the
(declare (unit modname)) is not generated. Then, the
modname.scm and modname_wrap.c files must be
compiled into their own shared library.
$ csc -sv modname.scm modname_wrap.c modname_impl.c -o modname.so
This library can then be loaded by scheme code with the
(require 'modname) function. See the Loading-extension-libraries
in the eval unit inside the CHICKEN manual for more information.
Another alternative is to run SWIG normally and create a scheme file
that contains (declare (uses modname)) and then
compile that file into the shared library as well. For example, inside
the mod_load.scm file,
(declare (uses mod1)) (declare (uses mod2))
Which would then be compiled with
$ swig -chicken mod1.i $ swig -chicken mod2.i $ csc -sv mod_load.scm mod1.scm mod2.scm mod1_wrap.c mod2_wrap.c mod1_impl.c mod2_impl.c -o mod.so
Then the extension library can be loaded with (require 'mod)
. As we can see here, mod_load.scm contains the code that gets
executed when the module is loaded. All this code does is load both
mod1 and mod2. As we can see, this technique is more useful when you
want to combine a few SWIG modules into one chicken extension library,
especially if modules are related by %import
In either method, the files that are compiled into the shared library could also be packaged into an egg. The mod1_wrap.c and mod2_wrap.c files that are created by SWIG are stand alone and do not need SWIG to be installed to be compiled. Thus the egg could be distributed and used by anyone, even if SWIG is not installed.
See the Examples/chicken/egg directory in the SWIG source for an example that builds two eggs, one using the first method and one using the second method.
Linking together multiple modules that share type information using
the %import directive while also using -proxy is
more complicated. For example, if mod2.i imports mod1.i
, then the mod2.scm file contains references to symbols
declared in mod1.scm, and thus a (declare (uses mod1
)) or (require 'mod1) must be exported to the
top of mod2.scm. By default, when SWIG encounters an
%import "modname.i" directive, it exports (declare (uses
modname)) into the scm file. This works fine unless mod1 was
compiled with the -nounit argument or was compiled into an
extension library with other modules under a different name.
One option is to override the automatic generation of (declare
(uses mod1)) by passing the -noclosuses option to SWIG
when compiling mod2.i. SWIG then provides the
%insert(closprefix) %{ %} directive. Any scheme code inside that
directive is inserted into the generated .scm file, and if mod1
was compiled with -nounit, the directive should contain
(require 'mod1). This option allows for mixed loading as well,
where some modules are imported with (declare (uses modname
)) (which means they were compiled without -nounit) and some are
imported with (require 'modname).
The other option is to use the second idea in the above section.
Compile all the modules normally, without any %insert(closprefix)
, -nounit, or -noclosuses. Then the modules will
import each other correctly with (declare (uses ...)). To
create an extension library or an egg, just create a
module_load.scm file that (declare (uses ...)) all the
modules.
The Chicken module handles all types via typemaps. This information
is read from Lib/chicken/typemaps.i and
Lib/chicken/chicken.swg.
For pointer types, SWIG uses CHICKEN tagged pointers. A tagged pointer is an ordinary CHICKEN pointer with an extra slot for a void *. With SWIG CHICKEN, this void * is a pointer to a type-info structure. So each pointer used as input or output from the SWIG-generated CHICKEN wrappers will have type information attached to it. This will let the wrappers correctly determine which method should be called according to the object type hierarchy exposed in the SWIG interface files.
To construct a Scheme object from a C pointer, the wrapper code
calls the function SWIG_NewPointerObj(void *ptr, swig_type_info
*type, int owner), The function that calls
SWIG_NewPointerObj must have a variable declared C_word
*known_space = C_alloc(C_SIZEOF_SWIG_POINTER); It is ok to call
SWIG_NewPointerObj more than once, just make sure known_space has
enough space for all the created pointers.
To get the pointer represented by a CHICKEN tagged pointer, the
wrapper code calls the function SWIG_ConvertPtr(C_word s, void
**result, swig_type_info *type, int flags), passing a pointer to
a struct representing the expected pointer type. flags is either zero
or SWIG_POINTER_DISOWN (see below).
If the owner flag passed to SWIG_NewPointerObj is 1,
NewPointerObj will add a finalizer to the type which will call
the destructor or delete method of that type. The destructor and delete
functions are no longer exported for use in scheme code, instead SWIG
and chicken manage pointers. In situations where SWIG knows that a
function is returning a type that should be garbage collected, SWIG
will automatically set the owner flag to 1. For other functions, the
%newobject directive must be specified for functions whose return
values should be garbage collected. See
Object ownership and %newobject for more information.
In situations where a C or C++ function will assume ownership of a
pointer, and thus chicken should no longer garbage collect it, SWIG
provides the DISOWN input typemap. After applying this
typemap (see the Typemaps chapter for more
information on how to apply typemaps), any pointer that gets passed in
will no longer be garbage collected. An object is disowned by passing
the SWIG_POINTER_DISOWN flag to SWIG_ConvertPtr
. Warning: Since the lifetime of the object is now controlled by
the underlying code, the object might get deleted while the scheme code
still holds a pointer to it. Further use of this pointer can lead to a
crash.
Adding a finalizer function from C code was added to chicken in the
1.89 release, so garbage collection does not work for chicken versions
below 1.89. If you would like the SWIG generated code to work with
chicken 1.40 to 1.89, pass the -nocollection argument to
SWIG. This will not export code inside the _wrap.c file to register
finalizers, and will then export destructor functions which must be
called manually.
In Chicken versions equal to or below 1.92, TinyCLOS has a limitation such that generic methods do not properly work on methods with different number of specializers: TinyCLOS assumes that every method added to a generic function will have the same number of specializers. SWIG generates functions with different lengths of specializers when C/C++ functions are overloaded. For example, the code
class Foo {};
int foo(int a, Foo *b);
int foo(int a);
will produce scheme code
(define-method (foo (arg0 <top>) (arg1 <Foo>)) (call primitive function)) (define-method (foo (arg0 <top>)) (call primitive function))
Using unpatched TinyCLOS, the second (define-method)
will replace the first one, so calling (foo 3 f) will
produce an error.
There are three solutions to this. The easist is to upgrade to the latest Chicken version. Otherwise, the file Lib/chicken/tinyclos-multi-generic.patch in the SWIG source contains a patch against tinyclos.scm inside the 1.92 chicken source to add support into TinyCLOS for multi-argument generics. (This patch was accepted into Chicken) This requires chicken to be rebuilt and custom install of chicken. An alternative is the Lib/chicken/multi-generic.scm file in the SWIG source. This file can be loaded after TinyCLOS is loaded, and it will override some functions inside TinyCLOS to correctly support multi-argument generics. Please see the comments at the top of both files for more information.
From the D Programming Language web site: D is a systems programming language. Its focus is on combining the power and high performance of C and C++ with the programmer productivity of modern languages like Ruby and Python. [...] The D language is statically typed and compiles directly to machine code. As such, it is not very surprising that D is able to directly interface with C libraries. Why would a SWIG module for D be needed then in the first place?
Well, besides the obvious downside that the C header files have to be manually converted to D modules for this to work, there is one major inconvenience with this approach: D code usually is on a higher abstraction level than C, and many of the features that make D interesting are simply not available when dealing with C libraries, requiring you e.g. to manually convert strings between pointers to \0-terminated char arrays and D char arrays, making the algorithms from the D2 standard library unusable with C arrays and data structures, and so on.
While these issues can be worked around relatively easy by hand-coding a thin wrapper layer around the C library in question, there is another issue where writing wrapper code per hand is not feasible: C++ libraries. D did not support interfacing to C++ in version 1 at all, and even if extern(C++) has been added to D2, the support is still very limited, and a custom wrapper layer is still required in many cases.
To help addressing these issues, the SWIG C# module has been forked to support D. Is has evolved quite a lot since then, but there are still many similarities, so if you do not find what you are looking for on this page, it might be worth having a look at the chapter on C# (and also on Java, since the C# module was in turn forked from it).
To activate the D module, pass the -d option to SWIG at the command line. The same standard command line switches as with any other language module are available, plus the following D specific ones:
By default, SWIG generates code for D1/Tango. Use the -d2 flag to target D2/Phobos instead.
By default, SWIG generates two D modules: the proxy module, named like the source module (either specified via the %module directive or via the module command line switch), which contains all the proxy classes, functions, enums, etc., and the intermediary module (named like the proxy module, but suffixed with _im), which contains all the extern(C) function declarations and other private parts only used internally by the proxy module.
If the split proxy mode is enabled by passing this switch at the command line, all proxy classes and enums are emitted to their own D module instead. The main proxy module only contains free functions and constants in this case.
By default, the proxy D modules and the intermediary D module are written to the root package. Using this option, you can specify another target package instead.
The code SWIG generates to dynamically load the C/C++ wrapper layer looks for a library called $module_wrap by default. With this switch, you can override the name of the file the wrapper code loads at runtime (the lib prefix and the suffix for shared libraries are appended automatically, depending on the OS).
This might especially be useful if you want to invoke SWIG several times on separate modules, but compile the resulting code into a single shared library.
If you already know the SWIG C# module, you might find the following name comparison table useful:
ctype <-> ctype imtype <-> imtype cstype <-> dtype csin <-> din csout <-> dout csdirectorin <-> ddirectorin csdirectorout <-> ddirectorout csinterfaces <-> dinterfaces csinterfaces_derived <-> dinterfaces_derived csbase <-> dbase csclassmodifiers <-> dclassmodifiers cscode <-> dcode csimports <-> dimports csbody <-> dbody csfinalize <-> ddestructor csdestruct <-> ddispose csdestruct_derived <-> ddispose_derived
Mapping of types between the C/C++ library, the C/C++ library wrapper exposing the C functions, the D wrapper module importing these functions and the D proxy code.
The ctype typemap is used to determine the types to use in the C wrapper functions. The types from the imtype typemap are used in the extern(C) declarations of these functions in the intermediary D module. The dtype typemap contains the D types used in the D proxy module/class.
Used for converting between the types for C/C++ and D when generating the code for the wrapper functions (on the C++ side).
The code from the in typemap is used to convert arguments to the C wrapper function to the type used in the wrapped code (ctype ->original C++ type), the out typemap is utilized to convert values from the wrapped code to wrapper function return types (original C++ type->ctype).
The directorin typemap is used to convert parameters to the type used in the D director callback function, its return value is processed by directorout (see below).
Typemaps for code generation in D proxy and type wrapper classes.
The din typemap is used for converting function parameter types from the type used in the proxy module or class to the type used in the intermediary D module (the $dinput macro is replaced). To inject further parameter processing code before or after the call to the intermediary layer, the pre, post and terminator attributes can be used (please refer to the C# date marshalling example for more information on these).
The dout typemap is used for converting function return values from the return type used in the intermediary D module to the type returned by the proxy function. The $excode special variable in dout typemaps is replaced by the excode typemap attribute code if the method can throw any exceptions from unmanaged code, otherwise by nothing (the $imcall and $owner macros are replaced).
The code from the ddirectorin and ddirectorout typemaps is used for conversion in director callback functions. Arguments are converted to the type used in the proxy class method they are calling by using the code from ddirectorin, the proxy class method return value is converted to the type the C++ code expects via the ddirectorout typemap (the $dcall and $winput macros are replaced).
The full chain of type conversions when a director callback is invoked looks like this:
type CPPClass::method(type a)
↑ ↓
<directorout> <directorin>
↑ ↓
ctype methodCallback(ctype a) C++
:::::::::::::::::::::::::::::::::::::::::::::::::::::::::::::
imtype methodCallback(imtype a) D
↑ ↓
<ddirectorout> <ddirectorin>
↑ ↓
dtype DClass.method(dtype a)
Because, unlike many scripting languages supported by SWIG, D does not need any dynamic dispatch helper to access an overloaded function, the purpose of these is merely to issue a warning for overloaded C++ functions that cannot be overloaded in D (as more than one C++ type maps to a single D type).
These typemaps are used for generating the skeleton of proxy classes for C++ types.
By overriding dbase, dinterfaces or dinterfaces_derived, the inheritance chain of the generated proxy class for a type can be modified. dclassmodifiers allows you to add any custom modifiers around the class keyword.
Using dcode and dimports, you can specify additional D code which will be emitted into the class body respectively the imports section of the D module the class is written to.
dconstructor, ddestructor , ddispose and ddispose_derived are used to generate the class constructor, destructor and dispose() method, respectively. The auxiliary code for handling the pointer to the C++ object is stored in dbody and dbody_derived. You can override them for specific types.
The standard SWIG special variables are available for use within typemaps as described in the Typemaps documentation , for example $1, $input, $result etc.
When generating D wrappers, a few additional macros are available:
This special variable works similar to $n_type in that it returns the name of a type - it expands to the D proxy class name of the type being wrapped. If the type does not have an associated proxy class, it expands to the type wrapper class name, for example, SWIGTYPE_p_p_SomeCppClass is generated when wrapping SomeCppClass **.
There are two other variants available, $&dclassname and $*dclassname. The former adds a level of indirection, while the latter removes one. For instance, when wrapping Foo **, $*dclassname would be replaced by the proxy class name corresponding to Foo *.
This special variable expands the fully qualified C++ class into the package name, if used by the nspace feature, and the proxy class name, mangled for use as a function name. For example, Namespace1::Namespace2::Klass is expanded into Namespace1_Namespace2_Klass_.
This special variable might be useful for calling certain functions in the wrapper layer (e.g. upcast wrappers) which are mangled like this.
In code inserted into the generated C/C++ wrapper functions, this variable is replaced by either 0 or nothing at all, depending on whether the function has a return value or not. It can be used to bail out early e.g. in case of errors (return $null;).
This variable is used in din typemaps and is replaced by the expression which is to be passed to C/C++.
For example, this input
%typemap(din) SomeClass * "SomeClass.getCPointer($dinput)"
%inline %{
class SomeClass {};
void foo(SomeClass *arg);
%}
leads to the following D proxy code being generated:
void foo(SomeClass arg) {
example_im.foo(SomeClass.getCPointer(arg));
}
These variables are used in dout typemaps. $imcall contains the call to the intermediary module which provides the value to be used, and $owner signals if the caller is responsible for managing the object lifetime (that is, if the called method is a constructor or has been marked via %newobject ).
Consider the following example:
%typemap(dout) SomeClass * {
return new SomeClass($imcall, $owner);
}
%inline %{
class SomeClass;
SomeClass *foo();
%newobject bar();
SomeClass *bar();
%}
The code generated for foo() and bar() looks like this:
SomeClass foo() {
return new SomeClass(example_im.foo(), false);
}
SomeClass bar() {
return new SomeClass(example_im.bar(), true);
}
These variables are used in the director-specific typemaps ddirectorin and ddirectorout. They are more or less the reverse of the $imcall and $dinput macros: $dcall contains the invocation of the D proxy method of which the return value is to be passed back to C++, $winput contains the parameter value from C++.
This variable is used in dout and dconstructor typemaps and is filled with the contents of the excode typemap attribute if an exception could be thrown from the C++ side. See the C# documentation for details.
Currently for internal use only, it contains the D name of the C++ base class (if any) inside proxy classes.
This macro is only valid inside the dconstructor typemap and contains the value of the dconstructor typemap attribute if the currently wrapped class has directors enabled.
This is how the default dconstructor typemap looks like (you usually do not want to specify a custom one):
%typemap(dconstructor, excode=SWIGEXCODE,
directorconnect="\n swigDirectorConnect();") SWIGTYPE {
this($imcall, true);$excode$directorconnect
}
This macro is used in the dimports typemap if a dependency on another D type generated by SWIG is added by a custom typemap.
Consider the following code snippet:
%typemap(dinterfaces) SomeClass "AnInterface, AnotherInterface";
This causes SWIG to add AnInterface and AnotherInterface to the base class list of SomeClass:
class SomeClass : AnInterface, AnotherInterface {
...
}
For this to work, AnInterface and AnotherInterface have to be in scope. If SWIG is not in split proxy mode, this is already the case, but it it is, they have to be added to the import list via the dimports typemap. Additionally, the import statement depends on the package SWIG is configured to emit the modules to.
The $importtype macro helps you to elegantly solve this problem:
%typemap(dimports) RemoteMpe %{
$importtype(AnInterface)
$importtype(AnotherInterface)
%}
If SWIG is in split proxy mode, it expands to an import statement for the specified type, to nothing if not.
Expands to the name of the main proxy D module.
Contains the fully qualified name of the intermediary D module.
The D module defines a number of directives which modify the SWIG features set globally or for a specific declaration:
Out of the box, SWIG generates accessor methods for C #defines and C++ constants. The %dmanifestconst directive enables wrapping these constants as D manifest constants (const in D1, enum in D2).
For this to work, the C/C++ code for the constant value must directly compile as D code, though. If this is not the case, you can manually override the expression written to the D proxy module using the %dconstvalue directive, passing the new value as parameter.
For enums, again %dconstvalue can be used to override the value of an enum item if the initializer should not compile in D.
This directive can be used to override the modifiers for a proxy function. For instance, you could make a public C++ member function private in D like this:
%dmethodmodifiers A::foo "private";
%inline %{
struct A {
void foo();
};
%}
There are a few SWIG pragmas specific to the D module, which you can use to influence the D code SWIG generates:
The passed text (D code) is copied verbatim to the intermediary D module. For example, it can be (and is, internally) used to emit additional private helper code for the use by proxy typemaps.
Additional code to be emitted to the imports section of the intermediary D module (the $importtype macro can be used here). You probably want to use this in conjunction with the imdmodulecode pragma.
Just like proxydmodulecode, the argument is copied to the proxy D module (if SWIG is in split proxy mode and/or the nspace feature is used, it is emitted to the main proxy D module only).
The D module currently does not support specifying dependencies on external modules (e.g. from the standard library) for the D typemaps. To add the import statements to the proxy modules (resp. to all proxy modules if in split proxy mode), you can use the globalproxyimports directive.
For example:
%typemap(din) char[] "($dinput ? tango.stdc.stringz.toStringz($dinput) : null)" %pragma(d) globalproxyimports = "static import tango.stdc.stringz;";
The D code for loading the wrapper library (it is copied to the intermediary D module). The $wrapperloaderbindcode variable is replaced by the list of commands for binding the functions from the wrapper library to the symbols in the intermediary D module.
Each time this pragma is specified, the previous value is overwritten.
The D command to use for binding the wrapper functions from the C/C++ library to the symbols in the intermediary D module. The $function variable contains the name of the D function in the wrap module, the $symbol variable is replaced by the name of the symbol in the library.
Each time this pragma is specified, the previous value is overwritten.
Out of the box, C++ exceptions are fundamentally incompatible to their equivalent in the D world and cannot simply be propagated to a calling D method. There is, however, an easy way to solve this problem: Just catch the exception in the C/C++ wrapper layer, pass the contents to D, and make the wrapper code rethrow the exception in the D world.
The implementation details of this are a bit crude, but the SWIG D module automatically takes care of this, as long as it is able to detect that an exception could potentially be thrown (e.g. because the C++ method has a throw(...) exception specification).
As this feature is implemented in exactly the same way it is for C#, please see the C# documentation for a more detailed explanation.
When the directors feature is activated, SWIG generates extra code on both the C++ and the D side to enable cross-language polymorphism. Essentially, this means that if you subclass a proxy class in D, C++ code can access any overridden virtual methods just as if you created a derived class in C++.
There is no D specific documentation yet, but the way the feature is implemented is very similar to how it is done in Java and C#.
By default, SWIG flattens all C++ namespaces into a single target language namespace, but as for Java and C#, the nspace feature is supported for D. If it is active, C++ namespaces are mapped to D packages/modules. Note, however, that like for the other languages, free variables and functions are not supported yet; currently, they are all allows written to the main proxy D module.
Contrary to many of the scripting languages supported by SWIG, D fully supports C-style pointers. The D module thus includes a custom mechanism to wrap C pointers directly as D pointers where applicable, that is, if the type that is pointed to is represented the same in C and D (on the bit-level), dubbed a primitive type below.
Central to this custom pointer handling scheme are two typemap attributes: the cprimitive attribute on the dtype typemap and the nativepointer attribute on all the typemaps which influence the D side of the code (dtype, din, dout, ...). When a D typemap is looked up, the following happens behind the scenes:
First, the matching typemap is determined by the usual typemap lookup rules. Then, it is checked if the result has the nativepointer attribute set. If it is present, it means that its value should replace the typemap value if and only if the actual type the typemap is looked up for is a primitive type, a pointer to a primitive type (through an arbitrary level of indirections), or a function pointer with only primitive types in its signature.
To determine if a type should be considered primitive, the cprimitive attribute on its dtype attribute is used. For example, the dtype typemap for float has cprimitive="1", so the code from the nativepointer attribute is taken into account e.g. for float ** or the function pointer float (*)(float *).
The D module comes with basic operator overloading support for both D1 and D2. There are, however, a few limitations arising from conceptual differences between C++ and D:
The first key difference is that C++ supports free functions as operators (along with argument-dependent lookup), while D requires operators to be member functions of the class they are operating on. SWIG can only automatically generate wrapping code for member function operators; if you want to use operators defined as free functions in D, you need to handle them manually.
Another set of differences between C++ and D concerns individual operators. For example, there are quite a few operators which are overloadable in C++, but not in D, for example && and || , but also !, and prefix increment/decrement operators in D1 resp. their postfix pendants in D2.
There are also some cases where the operators can be translated to D, but the differences in the implementation details are big enough that a rather involved scheme would be required for automatic wrapping them, which has not been implemented yet. This affects, for example, the array subscript operator, [], in combination with assignments - while operator [] in C++ simply returns a reference which is then written to, D resorts to a separate opIndexAssign method -, or implicit casting (which was introduced in D2 via alias this ). Despite the lack of automatic support, manually handling these cases should be perfectly possible.
As with any other language, the SWIG test-suite can be built for D using the *-d-test-suite targets of the top-level Makefile. By default, D1 is targeted, to build it with D2, use the optional D_VERSION variable, e.g. make check-d-test-suite D_VERSION=2 .
Note: If you want to use GDC on Linux or another platform which requires you to link libdl for dynamically loading the shared library, you might have to add -ldl manually to the d_compile target in Examples/Makefile, because GDC does not currently honor the pragma(lib,...) statement.
There are no D-specific typemap examples yet. However, with the above name comparison table, you should be able to get an idea what can be done by looking at the corresponding C# section.
There are a couple of features which are not implemented yet, but would be very useful and might be added in the near future:
Some generated code might also be a bit rough around the edges, particularly in the following areas:
This chapter describes SWIG's support of Go. For more information on the Go programming language see golang.org .
Go is a compiled language, not a scripting language. However, it does not support direct calling of functions written in C/C++. The cgo program may be used to generate wrappers to call C code from Go, but there is no convenient way to call C++ code. SWIG fills this gap.
There are (at least) two different Go compilers. One is the gc compiler, normally invoked under the names 6g, 8g, or 5g. The other is the gccgo compiler, which is a frontend to the gcc compiler suite. The interface to C/C++ code is completely different for the two Go compilers. SWIG supports both, selected by a command line option.
Because Go is a type-safe compiled language, SWIG's runtime type checking and runtime library are not used with Go. This should be borne in mind when reading the rest of the SWIG documentation.
To generate Go code, use the -go option with SWIG. By default SWIG will generate code for the gc compilers. To generate code for gccgo, you should also use the -gccgo option.
These are the command line options for SWIG's GO module. They can also be seen by using:
swig -go -help
| Go specific options | |
|---|---|
| -intgo-type-size %lt;s%gt; | Set the size for the Go type int. This controls the size that the C/C++ code expects to see. The %lt;s%gt; argument should be 32 or 64. This option is currently required during the transition from Go 1.0 to Go 1.1, as the size of int on 64-bit x86 systems changes between those releases (from 32 bits to 64 bits). In the future the option may become optional, and SWIG will assume that the size of int is the size of a C pointer. |
| -gccgo | Generate code for gccgo. The default is to generate code for 6g/8g/5g. |
| -package <name> | Set the name of the Go package to <name>. The default package name is the SWIG module name. |
| -soname %lt;name%gt; | Set the runtime name of the shared
library that the dynamic linker should include at runtime. The default
is the package name with ".so" appended. This is only used when
generating code for 6g/8g/5g; when using gccgo, the equivalent name
will be taken from the -soname option passed to the
linker. |
| -go-prefix <prefix> | When generating code for gccgo, set the prefix to use. This corresponds to the -fgo-prefix option to gccgo. |
| -long-type-size <s> | Set the size for the C/C++ type long. This controls whether long is converted to the Go type int32 or int64. The <s> argument should be 32 or 64. |
When generating Go code, SWIG will generate the following files:
A typical command sequence would look like this:
% swig -go example.i % gcc -c -fpic example.c % gcc -c -fpic example_wrap.c % gcc -shared example.o example_wrap.o -o example.so % 6g example.go % 6c example_gc.c % gopack grc example.a example.6 example_gc.6 % 6g main.go # your code, not generated by SWIG % 6l main.6
By default, SWIG attempts to build a natural Go interface to your C/C++ code. However, the languages are somewhat different, so some modifications have to occur. This section briefly covers the essential aspects of this wrapping.
All Go source code lives in a package. The name of this package will default to the name of the module from SWIG's %module directive. You may override this by using SWIG's -package command line option.
In Go, a function is only visible outside the current package if the first letter of the name is uppercase. This is quite different from C/C++. Because of this, C/C++ names are modified when generating the Go interface: the first letter is forced to be uppercase if it is not already. This affects the names of functions, methods, variables, constants, enums, and classes.
C/C++ variables are wrapped with setter and getter functions in Go. First the first letter of the variable name will be forced to uppercase, and then Get or Set will be prepended. For example, if the C/C++ variable is called var, then SWIG will define the functions GetVar and SetVar. If a variable is declared as const, or if SWIG's %immutable directive is used for the variable, then only the getter will be defined.
C++ classes will be discussed further below. Here we'll note that the first letter of the class name will be forced to uppercase to give the name of a type in Go. A constructor will be named New followed by that name, and the destructor will be named Delete followed by that name.
C/C++ constants created via #define or the %constant directive become Go constants, declared with a const declaration.
C/C++ enumeration types will cause SWIG to define an integer type with the name of the enumeration (with first letter forced to uppercase as usual). The values of the enumeration will become variables in Go; code should avoid modifying those variables.
Go has interfaces, methods and inheritance, but it does not have classes in the same sense as C++. This sections describes how SWIG represents C++ classes represented in Go.
For a C++ class ClassName, SWIG will define two types in Go: an underlying type, which will just hold a pointer to the C++ type, and an interface type. The interface type will be named ClassName . SWIG will define a function NewClassName which will take any constructor arguments and return a value of the interface type ClassName. SWIG will also define a destructor DeleteClassName .
SWIG will represent any methods of the C++ class as methods on the underlying type, and also as methods of the interface type. Thus C++ methods may be invoked directly using the usual val.MethodName syntax. Public members of the C++ class will be given getter and setter functions defined as methods of the class.
SWIG will represent static methods of C++ classes as ordinary Go functions. SWIG will use names like ClassNameMethodName. SWIG will give static members getter and setter functions with names like GetClassName_VarName.
Given a value of the interface type, Go code can retrieve the pointer to the C++ type by calling the Swigcptr method. This will return a value of type SwigcptrClassName, which is just a name for uintptr. A Go type conversion can be used to convert this value to a different C++ type, but note that this conversion will not be type checked and is essentially equivalent to reinterpret_cast. This should only be used for very special cases, such as where C++ would use a dynamic_cast.
Note that C++ pointers to compound objects are represented in go as objects themselves, not as go pointers. So, for example, if you wrap the following function:
class MyClass {
int MyMethod();
static MyClass *MyFactoryFunction();
};
You will get go code that looks like this:
type MyClass interface {
Swigcptr() uintptr
SwigIsMyClass()
MyMethod() int
}
MyClassMyFactoryFunction() MyClass {
// swig magic here
}
Note that the factory function does not return a go pointer; it actually returns a go interface. If the returned pointer can be null, you can check for this by calling the Swigcptr() method.
C++ class inheritance is automatically represented in Go due to its use of interfaces. The interface for a child class will be a superset of the interface of its parent class. Thus a value of the child class type in Go may be passed to a function which expects the parent class. Doing the reverse will require an explicit type assertion, which will be checked dynamically.
In order to use C++ templates in Go, you must tell SWIG to create wrappers for a particular template instantation. To do this, use the %template directive.
SWIG's director feature permits a Go type to act as the subclass of a C++ class with virtual methods. This is complicated by the fact that C++ and Go define inheritance differently. In Go, structs can inherit methods via anonymous field embedding. However, when a method is called for an embedded struct, if that method calls any other methods, they are called for the embedded struct, not for the original type. Therefore, SWIG must use Go interfaces to represent C++ inheritance.
In order to use the director feature in Go, you must define a type in your Go code. You must then add methods for the type. Define a method in Go for each C++ virtual function that you want to override. You must then create a value of your new type, and pass a pointer to it to the function NewDirectorClassName, where ClassName is the name of the C++ class. That will return a value of type ClassName.
For example:
type GoClass struct { }
func (p *GoClass) VirtualFunction() { }
func MakeClass() ClassName {
return NewDirectorClassName(&GoClass{})
}
Any call in C++ code to the virtual function will wind up calling the method defined in Go. The Go code may of course call other methods on itself, and those methods may be defined either in Go or in C++.
The following table lists the default type mapping from C/C++ to Go. This table will tell you which Go type to expect for a function which uses a given C/C++ type.
| C/C++ type | Go type |
| bool | bool |
| char | byte |
| signed char | int8 |
| unsigned char | byte |
| short | int16 |
| unsigned short | uint16 |
| int | int |
| unsigned int | uint |
| long | int32 or int64, depending on -long-type-size |
| unsigned long | uint32 or uint64, depending on -long-type-size |
| long long | int64 |
| unsigned long long | uint64 |
| float | float32 |
| double | float64 |
| char *
char [] | string |
Note that SWIG wraps the C char type as a character. Pointers and arrays of this type are wrapped as strings. The signed char type can be used if you want to treat char as a signed number rather than a character. Also note that all const references to primitive types are treated as if they are passed by value.
These type mappings are defined by the "gotype" typemap. You may change that typemap, or add new values, to control how C/C++ types are mapped into Go types.
Because of limitations in the way output arguments are processed in swig, a function with output arguments will not have multiple return values. Instead, you must pass a pointer into the C++ function to tell it where to store the output value. In go, you supply a slice in the place of the output argument.
For example, suppose you were trying to wrap the modf() function in the C math library which splits x into integral and fractional parts (and returns the integer part in one of its parameters):
double modf(double x, double *ip);
You could wrap it with SWIG as follows:
%include <typemaps.i> double modf(double x, double *OUTPUT);
or you can use the %apply directive:
%include <typemaps.i>
%apply double *OUTPUT { double *ip };
double modf(double x, double *ip);
In Go you would use it like this:
ptr := []float64{0.0}
fraction := modulename.Modf(5.0, ptr)
Since this is ugly, you may want to wrap the swig-generated API with some additional functions written in go that hide the ugly details.
There are no char *OUTPUT typemaps. However you can
apply the signed char * typemaps instead:
%include <typemaps.i>
%apply signed char *OUTPUT {char *output};
void f(char *output);
Often the APIs generated by swig are not very natural in go,
especially if there are output arguments. You can insert additional go
wrapping code to add new APIs with %insert(go_wrapper),
like this:
%include <typemaps.i>
// Change name of what swig generates to Wrapped_modf. This function will
// have the following signature in go:
// func Wrapped_modf(float64, []float64) float64
%rename(wrapped_modf) modf(double x, double *ip);
%apply double *OUTPUT { double *ip };
double modf(double x, double *ip);
%insert(go_wrapper) %{
// The improved go interface to this function, which has two return values,
// in the more natural go idiom:
func Modf(x float64) (fracPart float64, intPart float64) {
ip := []float64{0.0}
fracPart = Wrapped_modf(x, ip)
intPart = ip[0]
return
}
%}
For classes, since swig generates an interface, you can add additional methods by defining another interface that includes the swig-generated interface. For example,
%rename(Wrapped_MyClass) MyClass;
%rename(Wrapped_GetAValue) MyClass::GetAValue(int *x);
%apply int *OUTPUT { int *x };
class MyClass {
public:
MyClass();
int AFineMethod(const char *arg); // Swig's wrapping is fine for this one.
bool GetAValue(int *x);
};
%insert(go_wrapper) %{
type MyClass interface {
Wrapped_MyClass
GetAValue() (int, bool)
}
func (arg SwigcptrWrapped_MyClass) GetAValue() (int, bool) {
ip := []int{0}
ok := arg.Wrapped_GetAValue(ip)
return ip[0], ok
}
%}
Of course, if you have to rewrite most of the methods, instead of just a few, then you might as well define your own struct that includes the swig-wrapped object, instead of adding methods to the swig-generated object.
This only works if your wrappers do not need to import other go modules. There is at present no way to insert import statements in the correct place in swig-generated go. If you need to do that, you must put your go code in a separate file.
This section details guile-specific support in SWIG.
SWIG works with Guile versions 1.8.x and 2.0.x. Support for version 1.6.x has been dropped. The last version of SWIG that still works with Guile version 1.6.x is SWIG 2.0.9.
Note that starting with guile 2.0, the guile sources can be compiled for improved performance. This is currently not tested with swig so your mileage may vary. To be safe set environment variable GUILE_AUTO_COMPILE to 0 when using swig generated guile code.
There are three different concepts of "module" involved, defined separately for SWIG, Guile, and Libtool. To avoid horrible confusion, we explicitly prefix the context, e.g., "guile-module".
Guile 1.8 and older could be interfaced using two different api's, the SCM or the GH API. The GH interface to guile is deprecated. Read more about why in the Guile manual.
Support for the guile GH wrapper code generation has been dropped from SWIG. The last version of SWIG that can still generate guile GH wrapper code is 2.0.9. Please use that version if you really need the GH wrapper code.
Guile support is complicated by a lack of user community cohesiveness, which manifests in multiple shared-library usage conventions. A set of policies implementing a usage convention is called a linkage.
The default linkage is the simplest; nothing special is done. In
this case the function SWIG_init() is exported. Simple
linkage can be used in several ways:
SWIG_init() in the
inner_main() function. See the "simple" and "matrix" examples
under Examples/guile.Dynamic module mix-in. You want to create a Guile module using
define-module, containing both Scheme code and bindings
made by SWIG; you want to load the SWIG modules as shared libraries
into Guile.
(define-module (my module)) (define my-so (dynamic-link "./libexample.so")) (dynamic-call "SWIG_init" my-so) ; make SWIG bindings ;; Scheme definitions can go here
Newer Guile versions provide a shorthand for dynamic-link
and dynamic-call:
(load-extension "./libexample.so" "SWIG_init")
A more portable approach would be to drop the shared library extension:
(load-extension "./libexample" "SWIG_init")
You need to explicitly export those bindings made by SWIG that you want to import into other modules:
(export foo bar)
In this example, the procedures foo and bar
would be exported. Alternatively, you can export all bindings with the
following module-system hack:
(module-map (lambda (sym var) (module-export! (current-module) (list sym))) (current-module))
SWIG can also generate this Scheme stub (from define-module
up to export) semi-automagically if you pass it the
command-line argument -scmstub. The code will be exported
in a file called module.scm in the directory
specified by -outdir or the current directory if
-outdir is not specified. Since SWIG doesn't know how to load
your extension module (with dynamic-link or
load-extension), you need to supply this information by including
a directive like this in the interface file:
%scheme %{ (load-extension "./libexample.so" "SWIG_init") %}
(The %scheme directive allows to insert arbitrary
Scheme code into the generated file module.scm;
it is placed between the define-module form and the
export form.)
If you want to include several SWIG modules, you would need to rename
SWIG_init via a preprocessor define to avoid symbol
clashes. For this case, however, passive linkage is available.
Passive linkage is just like simple linkage, but it generates an initialization function whose name is derived from the module and package name (see below).
You should use passive linkage rather than simple linkage when you are using multiple modules.
SWIG can also generate wrapper code that does all the Guile module
declarations on its own if you pass it the -Linkage module
command-line option.
The module name is set with the -package and
-module command-line options. Suppose you want to define a module
with name (my lib foo); then you would have to pass the
options -package my/lib -module foo
. Note that the last part of the name can also be set via the
SWIG directive %module.
You can use this linkage in several ways:
scm_init_my
_modules_foo_module in the
inner_main() function.(define my-so (dynamic-link "./libfoo")) ;; create new module and put bindings there: (dynamic-call "scm_init_my_modules_foo_module" my-so)
(load-extension "./libfoo.so" "scm_init_my_modules_foo_module")
Guile used to support an autoloading facility for object-code
modules. This support has been marked deprecated in version 1.4.1 and
is going to disappear sooner or later. SWIG still supports building
auto-loading modules if you pass it the -Linkage ltdlmod
command-line option.
Auto-loading worked like this: Suppose a module with name (my
lib foo) is required and not loaded yet. Guile will then search
all directories in its search path for a Scheme file
my/modules/foo.scm or a shared library my/
modules/libfoo.so (or my/
modules/libfoo.la; see the GNU libtool
documentation). If a shared library is found that contains the symbol
scm_init_my_modules_foo_module,
the library is loaded, and the function at that symbol is called with
no arguments in order to initialize the module.
When invoked with the -Linkage ltdlmod command-line
option, SWIG generates an exported module initialization function with
an appropriate name.
The only other linkage supported at this time creates shared object
libraries suitable for use by hobbit's (hobbit4d link)
guile module. This is called the "hobbit" linkage, and requires also
using the "-package" command line option to set the part of the module
name before the last symbol. For example, both command lines:
swig -guile -package my/lib foo.i swig -guile -package my/lib -module foo foo.i
would create module (my lib foo) (assuming in the first
case foo.i declares the module to be "foo"). The installed files are
my/lib/libfoo.so.X.Y.Z and friends. This scheme is still very
experimental; the (hobbit4d link) conventions are not well understood.
Underscores are converted to dashes in identifiers. Guile support may grow an option to inhibit this folding in the future, but no one has complained so far.
You can use the SWIG directives %name and %rename
to specify the Guile name of the wrapped functions and variables (see
CHANGES).
The Guile module handles all types via typemaps. This information is
read from Lib/guile/typemaps.i. Some non-standard typemap
substitutions are supported:
$descriptor expands to a type descriptor for use with
the SWIG_NewPointerObj() and SWIG_ConvertPtr
functions.$*descriptor expands to a descriptor
for the direct base type (i.e., one pointer is stripped), whereas
$basedescriptor expands to a descriptor for the base type (i.e.,
all pointers are stripped).A function returning void (more precisely, a function
whose out typemap returns SCM_UNSPECIFIED) is
treated as returning no values. In argout typemaps, one
can use the macro GUILE_APPEND_RESULT in order to append a
value to the list of function return values.
Multiple values can be passed up to Scheme in one of three ways:
Multiple values as lists. By default, if more than one value is to be returned, a list of the values is created and returned; to switch back to this behavior, use
%values_as_list;
Multiple values as vectors. By issuing
%values_as_vector;
vectors instead of lists will be used.
Multiple values for multiple-value continuations. This is the most elegant way. By issuing
%multiple_values;
multiple values are passed to the multiple-value continuation, as
created by call-with-values or the convenience macro
receive. The latter is available if you issue (use-modules
(srfi srfi-8)). Assuming that your divide function
wants to return two values, a quotient and a remainder, you can write:
(receive (quotient remainder)
(divide 35 17)
body...)
In body, the first result of divide
will be bound to the variable quotient, and the second
result to remainder.
See also the "multivalue" example.
Constants are exported as a function that returns the value. The %feature("constasvar") can be applied to any constant, immutable variable, or enum. Instead of exporting the constant as a function that must be called, the constant will appear as a scheme variable. See Features and the %feature directive for info on how to apply the %feature.
For pointer types, SWIG uses Guile smobs. SWIG smobs print like
this: #<swig struct xyzzy * 0x1234affe> Two of them are
equal? if and only if they have the same type and value.
To construct a Scheme object from a C pointer, the wrapper code
calls the function SWIG_NewPointerObj(), passing a pointer
to a struct representing the pointer type. The type index to store in
the upper half of the CAR is read from this struct. To get the pointer
represented by a smob, the wrapper code calls the function
SWIG_ConvertPtr(), passing a pointer to a struct representing the
expected pointer type. See also
The run-time type checker. If the Scheme object passed was not a
SWIG smob representing a compatible pointer, a wrong-type-arg
exception is raised.
In earlier versions of SWIG, C pointers were represented as Scheme strings containing a hexadecimal rendering of the pointer value and a mangled type name. As Guile allows registering user types, so-called "smobs" (small objects), a much cleaner representation has been implemented now. The details will be discussed in the following.
The whole type system, when it is first initialized, creates two smobs named "swig" and "collected_swig". The swig smob is used for non-garbage collected smobs, while the collected_swig smob is used as described below. Each smob has the same format, which is a double cell created by SCM_NEWSMOB2() The first word of data is the pointer to the object and the second word of data is the swig_type_info * structure describing this type. If a generated GOOPS module has been loaded, smobs will be wrapped by the corresponding GOOPS class.
Garbage collection is a feature of Guile since version 1.6. As SWIG now requires Guile > 1.8, it is automatically included. Garbage collection works like this. Every swig_type_info structure stores in its clientdata field a pointer to the destructor for this type. The destructor is the generated wrapper around the delete function. So swig still exports a wrapper for the destructor, it just does not call scm_c_define_gsubr() for the wrapped delete function. So the only way to delete an object is from the garbage collector, since the delete function is not available to scripts. How swig determines if a type should be garbage collected is exactly like described in Object ownership and %newobject in the SWIG manual. All typemaps use an $owner var, and the guile module replaces $owner with 0 or 1 depending on feature:new.
SWIG code calls scm_error on exception, using the
following mapping:
MAP(SWIG_MemoryError, "swig-memory-error");
MAP(SWIG_IOError, "swig-io-error");
MAP(SWIG_RuntimeError, "swig-runtime-error");
MAP(SWIG_IndexError, "swig-index-error");
MAP(SWIG_TypeError, "swig-type-error");
MAP(SWIG_DivisionByZero, "swig-division-by-zero");
MAP(SWIG_OverflowError, "swig-overflow-error");
MAP(SWIG_SyntaxError, "swig-syntax-error");
MAP(SWIG_ValueError, "swig-value-error");
MAP(SWIG_SystemError, "swig-system-error");
The default when not specified here is to use "swig-error". See Lib/exception.i for details.
If invoked with the command-line option -procdoc file
, SWIG creates documentation strings for the generated wrapper
functions, describing the procedure signature and return value, and
writes them to file.
SWIG can generate documentation strings in three formats, which are
selected via the command-line option -procdocformat format
:
guile-1.4 (default): Generates a format suitable for
Guile 1.4.plain: Generates a format suitable for Guile 1.4.1 and
later.texinfo: Generates texinfo source, which must be run
through texinfo in order to get a format suitable for Guile 1.4.1 and
later.You need to register the generated documentation file with Guile like this:
(use-modules (ice-9 documentation))
(set! documentation-files
(cons "file" documentation-files))
Documentation strings can be configured using the Guile-specific
typemap argument doc. See Lib/guile/typemaps.i
for details.
For global variables, SWIG creates a single wrapper procedure (
variable :optional value), which is used for both getting
and setting the value. For struct members, SWIG creates two wrapper
procedures (struct-member-get pointer)
and (struct-member-set pointer value).
If invoked with the command-line option -emit-setters (
recommended), SWIG will additionally create procedures with
setters. For global variables, the procedure-with-setter
variable is created, so you can use (variable
) to get the value and (set! (variable)
value) to set it. For struct members, the
procedure-with-setter struct-member
is created, so you can use (struct-member
pointer) to get the value and (set! (struct
-member pointer) value) to set
it.
If invoked with the command-line option -only-setters,
SWIG will only create procedures with setters, i.e., for
struct members, the procedures (struct-member
-get pointer) and (struct-member-set pointer
value) are not generated.
SWIG can also generate classes and generic functions for use with Guile's Object-Oriented Programming System (GOOPS). GOOPS is a sophisticated object system in the spirit of the Common Lisp Object System (CLOS).
To enable GOOPS support, pass the -proxy argument to
swig. This will export the GOOPS wrapper definitions into the
module.scm file in the directory specified by -outdir or the
current directory. GOOPS support requires either passive or module
linkage.
The generated file will contain definitions of GOOPS classes mimicking the C++ class hierarchy.
Enabling GOOPS support implies -emit-setters.
If -emit-slot-accessors is also passed as an argument,
then the generated file will contain accessor methods for all the slots
in the classes and for global variables. The input class
class Foo {
public:
Foo(int i) : a(i) {}
int a;
int getMultBy(int i) { return a * i; }
Foo getFooMultBy(int i) { return Foo(a * i); }
};
Foo getFooPlus(int i) { return Foo(a + i); }
will produce (if -emit-slot-accessors is not passed as
a parameter)
(define-class <Foo> (<swig>)
(a #:allocation #:swig-virtual
#:slot-ref primitive:Foo-a-get
#:slot-set! primitive:Foo-a-set)
#:metaclass <swig-metaclass>
#:new-function primitive:new-Foo
)
(define-method (getMultBy (swig_smob <Foo>) i)
(primitive:Foo-getMultBy (slot-ref swig_smob 'smob) i))
(define-method (getFooMultBy (swig_smob <Foo>) i)
(make <Foo> #:init-smob (primitive:Foo-getFooMultBy (slot-ref swig_smob 'smob) i)))
(define-method (getFooPlus i)
(make <Foo> #:init-smob (primitive:getFooPlus i)))
(export <Foo> getMultBy getFooMultBy getFooPlus )
and will produce (if -emit-slot-accessors is passed as
a parameter)
(define-class <Foo> (<swig>)
(a #:allocation #:swig-virtual
#:slot-ref primitive:Foo-a-get
#:slot-set! primitive:Foo-a-set
#:accessor a)
#:metaclass <swig-metaclass>
#:new-function primitive:new-Foo
)
(define-method (getMultBy (swig_smob <Foo>) i)
(primitive:Foo-getMultBy (slot-ref swig_smob 'smob) i))
(define-method (getFooMultBy (swig_smob <Foo>) i)
(make <Foo> #:init-smob (primitive:Foo-getFooMultBy (slot-ref swig_smob 'smob) i)))
(define-method (getFooPlus i)
(make <Foo> #:init-smob (primitive:getFooPlus i)))
(export <Foo> a getMultBy getFooMultBy getFooPlus )
which can then be used by this code
;; not using getters and setters (define foo (make <Foo> #:args '(45))) (slot-ref foo 'a) (slot-set! foo 'a 3) (getMultBy foo 4) (define foo2 (getFooMultBy foo 7)) (slot-ref foo 'a) (slot-ref (getFooPlus foo 4) 'a) ;; using getters and setters (define foo (make <Foo> #:args '(45))) (a foo) (set! (a foo) 5) (getMultBy foo 4) (a (getFooMultBy foo 7))
Notice that constructor arguments are passed as a list after the
#:args keyword. Hopefully in the future the following will be
valid (make <Foo> #:a 5 #:b 4)
Also note that the order the declarations occur in the .i file make a difference. For example,
%module test
%{ #include "foo.h" %}
%inline %{
int someFunc(Foo &a) {
...
}
%}
%include "foo.h"
This is a valid SWIG file it will work as you think it will for
primitive support, but the generated GOOPS file will be broken. Since
the someFunc definition is parsed by SWIG before all the
declarations in foo.h, the generated GOOPS file will contain the
definition of someFunc() before the definition of <Foo>.
The generated GOOPS file would look like
;;... (define-method (someFunc (swig_smob <Foo>)) (primitive:someFunc (slot-ref swig_smob 'smob))) ;;... (define-class <Foo> (<swig>) ;;... ) ;;...
Notice that <Foo> is used before it is defined. The fix is to just
put the %import "foo.h" before the %inline
block.
As you can see in the example above, there are potential naming
conflicts. The default exported accessor for the Foo::a
variable is named a. The name of the wrapper global
function is getFooPlus. If the -useclassprefix
option is passed to swig, the name of all accessors and member
functions will be prepended with the class name. So the accessor will
be called Foo-a and the member functions will be called
Foo-getMultBy. Also, if the -goopsprefix goops:
argument is passed to swig, every identifier will be prefixed by
goops:
Two guile-modules are created by SWIG. The first module contains the
primitive definitions of all the wrapped functions and variables, and
is located either in the _wrap.cxx file (with -Linkage module
) or in the scmstub file (if -Linkage passive -scmstub).
The name of this guile-module is the swig-module name (given on the
command line with the -module argument or with the %module directive)
concatenated with the string "-primitive". For example, if
%module Test is set in the swig interface file, the name of the
guile-module in the scmstub or -Linkage module will be
Test-primitive. Also, the scmstub file will be named
Test-primitive.scm. The string "primitive" can be changed by the
-primsuffix swig argument. So the same interface, with the
-primsuffix base will produce a module called Test-base
. The second generated guile-module contains all the GOOPS class
definitions and is located in a file named module.scm in the
directory specified with -outdir or the current directory. The name of
this guile-module is the name of the swig-module (given on the command
line or with the %module directive). In the previous
example, the GOOPS definitions will be in a file named Test.scm.
Because of the naming conflicts, you can't in general use both the
-primitive and the GOOPS guile-modules at the same time. To do
this, you need to rename the exported symbols from one or both
guile-modules. For example,
(use-modules ((Test-primitive) #:renamer (symbol-prefix-proc 'primitive:))) (use-modules ((Test) #:renamer (symbol-prefix-proc 'goops:)))
The guile-modules generated above all need to be linked together.
GOOPS support requires either passive or module linkage. The exported
GOOPS guile-module will be the name of the swig-module and should be
located in a file called Module.scm. This should be installed on
the autoload path for guile, so that (use-modules (Package
Module)) will load everything needed. Thus, the top of the
GOOPS guile-module will contain code to load everything needed by the
interface (the shared library, the scmstub module, etc.). The
%goops directive inserts arbitrary code into the generated GOOPS
guile-module, and should be used to load the dependent libraries.
This breaks up into three cases
-exportprimitive option is passed to SWIG the (export ...)
code that would be exported into the scmstub file is exported at the
bottom of the generated GOOPS guile-module. The %goops
directive should contain code to load the shared library.
%goops %{ (load-extension "./libfoo.so" "scm_init_my_modules_foo_module") %}
Produces the following code at the top of the generated GOOPS
guile-module (with the -package my/modules -module foo
command line arguments)
(define-module (my modules foo)) ;; %goops directive goes here (load-extension "./libfoo.so" "scm_init_my_modules_foo_module") (use-modules (oop goops) (Swig common))
Passive Linkage with -scmstub: Here, the name of the scmstub
file should be Module-primitive.scm (with primitive
replaced with whatever is given with the -primsuffix
argument. The code to load the shared library should be located in the
%scheme directive, which will then be added to the scmstub file.
SWIG will automatically generate the line (use-modules (
Package Module-primitive)) into the GOOPS
guile-module. So if Module-primitive.scm is on the autoload path
for guile, the %goops directive can be empty. Otherwise,
the %goops directive should contain whatever code is
needed to load the Module-primitive.scm file into guile.
%scheme %{ (load-extension "./libfoo.so" "scm_init_my_modules_foo_module") %}
// only include the following definition if (my modules foo) cannot
// be loaded automatically
%goops %{
(primitive-load "/path/to/foo-primitive.scm")
(primitive-load "/path/to/Swig/common.scm")
%}
Produces the following code at the top of the generated GOOPS guile-module
(define-module (my modules foo))
;; %goops directive goes here (if any)
(primitive-load "/path/to/foo-primitive.scm")
(primitive-load "/path/to/Swig/common.scm")
(use-modules (oop goops) (Swig common))
(use-modules ((my modules foo-primitive) :renamer (symbol-prefix-proc
'primitive:)))
Module Linkage: This is very similar to passive linkage with a
scmstub file. SWIG will also automatically generate the line
(use-modules (Package Module-primitive)) into the
GOOPS guile-module. Again the %goops directive should
contain whatever code is needed to get that module loaded into guile.
%goops %{ (load-extension "./libfoo.so" "scm_init_my_modules_foo_module") %}
Produces the following code at the top of the generated GOOPS guile-module
(define-module (my modules foo))
;; %goops directive goes here (if any)
(load-extension "./libfoo.so" "scm_init_my_modules_foo_module")
(use-modules (oop goops) (Swig common))
(use-modules ((my modules foo-primitive) :renamer (symbol-prefix-proc
'primitive:)))
(Swig common): The generated GOOPS guile-module also imports
definitions from the (Swig common) guile-module. This module is
included with SWIG and should be installed by SWIG into the autoload
path for guile (based on the configure script and whatever arguments
are passed). If it is not, then the %goops directive also
needs to contain code to load the common.scm file into
guile. Also note that if you are trying to install the generated
wrappers on a computer without SWIG installed, you will need to include
the common.swg file along with the install.
Multiple Modules: Type dependencies between modules is
supported. For example, if mod1 includes definitions of
some classes, and mod2 includes some classes derived from
classes in mod1, the generated GOOPS file for mod2
will declare the correct superclasses. The only problem is that since
mod2 uses symbols from mod1, the mod2
GOOPS file must include a (use-modules (mod2)). Currently,
SWIG does not automatically export this line; it must be included in
the %goops directive of mod2. Maybe in the
future SWIG can detect dependencies and export this line. (how do other
language modules handle this problem?)
This chapter describes SWIG's support of Java. It covers most SWIG features, but certain low-level details are covered in less depth than in earlier chapters.
The 100% Pure Java effort is a commendable concept, however in the real world programmers often either need to re-use their existing code or in some situations want to take advantage of Java but are forced into using some native (C/C++) code. The Java extension to SWIG makes it very easy to plumb in existing C/C++ code for access from Java, as SWIG writes the Java Native Interface (JNI) code for you. It is different to using the 'javah' tool as SWIG will wrap existing C/C++ code, whereas javah takes 'native' Java function declarations and creates C/C++ function prototypes. SWIG wraps C/C++ code using Java proxy classes and is very useful if you want to have access to large amounts of C/C++ code from Java. If only one or two JNI functions are needed then using SWIG may be overkill. SWIG enables a Java program to easily call into C/C++ code from Java. Historically, SWIG was not able to generate any code to call into Java code from C++. However, SWIG now supports full cross language polymorphism and code is generated to call up from C++ to Java when wrapping C++ virtual methods via the director feature.
Java is one of the few non-scripting language modules in SWIG. As SWIG utilizes the type safety that the Java language offers, it takes a somewhat different approach to that used for scripting languages. In particular runtime type checking and the runtime library are not used by Java. This should be borne in mind when reading the rest of the SWIG documentation. This chapter on Java is relatively self contained and will provide you with nearly everything you need for using SWIG and Java. However, the "SWIG Basics" chapter will be a useful read in conjunction with this one.
This chapter starts with a few practicalities on running SWIG and compiling the generated code. If you are looking for the minimum amount to read, have a look at the sections up to and including the tour of basic C/C++ wrapping section which explains how to call the various C/C++ code constructs from Java. Following this section are details of the C/C++ code and Java classes that SWIG generates. Due to the complexities of C and C++ there are different ways in which C/C++ code could be wrapped and called from Java. SWIG is a powerful tool and the rest of the chapter details how the default code wrapping can be tailored. Various customisation tips and techniques using SWIG directives are covered. The latter sections cover the advanced techniques of using typemaps for complete control of the wrapping process.
SWIG 1.1 works with JDKs from JDK 1.1 to JDK1.4 (Java 2 SDK1.4) and should also work with any later versions. Given the choice, you should probably use the latest version of Sun's JDK. The SWIG Java module is known to work using Sun's JVM on Solaris, Linux and the various flavours of Microsoft Windows including Cygwin. The Kaffe JVM is known to give a few problems and at the time of writing was not a fully fledged JVM with full JNI support. The generated code is also known to work on vxWorks using WindRiver's PJava 3.1. The best way to determine whether your combination of operating system and JDK will work is to test the examples and test-suite that comes with SWIG. Run make -k check from the SWIG root directory after installing SWIG on Unix systems.
The Java module requires your system to support shared libraries and dynamic loading. This is the commonly used method to load JNI code so your system will more than likely support this.
Android uses Java JNI and also works with SWIG. Please read the Android chapter in conjunction with this one if you are targeting Android.
Suppose that you defined a SWIG module such as the following:
/* File: example.i */
%module test
%{
#include "stuff.h"
%}
int fact(int n);
To build a Java module, run SWIG using the -java option :
%swig -java example.i
If building C++, add the -c++ option:
$ swig -c++ -java example.i
This creates two different files; a C/C++ source file example_wrap.c or example_wrap.cxx and numerous Java files. The generated C/C++ source file contains the JNI wrapper code that needs to be compiled and linked with the rest of your C/C++ application.
The name of the wrapper file is derived from the name of the input file. For example, if the input file is example.i, the name of the wrapper file is example_wrap.c. To change this, you can use the -o option. It is also possible to change the output directory that the Java files are generated into using -outdir.
The module name, specified with %module, determines the name of various generated classes as discussed later. Note that the module name does not define a Java package and by default, the generated Java classes do not have a Java package. The -package option described below can specify a Java package name to use.
The following sections have further practical examples and details on how you might go about compiling and using the generated files.
The following table list the additional commandline options available for the Java module. They can also be seen by using:
swig -java -help
| Java specific options | |
|---|---|
| -nopgcpp | suppress the premature garbage collection prevention parameter |
| -noproxy | generate the low-level functional interface instead of proxy classes |
| -package <name> | set name of the Java package to <name> |
Their use will become clearer by the time you have finished reading this section on SWIG and Java.
In order to compile the C/C++ wrappers, the compiler needs the jni.h and jni_md.h header files which are part of the JDK. They are usually in directories like this:
/usr/java/include /usr/java/include/<operating_system>
The exact location may vary on your machine, but the above locations are typical.
The JNI code exists in a dynamic module or shared library (DLL on Windows) and gets loaded by the JVM. Assuming you have code you need to link to in a file called example.c, in order to build a shared library file, you need to compile your module in a manner similar to the following (shown for Solaris):
$ swig -java example.i $ gcc -c example_wrap.c -I/usr/java/include -I/usr/java/include/solaris $ gcc -c example.c $ ld -G example_wrap.o example.o -o libexample.so
The exact commands for doing this vary from platform to platform. However, SWIG tries to guess the right options when it is installed. Therefore, you may want to start with one of the examples in the Examples/java directory. If that doesn't work, you will need to read the man-pages for your compiler and linker to get the right set of options. You might also check the SWIG Wiki for additional information. JNI compilation is a useful reference for compiling on different platforms.
Important
If you are going to use optimisations turned on with gcc (for
example -O2), ensure you also compile with -fno-strict-aliasing. The
GCC optimisations have become more aggressive from gcc-4.0 onwards and
will result in code that fails with strict aliasing optimisations
turned on. See the C/C++ to
Java typemaps section for more details.
The name of the shared library output file is important. If the name of your SWIG module is "example", the name of the corresponding shared library file should be "libexample.so" (or equivalent depending on your machine, see Dynamic linking problems for more information). The name of the module is specified using the %module directive or -module command line option.
To load your shared native library module in Java, simply use Java's System.loadLibrary method in a Java class:
// runme.java
public class runme {
static {
System.loadLibrary("example");
}
public static void main(String argv[]) {
System.out.println(example.fact(4));
}
}
Compile all the Java files and run:
$ javac *.java $ java runme 24 $
If it doesn't work have a look at the following section which discusses problems loading the shared library.
As shown in the previous section the code to load a native library (shared library) is System.loadLibrary("name"). This can fail with an UnsatisfiedLinkError exception and can be due to a number of reasons.
You may get an exception similar to this:
$ java runme
Exception in thread "main" java.lang.UnsatisfiedLinkError: no example in java.library.path
at java.lang.ClassLoader.loadLibrary(ClassLoader.java:1312)
at java.lang.Runtime.loadLibrary0(Runtime.java:749)
at java.lang.System.loadLibrary(System.java:820)
at runme.<clinit>(runme.java:5)
The most common cause for this is an incorrect naming of the native library for the name passed to the loadLibrary function. The string passed to the loadLibrary function must not include the file extension name in the string, that is .dll or .so. The string must be name and not libname for all platforms. On Windows the native library must then be called name.dll and on most Unix systems it must be called libname.so .
Another common reason for the native library not loading is because it is not in your path. On Windows make sure the path environment variable contains the path to the native library. On Unix make sure that your LD_LIBRARY_PATH contains the path to the native library. Adding paths to LD_LIBRARY_PATH can slow down other programs on your system so you may want to consider alternative approaches. For example you could recompile your native library with extra path information using -rpath if you're using GNU, see the GNU linker documentation (ld man page). You could use a command such as ldconfig (Linux) or crle (Solaris) to add additional search paths to the default system configuration (this requires root access and you will need to read the man pages).
The native library will also not load if there are any unresolved symbols in the compiled C/C++ code. The following exception is indicative of this:
$ java runme
Exception in thread "main" java.lang.UnsatisfiedLinkError: libexample.so: undefined
symbol: fact
at java.lang.ClassLoader$NativeLibrary.load(Native Method)
at java.lang.ClassLoader.loadLibrary0(ClassLoader.java, Compiled Code)
at java.lang.ClassLoader.loadLibrary(ClassLoader.java, Compiled Code)
at java.lang.Runtime.loadLibrary0(Runtime.java, Compiled Code)
at java.lang.System.loadLibrary(System.java, Compiled Code)
at runme.<clinit>(runme.java:5)
$
This error usually indicates that you forgot to include some object files or libraries in the linking of the native library file. Make sure you compile both the SWIG wrapper file and the code you are wrapping into the native library file. If you forget to compile and link in the SWIG wrapper file into your native library file, you will get a message similar to the following:
$ java runme Exception in thread "main" java.lang.UnsatisfiedLinkError: exampleJNI.gcd(II)I at exampleJNI.gcd(Native Method) at example.gcd(example.java:12) at runme.main(runme.java:18)
where gcd is the missing JNI function that SWIG generated into the wrapper file. Also make sure you pass all of the required libraries to the linker. The java -verbose:jni commandline switch is also a great way to get more information on unresolved symbols. One last piece of advice is to beware of the common faux pas of having more than one native library version in your path.
In summary, ensure that you are using the correct C/C++ compiler and linker combination and options for successful native library loading. If you are using the examples that ship with SWIG, then the Examples/Makefile must have these set up correctly for your system. The SWIG installation package makes a best attempt at getting these correct but does not get it right 100% of the time. The SWIG Wiki also has some settings for commonly used compiler and operating system combinations. The following section also contains some C++ specific linking problems and solutions.
On most machines, shared library files should be linked using the C++ compiler. For example:
% swig -c++ -java example.i % g++ -c -fpic example.cxx % g++ -c -fpic example_wrap.cxx -I/usr/java/j2sdk1.4.1/include -I/usr/java/ j2sdk1.4.1/include/linux % g++ -shared example.o example_wrap.o -o libexample.so
In addition to this, you may need to include additional library files to make it work. For example, if you are using the Sun C++ compiler on Solaris, you often need to add an extra library -lCrun like this:
% swig -c++ -java example.i % CC -c example.cxx % CC -c example_wrap.cxx -I/usr/java/include -I/usr/java/include/solaris % CC -G example.o example_wrap.o -L/opt/SUNWspro/lib -o libexample.so -lCrun
If you aren't entirely sure about the linking for C++, you might look at an existing C++ program. On many Unix machines, the ldd command will list library dependencies. This should give you some clues about what you might have to include when you link your shared library. For example:
$ ldd swig
libstdc++-libc6.1-1.so.2 => /usr/lib/libstdc++-libc6.1-1.so.2 (0x40019000)
libm.so.6 => /lib/libm.so.6 (0x4005b000)
libc.so.6 => /lib/libc.so.6 (0x40077000)
/lib/ld-linux.so.2 => /lib/ld-linux.so.2 (0x40000000)
$
Finally make sure the version of JDK header files matches the version of Java that you are running as incompatibilities could lead to compilation problems or unpredictable behaviour.
Building on Windows is roughly similar to the process used with Unix. You will want to produce a DLL that can be loaded by the Java Virtual Machine. This section covers the process of using SWIG with Microsoft Visual C++ 6 although the procedure may be similar with other compilers. In order for everything to work, you will need to have a JDK installed on your machine in order to read the JNI header files.
If you are developing your application within Microsoft Visual studio, SWIG can be invoked as a custom build option. The Examples\java directory has a few Windows Examples containing Visual Studio project (.dsp) files. The process to re-create the project files for a C project are roughly:
Note: If using C++, choose a C++ suffix for the wrapper file, for example example_wrap.cxx. Use _wrap.cxx instead of _wrap.c in the instructions above and add -c++ when invoking swig.
Now, assuming all went well, SWIG will be automatically invoked when you build your project. When doing a build, any changes made to the interface file will result in SWIG being automatically invoked to produce a new version of the wrapper file.
The Java classes that SWIG output should also be compiled into .class files. To run the native code in the DLL (example.dll), make sure that it is in your path then run your Java program which uses it, as described in the previous section. If the library fails to load have a look at Dynamic linking problems.
Alternatively, a Makefile for use by NMAKE can be written. Make sure the environment variables for MSVC++ are available and the MSVC++ tools are in your path. Now, just write a short Makefile like this :
# Makefile for using SWIG and Java for C code
SRCS = example.c
IFILE = example
INTERFACE = $(IFILE).i
WRAPFILE = $(IFILE)_wrap.c
# Location of the Visual C++ tools (32 bit assumed)
TOOLS = c:\msdev
TARGET = example.dll
CC = $(TOOLS)\bin\cl.exe
LINK = $(TOOLS)\bin\link.exe
INCLUDE32 = -I$(TOOLS)\include
MACHINE = IX86
# C Library needed to build a DLL
DLLIBC = msvcrt.lib oldnames.lib
# Windows libraries that are apparently needed
WINLIB = kernel32.lib advapi32.lib user32.lib gdi32.lib comdlg32.lib winspool.lib
# Libraries common to all DLLs
LIBS = $(DLLIBC) $(WINLIB)
# Linker options
LOPT = -debug:full -debugtype:cv /NODEFAULTLIB /RELEASE /NOLOGO \
/MACHINE:$(MACHINE) -entry:_DllMainCRTStartup@12 -dll
# C compiler flags
CFLAGS = /Z7 /Od /c /nologo
JAVA_INCLUDE = -ID:\jdk1.3\include -ID:\jdk1.3\include\win32
java::
swig -java -o $(WRAPFILE) $(INTERFACE)
$(CC) $(CFLAGS) $(JAVA_INCLUDE) $(SRCS) $(WRAPFILE)
set LIB=$(TOOLS)\lib
$(LINK) $(LOPT) -out:example.dll $(LIBS) example.obj example_wrap.obj
javac *.java
To build the DLL and compile the java code, run NMAKE (you may need to run vcvars32 first). This is a pretty simplistic Makefile, but hopefully its enough to get you started. Of course you may want to make changes for it to work for C++ by adding in the -c++ command line switch for swig and replacing .c with .cxx.
By default, SWIG attempts to build a natural Java interface to your C/C++ code. Functions are wrapped as functions, classes are wrapped as classes, variables are wrapped with JavaBean type getters and setters and so forth. This section briefly covers the essential aspects of this wrapping.
The SWIG %module directive specifies the name of the Java module. When you specify `%module example', the module name determines the name of some of the generated files in the module. The generated code consists of a module class file example.java , an intermediary JNI class file, exampleJNI.java as well as numerous other Java proxy class files. Each proxy class is named after the structs, unions and classes you are wrapping. You may also get a constants interface file if you are wrapping any unnamed enumerations or constants, for example exampleConstants.java. When choosing a module name, make sure you don't use the same name as one of the generated proxy class files nor a Java keyword. Sometimes a C/C++ type cannot be wrapped by a proxy class, for example a pointer to a primitive type. In these situations a type wrapper class is generated. Wrapping an enum generates an enum class, either a proper Java enum or a Java class that simulates the enums pattern. Details of all these generated classes will unfold as you read this section.
The JNI (C/C++) code is generated into a file which also contains the module name, for example example_wrap.cxx or example_wrap.c. These C or C++ files complete the contents of the module.
The generated Java classes can be placed into a Java package by using the -package commandline option. This is often combined with the -outdir to specify a package directory for generating the Java files.
swig -java -package com.bloggs.swig -outdir com/bloggs/swig example.i
SWIG won't create the directory, so make sure it exists beforehand.
There is no such thing as a global Java function so global C functions are wrapped as static methods in the module class. For example,
%module example int fact(int n);
creates a static function that works exactly like you think it might:
public class example {
public static int fact(int n) {
// makes call using JNI to the C function
}
}
The Java class example is the module class. The function can be used as follows from Java:
System.out.println(example.fact(4));
C/C++ global variables are fully supported by SWIG. Java does not allow the overriding of the dot operator so all variables are accessed through getters and setters. Again because there is no such thing as a Java global variable, access to C/C++ global variables is done through static getter and setter functions in the module class.
// SWIG interface file with global variables
%module example
...
%inline %{
extern int My_variable;
extern double density;
%}
...
Now in Java :
// Print out value of a C global variable
System.out.println("My_variable = " + example.getMy_variable());
// Set the value of a C global variable
example.setDensity(0.8442);
The value returned by the getter will always be up to date even if the value is changed in C. Note that the getters and setters produced follow the JavaBean property design pattern. That is the first letter of the variable name is capitalized and preceded with set or get. If you have the misfortune of wrapping two variables that differ only in the capitalization of their first letters, use %rename to change one of the variable names. For example:
%rename Clash RenamedClash; float Clash; int clash;
If a variable is declared as const, it is wrapped as a read-only variable. That is only a getter is produced.
To make ordinary variables read-only, you can use the %immutable directive. For example:
%{
extern char *path;
%}
%immutable;
extern char *path;
%mutable;
The %immutable directive stays in effect until it is explicitly disabled or cleared using %mutable. See the Creating read-only variables section for further details.
If you just want to make a specific variable immutable, supply a declaration name. For example:
%{
extern char *path;
%}
%immutable path;
...
extern char *path; // Read-only (due to %immutable)
C/C++ constants are wrapped as Java static final variables. To create a constant, use #define or the %constant directive. For example:
#define PI 3.14159 #define VERSION "1.0" %constant int FOO = 42; %constant const char *path = "/usr/local";
By default the generated static final variables are initialized by making a JNI call to get their value. The constants are generated into the constants interface and look like this:
public interface exampleConstants {
public final static double PI = exampleJNI.PI_get();
public final static String VERSION = exampleJNI.VERSION_get();
public final static int FOO = exampleJNI.FOO_get();
public final static String path = exampleJNI.path_get();
}
Note that SWIG has inferred the C type and used an appropriate Java type that will fit the range of all possible values for the C type. By default SWIG generates runtime constants. They are not compiler constants that can, for example, be used in a switch statement. This can be changed by using the %javaconst(flag) directive. It works like all the other %feature directives. The default is %javaconst(0). It is possible to initialize all wrapped constants from pure Java code by placing a %javaconst(1) before SWIG parses the constants. Putting it at the top of your interface file would ensure this. Here is an example:
%javaconst(1); %javaconst(0) BIG; %javaconst(0) LARGE; #define EXPRESSION (0x100+5) #define BIG 1000LL #define LARGE 2000ULL
generates:
public interface exampleConstants {
public final static int EXPRESSION = (0x100+5);
public final static long BIG = exampleJNI.BIG_get();
public final static java.math.BigInteger LARGE = exampleJNI.LARGE_get();
}
Note that SWIG has inferred the C long long type from BIG and used an appropriate Java type (long) as a Java long is the smallest sized Java type that will take all possible values for a C long long. Similarly for LARGE.
Be careful using the %javaconst(1) directive as not all C code will compile as Java code. For example neither the 1000LL value for BIG nor 2000ULL for LARGE above would generate valid Java code. The example demonstrates how you can target particular constants (BIG and LARGE) with %javaconst. SWIG doesn't use %javaconst(1) as the default as it tries to generate code that will always compile. However, using a %javaconst(1) at the top of your interface file is strongly recommended as the preferred compile time constants will be generated and most C constants will compile as Java code and in any case the odd constant that doesn't can be fixed using %javaconst(0).
There is an alternative directive which can be used for these rare constant values that won't compile as Java code. This is the %javaconstvalue(value) directive, where value is a Java code replacement for the C constant and can be either a string or a number. This is useful if you do not want to use either the parsed C value nor a JNI call, such as when the C parsed value will not compile as Java code and a compile time constant is required. The same example demonstrates this:
%javaconst(1);
%javaconstvalue("new java.math.BigInteger(\"2000\")") LARGE;
%javaconstvalue(1000) BIG;
#define EXPRESSION (0x100+5)
#define BIG 1000LL
#define LARGE 2000ULL
Note the string quotes for "2000" are escaped. The following is then generated:
public interface exampleConstants {
public final static int EXPRESSION = (0x100+5);
public final static long BIG = 1000;
public final static java.math.BigInteger LARGE = new java.math.BigInteger("2000");
}
Note: declarations declared as const are wrapped as read-only variables and will be accessed using a getter as described in the previous section. They are not wrapped as constants. The exception to this rule are static const integral values defined within a class/struct, where they are wrapped as constants, eg:.
struct Maths {
static const int FIVE = 5;
};
Compatibility Note: In SWIG-1.3.19 and earlier releases, the constants were generated into the module class and the constants interface didn't exist. Backwards compatibility is maintained as the module class implements the constants interface (even though some consider this type of interface implementation to be bad practice):
public class example implements exampleConstants {
}
You thus have the choice of accessing these constants from either the module class or the constants interface, for example, example.EXPRESSION or exampleConstants.EXPRESSION. Or if you decide this practice isn't so bad and your own class implements exampleConstants, you can of course just use EXPRESSION.
SWIG handles both named and unnamed (anonymous) enumerations. There is a choice of approaches to wrapping named C/C++ enums. This is due to historical reasons as SWIG's initial support for enums was limited and Java did not originally have support for enums. Each approach has advantages and disadvantages and it is important for the user to decide which is the most appropriate solution. There are four approaches of which the first is the default approach based on the so called Java typesafe enum pattern. The second generates proper Java enums. The final two approaches use simple integers for each enum item. Before looking at the various approaches for wrapping named C/C++ enums, anonymous enums are considered.
There is no name for anonymous enums and so they are handled like constants. For example:
enum { ALE, LAGER=10, STOUT, PILSNER, PILZ=PILSNER };
is wrapped into the constants interface, in a similar manner as constants (see previous section):
public interface exampleConstants {
public final static int ALE = exampleJNI.ALE_get();
public final static int LAGER = exampleJNI.LAGER_get();
public final static int STOUT = exampleJNI.STOUT_get();
public final static int PILSNER = exampleJNI.PILSNER_get();
public final static int PILZ = exampleJNI.PILZ_get();
}
The %javaconst(flag) and %javaconstvalue(value) directive introduced in the previous section on constants can also be used with enums. As is the case for constants, the default is %javaconst(0) as not all C values will compile as Java code. However, it is strongly recommended to add in a %javaconst(1) directive at the top of your interface file as it is only on very rare occasions that this will produce code that won't compile under Java. Using %javaconst(1) will ensure compile time constants are generated, thereby allowing the enum values to be used in Java switch statements. Example usage:
%javaconst(1);
%javaconst(0) PILSNER;
enum { ALE, LAGER=10, STOUT, PILSNER, PILZ=PILSNER };
generates:
public interface exampleConstants {
public final static int ALE = 0;
public final static int LAGER = 10;
public final static int STOUT = LAGER + 1;
public final static int PILSNER = exampleJNI.PILSNER_get();
public final static int PILZ = PILSNER;
}
As in the case of constants, you can access them through either the module class or the constants interface, for example, example.ALE or exampleConstants.ALE.
This is the default approach to wrapping named enums. The typesafe enum pattern is a relatively well known construct to work around the lack of enums in versions of Java prior to JDK 1.5. It basically defines a class for the enumeration and permits a limited number of final static instances of the class. Each instance equates to an enum item within the enumeration. The implementation is in the "enumtypesafe.swg" file. Let's look at an example:
%include "enumtypesafe.swg" // optional as typesafe enums are the default
enum Beverage { ALE, LAGER=10, STOUT, PILSNER, PILZ=PILSNER };
will generate:
public final class Beverage {
public final static Beverage ALE = new Beverage("ALE");
public final static Beverage LAGER = new Beverage("LAGER", exampleJNI.LAGER_get());
public final static Beverage STOUT = new Beverage("STOUT");
public final static Beverage PILSNER = new Beverage("PILSNER");
public final static Beverage PILZ = new Beverage("PILZ", exampleJNI.PILZ_get());
[... additional support methods omitted for brevity ...]
}
See Typesafe enum classes to see the omitted support methods. Note that the enum item with an initializer (LAGER) is initialized with the enum value obtained via a JNI call. However, as with anonymous enums and constants, use of the %javaconst directive is strongly recommended to change this behaviour:
%include "enumtypesafe.swg" // optional as typesafe enums are the default
%javaconst(1);
enum Beverage { ALE, LAGER=10, STOUT, PILSNER, PILZ=PILSNER };
will generate:
public final class Beverage {
public final static Beverage ALE = new Beverage("ALE");
public final static Beverage LAGER = new Beverage("LAGER", 10);
public final static Beverage STOUT = new Beverage("STOUT");
public final static Beverage PILSNER = new Beverage("PILSNER");
public final static Beverage PILZ = new Beverage("PILZ", PILSNER);
[... additional support methods omitted for brevity ...]
}
The generated code is easier to read and more efficient as a true constant is used instead of a JNI call. As is the case for constants, the default is %javaconst(0) as not all C values will compile as Java code. However, it is recommended to add in a %javaconst(1) directive at the top of your interface file as it is only on very rare occasions that this will produce code that won't compile under Java. The %javaconstvalue(value) directive can also be used for typesafe enums. Note that global enums are generated into a Java class within whatever package you are using. C++ enums defined within a C++ class are generated into a static final inner Java class within the Java proxy class.
Typesafe enums have their advantages over using plain integers in that they can be used in a typesafe manner. However, there are limitations. For example, they cannot be used in switch statements and serialization is an issue. Please look at the following references for further information: http://java.sun.com/developer/Books/shiftintojava/page1.html#replaceenums Replace Enums with Classes in Effective Java Programming on the Sun website, Create enumerated constants in Java JavaWorld article, Java Tip 133: More on typesafe enums and Java Tip 122: Beware of Java typesafe enumerations JavaWorld tips.
Note that the syntax required for using typesafe enums is the same as that for proper Java enums. This is useful during the period that a project has to support legacy versions of Java. When upgrading to JDK 1.5 or later, proper Java enums could be used instead, without users having to change their code. The following section details proper Java enum generation.
Proper Java enums were only introduced in JDK 1.5 so this approach is only compatible with more recent versions of Java. Java enums have been designed to overcome all the limitations of both typesafe and type unsafe enums and should be the choice solution, provided older versions of Java do not have to be supported. In this approach, each named C/C++ enum is wrapped by a Java enum. Java enums, by default, do not support enums with initializers. Java enums are in many respects similar to Java classes in that they can be customised with additional methods. SWIG takes advantage of this feature to facilitate wrapping C/C++ enums that have initializers. In order to wrap all possible C/C++ enums using proper Java enums, the "enums.swg" file must be used. Let's take a look at an example.
%include "enums.swg"
%javaconst(1);
enum Beverage { ALE, LAGER=10, STOUT, PILSNER, PILZ=PILSNER };
will generate:
public enum Beverage {
ALE,
LAGER(10),
STOUT,
PILSNER,
PILZ(PILSNER);
[... additional support methods omitted for brevity ...]
}
See Proper Java enum classes to see the omitted support methods. The generated Java enum has numerous additional methods to support enums with initializers, such as LAGER above. Note that as with the typesafe enum pattern, enum items with initializers are by default initialized with the enum value obtained via a JNI call. However, this is not the case above as we have used the recommended %javaconst(1) to avoid the JNI call. The %javaconstvalue(value) directive covered in the Constants section can also be used for proper Java enums.
The additional support methods need not be generated if none of the enum items have initializers and this is covered later in the Simpler Java enums for enums without initializers section.
In this approach each enum item in a named enumeration is wrapped as a static final integer in a class named after the C/C++ enum name. This is a commonly used pattern in Java to simulate C/C++ enums, but it is not typesafe. However, the main advantage over the typesafe enum pattern is enum items can be used in switch statements. In order to use this approach, the "enumtypeunsafe.swg" file must be used. Let's take a look at an example.
%include "enumtypeunsafe.swg"
%javaconst(1);
enum Beverage { ALE, LAGER=10, STOUT, PILSNER, PILZ=PILSNER };
will generate:
public final class Beverage {
public final static int ALE = 0;
public final static int LAGER = 10;
public final static int STOUT = LAGER + 1;
public final static int PILSNER = STOUT + 1;
public final static int PILZ = PILSNER;
}
As is the case previously, the default is %javaconst(0) as not all C/C++ values will compile as Java code. However, again it is recommended to add in a %javaconst(1) directive. and the %javaconstvalue(value) directive covered in the Constants section can also be used for type unsafe enums. Note that global enums are generated into a Java class within whatever package you are using. C++ enums defined within a C++ class are generated into a static final inner Java class within the Java proxy class.
Note that unlike typesafe enums, this approach requires users to mostly use different syntax compared with proper Java enums. Thus the upgrade path to proper enums provided in JDK 1.5 is more painful.
This approach is similar to the type unsafe approach. Each enum item is also wrapped as a static final integer. However, these integers are not generated into a class named after the C/C++ enum. Instead, global enums are generated into the constants interface. Also, enums defined in a C++ class have their enum items generated directly into the Java proxy class rather than an inner class within the Java proxy class. In fact, this approach is effectively wrapping the enums as if they were anonymous enums and the resulting code is as per anonymous enums. The implementation is in the "enumsimple.swg" file.
Compatibility Note: SWIG-1.3.21 and earlier versions wrapped all enums using this approach. The type unsafe approach is preferable to this one and this simple approach is only included for backwards compatibility with these earlier versions of SWIG.
C/C++ pointers are fully supported by SWIG. Furthermore, SWIG has no problem working with incomplete type information. Here is a rather simple interface:
%module example FILE *fopen(const char *filename, const char *mode); int fputs(const char *, FILE *); int fclose(FILE *);
When wrapped, you will be able to use the functions in a natural way from Java. For example:
SWIGTYPE_p_FILE f = example.fopen("junk","w");
example.fputs("Hello World\n", f);
example.fclose(f);
C pointers in the Java module are stored in a Java long and cross the JNI boundary held within this 64 bit number. Many other SWIG language modules use an encoding of the pointer in a string. These scripting languages use the SWIG runtime type checker for dynamic type checking as they do not support static type checking by a compiler. In order to implement static type checking of pointers within Java, they are wrapped by a simple Java class. In the example above the FILE * pointer is wrapped with a type wrapper class called SWIGTYPE_p_FILE.
Once obtained, a type wrapper object can be freely passed around to different C functions that expect to receive an object of that type. The only thing you can't do is dereference the pointer from Java. Of course, that isn't much of a concern in this example.
As much as you might be inclined to modify a pointer value directly from Java, don't. The value is not necessarily the same as the logical memory address of the underlying object. The value will vary depending on the native byte-ordering of the platform (i.e., big-endian vs. little-endian). Most JVMs are 32 bit applications so any JNI code must also be compiled as 32 bit. The net result is pointers in JNI code are also 32 bits and are stored in the high order 4 bytes on big-endian machines and in the low order 4 bytes on little-endian machines. By design it is also not possible to manually cast a pointer to a new type by using Java casts as it is particularly dangerous especially when casting C++ objects. If you need to cast a pointer or change its value, consider writing some helper functions instead. For example:
%inline %{
/* C-style cast */
Bar *FooToBar(Foo *f) {
return (Bar *) f;
}
/* C++-style cast */
Foo *BarToFoo(Bar *b) {
return dynamic_cast<Foo*>(b);
}
Foo *IncrFoo(Foo *f, int i) {
return f+i;
}
%}
Also, if working with C++, you should always try to use the new C++ style casts. For example, in the above code, the C-style cast may return a bogus result whereas as the C++-style cast will return a NULL pointer if the conversion can't be performed.
If you wrap a C structure, it is wrapped by a Java class with getters and setters for access to the member variables. For example,
struct Vector {
double x,y,z;
};
is used as follows:
Vector v = new Vector(); v.setX(3.5); v.setY(7.2); double x = v.getX(); double y = v.getY();
The variable setters and getters are also based on the JavaBean design pattern already covered under the Global variables section. Similar access is provided for unions and the public data members of C++ classes.
This object is actually an instance of a Java class that has been wrapped around a pointer to the C structure. This instance doesn't actually do anything--it just serves as a proxy. The pointer to the C object is held in the Java proxy class in much the same way as pointers are held by type wrapper classes. Further details about Java proxy classes are covered a little later.
const members of a structure are read-only. Data members can also be forced to be read-only using the %immutable directive. For example:
struct Foo {
...
%immutable;
int x; /* Read-only members */
char *name;
%mutable;
...
};
When char * members of a structure are wrapped, the contents are assumed to be dynamically allocated using malloc or new (depending on whether or not SWIG is run with the -c++ option). When the structure member is set, the old contents will be released and a new value created. If this is not the behavior you want, you will have to use a typemap (described later).
If a structure contains arrays, access to those arrays is managed through pointers. For example, consider this:
struct Bar {
int x[16];
};
If accessed in Java, you will see behavior like this:
Bar b = new Bar(); SWIGTYPE_p_int x = b.getX();
This pointer can be passed around to functions that expect to receive an int * (just like C). You can also set the value of an array member using another pointer. For example:
Bar b = new Bar(); SWIGTYPE_p_int x = b.getX(); Bar c = new Bar(); c.setX(x); // Copy contents of b.x to c.x
For array assignment (setters not getters), SWIG copies the entire contents of the array starting with the data pointed to by b.x . In this example, 16 integers would be copied. Like C, SWIG makes no assumptions about bounds checking---if you pass a bad pointer, you may get a segmentation fault or access violation. The default wrapping makes it hard to set or get just one element of the array and so array access from Java is somewhat limited. This can be changed easily though by using the approach outlined later in the Wrapping C arrays with Java arrays and Unbounded C Arrays sections.
When a member of a structure is itself a structure, it is handled as a pointer. For example, suppose you have two structures like this:
struct Foo {
int a;
};
struct Bar {
Foo f;
};
Now, suppose that you access the f member of Bar like this:
Bar b = new Bar(); Foo x = b.getF();
In this case, x is a pointer that points to the Foo that is inside b. This is the same value as generated by this C code:
Bar b; Foo *x = &b->f; /* Points inside b */
Because the pointer points inside the structure, you can modify the contents and everything works just like you would expect. For example:
Bar b = new Bar(); b.getF().setA(3); // Modify b.f.a Foo x = b.getF(); x.setA(3); // Modify x.a - this is the same as b.f.a
C++ classes are wrapped by Java classes as well. For example, if you have this class,
class List {
public:
List();
~List();
int search(char *item);
void insert(char *item);
void remove(char *item);
char *get(int n);
int length;
};
you can use it in Java like this:
List l = new List();
l.insert("Ale");
l.insert("Stout");
l.insert("Lager");
String item = l.get(2);
int length = l.getLength();
Class data members are accessed in the same manner as C structures.
Static class members are unsurprisingly wrapped as static members of the Java class:
class Spam {
public:
static void foo();
static int bar;
};
The static members work like any other Java static member:
Spam.foo(); int bar = Spam.getBar();
SWIG is fully aware of issues related to C++ inheritance. Therefore, if you have classes like this
class Foo {
...
};
class Bar : public Foo {
...
};
those classes are wrapped into a hierarchy of Java classes that reflect the same inheritance structure:
Bar b = new Bar(); Class c = b.getClass(); System.out.println(c.getSuperclass().getName());
will of course display:
Foo
Furthermore, if you have functions like this
void spam(Foo *f);
then the Java function spam() accepts instances of Foo or instances of any other proxy classes derived from Foo.
Note that Java does not support multiple inheritance so any multiple inheritance in the C++ code is not going to work. A warning is given when multiple inheritance is detected and only the first base class is used.
In C++, there are many different ways a function might receive and manipulate objects. For example:
void spam1(Foo *x); // Pass by pointer void spam2(Foo &x); // Pass by reference void spam3(Foo x); // Pass by value void spam4(Foo x[]); // Array of objects
In Java, there is no detailed distinction like this--specifically, there are only instances of classes. There are no pointers nor references. Because of this, SWIG unifies all of these types together in the wrapper code. For instance, if you actually had the above functions, it is perfectly legal to do this from Java:
Foo f = new Foo(); // Create a Foo example.spam1(f); // Ok. Pointer example.spam2(f); // Ok. Reference example.spam3(f); // Ok. Value. example.spam4(f); // Ok. Array (1 element)
Similar behavior occurs for return values. For example, if you had functions like this,
Foo *spam5(); Foo &spam6(); Foo spam7();
then all three functions will return a pointer to some Foo object. Since the third function (spam7) returns a value, newly allocated memory is used to hold the result and a pointer is returned (Java will release this memory when the returned object's finalizer is run by the garbage collector).
Working with null pointers is easy. A Java null can be used whenever a method expects a proxy class or typewrapper class. However, it is not possible to pass null to C/C++ functions that take parameters by value or by reference. If you try you will get a NullPointerException.
example.spam1(null); // Pointer - ok example.spam2(null); // Reference - NullPointerException example.spam3(null); // Value - NullPointerException example.spam4(null); // Array - ok
For spam1 and spam4 above the Java null gets translated into a NULL pointer for passing to the C/C++ function. The converse also occurs, that is, NULL pointers are translated into null Java objects when returned from a C/C++ function.
C++ overloaded functions, methods, and constructors are mostly supported by SWIG. For example, if you have two functions like this:
%module example void foo(int); void foo(char *c);
You can use them in Java in a straightforward manner:
example.foo(3); // foo(int)
example.foo("Hello"); // foo(char *c)
Similarly, if you have a class like this,
class Foo {
public:
Foo();
Foo(const Foo &);
...
};
you can write Java code like this:
Foo f = new Foo(); // Create a Foo Foo g = new Foo(f); // Copy f
Overloading support is not quite as flexible as in C++. Sometimes there are methods that SWIG cannot disambiguate as there can be more than one C++ type mapping onto a single Java type. For example:
void spam(int); void spam(unsigned short);
Here both int and unsigned short map onto a Java int. Here is another example:
void foo(Bar *b); void foo(Bar &b);
If declarations such as these appear, you will get a warning message like this:
example.i:12: Warning 515: Overloaded method spam(unsigned short) ignored. Method spam(int) at example.i:11 used.
To fix this, you either need to either rename or ignore one of the methods. For example:
%rename(spam_ushort) spam(unsigned short); ... void spam(int); void spam(unsigned short); // Now renamed to spam_ushort
or
%ignore spam(unsigned short); ... void spam(int); void spam(unsigned short); // Ignored
Any function with a default argument is wrapped by generating an additional function for each argument that is defaulted. For example, if we have the following C++:
%module example void defaults(double d=10.0, int i=0);
The following methods are generated in the Java module class:
public class example {
public static void defaults(double d, int i) { ... }
public static void defaults(double d) { ... }
public static void defaults() { ... }
}
It is as if SWIG had parsed three separate overloaded methods. The same approach is taken for static methods, constructors and member methods.
Compatibility note: Versions of SWIG prior to SWIG-1.3.23 wrapped these with a single wrapper method and so the default values could not be taken advantage of from Java. Further details on default arguments and how to restore this approach are given in the more general Default arguments section.
SWIG is aware of named C++ namespaces and they can be mapped to Java packages, however, the default wrapping flattens the namespaces, effectively ignoring them. So by default, the namespace names do not appear in the module nor do namespaces result in a module that is broken up into submodules or packages. For example, if you have a file like this,
%module example
namespace foo {
int fact(int n);
struct Vector {
double x,y,z;
};
};
it works in Java as follows:
int f = example.fact(3); Vector v = new Vector(); v.setX(3.4); double y = v.getY();
If your program has more than one namespace, name conflicts (if any) can be resolved using %rename For example:
%rename(Bar_spam) Bar::spam;
namespace Foo {
int spam();
}
namespace Bar {
int spam();
}
If you have more than one namespace and you want to keep their symbols separate, consider wrapping them as separate SWIG modules. Each SWIG module can be placed into a separate package.
The default behaviour described above can be improved via the nspace feature. Note that it only works for classes, structs, unions and enums declared within a named C++ namespace. When the nspace feature is used, the C++ namespaces are converted into Java packages of the same name. Proxy classes are thus declared within a package and this proxy makes numerous calls to the JNI intermediary class which is declared in the unnamed package by default. As Java does not support types declared in a named package accessing types declared in an unnamed package, the -package commandline option described earlier generally should be used to provide a parent package. So if SWIG is run using the -package com.myco option, a wrapped class, MyWorld::Material::Color, can then be accessed as com.myco.MyWorld.Material.Color. If you don't specify a package, you will get the following warning:
example.i:16: Warning 826: The nspace feature is used on 'MyWorld::Material::Color' without -package. The generated code may not compile as Java does not support types declared in a named package accessing types declared in an unnamed package.
If it is undesirable to have a single top level package, the nspace feature may be used without the -package commandline option (and the resulting warning ignored) if all of the types exposed using SWIG are placed in a package using the nspace feature and the 'jniclasspackage' pragma is used to specify a package for the JNI intermediary class.
If the resulting use of the nspace feature and hence packages results in a proxy class in one package deriving or using a proxy class from another package, you will need to open up the visibility for the pointer constructor and getCPtr method from the default 'protected' to 'public' with the SWIG_JAVABODY_PROXY macro. See Java code typemaps.
C++ templates don't present a huge problem for SWIG. However, in order to create wrappers, you have to tell SWIG to create wrappers for a particular template instantiation. To do this, you use the %template directive. For example:
%module example
%{
#include <utility>
%}
template<class T1, class T2>
struct pair {
typedef T1 first_type;
typedef T2 second_type;
T1 first;
T2 second;
pair();
pair(const T1&, const T2&);
~pair();
};
%template(pairii) pair<int,int>;
In Java:
pairii p = new pairii(3,4); int first = p.getFirst(); int second = p.getSecond();
Obviously, there is more to template wrapping than shown in this example. More details can be found in the SWIG and C++ chapter.
In certain C++ programs, it is common to use classes that have been wrapped by so-called "smart pointers." Generally, this involves the use of a template class that implements operator->() like this:
template<class T> class SmartPtr {
...
T *operator->();
...
}
Then, if you have a class like this,
class Foo {
public:
int x;
int bar();
};
A smart pointer would be used in C++ as follows:
SmartPtr<Foo> p = CreateFoo(); // Created somehow (not shown) ... p->x = 3; // Foo::x int y = p->bar(); // Foo::bar
To wrap this in Java, simply tell SWIG about the SmartPtr class and the low-level Foo object. Make sure you instantiate SmartPtr using %template if necessary. For example:
%module example ... %template(SmartPtrFoo) SmartPtr<Foo>; ...
Now, in Java, everything should just "work":
SmartPtrFoo p = example.CreateFoo(); // Create a smart-pointer somehow p.setX(3); // Foo::x int y = p.bar(); // Foo::bar
If you ever need to access the underlying pointer returned by operator->() itself, simply use the __deref__() method. For example:
Foo f = p.__deref__(); // Returns underlying Foo *
In the previous section, a high-level view of Java wrapping was presented. A key component of this wrapping is that structures and classes are wrapped by Java proxy classes and type wrapper classes are used in situations where no proxies are generated. This provides a very natural, type safe Java interface to the C/C++ code and fits in with the Java programming paradigm. However, a number of low-level details were omitted. This section provides a brief overview of how the proxy classes work and then covers the type wrapper classes. Finally enum classes are covered. First, the crucial intermediary JNI class is considered.
In the "SWIG basics" and "SWIG and C++" chapters, details of low-level structure and class wrapping are described. To summarize those chapters, if you have a global function and class like this
class Foo {
public:
int x;
int spam(int num, Foo* foo);
};
void egg(Foo* chips);
then SWIG transforms the class into a set of low-level procedural wrappers. These procedural wrappers essentially perform the equivalent of this C++ code:
Foo *new_Foo() {
return new Foo();
}
void delete_Foo(Foo *f) {
delete f;
}
int Foo_x_get(Foo *f) {
return f->x;
}
void Foo_x_set(Foo *f, int value) {
f->x = value;
}
int Foo_spam(Foo *f, int num, Foo* foo) {
return f->spam(num, foo);
}
These procedural function names don't actually exist, but their functionality appears inside the generated JNI functions. The JNI functions have to follow a particular naming convention so the function names are actually:
SWIGEXPORT jlong JNICALL Java_exampleJNI_new_1Foo(JNIEnv *jenv, jclass jcls);
SWIGEXPORT void JNICALL Java_exampleJNI_delete_1Foo(JNIEnv *jenv, jclass jcls,
jlong jarg1);
SWIGEXPORT void JNICALL Java_exampleJNI_Foo_1x_1set(JNIEnv *jenv, jclass jcls,
jlong jarg1, jobject jarg1_, jint jarg2);
SWIGEXPORT jint JNICALL Java_exampleJNI_Foo_1x_1get(JNIEnv *jenv, jclass jcls,
jlong jarg1, jobject jarg1_);
SWIGEXPORT jint JNICALL Java_exampleJNI_Foo_1spam(JNIEnv *jenv, jclass jcls,
jlong jarg1, jobject jarg1_, jint jarg2,
jlong jarg3, jobject jarg3_);
SWIGEXPORT void JNICALL Java_exampleJNI_egg(JNIEnv *jenv, jclass jcls,
jlong jarg1, jobject jarg1_);
For every JNI C function there has to be a static native Java function. These appear in the intermediary JNI class:
class exampleJNI {
public final static native long new_Foo();
public final static native void delete_Foo(long jarg1);
public final static native void Foo_x_set(long jarg1, Foo jarg1_, int jarg2);
public final static native int Foo_x_get(long jarg1, Foo jarg1_);
public final static native int Foo_spam(long jarg1, Foo jarg1_, int jarg2,
long jarg3, Foo jarg3_);
public final static native void egg(long jarg1, Foo jarg1_);
}
This class contains the complete Java - C/C++ interface so all function calls go via this class. As this class acts as a go-between for all JNI calls to C/C++ code from the Java proxy classes, type wrapper classes and module class, it is known as the intermediary JNI class.
You may notice that SWIG uses a Java long wherever a pointer or class object needs to be marshalled across the Java-C/C++ boundary. This approach leads to minimal JNI code which makes for better performance as JNI code involves a lot of string manipulation. SWIG favours generating Java code over JNI code as Java code is compiled into byte code and avoids the costly string operations needed in JNI code. This approach has a downside though as the proxy class might get collected before the native method has completed. You might notice above that there is an additional parameters with a underscore postfix, eg jarg1_. These are added in order to prevent premature garbage collection when marshalling proxy classes.
The functions in the intermediary JNI class cannot be accessed outside of its package. Access to them is gained through the module class for globals otherwise the appropriate proxy class.
The name of the intermediary JNI class can be changed from its default, that is, the module name with JNI appended after it. The module directive attribute jniclassname is used to achieve this:
%module (jniclassname="name") modulename
If name is the same as modulename then the module class name gets changed from modulename to modulenameModule.
The intermediary JNI class can be tailored through the use of pragmas, but is not commonly done. The pragmas for this class are:
| Pragma | Description |
| jniclassbase | Base class for the intermediary JNI class |
| jniclasspackage | Package in which to place the intermediary JNI class |
| jniclassclassmodifiers | Class modifiers and class type for the intermediary JNI class |
| jniclasscode | Java code is copied verbatim into the intermediary JNI class |
| jniclassimports | Java code, usually one or more import statements, placed before the intermediary JNI class definition |
| jniclassinterfaces | Comma separated interface classes for the intermediary JNI class |
The pragma code appears in the generated intermediary JNI class where you would expect:
[ jniclassimports pragma ]
[ jniclassclassmodifiers pragma ] jniclassname extends [ jniclassbase pragma ]
implements [ jniclassinterfaces pragma ] {
[ jniclasscode pragma ]
... SWIG generated native methods ...
}
The jniclasscode pragma is quite useful for adding in a static block for loading the shared library / dynamic link library and demonstrates how pragmas work:
%pragma(java) jniclasscode=%{
static {
try {
System.loadLibrary("example");
} catch (UnsatisfiedLinkError e) {
System.err.println("Native code library failed to load. \n" + e);
System.exit(1);
}
}
%}
Pragmas will take either "" or %{ %} as delimiters. For example, let's change the intermediary JNI class access to just the default package-private access.
%pragma(java) jniclassclassmodifiers="class"
All the methods in the intermediary JNI class will then not be callable outside of the package as the method modifiers have been changed from public access to default access. This is useful if you want to prevent users calling these low level functions.
All global functions and variable getters/setters appear in the module class. For our example, there is just one function:
public class example {
public static void egg(Foo chips) {
exampleJNI.egg(Foo.getCPtr(chips), chips);
}
}
The module class is necessary as there is no such thing as a global in Java so all the C globals are put into this class. They are generated as static functions and so must be accessed as such by using the module name in the static function call:
example.egg(new Foo());
The primary reason for having the module class wrapping the calls in the intermediary JNI class is to implement static type checking. In this case only a Foo can be passed to the egg function, whereas any long can be passed to the egg function in the intermediary JNI class.
The module class can be tailored through the use of pragmas, in the same manner as the intermediary JNI class. The pragmas are similarly named and are used in the same way. The complete list follows:
| Pragma | Description |
| modulebase | Base class for the module class |
| moduleclassmodifiers | Class modifiers and class type for the module class |
| modulecode | Java code is copied verbatim into the module class |
| moduleimports | Java code, usually one or more import statements, placed before the module class definition |
| moduleinterfaces | Comma separated interface classes for the module class |
The pragma code appears in the generated module class like this:
[ moduleimports pragma ]
[ modulemodifiers pragma ] modulename extends [ modulebase pragma ]
implements [ moduleinterfaces pragma ] {
[ modulecode pragma ]
... SWIG generated wrapper functions ...
}
See The intermediary JNI class pragmas section for further details on using pragmas.
A Java proxy class is generated for each structure, union or C++ class that is wrapped. Proxy classes have also been called peer classes. The default proxy class for our previous example looks like this:
public class Foo {
private long swigCPtr;
protected boolean swigCMemOwn;
protected Foo(long cPtr, boolean cMemoryOwn) {
swigCMemOwn = cMemoryOwn;
swigCPtr = cPtr;
}
protected static long getCPtr(Foo obj) {
return (obj == null) ? 0 : obj.swigCPtr;
}
protected void finalize() {
delete();
}
public synchronized void delete() {
if(swigCPtr != 0 && swigCMemOwn) {
swigCMemOwn = false;
exampleJNI.delete_Foo(swigCPtr);
}
swigCPtr = 0;
}
public void setX(int value) {
exampleJNI.Foo_x_set(swigCPtr, this, value);
}
public int getX() {
return exampleJNI.Foo_x_get(swigCPtr, this);
}
public int spam(int num, Foo foo) {
return exampleJNI.Foo_spam(swigCPtr, this, num, Foo.getCPtr(foo), foo);
}
public Foo() {
this(exampleJNI.new_Foo(), true);
}
}
This class merely holds a pointer to the underlying C++ object ( swigCPtr). It also contains all the methods in the C++ class it is proxying plus getters and setters for public member variables. These functions call the native methods in the intermediary JNI class. The advantage of having this extra layer is the type safety that the proxy class functions offer. It adds static type checking which leads to fewer surprises at runtime. For example, you can see that if you attempt to use the spam() function it will only compile when the parameters passed are an int and a Foo. From a user's point of view, it makes the class work as if it were a Java class:
Foo f = new Foo(); f.setX(3); int y = f.spam(5, new Foo());
Each proxy class has an ownership flag swigCMemOwn. The value of this flag determines who is responsible for deleting the underlying C++ object. If set to true, the proxy class's finalizer will destroy the C++ object when the proxy class is garbage collected. If set to false, then the destruction of the proxy class has no effect on the C++ object.
When an object is created by a constructor or returned by value, Java automatically takes ownership of the result. On the other hand, when pointers or references are returned to Java, there is often no way to know where they came from. Therefore, the ownership is set to false. For example:
class Foo {
public:
Foo();
Foo bar1();
Foo &bar2();
Foo *bar2();
};
In Java:
Foo f = new Foo(); // f.swigCMemOwn = true Foo f1 = f.bar1(); // f1.swigCMemOwn = true Foo f2 = f.bar2(); // f2.swigCMemOwn = false Foo f3 = f.bar3(); // f3.swigCMemOwn = false
This behavior for pointers and references is especially important for classes that act as containers. For example, if a method returns a pointer to an object that is contained inside another object, you definitely don't want Java to assume ownership and destroy it!
For the most part, memory management issues remain hidden. However, there are situations where you might have to manually change the ownership of an object. For instance, consider code like this:
class Obj {};
class Node {
Obj *value;
public:
void set_value(Obj *v) { value = v; }
};
Now, consider the following Java code:
Node n = new Node(); // Create a node
{
Obj o = new Obj(); // Create an object
n.set_value(o); // Set value
} // o goes out of scope
In this case, the Node n is holding a reference to o internally. However, SWIG has no way to know that this has occurred. The Java proxy class still thinks that it has ownership of o. As o has gone out of scope, it could be garbage collected in which case the C++ destructor will be invoked and n will then be holding a stale-pointer to o. If you're lucky, you will only get a segmentation fault.
To work around this, the ownership flag of o needs changing to false. The ownership flag is a private member variable of the proxy class so this is not possible without some customization of the proxy class. This can be achieved by using a typemap to customise the proxy class with pure Java code as detailed later in the section on Java typemaps.
Sometimes a function will create memory and return a pointer to a newly allocated object. SWIG has no way of knowing this so by default the proxy class does not manage the returned object. However, you can tell the proxy class to manage the memory if you specify the %newobject directive. Consider:
class Obj {...};
class Factory {
public:
static Obj *createObj() { return new Obj(); }
};
If we call the factory function, then we have to manually delete the memory:
Obj obj = Factory.createObj(); // obj.swigCMemOwn = false ... obj.delete();
Now add in the %newobject directive:
%newobject Factory::createObj();
class Obj {...};
class Factory {
public:
static Obj *createObj() { return new Obj(); }
};
A call to delete() is no longer necessary as the garbage collector will make the C++ destructor call because swigCMemOwn is now true.
Obj obj = Factory.createObj(); // obj.swigCMemOwn = true; ...
Some memory management issues are quite tricky to fix and may only be noticeable after using for a long time. One such issue is premature garbage collection of an object created from Java and resultant usage from C++ code. The section on typemap examples cover two such scenarios, Memory management for objects passed to the C++ layer and Memory management when returning references to member variables
Java proxy classes will mirror C++ inheritance chains. For example, given the base class Base and its derived class Derived :
class Base {
public:
virtual double foo();
};
class Derived : public Base {
public:
virtual double foo();
};
The base class is generated much like any other proxy class seen so far:
public class Base {
private long swigCPtr;
protected boolean swigCMemOwn;
protected Base(long cPtr, boolean cMemoryOwn) {
swigCMemOwn = cMemoryOwn;
swigCPtr = cPtr;
}
protected static long getCPtr(Base obj) {
return (obj == null) ? 0 : obj.swigCPtr;
}
protected void finalize() {
delete();
}
public synchronized void delete() {
if(swigCPtr != 0 && swigCMemOwn) {
swigCMemOwn = false;
exampleJNI.delete_Base(swigCPtr);
}
swigCPtr = 0;
}
public double foo() {
return exampleJNI.Base_foo(swigCPtr, this);
}
public Base() {
this(exampleJNI.new_Base(), true);
}
}
The Derived class extends Base mirroring the C++ class inheritance hierarchy.
public class Derived extends Base {
private long swigCPtr;
protected Derived(long cPtr, boolean cMemoryOwn) {
super(exampleJNI.SWIGDerivedUpcast(cPtr), cMemoryOwn);
swigCPtr = cPtr;
}
protected static long getCPtr(Derived obj) {
return (obj == null) ? 0 : obj.swigCPtr;
}
protected void finalize() {
delete();
}
public synchronized void delete() {
if(swigCPtr != 0 && swigCMemOwn) {
swigCMemOwn = false;
exampleJNI.delete_Derived(swigCPtr);
}
swigCPtr = 0;
super.delete();
}
public double foo() {
return exampleJNI.Derived_foo(swigCPtr, this);
}
public Derived() {
this(exampleJNI.new_Derived(), true);
}
}
Note the memory ownership is controlled by the base class. However each class in the inheritance hierarchy has its own pointer value which is obtained during construction. The SWIGDerivedUpcast() call converts the pointer from a Derived * to a Base *. This is a necessity as C++ compilers are free to implement pointers in the inheritance hierarchy with different values.
It is of course possible to extend Base using your own Java classes. If Derived is provided by the C++ code, you could for example add in a pure Java class Extended derived from Base. There is a caveat and that is any C++ code will not know about your pure Java class Extended so this type of derivation is restricted. However, true cross language polymorphism can be achieved using the directors feature.
By default each proxy class has a delete() and a finalize() method. The finalize() method calls delete() which frees any malloc'd memory for wrapped C structs or calls the C++ class destructors. The idea is for delete() to be called when you have finished with the C/C++ object. Ideally you need not call delete(), but rather leave it to the garbage collector to call it from the finalizer. When a program exits, the garbage collector does not guarantee to call all finalizers. An insight into the reasoning behind this can be obtained from Hans Boehm's Destructors, Finalizers, and Synchronization paper. Depending on what the finalizers do and which operating system you use, this may or may not be a problem.
If the delete() call into JNI code is just for memory handling, there is not a problem when run on most operating systems, for example Windows and Unix. Say your JNI code creates memory on the heap which your finalizers should clean up, the finalizers may or may not be called before the program exits. In Windows and Unix all memory that a process uses is returned to the system on exit, so this isn't a problem. This is not the case in some operating systems like vxWorks. If however, your finalizer calls into JNI code invoking the C++ destructor which in turn releases a TCP/IP socket for example, there is no guarantee that it will be released. Note that with long running programs the garbage collector will eventually run, thereby calling any unreferenced object's finalizers.
Some not so ideal solutions are:
Call the System.runFinalizersOnExit(true) or Runtime.getRuntime().runFinalizersOnExit(true) to ensure the finalizers are called before the program exits. The catch is that this is a deprecated function call as the documentation says:
In many cases you will be lucky and find that it works, but it is not to be advocated. Have a look at Java web site and search for runFinalizersOnExit.
From jdk1.3 onwards a new function, addShutdownHook(), was introduced which is guaranteed to be called when your program exits. You can encourage the garbage collector to call the finalizers, for example, add this static block to the class that has the main() function:
static {
Runtime.getRuntime().addShutdownHook(
new Thread() {
public void run() { System.gc(); System.runFinalization(); }
}
);
}
Although this usually works, the documentation doesn't guarantee that runFinalization() will actually call the finalizers. As the shutdown hook is guaranteed you could also make a JNI call to clean up any resources that are being tracked by the C/C++ code.
Call the delete() function manually which will immediately invoke the C++ destructor. As a suggestion it may be a good idea to set the object to null so that should the object be inadvertently used again a Java null pointer exception is thrown, the alternative would crash the JVM by using a null C pointer. For example given a SWIG generated class A:
A myA = new A(); // use myA ... myA.delete(); // any use of myA here would crash the JVM myA=null; // any use of myA here would cause a Java null pointer exception to be thrown
The SWIG generated code ensures that the memory is not deleted twice, in the event the finalizers get called in addition to the manual delete() call.
Write your own object manager in Java. You could derive all SWIG classes from a single base class which could track which objects have had their finalizers run, then call the rest of them on program termination. The section on Java typemaps details how to specify a pure Java base class.
See the How to Handle Java Finalization's Memory-Retention Issues article for alternative approaches to managing memory by avoiding finalizers altogether.
As covered earlier, the C/C++ struct/class pointer is stored in the proxy class as a Java long and when needed is passed into the native method where it is cast into the appropriate type. This approach provides very fast marshalling but could be susceptible to premature garbage collection. Consider the following C++ code:
class Wibble {
};
void wobble(Wibble &w);
The module class contains the Java wrapper for the global wobble method:
public class example {
...
public static void wobble(Wibble w) {
exampleJNI.wobble(Wibble.getCPtr(w), w);
}
}
where example is the name of the module. All native methods go through the intermediary class which has the native method declared as such:
public class exampleJNI {
...
public final static native void wobble(long jarg1, Wibble jarg1_);
}
The second parameter, jarg1_, is the premature garbage collection prevention parameter and is added to the native method parameter list whenever a C/C++ struct or class is marshalled as a Java long. In order to understand why, consider the alternative where the intermediary class method is declared without the additional parameter:
public class exampleJNI {
...
public final static native void wobble(long jarg1);
}
and the following simple call to wobble:
{
Wibble w = new Wibble();
example.wobble(w);
}
The hotspot compiler effectively sees something like:
{
Wibble w = new Wibble();
long w_ptr = Wibble.getCPtr(w);
// w is no longer reachable
exampleJNI.wobble(w_ptr);
}
The Wibble object is no longer reachable after the point shown as in this bit of code, the Wibble object is not referenced again after this point. This means that it is a candidate for garbage collection. Should wobble be a long running method, it is quite likely that the finalizer for the Wibble instance will be called. This in turn will call its underlying C++ destructor which is obviously disastrous while the method wobble is running using this object. Even if wobble is not a long running method, it is possible for the Wibble instance to be finalized. By passing the Wibble instance into the native method, it will not be finalized as the JVM guarantees not to finalize any objects until the native method returns. Effectively, the code then becomes
{
Wibble w = new Wibble();
long w_ptr = Wibble.getCPtr(w);
exampleJNI.wobble(w_ptr, w);
// w is no longer reachable
}
and therefore there is no possibility of premature garbage collection. In practice, this premature garbage collection was only ever observed in Sun's server JVM from jdk-1.3 onwards and in Sun's client JVM from jdk-1.6 onwards.
The premature garbage collection prevention parameter for proxy classes is generated by default whenever proxy classes are passed by value, reference or with a pointer. The implementation for this extra parameter generation requires the "jtype" typemap to contain long and the "jstype" typemap to contain the name of a proxy class.
The additional parameter does impose a slight performance overhead and the parameter generation can be suppressed globally with the -nopgcpp commandline option. More selective suppression is possible with the 'nopgcpp' attribute in the "jtype" Java typemap. The attribute is a flag and so should be set to "1" to enable the suppression, or it can be omitted or set to "0" to disable. For example:
%typemap(jtype, nopgcpp="1") Wibble & "long"
Compatibility note: The generation of this additional parameter did not occur in versions prior to SWIG-1.3.30.
Single threaded Java applications using JNI need to consider thread safety. The same applies for the C# module where the .NET wrappers use PInvoke. Consider the C++ class:
class Test {
string str;
public:
Test() : str("initial") {}
};
and the Java proxy class generated by SWIG:
public class Test {
private long swigCPtr;
protected boolean swigCMemOwn;
protected Test(long cPtr, boolean cMemoryOwn) {
swigCMemOwn = cMemoryOwn;
swigCPtr = cPtr;
}
protected static long getCPtr(Test obj) {
return (obj == null) ? 0 : obj.swigCPtr;
}
protected void finalize() {
delete();
}
// Call C++ destructor
public synchronized void delete() {
if(swigCPtr != 0 && swigCMemOwn) {
swigCMemOwn = false;
exampleJNI.delete_Test(swigCPtr);
}
swigCPtr = 0;
}
// Call C++ constructor
public Test() {
this(exampleJNI.new_Test(), true);
}
}
It has two methods that call JNI methods, namely, exampleJNI.new_Test() for the C++ constructor and exampleJNI.delete_Test() for the C++ destructor. If the garbage collector collects an instance of this class, ie delete() is not explicitly called, then the C++ destructor will be run in a different thread to the main thread. This is because when an object is marked for garbage collection, any objects with finalizers are added to a finalization queue and the objects in the finalization queue have their finalize() methods run in a separate finalization thread. Therefore, if the C memory allocator is not thread safe, then the heap will get corrupted sooner or later, when a concurrent C++ delete and new are executed. It is thus essential, even in single threaded usage, to link to the C multi-thread runtime libraries, for example, use the /MD option for Visual C++ on Windows. Alternatively, lock all access to C++ functions that have heap allocation/deallocation.
Note that some of the STL in Visual C++ 6 is not thread safe, so although code might be linked to the multithread runtime libraries, undefined behaviour might still occur in a single threaded Java program. Similarly some older versions of Sun Studio have bugs in the multi-threaded implementation of the std::string class and so will lead to undefined behaviour in these supposedly single threaded Java applications.
The following innocuous Java usage of Test is an example that will crash very quickly on a multiprocessor machine if the JNI compiled code is linked against the single thread C runtime libraries.
for (int i=0; i<100000; i++) {
System.out.println("Iteration " + i);
for (int k=0; k<10; k++) {
Test test = new Test();
}
System.gc();
}
The generated type wrapper class, for say an int *, looks like this:
public class SWIGTYPE_p_int {
private long swigCPtr;
protected SWIGTYPE_p_int(long cPtr, boolean bFutureUse) {
swigCPtr = cPtr;
}
protected SWIGTYPE_p_int() {
swigCPtr = 0;
}
protected static long getCPtr(SWIGTYPE_p_int obj) {
return obj.swigCPtr;
}
}
The methods do not have public access, so by default it is impossible to do anything with objects of this class other than pass them around. The methods in the class are part of the inner workings of SWIG. If you need to mess around with pointers you will have to use some typemaps specific to the Java module to achieve this. The section on Java typemaps details how to modify the generated code.
Note that if you use a pointer or reference to a proxy class in a function then no type wrapper class is generated because the proxy class can be used as the function parameter. If however, you need anything more complicated like a pointer to a pointer to a proxy class then a typewrapper class is generated for your use.
Note that SWIG generates a type wrapper class and not a proxy class when it has not parsed the definition of a type that gets used. For example, say SWIG has not parsed the definition of class Snazzy because it is in a header file that you may have forgotten to use the %include directive on. Should SWIG parse Snazzy * being used in a function parameter, it will then generates a type wrapper class around a Snazzy pointer. Also recall from earlier that SWIG will use a pointer when a class is passed by value or by reference:
void spam(Snazzy *x, Snazzy &y, Snazzy z);
Should SWIG not know anything about Snazzy then a SWIGTYPE_p_Snazzy must be used for all 3 parameters in the spam function. The Java function generated is:
public static void spam(SWIGTYPE_p_Snazzy x, SWIGTYPE_p_Snazzy y, SWIGTYPE_p_Snazzy z) {
...
}
Note that typedefs are tracked by SWIG and the typedef name is used to construct the type wrapper class name. For example, consider the case where Snazzy is a typedef to an int which SWIG does parse:
typedef int Snazzy; void spam(Snazzy *x, Snazzy &y, Snazzy z);
Because the typedefs have been tracked the Java function generated is:
public static void spam(SWIGTYPE_p_int x, SWIGTYPE_p_int y, int z) { ... }
SWIG can generate three types of enum classes. The Enumerations section discussed these but omitted all the details. The following sub-sections detail the various types of enum classes that can be generated.
The following example demonstrates the typesafe enum classes which SWIG generates:
%include "enumtypesafe.swg"
%javaconst(1);
enum Beverage { ALE, LAGER=10, STOUT, PILSNER, PILZ=PILSNER };
The following is the code that SWIG generates:
public final class Beverage {
public final static Beverage ALE = new Beverage("ALE");
public final static Beverage LAGER = new Beverage("LAGER", 10);
public final static Beverage STOUT = new Beverage("STOUT");
public final static Beverage PILSNER = new Beverage("PILSNER");
public final static Beverage PILZ = new Beverage("PILZ", PILSNER);
public final int swigValue() {
return swigValue;
}
public String toString() {
return swigName;
}
public static Beverage swigToEnum(int swigValue) {
if (swigValue < swigValues.length && swigValue >= 0 &&
swigValues[swigValue].swigValue == swigValue)
return swigValues[swigValue];
for (int i = 0; i < swigValues.length; i++)
if (swigValues[i].swigValue == swigValue)
return swigValues[i];
throw new IllegalArgumentException("No enum " + Beverage.class + " with value " +
swigValue);
}
private Beverage(String swigName) {
this.swigName = swigName;
this.swigValue = swigNext++;
}
private Beverage(String swigName, int swigValue) {
this.swigName = swigName;
this.swigValue = swigValue;
swigNext = swigValue+1;
}
private Beverage(String swigName, Beverage swigEnum) {
this.swigName = swigName;
this.swigValue = swigEnum.swigValue;
swigNext = this.swigValue+1;
}
private static Beverage[] swigValues = { ALE, LAGER, STOUT, PILSNER, PILZ };
private static int swigNext = 0;
private final int swigValue;
private final String swigName;
}
As can be seen, there are a fair number of support methods for the typesafe enum pattern. The typesafe enum pattern involves creating a fixed number of static instances of the enum class. The constructors are private to enforce this. Three constructors are available - two for C/C++ enums with an initializer and one for those without an initializer. Note that the two enums with initializers, LAGER and PILZ, each call one the two different initializer constructors. In order to use one of these typesafe enums, the swigToEnum static method must be called to return a reference to one of the static instances. The JNI layer returns the enum value from the C/C++ world as an integer and this method is used to find the appropriate Java enum static instance. The swigValue method is used for marshalling in the other direction. The toString method is overridden so that the enum name is available.
The following example demonstrates the Java enums approach:
%include "enums.swg"
%javaconst(1);
enum Beverage { ALE, LAGER=10, STOUT, PILSNER, PILZ=PILSNER };
SWIG will generate the following Java enum:
public enum Beverage {
ALE,
LAGER(10),
STOUT,
PILSNER,
PILZ(PILSNER);
public final int swigValue() {
return swigValue;
}
public static Beverage swigToEnum(int swigValue) {
Beverage[] swigValues = Beverage.class.getEnumConstants();
if (swigValue < swigValues.length && swigValue >= 0 &&
swigValues[swigValue].swigValue == swigValue)
return swigValues[swigValue];
for (Beverage swigEnum : swigValues)
if (swigEnum.swigValue == swigValue)
return swigEnum;
throw new IllegalArgumentException("No enum " + Beverage.class +
" with value " + swigValue);
}
private Beverage() {
this.swigValue = SwigNext.next++;
}
private Beverage(int swigValue) {
this.swigValue = swigValue;
SwigNext.next = swigValue+1;
}
private Beverage(Beverage swigEnum) {
this.swigValue = swigEnum.swigValue;
SwigNext.next = this.swigValue+1;
}
private final int swigValue;
private static class SwigNext {
private static int next = 0;
}
}
The enum items appear first. Like the typesafe enum pattern, the constructors are private. The constructors are required to handle C/C++ enums with initializers. The next variable is in the SwigNext inner class rather than in the enum class as static primitive variables cannot be modified from within enum constructors. Marshalling between Java enums and the C/C++ enum integer value is handled via the swigToEnum and swigValue methods. All the constructors and methods in the Java enum are required just to handle C/C++ enums with initializers. These needn't be generated if the enum being wrapped does not have any initializers and the Simpler Java enums for enums without initializers section describes how typemaps can be used to achieve this.
The following example demonstrates type unsafe enums:
%include "enumtypeunsafe.swg"
%javaconst(1);
enum Beverage { ALE, LAGER=10, STOUT, PILSNER, PILZ=PILSNER };
SWIG will generate the following simple class:
public final class Beverage {
public final static int ALE = 0;
public final static int LAGER = 10;
public final static int STOUT = LAGER + 1;
public final static int PILSNER = STOUT + 1;
public final static int PILZ = PILSNER;
}
Proxy classes provide a natural, object-oriented way to wrap C++ classes. as described earlier, each proxy instance has an associated C++ instance, and method calls from Java to the proxy are passed to the C++ instance transparently via C wrapper functions.
This arrangement is asymmetric in the sense that no corresponding mechanism exists to pass method calls down the inheritance chain from C++ to Java. In particular, if a C++ class has been extended in Java (by deriving from the proxy class), these classes will not be visible from C++ code. Virtual method calls from C++ are thus not able to access the lowest implementation in the inheritance chain.
SWIG can address this problem and make the relationship between C++ classes and proxy classes more symmetric. To achieve this goal, new classes called directors are introduced at the bottom of the C++ inheritance chain. The job of the directors is to route method calls correctly, either to C++ implementations higher in the inheritance chain or to Java implementations lower in the inheritance chain. The upshot is that C++ classes can be extended in Java and from C++ these extensions look exactly like native C++ classes. Neither C++ code nor Java code needs to know where a particular method is implemented: the combination of proxy classes, director classes, and C wrapper functions transparently takes care of all the cross-language method routing.
The director feature is disabled by default. To use directors you must make two changes to the interface file. First, add the "directors" option to the %module directive, like this:
%module(directors="1") modulename
Without this option no director code will be generated. Second, you must use the %feature("director") directive to tell SWIG which classes and methods should get directors. The %feature directive can be applied globally, to specific classes, and to specific methods, like this:
// generate directors for all classes that have virtual methods
%feature("director");
// generate directors for all virtual methods in class Foo
%feature("director") Foo;
You can use the %feature("nodirector") directive to turn off directors for specific classes or methods. So for example,
%feature("director") Foo;
%feature("nodirector") Foo::bar;
will generate directors for all virtual methods of class Foo except bar().
Directors can also be generated implicitly through inheritance. In the following, class Bar will get a director class that handles the methods one() and two() (but not three()):
%feature("director") Foo;
class Foo {
public:
virtual void one();
virtual void two();
};
class Bar: public Foo {
public:
virtual void three();
};
For each class that has directors enabled, SWIG generates a new class that derives from both the class in question and a special Swig::Director class. These new classes, referred to as director classes, can be loosely thought of as the C++ equivalent of the Java proxy classes. The director classes store a pointer to their underlying Java proxy classes.
For simplicity let's ignore the Swig::Director class and refer to the original C++ class as the director's base class. By default, a director class extends all virtual methods in the inheritance chain of its base class (see the preceding section for how to modify this behavior). Thus all virtual method calls, whether they originate in C++ or in Java via proxy classes, eventually end up in at the implementation in the director class. The job of the director methods is to route these method calls to the appropriate place in the inheritance chain. By "appropriate place" we mean the method that would have been called if the C++ base class and its Java derived classes were seamlessly integrated. That seamless integration is exactly what the director classes provide, transparently skipping over all the messy JNI glue code that binds the two languages together.
In reality, the "appropriate place" is one of only two possibilities: C++ or Java. Once this decision is made, the rest is fairly easy. If the correct implementation is in C++, then the lowest implementation of the method in the C++ inheritance chain is called explicitly. If the correct implementation is in Java, the Java API is used to call the method of the underlying Java object (after which the usual virtual method resolution in Java automatically finds the right implementation).
Enabling directors for a class will generate a new director method for every virtual method in the class' inheritance chain. This alone can generate a lot of code bloat for large hierarchies. Method arguments that require complex conversions to and from Java types can result in large director methods. For this reason it is recommended that directors are selectively enabled only for specific classes that are likely to be extended in Java and used in C++.
Although directors make it natural to mix native C++ objects with Java objects (as director objects), one should be aware of the obvious fact that method calls to Java objects from C++ will be much slower than calls to C++ objects. Additionally, compared to classes that do not use directors, the call routing in the director methods adds a small overhead. This situation can be optimized by selectively enabling director methods (using the %feature directive) for only those methods that are likely to be extended in Java.
Consider the following SWIG interface file:
%module(directors="1") example;
%feature("director") DirectorBase;
class DirectorBase {
public:
virtual ~DirectorBase() {}
virtual void upcall_method() {}
};
void callup(DirectorBase *director) {
director->upcall_method();
}
The following DirectorDerived Java class is derived
from the Java proxy class DirectorBase and overrides
upcall_method(). When C++ code invokes upcall_method()
, the SWIG-generated C++ code redirects the call via JNI to the Java
DirectorDerived subclass. Naturally, the SWIG generated C++ code
and the generated Java intermediary class marshal and convert arguments
between C++ and Java when needed.
public class DirectorDerived extends DirectorBase {
public DirectorDerived() {
}
public void upcall_method() {
System.out.println("DirectorDerived::upcall_method() invoked.");
}
}
Running the following Java code
DirectorDerived director = new DirectorDerived(); example.callup(director);
will result in the following being output:
DirectorDerived::upcall_method() invoked.
Depending on your operating system and version of Java and how you are using threads, you might find the JVM hangs on exit. There are a couple of solutions to try out. The preferred solution requires jdk-1.4 and later and uses AttachCurrentThreadAsDaemon instead of AttachCurrentThread whenever a call into the JVM is required. This can be enabled by defining the SWIG_JAVA_ATTACH_CURRENT_THREAD_AS_DAEMON macro when compiling the C++ wrapper code. For older JVMs define SWIG_JAVA_NO_DETACH_CURRENT_THREAD instead, to avoid the DetachCurrentThread call but this will result in a memory leak instead. For further details inspect the source code in the java/director.swg library file.
Macros can be defined on the commandline when compiling your C++ code, or alternatively added to the C++ wrapper file as shown below:
%insert("runtime") %{
#define SWIG_JAVA_NO_DETACH_CURRENT_THREAD
%}
When a new instance of a director (or subclass) is created in Java, the C++ side of the director performs a runtime check per director method to determine if that particular method is overridden in Java or if it should invoke the C++ base implementation directly. Although this makes initialization slightly more expensive, it is generally a good overall tradeoff.
However, if all director methods are expected to usually be overridden by Java subclasses, then initialization can be made faster by avoiding these checks via the assumeoverride attribute. For example:
%feature("director", assumeoverride=1) Foo;
The disadvantage is that invocation of director methods from C++ when Java doesn't actually override the method will require an additional call up into Java and back to C++. As such, this option is only useful when overrides are extremely common and instantiation is frequent enough that its performance is critical.
When using directors, the protected virtual methods are also wrapped. These methods are wrapped with a protected Java proxy method, so the only way that Java code can access these is from within a Java class derived from the director class.
Members which are protected and non-virtual can also be accessed when using the 'allprotected' mode. The allprotected mode requires directors and is turned on by setting the allprotected option in addition to the directors option in the %module directive, like this:
%module(directors="1", allprotected="1") modulename
Protected member variables and methods (both static and non-static) will then be wrapped with protected access in the Java proxy class.
Note: Neither the directors option nor the allprotected mode support types defined with protected scope. This includes any enums or typedefs declared in the protected section of the C++ class.
The following simple example is a class with numerous protected members, including the constructor and destructor:
%module(directors="1", allprotected="1") example
%feature("director") ProtectedBase;
// Ignore use of unsupported types (those defined in the protected section)
%ignore ProtectedBase::typedefs;
%inline %{
class ProtectedBase {
protected:
ProtectedBase() {}
virtual ~ProtectedBase() {}
virtual void virtualMethod() const {}
void nonStaticMethod(double d) const {}
static void staticMethod(int i) {}
int instanceMemberVariable;
static int staticMemberVariable;
// unsupported: types defined with protected access and the methods/variables which use them
typedef int IntegerType;
IntegerType typedefs(IntegerType it) { return it; }
};
int ProtectedBase::staticMemberVariable = 10;
%}
Note that the IntegerType has protected scope and the members which use this type must be ignored as they cannot be wrapped.
The proxy methods are protected, so the only way the protected members can be accessed is within a class that derives from the director class, such as the following:
class MyProtectedBase extends ProtectedBase
{
public MyProtectedBase() {
}
public void accessProtected() {
virtualMethod();
nonStaticMethod(1.2);
staticMethod(99);
setInstanceMemberVariable(5);
int i = getInstanceMemberVariable();
setStaticMemberVariable(10);
i = getStaticMemberVariable();
}
}
An earlier section presented the absolute basics of C/C++ wrapping. If you do nothing but feed SWIG a header file, you will get an interface that mimics the behavior described. However, sometimes this isn't enough to produce a nice module. Certain types of functionality might be missing or the interface to certain functions might be awkward. This section describes some common SWIG features that are used to improve the interface to existing C/C++ code.
Sometimes when you create a module, it is missing certain bits of functionality. For example, if you had a function like this
typedef struct Image {...};
void set_transform(Image *im, double m[4][4]);
it would be accessible from Java, but there may be no easy way to call it. The problem here is that a type wrapper class is generated for the two dimensional array parameter so there is no easy way to construct and manipulate a suitable double [4][4] value. To fix this, you can write some extra C helper functions. Just use the %inline directive. For example:
%inline %{
/* Note: double[4][4] is equivalent to a pointer to an array double (*)[4] */
double (*new_mat44())[4] {
return (double (*)[4]) malloc(16*sizeof(double));
}
void free_mat44(double (*x)[4]) {
free(x);
}
void mat44_set(double x[4][4], int i, int j, double v) {
x[i][j] = v;
}
double mat44_get(double x[4][4], int i, int j) {
return x[i][j];
}
%}
From Java, you could then write code like this:
Image im = new Image(); SWIGTYPE_p_a_4__double a = example.new_mat44(); example.mat44_set(a,0,0,1.0); example.mat44_set(a,1,1,1.0); example.mat44_set(a,2,2,1.0); ... example.set_transform(im,a); example.free_mat44(a);
Admittedly, this is not the most elegant looking approach. However, it works and it wasn't too hard to implement. It is possible to improve on this using Java code, typemaps, and other customization features as covered in later sections, but sometimes helper functions are a quick and easy solution to difficult cases.
One of the more interesting features of SWIG is that it can extend structures and classes with new methods or constructors. Here is a simple example:
%module example
%{
#include "someheader.h"
%}
struct Vector {
double x,y,z;
};
%extend Vector {
char *toString() {
static char tmp[1024];
sprintf(tmp,"Vector(%g,%g,%g)", $self->x,$self->y,$self->z);
return tmp;
}
Vector(double x, double y, double z) {
Vector *v = (Vector *) malloc(sizeof(Vector));
v->x = x;
v->y = y;
v->z = z;
return v;
}
};
Now, in Java
Vector v = new Vector(2,3,4); System.out.println(v);
will display
Vector(2,3,4)
%extend works with both C and C++ code. It does not modify the underlying object in any way---the extensions only show up in the Java interface.
If a C or C++ function throws an error, you may want to convert that error into a Java exception. To do this, you can use the %exception directive. The %exception directive simply lets you rewrite part of the generated wrapper code to include an error check. It is detailed in full in the Exception handling with %exception section.
In C, a function often indicates an error by returning a status code (a negative number or a NULL pointer perhaps). Here is a simple example of how you might handle that:
%exception malloc {
$action
if (!result) {
jclass clazz = (*jenv)->FindClass(jenv, "java/lang/OutOfMemoryError");
(*jenv)->ThrowNew(jenv, clazz, "Not enough memory");
return $null;
}
}
void *malloc(size_t nbytes);
In Java,
SWIGTYPE_p_void a = example.malloc(2000000000);
will produce a familiar looking Java exception:
Exception in thread "main" java.lang.OutOfMemoryError: Not enough memory
at exampleJNI.malloc(Native Method)
at example.malloc(example.java:16)
at runme.main(runme.java:112)
If a library provides some kind of general error handling framework, you can also use that. For example:
%exception malloc {
$action
if (err_occurred()) {
jclass clazz = (*jenv)->FindClass(jenv, "java/lang/OutOfMemoryError");
(*jenv)->ThrowNew(jenv, clazz, "Not enough memory");
return $null;
}
}
void *malloc(size_t nbytes);
If no declaration name is given to %exception, it is applied to all wrapper functions. The $action is a SWIG special variable and is replaced by the C/C++ function call being wrapped. The return $null; handles all native method return types, namely those that have a void return and those that do not. This is useful for typemaps that will be used in native method returning all return types. See the section on Java special variables for further explanation.
C++ exceptions are also easy to handle. We can catch the C++ exception and rethrow it as a Java exception like this:
%exception getitem {
try {
$action
} catch (std::out_of_range &e) {
jclass clazz = jenv->FindClass("java/lang/Exception");
jenv->ThrowNew(clazz, "Range error");
return $null;
}
}
class FooClass {
public:
FooClass *getitem(int index); // Might throw std::out_of_range exception
...
};
In the example above, java.lang.Exception is a checked exception class and so ought to be declared in the throws clause of getitem. Classes can be specified for adding to the throws clause using %javaexception(classes) instead of %exception, where classes is a string containing one or more comma separated Java classes. The %clearjavaexception feature is the equivalent to %clearexception and clears previously declared exception handlers. The %nojavaexception feature is the equivalent to %noexception and disables the exception handler. See Clearing features for the difference on disabling and clearing features.
%javaexception("java.lang.Exception") getitem {
try {
$action
} catch (std::out_of_range &e) {
jclass clazz = jenv->FindClass("java/lang/Exception");
jenv->ThrowNew(clazz, "Range error");
return $null;
}
}
class FooClass {
public:
FooClass *getitem(int index); // Might throw std::out_of_range exception
...
};
The generated proxy method now generates a throws clause containing java.lang.Exception:
public class FooClass {
...
public FooClass getitem(int index) throws java.lang.Exception { ... }
...
}
The examples above first use the C JNI calling syntax then the C++ JNI calling syntax. The C++ calling syntax will not compile as C and also vice versa. It is however possible to write JNI calls which will compile under both C and C++ and is covered in the Typemaps for both C and C++ compilation section.
The language-independent exception.i library file can also be used to raise exceptions. See the SWIG Library chapter. The typemap example Handling C++ exception specifications as Java exceptions provides further exception handling capabilities.
A Java feature called %javamethodmodifiers can be used to change the method modifiers from the default public. It applies to both module class methods and proxy class methods. For example:
%javamethodmodifiers protect_me() "protected"; void protect_me();
Will produce the method in the module class with protected access.
protected static void protect_me() {
exampleJNI.protect_me();
}
Although SWIG is largely automatic, there are certain types of wrapping problems that require additional user input. Examples include dealing with output parameters, strings and arrays. This chapter discusses the common techniques for solving these problems.
A common problem in some C programs is handling parameters passed as simple pointers or references. For example:
void add(int x, int y, int *result) {
*result = x + y;
}
or perhaps
int sub(int *x, int *y) {
return *x-*y;
}
The typemaps.i library file will help in these situations. For example:
%module example %include "typemaps.i" void add(int, int, int *OUTPUT); int sub(int *INPUT, int *INPUT);
In Java, this allows you to pass simple values. For example:
int result = example.sub(7,4);
System.out.println("7 - 4 = " + result);
int[] sum = {0};
example.add(3,4,sum);
System.out.println("3 + 4 = " + sum[0]);
Which will display:
7 - 4 = 3 3 + 4 = 7
Notice how the INPUT parameters allow integer values to be passed instead of pointers and how the OUTPUT parameter will return the result in the first element of the integer array.
If you don't want to use the names INPUT or OUTPUT , use the %apply directive. For example:
%module example
%include "typemaps.i"
%apply int *OUTPUT { int *result };
%apply int *INPUT { int *x, int *y};
void add(int x, int y, int *result);
int sub(int *x, int *y);
If a function mutates one of its parameters like this,
void negate(int *x) {
*x = -(*x);
}
you can use INOUT like this:
%include "typemaps.i" ... void negate(int *INOUT);
In Java, the input parameter is the first element in a 1 element array and is replaced by the output of the function. For example:
int[] neg = {3};
example.negate(neg);
System.out.println("Negative of 3 = " + neg[0]);
And no prizes for guessing the output:
Negative of 3 = -3
These typemaps can also be applied to C++ references. The above examples would work the same if they had been defined using references instead of pointers. For example, the Java code to use the negate function would be the same if it were defined either as it is above:
void negate(int *INOUT);
or using a reference:
void negate(int &INOUT);
Note: Since most Java primitive types are immutable and are passed by value, it is not possible to perform in-place modification of a type passed as a parameter.
Be aware that the primary purpose of the typemaps.i file is to support primitive datatypes. Writing a function like this
void foo(Bar *OUTPUT);
will not have the intended effect since typemaps.i does not define an OUTPUT rule for Bar.
If you must work with simple pointers such as int * or double * another approach to using typemaps.i is to use the cpointer.i pointer library file. For example:
%module example
%include "cpointer.i"
%inline %{
extern void add(int x, int y, int *result);
%}
%pointer_functions(int, intp);
The %pointer_functions(type,name) macro generates five helper functions that can be used to create, destroy, copy, assign, and dereference a pointer. In this case, the functions are as follows:
int *new_intp(); int *copy_intp(int *x); void delete_intp(int *x); void intp_assign(int *x, int value); int intp_value(int *x);
In Java, you would use the functions like this:
SWIGTYPE_p_int intPtr = example.new_intp();
example.add(3,4,intPtr);
int result = example.intp_value(intPtr);
System.out.println("3 + 4 = " + result);
If you replace %pointer_functions(int,intp) by %pointer_class(int,intp), the interface is more class-like.
intp intPtr = new intp();
example.add(3,4,intPtr.cast());
int result = intPtr.value();
System.out.println("3 + 4 = " + result);
See the SWIG Library chapter for further details.
SWIG can wrap arrays in a more natural Java manner than the default by using the arrays_java.i library file. Let's consider an example:
%include "arrays_java.i";
int array[4];
void populate(int x[]) {
int i;
for (i=0; i<4; i++)
x[i] = 100 + i;
}
These one dimensional arrays can then be used as if they were Java arrays:
int[] array = new int[4];
example.populate(array);
System.out.print("array: ");
for (int i=0; i<array.length; i++)
System.out.print(array[i] + " ");
example.setArray(array);
int[] global_array = example.getArray();
System.out.print("\nglobal_array: ");
for (int i=0; i<array.length; i++)
System.out.print(global_array[i] + " ");
Java arrays are always passed by reference, so any changes a function makes to the array will be seen by the calling function. Here is the output after running this code:
array: 100 101 102 103 global_array: 100 101 102 103
Note that for assigning array variables the length of the C variable is used, so it is possible to use a Java array that is bigger than the C code will cope with. Only the number of elements in the C array will be used. However, if the Java array is not large enough then you are likely to get a segmentation fault or access violation, just like you would in C. When arrays are used in functions like populate, the size of the C array passed to the function is determined by the size of the Java array.
Please be aware that the typemaps in this library are not efficient as all the elements are copied from the Java array to a C array whenever the array is passed to and from JNI code. There is an alternative approach using the SWIG array library and this is covered in the next section.
Sometimes a C function expects an array to be passed as a pointer. For example,
int sumitems(int *first, int nitems) {
int i, sum = 0;
for (i = 0; i < nitems; i++) {
sum += first[i];
}
return sum;
}
One of the ways to wrap this is to apply the Java array typemaps that come in the arrays_java.i library file:
%include "arrays_java.i"
%apply int[] {int *};
The ANY size will ensure the typemap is applied to arrays of all sizes. You could narrow the typemap matching rules by specifying a particular array size. Now you can use a pure Java array and pass it to the C code:
int[] array = new int[10000000]; // Array of 10-million integers
for (int i=0; i<array.length; i++) { // Set some values
array[i] = i;
}
int sum = example.sumitems(array,10000);
System.out.println("Sum = " + sum);
and the sum would be displayed:
Sum = 49995000
This approach is probably the most natural way to use arrays. However, it suffers from performance problems when using large arrays as a lot of copying of the elements occurs in transferring the array from the Java world to the C++ world. An alternative approach to using Java arrays for C arrays is to use an alternative SWIG library file carrays.i. This approach can be more efficient for large arrays as the array is accessed one element at a time. For example:
%include "carrays.i" %array_functions(int, intArray);
The %array_functions(type,name) macro generates four helper functions that can be used to create and destroy arrays and operate on elements. In this case, the functions are as follows:
int *new_intArray(int nelements); void delete_intArray(int *x); int intArray_getitem(int *x, int index); void intArray_setitem(int *x, int index, int value);
In Java, you would use the functions like this:
SWIGTYPE_p_int array = example.new_intArray(10000000); // Array of 10-million integers
for (int i=0; i<10000; i++) { // Set some values
example.intArray_setitem(array,i,i);
}
int sum = example.sumitems(array,10000);
System.out.println("Sum = " + sum);
If you replace %array_functions(int,intp) by %array_class(int,intp), the interface is more class-like and a couple more helper functions are available for casting between the array and the type wrapper class.
%include "carrays.i" %array_class(int, intArray);
The %array_class(type, name) macro creates wrappers for an unbounded array object that can be passed around as a simple pointer like int * or double *. For instance, you will be able to do this in Java:
intArray array = new intArray(10000000); // Array of 10-million integers
for (int i=0; i<10000; i++) { // Set some values
array.setitem(i,i);
}
int sum = example.sumitems(array.cast(),10000);
System.out.println("Sum = " + sum);
The array "object" created by %array_class() does not encapsulate pointers inside a special array object. In fact, there is no bounds checking or safety of any kind (just like in C). Because of this, the arrays created by this library are extremely low-level indeed. You can't iterate over them nor can you even query their length. In fact, any valid memory address can be accessed if you want (negative indices, indices beyond the end of the array, etc.). Needless to say, this approach is not going to suit all applications. On the other hand, this low-level approach is extremely efficient and well suited for applications in which you need to create buffers, package binary data, etc.
By default SWIG handles char * as a string but there is a handy multi-argument typemap available as mentioned in Passing binary data. The following simple example demonstrates using a byte array instead of passing the default string type and length to the wrapped function.
%apply (char *STRING, size_t LENGTH) { (const char data[], size_t len) }
%inline %{
void binaryChar1(const char data[], size_t len) {
printf("len: %d data: ", len);
for (size_t i=0; i<len; ++i)
printf("%x ", data[i]);
printf("\n");
}
%}
Calling from Java requires just the byte array to be passed in as the multi-argument typemap being applied reduces the number of arguments in the target language to one, from the original two:
byte[] data = "hi\0jk".getBytes(); example.binaryChar1(data);
resulting in the output
$ java runme len: 5 data: 68 69 0 6a 6b
Unlike some languages supported by SWIG, Java has a true garbage collection subsystem. Other languages will free SWIG wrapped objects when their reference count reaches zero. Java only schedules these objects for finalization, which may not occur for some time. Because SWIG objects are allocated on the C heap, Java users may find the JVM memory use quickly exceeds the assigned limits, as memory fills with unfinalized proxy objects. Forcing garbage collection is clearly an undesirable solution.
An elegant fix for C++ users is to override new and delete using the following code (here shown included in a SWIG interface file)
/* File: java_heap.i */
%module test
%{
#include <stdexcept>
#include "jni.h"
/**
* A stash area embedded in each allocation to hold java handles
*/
struct Jalloc {
jbyteArray jba;
jobject ref;
};
static JavaVM *cached_jvm = 0;
JNIEXPORT jint JNICALL JNI_OnLoad(JavaVM *jvm, void *reserved) {
cached_jvm = jvm;
return JNI_VERSION_1_2;
}
static JNIEnv * JNU_GetEnv() {
JNIEnv *env;
jint rc = cached_jvm->GetEnv((void **)&env, JNI_VERSION_1_2);
if (rc == JNI_EDETACHED)
throw std::runtime_error("current thread not attached");
if (rc == JNI_EVERSION)
throw std::runtime_error("jni version not supported");
return env;
}
void * operator new(size_t t) {
if (cached_jvm != 0) {
JNIEnv *env = JNU_GetEnv();
jbyteArray jba = env->NewByteArray((int) t + sizeof(Jalloc));
if (env->ExceptionOccurred())
throw bad_alloc();
void *jbuffer = static_cast<void *>(env->GetByteArrayElements(jba, 0));
if (env->ExceptionOccurred())
throw bad_alloc();
Jalloc *pJalloc = static_cast<Jalloc *>(jbuffer);
pJalloc->jba = jba;
/* Assign a global reference so byte array will persist until delete'ed */
pJalloc->ref = env->NewGlobalRef(jba);
if (env->ExceptionOccurred())
throw bad_alloc();
return static_cast<void *>(static_cast<char *>(jbuffer) + sizeof(Jalloc));
}
else { /* JNI_OnLoad not called, use malloc and mark as special */
Jalloc *pJalloc = static_cast<Jalloc *>(malloc((int) t + sizeof(Jalloc)));
if (!pJalloc)
throw bad_alloc();
pJalloc->ref = 0;
return static_cast<void *>(
static_cast<char *>(static_cast<void *>(pJalloc)) + sizeof(Jalloc));
}
}
void operator delete(void *v) {
if (v != 0) {
void *buffer = static_cast<void *>( static_cast<char *>(v) - sizeof(Jalloc));
Jalloc *pJalloc = static_cast<Jalloc *>(buffer);
if (pJalloc->ref) {
JNIEnv *env = JNU_GetEnv();
env->DeleteGlobalRef(pJalloc->ref);
env->ReleaseByteArrayElements(pJalloc->jba, static_cast<jbyte *>(buffer), 0);
}
else {
free(buffer);
}
}
}
%}
...
This code caches the Java environment during initialization, and when new is called, a Java ByteArray is allocated to provide the SWIG objects with space in the Java heap. This has the combined effect of re-asserting the Java virtual machine's limit on memory allocation, and puts additional pressure on the garbage collection system to run more frequently. This code is made slightly more complicated because allowances must be made if new is called before the JNI_OnLoad is executed. This can happen during static class initialization, for example.
Unfortunately, because most Java implementations call malloc and free, this solution will not work for C wrapped structures. However, you are free to make functions that allocate and free memory from the Java heap using this model and use these functions in place of malloc and free in your own code.
This section describes how you can modify SWIG's default wrapping behavior for various C/C++ datatypes using the %typemap directive. You are advised to be familiar with the material in the " Typemaps" chapter. While not absolutely essential knowledge, this section assumes some familiarity with the Java Native Interface (JNI). JNI documentation can be consulted either online at Sun's Java web site or from a good JNI book. The following two books are recommended:
Before proceeding, it should be stressed that typemaps are not a required part of using SWIG---the default wrapping behavior is enough in most cases. Typemaps are only used if you want to change some aspect of the generated code.
The following table lists the default type mapping from Java to C/C++.
| C/C++ type | Java type | JNI type |
| bool
const bool & | boolean | jboolean |
| char
const char & | char | jchar |
| signed char
const signed char & | byte | jbyte |
| unsigned char
const unsigned char & | short | jshort |
| short
const short & | short | jshort |
| unsigned short
const unsigned short & | int | jint |
| int
const int & | int | jint |
| unsigned int
const unsigned int & | long | jlong |
| long
const long & | int | jint |
| unsigned long
const unsigned long & | long | jlong |
| long long
const long long & | long | jlong |
| unsigned long long
const unsigned long long & | java.math.BigInteger | jobject |
| float
const float & | float | jfloat |
| double
const double & | double | jdouble |
| char *
char [] | String | jstring |
Note that SWIG wraps the C char type as a character. Pointers and arrays of this type are wrapped as strings. The signed char type can be used if you want to treat char as a signed number rather than a character. Also note that all const references to primitive types are treated as if they are passed by value.
Given the following C function:
void func(unsigned short a, char *b, const long &c, unsigned long long d);
The module class method would be:
public static void func(int a, String b, int c, java.math.BigInteger d) {...}
The intermediary JNI class would use the same types:
public final static native void func(int jarg1, String jarg2, int jarg3,
java.math.BigInteger jarg4);
and the JNI function would look like this:
SWIGEXPORT void JNICALL Java_exampleJNI_func(JNIEnv *jenv, jclass jcls,
jint jarg1, jstring jarg2, jint jarg3, jobject jarg4) {...}
The mappings for C int and C long are appropriate for 32 bit applications which are used in the 32 bit JVMs. There is no perfect mapping between Java and C as Java doesn't support all the unsigned C data types. However, the mappings allow the full range of values for each C type from Java.
The previous section covered the primitive type mappings. Non-primitive types such as classes and structs are mapped using pointers on the C/C++ side and storing the pointer into a Java long variable which is held by the proxy class or type wrapper class. This applies whether the type is marshalled as a pointer, by reference or by value. It also applies for any unknown/incomplete types which use type wrapper classes.
So in summary, the C/C++ pointer to non-primitive types is cast into the 64 bit Java long type and therefore the JNI type is a jlong. The Java type is either the proxy class or type wrapper class.
If you are using a 64 bit JVM you may have to override the C long, but probably not C int default mappings. Mappings will be system dependent, for example long will need remapping on Unix LP64 systems (long, pointer 64 bits, int 32 bits), but not on Microsoft 64 bit Windows which will be using a P64 IL32 (pointer 64 bits and int, long 32 bits) model. This may be automated in a future version of SWIG. Note that the Java write once run anywhere philosophy holds true for all pure Java code when moving to a 64 bit JVM. Unfortunately it won't of course hold true for JNI code.
A typemap is nothing more than a code generation rule that is attached to a specific C datatype. For example, to convert integers from Java to C, you might define a typemap like this:
%module example
%typemap(in) int {
$1 = $input;
printf("Received an integer : %d\n", $1);
}
%inline %{
extern int fact(int nonnegative);
%}
Typemaps are always associated with some specific aspect of code generation. In this case, the "in" method refers to the conversion of input arguments to C/C++. The datatype int is the datatype to which the typemap will be applied. The supplied C code is used to convert values. In this code a number of special variables prefaced by a $ are used. The $1 variable is a placeholder for a local variable of type int. The $input variable contains the Java data, the JNI jint in this case.
When this example is compiled into a Java module, it can be used as follows:
System.out.println(example.fact(6));
and the output will be:
Received an integer : 6 720
In this example, the typemap is applied to all occurrences of the int datatype. You can refine this by supplying an optional parameter name. For example:
%module example
%typemap(in) int nonnegative {
$1 = $input;
printf("Received an integer : %d\n", $1);
}
%inline %{
extern int fact(int nonnegative);
%}
In this case, the typemap code is only attached to arguments that exactly match int nonnegative.
The application of a typemap to specific datatypes and argument names involves more than simple text-matching--typemaps are fully integrated into the SWIG C++ type-system. When you define a typemap for int, that typemap applies to int and qualified variations such as const int. In addition, the typemap system follows typedef declarations. For example:
%typemap(in) int nonnegative {
$1 = $input;
printf("Received an integer : %d\n", $1);
}
%inline %{
typedef int Integer;
extern int fact(Integer nonnegative); // Above typemap is applied
%}
However, the matching of typedef only occurs in one direction. If you defined a typemap for Integer, it is not applied to arguments of type int.
Typemaps can also be defined for groups of consecutive arguments. For example:
%typemap(in) (char *str, int len) {
...
};
int count(char c, char *str, int len);
When a multi-argument typemap is defined, the arguments are always handled as a single Java parameter. This allows the function to be used like this (notice how the length parameter is omitted):
int c = example.count('e',"Hello World");
The typemaps available to the Java module include the common typemaps listed in the main typemaps section. There are a number of additional typemaps which are necessary for using SWIG with Java. The most important of these implement the mapping of C/C++ types to Java types:
| Typemap | Description |
| jni | JNI C types. These provide the default mapping of types from C/C++ to JNI for use in the JNI (C/C++) code. |
| jtype | Java intermediary types. These provide the default mapping of types from C/C++ to Java for use in the native functions in the intermediary JNI class. The type must be the equivalent Java type for the JNI C type specified in the "jni" typemap. |
| jstype | Java types. These provide the default mapping of types from C/C++ to Java for use in the Java module class, proxy classes and type wrapper classes. |
| javain | Conversion from jstype to jtype. These are Java code typemaps which transform the type used in the Java module class, proxy classes and type wrapper classes (as specified in the "jstype" typemap) to the type used in the Java intermediary JNI class (as specified in the "jtype" typemap). In other words the typemap provides the conversion to the native method call parameter types. |
| javaout | Conversion from jtype to jstype. These are Java code typemaps which transform the type used in the Java intermediary JNI class (as specified in the "jtype" typemap) to the Java type used in the Java module class, proxy classes and type wrapper classes (as specified in the "jstype" typemap). In other words the typemap provides the conversion from the native method call return type. |
| javadirectorin | Conversion from jtype to jstype for director methods. These are Java code typemaps which transform the type used in the Java intermediary JNI class (as specified in the "jtype" typemap) to the Java type used in the Java module class, proxy classes and type wrapper classes (as specified in the "jstype" typemap). This typemap provides the conversion for the parameters in the director methods when calling up from C++ to Java. See Director typemaps. |
| javadirectorout | Conversion from jstype to jtype for director methods. These are Java code typemaps which transform the type used in the Java module class, proxy classes and type wrapper classes (as specified in the "jstype" typemap) to the type used in the Java intermediary JNI class (as specified in the "jtype" typemap). This typemap provides the conversion for the return type in the director methods when returning from the C++ to Java upcall. See Director typemaps. |
| directorin | Conversion from C++ type to jni type for director methods. These are C++ typemaps which convert the parameters used in the C++ director method to the appropriate JNI intermediary type. The conversion is done in JNI code prior to calling the Java function from the JNI code. See Director typemaps. |
| directorout | Conversion from jni type to C++ type for director methods. These are C++ typemaps which convert the JNI return type used in the C++ director method to the appropriate C++ return type. The conversion is done in JNI code after calling the Java function from the JNI code. See Director typemaps. |
If you are writing your own typemaps to handle a particular type, you will normally have to write a collection of them. The default typemaps are in "java.swg" and so might be a good place for finding typemaps to base any new ones on.
The "jni", "jtype" and "jstype" typemaps are usually defined together to handle the Java to C/C++ type mapping. An "in" typemap should be accompanied by a "javain" typemap and likewise an "out" typemap by a "javaout" typemap. If an "in" typemap is written, a "freearg" and "argout" typemap may also need to be written as some types have a default "freearg" and/or "argout" typemap which may need overriding. The "freearg" typemap sometimes releases memory allocated by the "in" typemap. The "argout" typemap sometimes sets values in function parameters which are passed by reference in Java.
Note that the "in" typemap marshals the JNI type held in the "jni" typemap to the real C/C++ type and for the opposite direction, the "out" typemap marshals the real C/C++ type to the JNI type held in the "jni" typemap. For non-primitive types the "in" and "out" typemaps are responsible for casting between the C/C++ pointer and the 64 bit jlong type. There is no portable way to cast a pointer into a 64 bit integer type and the approach taken by SWIG is mostly portable, but breaks C/C++ aliasing rules. In summary, these rules state that a pointer to any type must never be dereferenced by a pointer to any other incompatible type. The following code snippet might aid in understand aliasing rules better:
short a;
short* pa = 0;
int i = 0x1234;
a = (short)i; /* okay */
a = *(short*)&i; /* breaks aliasing rules */
An email posting, Aliasing, pointer casts and gcc 3.3 elaborates further on the subject. In SWIG, the "in" and "out" typemaps for pointers are typically
%typemap(in) struct Foo * %{
$1 = *(struct Foo **)&$input; /* cast jlong into C ptr */
%}
%typemap(out) struct Bar * %{
*(struct Bar **)&$result = $1; /* cast C ptr into jlong */
%}
struct Bar {...};
struct Foo {...};
struct Bar * FooBar(struct Foo *f);
resulting in the following code which breaks the aliasing rules:
SWIGEXPORT jlong JNICALL Java_exampleJNI_FooBar(JNIEnv *jenv, jclass jcls,
jlong jarg1, jobject jarg1_) {
jlong jresult = 0 ;
struct Foo *arg1 = (struct Foo *) 0 ;
struct Bar *result = 0 ;
(void)jenv;
(void)jcls;
(void)jarg1_;
arg1 = *(struct Foo **)&jarg1;
result = (struct Bar *)FooBar(arg1);
*(struct Bar **)&jresult = result;
return jresult;
}
If you are using gcc as your C compiler, you might get a "dereferencing type-punned pointer will break strict-aliasing rules" warning about this. Please see Compiling a dynamic module to avoid runtime problems with these strict aliasing rules.
The default code generated by SWIG for the Java module comes from the typemaps in the "java.swg" library file which implements the Default primitive type mappings and Default typemaps for non-primitive types covered earlier. There are other type mapping typemaps in the Java library. These are listed below:
| C Type | Typemap | File | Kind | Java Type | Function |
| primitive pointers and references | INPUT | typemaps.i | input | Java basic types | Allows values to be used for C functions taking pointers for data input. |
| primitive pointers and references | OUTPUT | typemaps.i | output | Java basic type arrays | Allows values held within an array to be used for C functions taking pointers for data output. |
| primitive pointers and references | INOUT | typemaps.i | input
output | Java basic type arrays | Allows values held within an array to be used for C functions taking pointers for data input and output. |
| string
wstring | [unnamed] | std_string.i | input
output | String | Use for std::string mapping to Java String. |
| arrays of primitive types | [unnamed] | arrays_java.i | input
output | arrays of primitive Java types | Use for mapping C arrays to Java arrays. |
| arrays of classes/structs/unions | JAVA_ARRAYSOFCLASSES macro | arrays_java.i | input
output | arrays of proxy classes | Use for mapping C arrays to Java arrays. |
| arrays of enums | ARRAYSOFENUMS | arrays_java.i |
input
output | int[] | Use for mapping C arrays to Java arrays (typeunsafe and simple enum wrapping approaches only). |
| char * | BYTE | various.i | input | byte[] | Java byte array is converted to char array |
| char ** | STRING_ARRAY | various.i | input
output | String[] | Use for mapping NULL terminated arrays of C strings to Java String arrays |
There are a few additional typemap attributes that the Java module supports.
The first of these is the 'throws' attribute. The throws attribute is optional and specified after the typemap name and contains one or more comma separated classes for adding to the throws clause for any methods that use that typemap. It is analogous to the %javaexception feature's throws attribute.
%typemap(typemapname, throws="ExceptionClass1, ExceptionClass2") type { ... }
The attribute is necessary for supporting Java checked exceptions and can be added to just about any typemap. The list of typemaps include all the C/C++ (JNI) typemaps in the " Typemaps" chapter and the Java specific typemaps listed in the previous section, barring the "jni", "jtype" and "jstype" typemaps as they could never contain code to throw an exception.
The throws clause is generated for the proxy method as well as the JNI method in the JNI intermediary class. If a method uses more than one typemap and each of those typemaps have classes specified in the throws clause, the union of the exception classes is added to the throws clause ensuring there are no duplicate classes. See the NaN exception example for further usage.
The "jtype" typemap has the optional 'nopgcpp' attribute which can be used to suppress the generation of the premature garbage collection prevention parameter.
The "javain" typemap has the optional 'pre', 'post' and 'pgcppname' attributes. These are used for generating code before and after the JNI call in the proxy class or module class. The 'pre' attribute contains code that is generated before the JNI call and the 'post' attribute contains code generated after the JNI call. The 'pgcppname' attribute is used to change the premature garbage collection prevention parameter name passed to the JNI function. This is sometimes needed when the 'pre' typemap creates a temporary variable which is then passed to the JNI function.
Note that when the 'pre' or 'post' attributes are specified and the associated type is used in a constructor, a constructor helper function is generated. This is necessary as the Java proxy constructor wrapper makes a call to a support constructor using a this call. In Java the this call must be the first statement in the constructor body. The constructor body thus calls the helper function and the helper function instead makes the JNI call, ensuring the 'pre' code is called before the JNI call is made. There is a Date marshalling example showing 'pre', 'post' and 'pgcppname' attributes in action.
The standard SWIG special variables are available for use within typemaps as described in the Typemaps documentation , for example $1, $input,$result etc.
The Java module uses a few additional special variables:
$javaclassname
This special variable works like the other
special variables and $javaclassname is similar to
$1_type. It expands to the class name for use in Java given a
pointer. SWIG wraps unions, structs and classes using pointers and in
this case it expands to the Java proxy class name. For example,
$javaclassname is replaced by the proxy classname Foo when
wrapping a Foo * and $&javaclassname expands to the
proxy classname when wrapping the C/C++ type Foo and
$*javaclassname expands to the proxy classname when wrapping
Foo *&. If the type does not have an associated proxy class, it
expands to the type wrapper class name, for example,
SWIGTYPE_p_unsigned_short is generated when wrapping unsigned
short *.
$javaclazzname
This special variable works like $javaclassname, but
expands the fully qualified C++ class into the package name, if used by
the nspace feature, and the proxy class
name, mangled for use as a function name. For example,
Namespace1::Namespace2::Klass is expanded into
Namespace1_Namespace2_Klass_. This special variable is usually used
for making calls to a function in the intermediary JNI class, as they
are mangled with this prefix.
$null
Used in input typemaps to return early from JNI functions that have
either void or a non-void return type. Example:
%typemap(check) int * %{
if (error) {
SWIG_JavaThrowException(jenv, SWIG_JavaIndexOutOfBoundsException, "Array element error");
return $null;
}
%}
If the typemap gets put into a function with void as return, $null will expand to nothing:
SWIGEXPORT void JNICALL Java_jnifn(...) {
if (error) {
SWIG_JavaThrowException(jenv, SWIG_JavaIndexOutOfBoundsException, "Array element error");
return ;
}
...
}
otherwise $null expands to NULL
SWIGEXPORT jobject JNICALL Java_jnifn(...) {
if (error) {
SWIG_JavaThrowException(jenv, SWIG_JavaIndexOutOfBoundsException, "Array element error");
return NULL;
}
...
}
$javainput, $jnicall and $owner
The $javainput special variable is used in "javain" typemaps and
$jnicall and $owner are used in "javaout" typemaps. $jnicall is
analogous to $action in %exception. It is replaced by the call to the
native method in the intermediary JNI class. $owner is replaced by
either true if %newobject has been used, otherwise false
. $javainput is analogous to the $input special variable. It is replaced
by the parameter name.
Here is an example:
%typemap(javain) Class "Class.getCPtr($javainput)"
%typemap(javain) unsigned short "$javainput"
%typemap(javaout) Class * {
return new Class($jnicall, $owner);
}
%inline %{
class Class {...};
Class * bar(Class cls, unsigned short ush) { return new Class(); };
%}
The generated proxy code is then:
public static Class bar(Class cls, int ush) {
return new Class(exampleJNI.bar(Class.getCPtr(cls), cls, ush), false);
}
Here $javainput has been replaced by cls and ush. $jnicall has been replaced by the native method call, exampleJNI.bar(...) and $owner has been replaced by false. If %newobject is used by adding the following at the beginning of our example:
%newobject bar(Class cls, unsigned short ush);
The generated code constructs the return type using true indicating the proxy class Class is responsible for destroying the C++ memory allocated for it in bar:
public static Class bar(Class cls, int ush) {
return new Class(exampleJNI.bar(Class.getCPtr(cls), cls, ush), true);
}
$static
This special variable expands to either static or nothing
depending on whether the class is an inner Java class or not. It is
used in the "javaclassmodifiers" typemap so that global classes can be
wrapped as Java proxy classes and nested C++ classes/enums can be
wrapped with the Java equivalent, that is, static inner proxy classes.
$jniinput, $javacall and $packagepath
These special variables are used in the directors typemaps. See
Director specific typemaps for details.
$module
This special variable expands to the module name, as specified by
%module or the -module commandline option.
$imclassname
This special variable expands to the intermediary class name.
Usually this is the same as '$moduleJNI', unless the jniclassname
attribute is specified in the %module
directive.
JNI calls must be written differently depending on whether the code is being compiled as C or C++. For example C compilation requires the pointer to a function pointer struct member syntax like
const jclass clazz = (*jenv)->FindClass(jenv, "java/lang/String");
whereas C++ code compilation of the same function call is a member function call using a class pointer like
const jclass clazz = jenv->FindClass("java/lang/String");
To enable typemaps to be used for either C or C++ compilation, a set of JCALLx macros have been defined in Lib/java/javahead.swg, where x is the number of arguments in the C++ version of the JNI call. The above JNI calls would be written in a typemap like this
const jclass clazz = JCALL1(FindClass, jenv, "java/lang/String");
Note that the SWIG preprocessor expands these into the appropriate C or C++ JNI calling convention. The C calling convention is emitted by default and the C++ calling convention is emitted when using the -c++ SWIG commandline option. If you do not intend your code to be targeting both C and C++ then your typemaps can use the appropriate JNI calling convention and need not use the JCALLx macros.
Most of SWIG's typemaps are used for the generation of C/C++ code. The typemaps in this section are used solely for the generation of Java code. Elements of proxy classes and type wrapper classes come from the following typemaps (the defaults).
%typemap(javabase)
%typemap(javabody)
%typemap(javabody_derived)
%typemap(javaclassmodifiers)
%typemap(javacode)
%typemap(javadestruct, methodname="delete",
methodmodifiers="public synchronized")
%typemap(javadestruct_derived, methodname="delete", methodmodifiers="public synchronized")
%typemap(javaimports)
%typemap(javainterfaces)
%typemap(javafinalize)
Note that the default javafinalize typemap must contain the full implementation of the finalize method. Any customization to this typemap must still declare a java finalize method with the correct signature. Note also that the name of the generated "delete" method may be affected by javadestruct and javadestruct_derived typemaps. Below shows an example modifying the finalizer, assuming the delete method has been renamed to swig_delete.
%typemap(javafinalize) SWIGTYPE %{
protected void finalize() {
swig_delete(); // renamed to prevent conflict with existing delete method
}
]%
Compatibility Note: In SWIG-1.3.21 and earlier releases, typemaps called "javagetcptr" and "javaptrconstructormodifiers" were available. These are deprecated and the "javabody" typemap can be used instead.
In summary the contents of the typemaps make up a proxy class like this:
[ javaimports typemap ]
[ javaclassmodifiers typemap ] javaclassname extends [ javabase typemap ]
implements [ javainterfaces typemap ] {
[ javabody or javabody_derived typemap ]
[ javafinalize typemap ]
public synchronized void delete() [ javadestruct OR javadestruct_derived typemap ]
[ javacode typemap ]
... proxy functions ...
}
Note the delete() methodname and method modifiers are configurable, see "javadestruct" and "javadestruct_derived" typemaps above.
The type wrapper class is similar in construction:
[ javaimports typemap ]
[ javaclassmodifiers typemap ] javaclassname extends [ javabase typemap ]
implements [ javainterfaces typemap ] {
[ javabody typemap ]
[ javacode typemap ]
}
The enum class is also similar in construction:
[ javaimports typemap ]
[ javaclassmodifiers typemap ] javaclassname extends [ javabase typemap ]
implements [ javainterfaces typemap ] {
... Enum values ...
[ javabody typemap ]
[ javacode typemap ]
}
The "javaimports" typemap is ignored if the enum class is wrapped by an inner Java class, that is when wrapping an enum declared within a C++ class.
The defaults can be overridden to tailor these classes. Here is an example which will change the getCPtr method and constructor from the default public access to protected access. If the classes in one package are not using the classes in another package, then these methods need not be public and removing access to these low level implementation details, is a good thing. If you are invoking SWIG more than once and generating the wrapped classes into different packages in each invocation, then you cannot do this as you will then have different packages.
%typemap(javabody) SWIGTYPE %{
private long swigCPtr;
protected boolean swigCMemOwn;
protected $javaclassname(long cPtr, boolean cMemoryOwn) {
swigCMemOwn = cMemoryOwn;
swigCPtr = cPtr;
}
protected static long getCPtr($javaclassname obj) {
return (obj == null) ? 0 : obj.swigCPtr;
}
%}
The typemap code is the same that is in "java.swg", barring the last two method modifiers. Note that SWIGTYPE will target all proxy classes, but not the type wrapper classes. Also the above typemap is only used for proxy classes that are potential base classes. To target proxy classes that are derived from a wrapped class as well, the "javabody_derived" typemap should also be overridden.
For the typemap to be used in all type wrapper classes, all the different types that type wrapper classes could be used for should be targeted:
%typemap(javabody) SWIGTYPE *, SWIGTYPE &, SWIGTYPE [], SWIGTYPE (CLASS::*) %{
private long swigCPtr;
protected $javaclassname(long cPtr, boolean bFutureUse) {
swigCPtr = cPtr;
}
protected $javaclassname() {
swigCPtr = 0;
}
protected static long getCPtr($javaclassname obj) {
return (obj == null) ? 0 : obj.swigCPtr;
}
%}
Again this is the same that is in "java.swg", barring the method modifier for getCPtr.
When using multiple modules or the nspace feature it is common to invoke SWIG with a different -package command line option for each module. However, by default the generated code may not compile if generated classes in one package use generated classes in another package. The visibility of the getCPtr() and pointer constructor generated from the javabody typemaps needs changing. The default visibility is protected but it needs to be public for access from a different package. Just changing 'protected' to 'public' in the typemap achieves this. Two macros are available in java.swg to make this easier and using them is the preferred approach over simply copying the typemaps and modifying as this is forward compatible with any changes in the javabody typemap in future versions of SWIG. The macros are for the proxy and typewrapper classes and can respectively be used to to make the method and constructor public:
SWIG_JAVABODY_PROXY(public, public, SWIGTYPE) SWIG_JAVABODY_TYPEWRAPPER(public, public, public, SWIGTYPE)
The Java directors feature requires the "javadirectorin", "javadirectorout", "directorin" and the "directorout" typemaps in order to work properly. The "javapackage" typemap is an optional typemap used to identify the Java package path for individual SWIG generated proxy classes used in director methods.
%typemap(directorin)
The "directorin" typemap is used for converting arguments in the C++ director class to the appropriate JNI type before the upcall to Java. This typemap also specifies the JNI field descriptor for the type in the "descriptor" attribute. For example, integers are converted as follows:
%typemap(directorin,descriptor="I") int "$input = (jint) $1;"
$input is the SWIG name of the JNI temporary variable
passed to Java in the upcall. The descriptor="I" will put
an I into the JNI field descriptor that identifies the
Java method that will be called from C++. For more about JNI field
descriptors and their importance, refer to the
JNI documentation mentioned earlier. A typemap for C character
strings is:
%typemap(directorin,descriptor="Ljava/lang/String;") char *
%{ $input = jenv->NewStringUTF($1); %}
User-defined types have the default "descriptor" attribute "
L$packagepath/$javaclassname;" where $packagepath is
the package name passed from the SWIG command line and
$javaclassname is the Java proxy class' name. If the -package
commandline option is not used to specify the package, then
'$packagepath/' will be removed from the resulting output JNI field
descriptor. Do not forget the terminating ';' for JNI field
descriptors starting with 'L'. If the ';' is left out, Java will
generate a "method not found" runtime error.
%typemap(directorout)
The "directorout" typemap is used for converting the JNI return type in the C++ director class to the appropriate C++ type after the upcall to Java. For example, integers are converted as follows:
%typemap(directorout) int %{ $result = (int)$input; %}
$input is the SWIG name of the JNI temporary variable
returned from Java after the upcall. $result is the
resulting output. A typemap for C character strings is:
%typemap(directorout) char * {
$1 = 0;
if ($input) {
$result = (char *)jenv->GetStringUTFChars($input, 0);
if (!$1) return $null;
}
}
%typemap(javadirectorin)
Conversion from jtype to jstype for director methods. These are Java code typemaps which transform the type used in the Java intermediary JNI class (as specified in the "jtype" typemap) to the Java type used in the Java module class, proxy classes and type wrapper classes (as specified in the "jstype" typemap). This typemap provides the conversion for the parameters in the director methods when calling up from C++ to Java.
For primitive types, this typemap is usually specified as:
%typemap(javadirectorin) int "$jniinput"
The $jniinput special variable is analogous to
$javainput special variable. It is replaced by the input
parameter name.
%typemap(javadirectorout)
Conversion from jstype to jtype for director methods. These are Java code typemaps which transform the type used in the Java module class, proxy classes and type wrapper classes (as specified in the "jstype" typemap) to the type used in the Java intermediary JNI class (as specified in the "jtype" typemap). This typemap provides the conversion for the return type in the director methods when returning from the C++ to Java upcall.
For primitive types, this typemap is usually specified as:
%typemap(javadirectorout) int "$javacall"
The $javacall special variable is analogous to the
$jnicall special variable. It is replaced by the call to the
target Java method. The target method is the method in the Java proxy
class which overrides the virtual C++ method in the C++ base class.
%typemap(javapackage)
The "javapackage" typemap is optional; it serves to identify a class's Java package. This typemap should be used in conjunction with classes that are defined outside of the current SWIG interface file. The typemap is only used if the type is used in a director method, that is, in a virtual method in a director class. For example:
// class Foo is handled in a different interface file:
%import "Foo.i"
%feature("director") Example;
%inline {
class Bar { };
class Example {
public:
virtual ~Example();
virtual void ping(Foo *arg1, Bar *arg2);
};
}
Assume that the Foo class is part of the Java package com.wombat.foo but the above interface file is part of the Java package com.wombat.example. Without the "javapackage" typemap, SWIG will assume that the Foo class belongs to com.wombat.example class. The corrected interface file looks like:
// class Foo is handled in a different interface file:
%import "Foo.i"
%typemap("javapackage") Foo, Foo *, Foo & "com.wombat.foo";
%feature("director") Example;
%inline {
class Bar { };
class Example {
public:
virtual ~Example();
virtual void ping(Foo *arg1, Bar *arg2);
};
}
SWIG looks up the package based on the actual type (plain
Foo, Foo pointer and Foo reference), so it is important to associate
all three types with the desired package. Practically speaking, you
should create a separate SWIG interface file, which is %import-ed into
each SWIG interface file, when you have multiple Java packages. Note
the helper macros below, OTHER_PACKAGE_SPEC and
ANOTHER_PACKAGE_SPEC, which reduce the amount of extra typing. "
TYPE..." is useful when passing templated types to the macro,
since multiargument template types appear to the SWIG preprocessor as
multiple macro arguments.
%typemap("javapackage") SWIGTYPE, SWIGTYPE *, SWIGTYPE &
"package.for.most.classes";
%define OTHER_PACKAGE_SPEC(TYPE...)
%typemap("javapackage") TYPE, TYPE *, TYPE & "package.for.other.classes";
%enddef
%define ANOTHER_PACKAGE_SPEC(TYPE...)
%typemap("javapackage") TYPE, TYPE *, TYPE & "package.for.another.set";
%enddef
OTHER_PACKAGE_SPEC(Package_2_class_one)
ANOTHER_PACKAGE_SPEC(Package_3_class_two)
/* etc */
The basic strategy here is to provide a default package typemap for the majority of the classes, only providing "javapackage" typemaps for the exceptions.
This section includes a few examples of typemaps. For more examples, you might look at the files "java.swg" and "typemaps.i " in the SWIG library.
The default Proper Java enums approach to wrapping enums is somewhat verbose. This is to handle all possible C/C++ enums, in particular enums with initializers. The generated code can be simplified if the enum being wrapped does not have any initializers.
The following shows how to remove the support methods that are generated by default and instead use the methods in the Java enum base class java.lang.Enum and java.lang.Class for marshalling enums between C/C++ and Java. The type used for the typemaps below is enum SWIGTYPE which is the default type used for all enums. The "enums.swg" file should be examined in order to see the original overridden versions of the typemaps.
%include "enums.swg"
%typemap(javain) enum SWIGTYPE "$javainput.ordinal()"
%typemap(javaout) enum SWIGTYPE {
return $javaclassname.class.getEnumConstants()[$jnicall];
}
%typemap(javabody) enum SWIGTYPE ""
%inline %{
enum HairType { blonde, ginger, brunette };
void setHair(HairType h);
HairType getHair();
%}
SWIG will generate the following Java enum, which is somewhat simpler than the default:
public enum HairType {
blonde,
ginger,
brunette;
}
and the two Java proxy methods will be:
public static void setHair(HairType h) {
exampleJNI.setHair(h.ordinal());
}
public static HairType getHair() {
return HairType.class.getEnumConstants()[exampleJNI.getHair()];
}
For marshalling Java enums to C/C++ enums, the ordinal method is used to convert the Java enum into an integer value for passing to the JNI layer, see the "javain" typemap. For marshalling C/C++ enums to Java enums, the C/C++ enum value is cast to an integer in the C/C++ typemaps (not shown). This integer value is then used to index into the array of enum constants that the Java language provides. See the getEnumConstants method in the "javaout" typemap.
These typemaps can often be used as the default for wrapping enums as in many cases there won't be any enum initializers. In fact a good strategy is to always use these typemaps and to specifically handle enums with initializers using %apply. This would be done by using the original versions of these typemaps in "enums.swg" under another typemap name for applying using %apply.
This example demonstrates various ways in which C++ exceptions can be tailored and converted into Java exceptions. Let's consider a simple file class SimpleFile and an exception class FileException which it may throw on error:
%include "std_string.i" // for std::string typemaps
#include <string>
class FileException {
std::string message;
public:
FileException(const std::string& msg) : message(msg) {}
std::string what() {
return message;
}
};
class SimpleFile {
std::string filename;
public:
SimpleFile(const std::string& filename) : filename(filename) {}
void open() throw(FileException) {
...
}
};
As the open method has a C++ exception specification, SWIG will parse this and know that the method can throw an exception. The "throws" typemap is then used when SWIG encounters an exception specification. The default generic "throws" typemap looks like this:
%typemap(throws) SWIGTYPE, SWIGTYPE &, SWIGTYPE *, SWIGTYPE [ANY] %{
SWIG_JavaThrowException(jenv, SWIG_JavaRuntimeException,
"C++ $1_type exception thrown");
return $null;
%}
Basically SWIG will generate a C++ try catch block and the body of the "throws" typemap constitutes the catch block. The above typemap calls a SWIG supplied method which throws a java.lang.RuntimeException. This exception class is a runtime exception and therefore not a checked exception. If, however, we wanted to throw a checked exception, say java.io.IOException, then we could use the following typemap:
%typemap(throws, throws="java.io.IOException") FileException {
jclass excep = jenv->FindClass("java/io/IOException");
if (excep)
jenv->ThrowNew(excep, $1.what().c_str());
return $null;
}
Note that this typemap uses the 'throws' typemap attribute to ensure a throws clause is generated. The generated proxy method then specifies the checked exception by containing java.io.IOException in the throws clause:
public class SimpleFile {
...
public void open() throws java.io.IOException { ... }
}
Lastly, if you don't want to map your C++ exception into one of the standard Java exceptions, the C++ class can be wrapped and turned into a custom Java exception class. If we go back to our example, the first thing we must do is get SWIG to wrap FileException and ensure that it derives from java.lang.Exception. Additionally, we might want to override the java.lang.Exception.getMessage() method. The typemaps to use then are as follows:
%typemap(javabase) FileException "java.lang.Exception";
%typemap(javacode) FileException %{
public String getMessage() {
return what();
}
%}
This generates:
public class FileException extends java.lang.Exception {
...
public String getMessage() {
return what();
}
public FileException(String msg) { ... }
public String what() {
return exampleJNI.FileException_what(swigCPtr, this);
}
}
We could alternatively have used %rename to rename what() into getMessage().
A Java exception can be thrown from any Java or JNI code. Therefore, as most typemaps contain either Java or JNI code, just about any typemap could throw an exception. The following example demonstrates exception handling on a type by type basis by checking for 'Not a number' (NaN) whenever a parameter of type float is wrapped.
Consider the following C++ code:
bool calculate(float first, float second);
To validate every float being passed to C++, we could precede the code being wrapped by the following typemap which throws a runtime exception whenever the float is 'Not a Number':
%module example
%typemap(javain) float "$module.CheckForNaN($javainput)"
%pragma(java) modulecode=%{
/** Simply returns the input value unless it is not a number,
whereupon an exception is thrown. */
static protected float CheckForNaN(float num) {
if (Float.isNaN(num))
throw new RuntimeException("Not a number");
return num;
}
%}
Note that the CheckForNaN support method has been added to the module class using the modulecode pragma. The following shows the generated code of interest:
public class example {
...
/** Simply returns the input value unless it is not a number,
whereupon an exception is thrown. */
static protected float CheckForNaN(float num) {
if (Float.isNaN(num))
throw new RuntimeException("Not a number");
return num;
}
public static boolean calculate(float first, float second) {
return exampleJNI.calculate(example.CheckForNaN(first), example.CheckForNaN(second));
}
}
Note that the "javain" typemap is used for every occurrence of a float being used as an input. Of course, we could have targeted the typemap at a particular parameter by using float first, say, instead of just float.
The exception checking could alternatively have been placed into the 'pre' attribute that the "javain" typemap supports. The "javain" typemap above could be replaced with the following:
%typemap(javain, pre=" $module.CheckForNaN($javainput);") float "$javainput"
which would modify the calculate function to instead be generated as:
public class example {
...
public static boolean calculate(float first, float second) {
example.CheckForNaN(first);
example.CheckForNaN(second);
{
return exampleJNI.calculate(first, second);
}
}
}
See the Date marshalling example for an example using further "javain" typemap attributes.
If we decide that what we actually want is a checked exception instead of a runtime exception, we can change this easily enough. The proxy method that uses float as an input, must then add the exception class to the throws clause. SWIG can handle this as it supports the 'throws' typemap attribute for specifying classes for the throws clause. Thus we can modify the pragma and the typemap for the throws clause:
%typemap(javain, throws="java.lang.Exception") float "$module.CheckForNaN($javainput)"
%pragma(java) modulecode=%{
/** Simply returns the input value unless it is not a number,
whereupon an exception is thrown. */
static protected float CheckForNaN(float num) throws java.lang.Exception {
if (Float.isNaN(num))
throw new RuntimeException("Not a number");
return num;
}
%}
The calculate method now has a throws clause and even though the typemap is used twice for both float first and float second, the throws clause contains a single instance of java.lang.Exception:
public class example {
...
/** Simply returns the input value unless it is not a number,
whereupon an exception is thrown. */
static protected float CheckForNaN(float num) throws java.lang.Exception {
if (Float.isNaN(num))
throw new RuntimeException("Not a number");
return num;
}
public static boolean calculate(float first, float second) throws java.lang.Exception {
return exampleJNI.calculate(example.CheckForNaN(first), example.CheckForNaN(second));
}
}
If we were a martyr to the JNI cause, we could replace the succinct code within the "javain" typemap with a few pages of JNI code. If we had, we would have put it in the "in" typemap which, like all JNI and Java typemaps, also supports the 'throws' attribute.
A common problem in many C programs is the processing of command line arguments, which are usually passed in an array of NULL terminated strings. The following SWIG interface file allows a Java String array to be used as a char ** object.
%module example
/* This tells SWIG to treat char ** as a special case when used as a parameter
in a function call */
%typemap(in) char ** (jint size) {
int i = 0;
size = (*jenv)->GetArrayLength(jenv, $input);
$1 = (char **) malloc((size+1)*sizeof(char *));
/* make a copy of each string */
for (i = 0; i<size; i++) {
jstring j_string = (jstring)(*jenv)->GetObjectArrayElement(jenv, $input, i);
const char * c_string = (*jenv)->GetStringUTFChars(jenv, j_string, 0);
$1[i] = malloc((strlen(c_string)+1)*sizeof(char));
strcpy($1[i], c_string);
(*jenv)->ReleaseStringUTFChars(jenv, j_string, c_string);
(*jenv)->DeleteLocalRef(jenv, j_string);
}
$1[i] = 0;
}
/* This cleans up the memory we malloc'd before the function call */
%typemap(freearg) char ** {
int i;
for (i=0; i<size$argnum-1; i++)
free($1[i]);
free($1);
}
/* This allows a C function to return a char ** as a Java String array */
%typemap(out) char ** {
int i;
int len=0;
jstring temp_string;
const jclass clazz = (*jenv)->FindClass(jenv, "java/lang/String");
while ($1[len]) len++;
jresult = (*jenv)->NewObjectArray(jenv, len, clazz, NULL);
/* exception checking omitted */
for (i=0; i<len; i++) {
temp_string = (*jenv)->NewStringUTF(jenv, *result++);
(*jenv)->SetObjectArrayElement(jenv, jresult, i, temp_string);
(*jenv)->DeleteLocalRef(jenv, temp_string);
}
}
/* These 3 typemaps tell SWIG what JNI and Java types to use */
%typemap(jni) char ** "jobjectArray"
%typemap(jtype) char ** "String[]"
%typemap(jstype) char ** "String[]"
/* These 2 typemaps handle the conversion of the jtype to jstype typemap type
and vice versa */
%typemap(javain) char ** "$javainput"
%typemap(javaout) char ** {
return $jnicall;
}
/* Now a few test functions */
%inline %{
int print_args(char **argv) {
int i = 0;
while (argv[i]) {
printf("argv[%d] = %s\n", i, argv[i]);
i++;
}
return i;
}
char **get_args() {
static char *values[] = { "Dave", "Mike", "Susan", "John", "Michelle", 0};
return &values[0];
}
%}
Note that the 'C' JNI calling convention is used. Checking for any thrown exceptions after JNI function calls has been omitted. When this module is compiled, our wrapped C functions can be used by the following Java program:
// File runme.java
public class runme {
static {
try {
System.loadLibrary("example");
} catch (UnsatisfiedLinkError e) {
System.err.println("Native code library failed to load. " + e);
System.exit(1);
}
}
public static void main(String argv[]) {
String animals[] = {"Cat","Dog","Cow","Goat"};
example.print_args(animals);
String args[] = example.get_args();
for (int i=0; i<args.length; i++)
System.out.println(i + ":" + args[i]);
}
}
When compiled and run we get:
$ java runme argv[0] = Cat argv[1] = Dog argv[2] = Cow argv[3] = Goat 0:Dave 1:Mike 2:Susan 3:John 4:Michelle
In the example, a few different typemaps are used. The "in" typemap is used to receive an input argument and convert it to a C array. Since dynamic memory allocation is used to allocate memory for the array, the "freearg" typemap is used to later release this memory after the execution of the C function. The "out" typemap is used for function return values. Lastly the "jni", "jtype" and "jstype" typemaps are also required to specify what Java types to use.
Suppose that you had a collection of C functions with arguments such as the following:
int foo(int argc, char **argv);
In the previous example, a typemap was written to pass a Java String array as the char **argv. This allows the function to be used from Java as follows:
example.foo(4, new String[]{"red", "green", "blue", "white"});
Although this works, it's a little awkward to specify the argument count. To fix this, a multi-argument typemap can be defined. This is not very difficult--you only have to make slight modifications to the previous example's typemaps:
%typemap(in) (int argc, char **argv) {
int i = 0;
$1 = (*jenv)->GetArrayLength(jenv, $input);
$2 = (char **) malloc(($1+1)*sizeof(char *));
/* make a copy of each string */
for (i = 0; i<$1; i++) {
jstring j_string = (jstring)(*jenv)->GetObjectArrayElement(jenv, $input, i);
const char * c_string = (*jenv)->GetStringUTFChars(jenv, j_string, 0);
$2[i] = malloc((strlen(c_string)+1)*sizeof(char));
strcpy($2[i], c_string);
(*jenv)->ReleaseStringUTFChars(jenv, j_string, c_string);
(*jenv)->DeleteLocalRef(jenv, j_string);
}
$2[i] = 0;
}
%typemap(freearg) (int argc, char **argv) {
int i;
for (i=0; i<$1-1; i++)
free($2[i]);
free($2);
}
%typemap(jni) (int argc, char **argv) "jobjectArray"
%typemap(jtype) (int argc, char **argv) "String[]"
%typemap(jstype) (int argc, char **argv) "String[]"
%typemap(javain) (int argc, char **argv) "$javainput"
When writing a multiple-argument typemap, each of the types is referenced by a variable such as $1 or $2. The typemap code simply fills in the appropriate values from the supplied Java parameter.
With the above typemap in place, you will find it no longer necessary to supply the argument count. This is automatically set by the typemap code. For example:
example.foo(new String[]{"red", "green", "blue", "white"});
A common problem in some C programs is that values may be returned in function parameters rather than in the return value of a function. The typemaps.i file defines INPUT, OUTPUT and INOUT typemaps which can be used to solve some instances of this problem. This library file uses an array as a means of moving data to and from Java when wrapping a C function that takes non const pointers or non const references as parameters.
Now we are going to outline an alternative approach to using arrays for C pointers. The INOUT typemap uses a double[] array for receiving and returning the double* parameters. In this approach we are able to use a Java class myDouble instead of double[] arrays where the C pointer double* is required.
Here is our example function:
/* Returns a status value and two values in out1 and out2 */ int spam(double a, double b, double *out1, double *out2);
If we define a structure MyDouble containing a double member variable and use some typemaps we can solve this problem. For example we could put the following through SWIG:
%module example
/* Define a new structure to use instead of double * */
%inline %{
typedef struct {
double value;
} MyDouble;
%}
%{
/* Returns a status value and two values in out1 and out2 */
int spam(double a, double b, double *out1, double *out2) {
int status = 1;
*out1 = a*10.0;
*out2 = b*100.0;
return status;
};
%}
/*
This typemap will make any double * function parameters with name OUTVALUE take an
argument of MyDouble instead of double *. This will
allow the calling function to read the double * value after returning from the function.
*/
%typemap(in) double *OUTVALUE {
jclass clazz = jenv->FindClass("MyDouble");
jfieldID fid = jenv->GetFieldID(clazz, "swigCPtr", "J");
jlong cPtr = jenv->GetLongField($input, fid);
MyDouble *pMyDouble = NULL;
*(MyDouble **)&pMyDouble = *(MyDouble **)&cPtr;
$1 = &pMyDouble->value;
}
%typemap(jtype) double *OUTVALUE "MyDouble"
%typemap(jstype) double *OUTVALUE "MyDouble"
%typemap(jni) double *OUTVALUE "jobject"
%typemap(javain) double *OUTVALUE "$javainput"
/* Now we apply the typemap to the named variables */
%apply double *OUTVALUE { double *out1, double *out2 };
int spam(double a, double b, double *out1, double *out2);
Note that the C++ JNI calling convention has been used this time and so must be compiled as C++ and the -c++ commandline must be passed to SWIG. JNI error checking has been omitted for clarity.
What the typemaps do are make the named double* function parameters use our new MyDouble wrapper structure. The "in" typemap takes this structure, gets the C++ pointer to it, takes the double value member variable and passes it to the C++ spam function. In Java, when the function returns, we use the SWIG created getValue() function to get the output value. The following Java program demonstrates this:
// File: runme.java
public class runme {
static {
try {
System.loadLibrary("example");
} catch (UnsatisfiedLinkError e) {
System.err.println("Native code library failed to load. " + e);
System.exit(1);
}
}
public static void main(String argv[]) {
MyDouble out1 = new MyDouble();
MyDouble out2 = new MyDouble();
int ret = example.spam(1.2, 3.4, out1, out2);
System.out.println(ret + " " + out1.getValue() + " " + out2.getValue());
}
}
When compiled and run we get:
$ java runme 1 12.0 340.0
SWIG support for polymorphism works in that the appropriate virtual function is called. However, the default generated code does not allow for downcasting. Let's examine this with the following code:
%include "std_string.i"
#include <iostream>
using namespace std;
class Vehicle {
public:
virtual void start() = 0;
...
};
class Ambulance : public Vehicle {
string vol;
public:
Ambulance(string volume) : vol(volume) {}
virtual void start() {
cout << "Ambulance started" << endl;
}
void sound_siren() {
cout << vol << " siren sounded!" << endl;
}
...
};
Vehicle *vehicle_factory() {
return new Ambulance("Very loud");
}
If we execute the following Java code:
Vehicle vehicle = example.vehicle_factory(); vehicle.start(); Ambulance ambulance = (Ambulance)vehicle; ambulance.sound_siren();
We get:
Ambulance started
java.lang.ClassCastException
at runme.main(runme.java:16)
Even though we know from examination of the C++ code that vehicle_factory returns an object of type Ambulance, we are not able to use this knowledge to perform the downcast in Java. This occurs because the runtime type information is not completely passed from C++ to Java when returning the type from vehicle_factory(). Usually this is not a problem as virtual functions do work by default, such as in the case of start(). There are a few solutions to getting downcasts to work.
The first is not to use a Java cast but a call to C++ to make the cast. Add this to your code:
%exception Ambulance::dynamic_cast(Vehicle *vehicle) {
$action
if (!result) {
jclass excep = jenv->FindClass("java/lang/ClassCastException");
if (excep) {
jenv->ThrowNew(excep, "dynamic_cast exception");
}
}
}
%extend Ambulance {
static Ambulance *dynamic_cast(Vehicle *vehicle) {
return dynamic_cast<Ambulance *>(vehicle);
}
};
It would then be used from Java like this
Ambulance ambulance = Ambulance.dynamic_cast(vehicle); ambulance.sound_siren();
Should vehicle not be of type ambulance then a Java ClassCastException is thrown. The next solution is a purer solution in that Java downcasts can be performed on the types. Add the following before the definition of vehicle_factory:
%typemap(out) Vehicle * {
Ambulance *downcast = dynamic_cast<Ambulance *>($1);
*(Ambulance **)&$result = downcast;
}
%typemap(javaout) Vehicle * {
return new Ambulance($jnicall, $owner);
}
Here we are using our knowledge that vehicle_factory always returns type Ambulance so that the Java proxy is created as a type Ambulance. If vehicle_factory can manufacture any type of Vehicle and we want to be able to downcast using Java casts for any of these types, then a different approach is needed. Consider expanding our example with a new Vehicle type and a more flexible factory function:
class FireEngine : public Vehicle {
public:
FireEngine() {}
virtual void start() {
cout << "FireEngine started" << endl;
}
void roll_out_hose() {
cout << "Hose rolled out" << endl;
}
...
};
Vehicle *vehicle_factory(int vehicle_number) {
if (vehicle_number == 0)
return new Ambulance("Very loud");
else
return new FireEngine();
}
To be able to downcast with this sort of Java code:
FireEngine fireengine = (FireEngine)example.vehicle_factory(1); fireengine.roll_out_hose(); Ambulance ambulance = (Ambulance)example.vehicle_factory(0); ambulance.sound_siren();
the following typemaps targeted at the vehicle_factory function will achieve this. Note that in this case, the Java class is constructed using JNI code rather than passing a pointer across the JNI boundary in a Java long for construction in Java code.
%typemap(jni) Vehicle *vehicle_factory "jobject"
%typemap(jtype) Vehicle *vehicle_factory "Vehicle"
%typemap(jstype) Vehicle *vehicle_factory "Vehicle"
%typemap(javaout) Vehicle *vehicle_factory {
return $jnicall;
}
%typemap(out) Vehicle *vehicle_factory {
Ambulance *ambulance = dynamic_cast<Ambulance *>($1);
FireEngine *fireengine = dynamic_cast<FireEngine *>($1);
if (ambulance) {
// call the Ambulance(long cPtr, boolean cMemoryOwn) constructor
jclass clazz = jenv->FindClass("Ambulance");
if (clazz) {
jmethodID mid = jenv->GetMethodID(clazz, "<init>", "(JZ)V");
if (mid) {
jlong cptr = 0;
*(Ambulance **)&cptr = ambulance;
$result = jenv->NewObject(clazz, mid, cptr, false);
}
}
} else if (fireengine) {
// call the FireEngine(long cPtr, boolean cMemoryOwn) constructor
jclass clazz = jenv->FindClass("FireEngine");
if (clazz) {
jmethodID mid = jenv->GetMethodID(clazz, "<init>", "(JZ)V");
if (mid) {
jlong cptr = 0;
*(FireEngine **)&cptr = fireengine;
$result = jenv->NewObject(clazz, mid, cptr, false);
}
}
}
else {
cout << "Unexpected type " << endl;
}
if (!$result)
cout << "Failed to create new java object" << endl;
}
Better error handling would need to be added into this code. There are other solutions to this problem, but this last example demonstrates some more involved JNI code. SWIG usually generates code which constructs the proxy classes using Java code as it is easier to handle error conditions and is faster. Note that the JNI code above uses a number of string lookups to call a constructor, whereas this would not occur using byte compiled Java code.
When a pointer is returned from a JNI function, it is wrapped using a new Java proxy class or type wrapper class. Even when the pointers are the same, it will not be possible to know that the two Java classes containing those pointers are actually the same object. It is common in Java to use the equals() method to check whether two objects are equivalent. The equals() method is usually accompanied by a hashCode() method in order to fulfill the requirement that the hash code is equal for equal objects. Pure Java code methods like these can be easily added:
%typemap(javacode) SWIGTYPE %{
public boolean equals(Object obj) {
boolean equal = false;
if (obj instanceof $javaclassname)
equal = ((($javaclassname)obj).swigCPtr == this.swigCPtr);
return equal;
}
public int hashCode() {
return (int)getPointer();
}
%}
class Foo { };
Foo* returnFoo(Foo *foo) { return foo; }
The following would display false without the javacode typemap above. With the typemap defining the equals method the result is true.
Foo foo1 = new Foo();
Foo foo2 = example.returnFoo(foo1);
System.out.println("foo1? " + foo1.equals(foo2));
One might wonder why the common code that SWIG emits for the proxy and type wrapper classes is not pushed into a base class. The reason is that although swigCPtr could be put into a common base class for all classes wrapping C structures, it would not work for C++ classes involved in an inheritance chain. Each class derived from a base needs a separate swigCPtr because C++ compilers sometimes use a different pointer value when casting a derived class to a base. Additionally as Java only supports single inheritance, it would not be possible to derive wrapped classes from your own pure Java classes if the base class has been 'used up' by SWIG. However, you may want to move some of the common code into a base class. Here is an example which uses a common base class for all proxy classes and type wrapper classes:
%typemap(javabase) SWIGTYPE, SWIGTYPE *, SWIGTYPE &, SWIGTYPE [],
SWIGTYPE (CLASS::*) "SWIG"
%typemap(javacode) SWIGTYPE, SWIGTYPE *, SWIGTYPE &, SWIGTYPE [],
SWIGTYPE (CLASS::*) %{
protected long getPointer() {
return swigCPtr;
}
%}
Define new base class called SWIG:
public abstract class SWIG {
protected abstract long getPointer();
public boolean equals(Object obj) {
boolean equal = false;
if (obj instanceof SWIG)
equal = (((SWIG)obj).getPointer() == this.getPointer());
return equal;
}
SWIGTYPE_p_void getVoidPointer() {
return new SWIGTYPE_p_void(getPointer(), false);
}
}
This example contains some useful functionality which you may want in your code.
Pointers to pointers are often used as output parameters in C factory type functions. These are a bit more tricky to handle. Consider the following situation where a Butler can be hired and fired:
typedef struct {
int hoursAvailable;
char *greeting;
} Butler;
// Note: HireButler will allocate the memory
// The caller must free the memory by calling FireButler()!!
extern int HireButler(Butler **ppButler);
extern void FireButler(Butler *pButler);
C code implementation:
int HireButler(Butler **ppButler) {
Butler *pButler = (Butler *)malloc(sizeof(Butler));
pButler->hoursAvailable = 24;
pButler->greeting = (char *)malloc(32);
strcpy(pButler->greeting, "At your service Sir");
*ppButler = pButler;
return 1;
}
void FireButler(Butler *pButler) {
free(pButler->greeting);
free(pButler);
}
Let's take two approaches to wrapping this code. The first is to provide a functional interface, much like the original C interface. The following Java code shows how we intend the code to be used:
Butler jeeves = new Butler();
example.HireButler(jeeves);
System.out.println("Greeting: " + jeeves.getGreeting());
System.out.println("Availability: " + jeeves.getHoursAvailable() + " hours per day");
example.FireButler(jeeves);
Resulting in the following output when run:
Greeting: At your service Sir Availability: 24 hours per day
Note the usage is very much like it would be used if we were writing C code, that is, explicit memory management is needed. No C memory is allocated in the construction of the Butler proxy class and the proxy class will not destroy the underlying C memory when it is collected. A number of typemaps and features are needed to implement this approach. The following interface file code should be placed before SWIG parses the above C code.
%module example
// Do not generate the default proxy constructor or destructor
%nodefaultctor Butler;
%nodefaultdtor Butler;
// Add in pure Java code proxy constructor
%typemap(javacode) Butler %{
/** This constructor creates the proxy which initially does not create nor own any C memory */
public Butler() {
this(0, false);
}
%}
// Type typemaps for marshalling Butler **
%typemap(jni) Butler ** "jobject"
%typemap(jtype) Butler ** "Butler"
%typemap(jstype) Butler ** "Butler"
// Typemaps for Butler ** as a parameter output type
%typemap(in) Butler ** (Butler *ppButler = 0) %{
$1 = &ppButler;
%}
%typemap(argout) Butler ** {
// Give Java proxy the C pointer (of newly created object)
jclass clazz = (*jenv)->FindClass(jenv, "Butler");
jfieldID fid = (*jenv)->GetFieldID(jenv, clazz, "swigCPtr", "J");
jlong cPtr = 0;
*(Butler **)&cPtr = *$1;
(*jenv)->SetLongField(jenv, $input, fid, cPtr);
}
%typemap(javain) Butler ** "$javainput"
Note that the JNI code sets the proxy's swigCPtr member variable to point to the newly created object. The swigCMemOwn remains unchanged (at false), so that the proxy does not own the memory.
Note: The old %nodefault directive disabled the default constructor and destructor at the same time. This is unsafe in most of the cases, and you can use the explicit %nodefaultctor and %nodefaultdtor directives to achieve the same result if needed.
The second approach offers a more object oriented interface to the Java user. We do this by making the Java proxy class's constructor call the HireButler() method to create the underlying C object. Additionally we get the proxy to take ownership of the memory so that the finalizer will call the FireButler() function. The proxy class will thus take ownership of the memory and clean it up when no longer needed. We will also prevent the user from being able to explicitly call the HireButler() and FireButler() functions. Usage from Java will simply be:
Butler jeeves = new Butler();
System.out.println("Greeting: " + jeeves.getGreeting());
System.out.println("Availability: " + jeeves.getHoursAvailable() + " hours per day");
Note that the Butler class is used just like any other Java class and no extra coding by the user needs to be written to clear up the underlying C memory as the finalizer will be called by the garbage collector which in turn will call the FireButler() function. To implement this, we use the above interface file code but remove the javacode typemap and add the following:
// Don't expose the memory allocation/de-allocation functions
%ignore FireButler(Butler *pButler);
%ignore HireButler(Butler **ppButler);
// Add in a custom proxy constructor and destructor
%extend Butler {
Butler() {
Butler *pButler = 0;
HireButler(&pButler);
return pButler;
}
~Butler() {
FireButler($self);
}
}
Note that the code in %extend is using a C++ type constructor and destructor, yet the generated code will still compile as C code, see Adding member functions to C structures. The C functional interface has been completely morphed into an object-oriented interface and the Butler class would behave much like any pure Java class and feel more natural to Java users.
This example shows how to prevent premature garbage collection of objects when the underlying C++ class returns a pointer or reference to a member variable.
Consider the following C++ code:
struct Wheel {
int size;
Wheel(int sz) : size(sz) {}
};
class Bike {
Wheel wheel;
public:
Bike(int val) : wheel(val) {}
Wheel& getWheel() { return wheel; }
};
and the following usage from Java after running the code through SWIG:
Wheel wheel = new Bike(10).getWheel();
System.out.println("wheel size: " + wheel.getSize());
// Simulate a garbage collection
System.gc();
System.runFinalization();
System.out.println("wheel size: " + wheel.getSize());
Don't be surprised that if the resulting output gives strange results such as...
wheel size: 10 wheel size: 135019664
What has happened here is the garbage collector has collected the Bike instance as it doesn't think it is needed any more. The proxy instance, wheel, contains a reference to memory that was deleted when the Bike instance was collected. In order to prevent the garbage collector from collecting the Bike instance a reference to the Bike must be added to the wheel instance. You can do this by adding the reference when the getWheel() method is called using the following typemaps.
%typemap(javacode) Wheel %{
// Ensure that the GC doesn't collect any Bike instance set from Java
private Bike bikeReference;
protected void addReference(Bike bike) {
bikeReference = bike;
}
%}
// Add a Java reference to prevent premature garbage collection and resulting use
// of dangling C++ pointer. Intended for methods that return pointers or
// references to a member variable.
%typemap(javaout) Wheel& getWheel {
long cPtr = $jnicall;
$javaclassname ret = null;
if (cPtr != 0) {
ret = new $javaclassname(cPtr, $owner);
ret.addReference(this);
}
return ret;
}
The code in the first typemap gets added to the Wheel proxy class. The code in the second typemap constitutes the bulk of the code in the generated getWheel() function:
public class Wheel {
...
// Ensure that the GC doesn't collect any bike set from Java
private Bike bikeReference;
protected void addReference(Bike bike) {
bikeReference = bike;
}
}
public class Bike {
...
public Wheel getWheel() {
long cPtr = exampleJNI.Bike_getWheel(swigCPtr, this);
Wheel ret = null;
if (cPtr != 0) {
ret = new Wheel(cPtr, false);
ret.addReference(this);
}
return ret;
}
}
Note the addReference call.
Managing memory can be tricky when using C++ and Java proxy classes. The previous example shows one such case and this example looks at memory management for a class passed to a C++ method which expects the object to remain in scope after the function has returned. Consider the following two C++ classes:
struct Element {
int value;
Element(int val) : value(val) {}
};
class Container {
Element* element;
public:
Container() : element(0) {}
void setElement(Element* e) { element = e; }
Element* getElement() { return element; }
};
and usage from C++
Container container;
Element element(20);
container.setElement(&element);
cout << "element.value: " << container.getElement()->value << endl;
and more or less equivalent usage from Java
Container container = new Container();
container.setElement(new Element(20));
System.out.println("element value: " + container.getElement().getValue());
The C++ code will always print out 20, but the value printed out may not be this in the Java equivalent code. In order to understand why, consider a garbage collection occuring...
Container container = new Container();
container.setElement(new Element(20));
// Simulate a garbage collection
System.gc();
System.runFinalization();
System.out.println("element value: " + container.getElement().getValue());
The temporary element created with new Element(20) could get garbage collected which ultimately means the container variable is holding a dangling pointer, thereby printing out any old random value instead of the expected value of 20. One solution is to add in the appropriate references in the Java layer...
public class Container {
...
// Ensure that the GC doesn't collect any Element set from Java
// as the underlying C++ class stores a shallow copy
private Element elementReference;
private long getCPtrAndAddReference(Element element) {
elementReference = element;
return Element.getCPtr(element);
}
public void setElement(Element e) {
exampleJNI.Container_setElement(swigCPtr, this, getCPtrAndAddReference(e), e);
}
}
The following typemaps will generate the desired code. The 'javain' typemap matches the input parameter type for the setElement method. The 'javacode' typemap simply adds in the specified code into the Java proxy class.
%typemap(javain) Element *e "getCPtrAndAddReference($javainput)"
%typemap(javacode) Container %{
// Ensure that the GC doesn't collect any element set from Java
// as the underlying C++ class stores a shallow copy
private Element elementReference;
private long getCPtrAndAddReference(Element element) {
elementReference = element;
return Element.getCPtr(element);
}
%}
The NaN Exception example is a simple example of the "javain" typemap and its 'pre' attribute. This example demonstrates how a C++ date class, say CDate, can be mapped onto the standard Java date class, java.util.GregorianCalendar by using the 'pre', 'post' and 'pgcppname' attributes of the "javain" typemap. The idea is that the GregorianCalendar is used wherever the C++ API uses a CDate . Let's assume the code being wrapped is as follows:
class CDate {
public:
CDate(int year, int month, int day);
int getYear();
int getMonth();
int getDay();
...
};
struct Action {
static int doSomething(const CDate &dateIn, CDate &dateOut);
Action(const CDate &date, CDate &dateOut);
};
Note that dateIn is const and therefore read only and dateOut is a non-const output type.
First let's look at the code that is generated by default, where the Java proxy class CDate is used in the proxy interface:
public class Action {
...
public static int doSomething(CDate dateIn, CDate dateOut) {
return exampleJNI.Action_doSomething(CDate.getCPtr(dateIn), dateIn,
CDate.getCPtr(dateOut), dateOut);
}
public Action(CDate date, CDate dateOut) {
this(exampleJNI.new_Action(CDate.getCPtr(date), date,
CDate.getCPtr(dateOut), dateOut), true);
}
}
The CDate & and const CDate & Java code is generated from the following two default typemaps:
%typemap(jstype) SWIGTYPE & "$javaclassname" %typemap(javain) SWIGTYPE & "$javaclassname.getCPtr($javainput)"
where '$javaclassname' is translated into the proxy class name, CDate and '$javainput' is translated into the name of the parameter, eg dateIn. From Java, the intention is then to call into a modifed API with something like:
java.util.GregorianCalendar calendarIn =
new java.util.GregorianCalendar(2011, java.util.Calendar.APRIL, 13, 0, 0, 0);
java.util.GregorianCalendar calendarOut = new java.util.GregorianCalendar();
// Note in calls below, calendarIn remains unchanged and calendarOut
// is set to a new value by the C++ call
Action.doSomething(calendarIn, calendarOut);
Action action = new Action(calendarIn, calendarOut);
To achieve this mapping, we need to alter the default code generation slightly so that at the Java layer, a GregorianCalendar is converted into a CDate. The JNI intermediary layer will still take a pointer to the underlying CDate class. The typemaps to achieve this are shown below.
%typemap(jstype) const CDate& "java.util.GregorianCalendar"
%typemap(javain,
pre=" CDate temp$javainput = new CDate($javainput.get(java.util.Calendar.YEAR), "
"$javainput.get(java.util.Calendar.MONTH), $javainput.get(java.util.Calendar.DATE));",
pgcppname="temp$javainput") const CDate &
"$javaclassname.getCPtr(temp$javainput)"
%typemap(jstype) CDate& "java.util.Calendar"
%typemap(javain,
pre=" CDate temp$javainput = new CDate($javainput.get(java.util.Calendar.YEAR), "
"$javainput.get(java.util.Calendar.MONTH), $javainput.get(java.util.Calendar.DATE));",
post=" $javainput.set(temp$javainput.getYear(), temp$javainput.getMonth(), "
"temp$javainput.getDay(), 0, 0, 0);",
pgcppname="temp$javainput") CDate &
"$javaclassname.getCPtr(temp$javainput)"
The resulting generated proxy code in the Action class follows:
public class Action {
...
public static int doSomething(java.util.GregorianCalendar dateIn,
java.util.Calendar dateOut) {
CDate tempdateIn = new CDate(dateIn.get(java.util.Calendar.YEAR),
dateIn.get(java.util.Calendar.MONTH),
dateIn.get(java.util.Calendar.DATE));
CDate tempdateOut = new CDate(dateOut.get(java.util.Calendar.YEAR),
dateOut.get(java.util.Calendar.MONTH),
dateOut.get(java.util.Calendar.DATE));
try {
return exampleJNI.Action_doSomething(CDate.getCPtr(tempdateIn), tempdateIn,
CDate.getCPtr(tempdateOut), tempdateOut);
} finally {
dateOut.set(tempdateOut.getYear(), tempdateOut.getMonth(), tempdateOut.getDay(), 0, 0, 0);
}
}
static private long SwigConstructAction(java.util.GregorianCalendar date,
java.util.Calendar dateOut) {
CDate tempdate = new CDate(date.get(java.util.Calendar.YEAR),
date.get(java.util.Calendar.MONTH),
date.get(java.util.Calendar.DATE));
CDate tempdateOut = new CDate(dateOut.get(java.util.Calendar.YEAR),
dateOut.get(java.util.Calendar.MONTH),
dateOut.get(java.util.Calendar.DATE));
try {
return exampleJNI.new_Action(CDate.getCPtr(tempdate), tempdate,
CDate.getCPtr(tempdateOut), tempdateOut);
} finally {
dateOut.set(tempdateOut.getYear(), tempdateOut.getMonth(), tempdateOut.getDay(), 0, 0, 0);
}
}
public Action(java.util.GregorianCalendar date, java.util.Calendar dateOut) {
this(Action.SwigConstructAction(date, dateOut), true);
}
}
A few things to note:
This section is intended to address frequently asked questions and frequently encountered problems when using Java directors.
Open up the C++ wrapper source code file and look for
"method_foo" (include the double quotes, they are important!)
Look at the JNI field descriptor and make sure that each class that
occurs in the descriptor has the correct package name in front of it.
If the package name is incorrect, put a "javapackage" typemap in your
SWIG interface file.
Use the template's renamed name as the argument to the "javapackage" typemap:
%typemap(javapackage) std::vector<int> "your.package.here" %template(VectorOfInt) std::vector<int>;
When I pass class pointers or references through a C++ upcall and I try to type cast them, Java complains with a ClassCastException. What am I doing wrong?
Normally, a non-director generated Java proxy class creates temporary Java objects as follows:
public static void MyClass_method_upcall(MyClass self, long jarg1)
{
Foo darg1 = new Foo(jarg1, false);
self.method_upcall(darg1);
}
Unfortunately, this loses the Java type information that is part of the underlying Foo director proxy class's Java object pointer causing the type cast to fail. The SWIG Java module's director code attempts to correct the problem, but only for director-enabled classes, since the director class retains a global reference to its Java object. Thus, for director-enabled classes and only for director-enabled classes, the generated proxy Java code looks something like:
public static void MyClass_method_upcall(MyClass self, long jarg1,
Foo jarg1_object)
{
Foo darg1 = (jarg1_object != null ? jarg1_object : new Foo(jarg1, false));
self.method_upcall(darg1);
}
When you import a SWIG interface file containing class definitions,
the classes you want to be director-enabled must be have the
feature("director") enabled for type symmetry to work. This
applies even when the class being wrapped isn't a director-enabled
class but takes parameters that are director-enabled classes.
The current "type symmetry" design will work for simple C++
inheritance, but will most likely fail for anything more complicated
such as tree or diamond C++ inheritance hierarchies. Those who are
interested in challenging problems are more than welcome to hack the
Java::Java_director_declaration method in
Source/Modules/java.cxx.
If all else fails, you can use the downcastXXXXX() method to attempt to recover the director class's Java object pointer. For the Java Foo proxy class, the Foo director class's java object pointer can be accessed through the javaObjectFoo() method. The generated method's signature is:
public static Foo javaObjectFoo(Foo obj);
From your code, this method is invoked as follows:
public class MyClassDerived {
public void method_upcall(Foo foo_object)
{
FooDerived derived = (foo_object != null ?
(FooDerived) Foo.downcastFoo(foo_object) : null);
/* rest of your code here */
}
}
An good approach for managing downcasting is placing a static method in each derived class that performs the downcast from the superclass, e.g.,
public class FooDerived extends Foo {
/* ... */
public static FooDerived downcastFooDerived(Foo foo_object)
{
try {
return (foo_object != null ? (FooDerived) Foo.downcastFoo(foo_object);
}
catch (ClassCastException exc) {
// Wasn't a FooDerived object, some other subclass of Foo
return null;
}
}
}
Then change the code in MyClassDerived as follows:
public class MyClassDerived extends MyClass {
/* ... */
public void method_upcall(Foo foo_object)
{
FooDerived derived = FooDerived.downcastFooDerived(foo_object);
/* rest of your code here */
}
}
Why isn't the proxy class declared abstract? Why aren't the director upcall methods in the proxy class declared abstract?
Declaring the proxy class and its methods abstract would break the JNI argument marshalling and SWIG's downcall functionality (going from Java to C++.) Create an abstract Java subclass that inherits from the director-enabled class instead. Using the previous Foo class example:
public abstract class UserVisibleFoo extends Foo {
/** Make sure user overrides this method, it's where the upcall
* happens.
*/
public abstract void method_upcall(Foo foo_object);
/// Downcast from Foo to UserVisibleFoo
public static UserVisibleFoo downcastUserVisibleFoo(Foo foo_object)
{
try {
return (foo_object != null ? (FooDerived) Foo.downcastFoo(foo_object) : null);
}
catch (ClassCastException exc) {
// Wasn't a FooDerived object, some other subclass of Foo
return null;
}
}
}
This doesn't prevent the user from creating subclasses derived from
Foo, however, UserVisibleFoo provides the safety net that reminds the
user to override the method_upcall() method.
The SWIG documentation system is currently deprecated. When it is resurrected JavaDoc comments will be fully supported. If you can't wait for the full documentation system a couple of workarounds are available. The %javamethodmodifiers feature can be used for adding proxy class method comments and module class method comments. The "javaimports" typemap can be hijacked for adding in proxy class JavaDoc comments. The jniclassimports or jniclassclassmodifiers pragmas can also be used for adding intermediary JNI class comments and likewise the moduleimports or moduleclassmodifiers pragmas for the module class. Here is an example adding in a proxy class and method comment:
%javamethodmodifiers Barmy::lose_marbles() "
/**
* Calling this method will make you mad.
* Use with <b>utmost</b> caution.
*/
public";
%typemap(javaimports) Barmy "
/** The crazy class. Use as a last resort. */"
class Barmy {
public:
void lose_marbles() {}
};
Note the "public" added at the end of the %javamethodmodifiers as this is the default for this feature. The generated proxy class with JavaDoc comments is then as follows:
/** The crazy class. Use as a last resort. */
public class Barmy {
...
/**
* Calling this method will make you mad.
* Use with <b>utmost</b> caution.
*/
public void lose_marbles() {
...
}
...
}
It is possible to run SWIG in a mode that does not produce proxy classes by using the -noproxy commandline option. The interface is rather primitive when wrapping structures or classes and is accessed through function calls to the module class. All the functions in the module class are wrapped by functions with identical names as those in the intermediary JNI class.
Consider the example we looked at when examining proxy classes:
class Foo {
public:
int x;
int spam(int num, Foo* foo);
};
When using -noproxy, type wrapper classes are generated instead of proxy classes. Access to all the functions and variables is through a C like set of functions where the first parameter passed is the pointer to the class, that is an instance of a type wrapper class. Here is what the module class looks like:
public class example {
public static void Foo_x_get(SWIGTYPE_p_Foo self, int x) {...}
public static int Foo_x_get(SWIGTYPE_p_Foo self) {...}
public static int Foo_spam(SWIGTYPE_p_Foo self, int num, SWIGTYPE_p_Foo foo) {...}
public static SWIGTYPE_p_Foo new_Foo() {...}
public static void delete_Foo(SWIGTYPE_p_Foo self) {...}
}
This approach is not nearly as natural as using proxy classes as the functions need to be used like this:
SWIGTYPE_p_Foo foo = example.new_Foo(); example.Foo_x_set(foo, 10); int var = example.Foo_x_get(foo); example.Foo_spam(foo, 20, foo); example.delete_Foo(foo);
Unlike proxy classes, there is no attempt at tracking memory. All destructors have to be called manually for example the delete_Foo(foo) call above.
You may have some hand written JNI functions that you want to use in addition to the SWIG generated JNI functions. Adding these to your SWIG generated package is possible using the %native directive. If you don't want SWIG to wrap your JNI function then of course you can simply use the %ignore directive. However, if you want SWIG to generate just the Java code for a JNI function then use the %native directive. The C types for the parameters and return type must be specified in place of the JNI types and the function name must be the native method name. For example:
%native (HandRolled) void HandRolled(int, char *);
%{
JNIEXPORT void JNICALL Java_packageName_moduleName_HandRolled(JNIEnv *, jclass,
jlong, jstring);
%}
No C JNI function will be generated and the Java_packageName_moduleName_HandRolled function will be accessible using the SWIG generated Java native method call in the intermediary JNI class which will look like this:
public final static native void HandRolled(int jarg1, String jarg2);
and as usual this function is wrapped by another which for a global C function would appear in the module class:
public static void HandRolled(int arg0, String arg1) {
exampleJNI.HandRolled(arg0, arg1);
}
The packageName and moduleName must of course be correct else you will get linker errors when the JVM dynamically loads the JNI function. You may have to add in some "jtype", "jstype", "javain" and "javaout" typemaps when wrapping some JNI types. Here the default typemaps work for int and char *.
In summary the %native directive is telling SWIG to generate the Java code to access the JNI C code, but not the JNI C function itself. This directive is only really useful if you want to mix your own hand crafted JNI code and the SWIG generated code into one Java class or package.
If you're directly manipulating huge arrays of complex objects from Java, performance may suffer greatly when using the array functions in arrays_java.i. Try and minimise the expensive JNI calls to C/C++ functions, perhaps by using temporary Java variables instead of accessing the information directly from the C/C++ object.
Java classes without any finalizers generally speed up code execution as there is less for the garbage collector to do. Finalizer generation can be stopped by using an empty javafinalize typemap:
%typemap(javafinalize) SWIGTYPE ""
However, you will have to be careful about memory management and make sure that you code in a call to the delete() member function. This method normally calls the C++ destructor or free() for C code.
The generated code can be debugged using both a Java debugger and a C++ debugger using the usual debugging techniques. Breakpoints can be set in either Java or C++ code and so both can be debugged simultaneously. Most debuggers do not understand both Java and C++, with one noteable exception of Sun Studio, where it is possible to step from Java code into a JNI method within one environment.
Alternatively, debugging can involve placing debug printout statements in the JNI layer using the %exception directive. See the special variables for %exception section. Many of the default typemaps can also be overidden and modified for adding in extra logging/debug display information.
The -Xcheck:jni and -Xcheck:nabounds Java executable options are useful for debugging to make sure the JNI code is behaving. The -verbose:jni and -verbose:gc are also useful options for monitoring code behaviour.
The directory Examples/java has a number of further examples. Take a look at these if you want to see some of the techniques described in action. The Examples/index.html file in the parent directory contains the SWIG Examples Documentation and is a useful starting point. If your SWIG installation went well Unix users should be able to type make in each example directory, then java main to see them running. For the benefit of Windows users, there are also Visual C++ project files in a couple of the Windows Examples . There are also many regression tests in the Examples/test-suite directory. Many of these have runtime tests in the java subdirectory.
Common Lisp is a high-level, all-purpose, object-oriented, dynamic, functional programming language with long history. Common Lisp is used in many fields, ranging from web development to finance, and also common in computer science education. There are more than 9 different implementations of common lisp which are available, all have different foreign function interfaces. SWIG currently supports only the Allegro Common Lisp, Common Foreign Function Interface(CFFI), CLisp and UFFI foreign function interfaces.
Allegro Common Lisp support in SWIG has been updated to include support for both C and C++. You can read about the interface here
CFFI, the Common Foreign Function Interface, is a portable foreign function interface for ANSI Common Lisp systems, similar in spirit to UFFI. Unlike UFFI, CFFI requires only a small set of low-level functionality from the Lisp implementation, such as calling a foreign function by name, allocating foreign memory, and dereferencing pointers.
To run the cffi module of SWIG requires very little effort, you just need to run:
swig -cffi -module module-name file-name
But a better was of using all the power of SWIG is to write SWIG interface files. Below we will explain how to write interface files and the various things which you can do with them.
The following table list the additional commandline options available for the CLISP module. They can also be seen by using:
swig -cffi -help
| CFFI specific options | |
|---|---|
| -generate-typedef | If this option is given then defctype
will be used to generate
shortcuts according to the typedefs in the input. |
| -[no]cwrap | Turn on or turn off generation of an
intermediate C file when
creating a C interface. By default this is only done for C++ code. |
| -[no]swig-lisp | Turns on or off generation of code for helper lisp macro, functions, etc. which SWIG uses while generating wrappers. These macros, functions may still be used by generated wrapper code. |
#define y 5
#define x (y >> 1)
typedef int days;
struct bar {
short p, q;
char a, b;
int *z[1000];
struct bar * n;
};
struct bar * my_struct;
struct foo {
int a;
struct foo * b[100];
};
int pointer_func(void (*ClosureFun)( void* _fun, void* _data, void* _evt ), int p);
int func123(div_t * p,int **q[100],int r[][1000][10]);
void lispsort_double (int n, double * array);
enum color { RED, BLUE, GREEN};
%module test %include "test.h"
;;;SWIG wrapper code starts here
(cl:defmacro defanonenum (&body enums)
"Converts anonymous enums to defconstants."
`(cl:progn ,@(cl:loop for value in enums
for index = 0 then (cl:1+ index)
when (cl:listp value) do (cl:setf index (cl:second value)
value (cl:first value))
collect `(cl:defconstant ,value ,index))))
(cl:eval-when (:compile-toplevel :load-toplevel)
(cl:unless (cl:fboundp 'swig-lispify)
(cl:defun swig-lispify (name flag cl:&optional (package cl:*package*))
(cl:labels ((helper (lst last rest cl:&aux (c (cl:car lst)))
(cl:cond
((cl:null lst)
rest)
((cl:upper-case-p c)
(helper (cl:cdr lst) 'upper
(cl:case last
((lower digit) (cl:list* c #\- rest))
(cl:t (cl:cons c rest)))))
((cl:lower-case-p c)
(helper (cl:cdr lst) 'lower (cl:cons (cl:char-upcase c) rest)))
((cl:digit-char-p c)
(helper (cl:cdr lst) 'digit
(cl:case last
((upper lower) (cl:list* c #\- rest))
(cl:t (cl:cons c rest)))))
((cl:char-equal c #\_)
(helper (cl:cdr lst) '_ (cl:cons #\- rest)))
(cl:t
(cl:error "Invalid character: ~A" c)))))
(cl:let ((fix (cl:case flag
((constant enumvalue) "+")
(variable "*")
(cl:t ""))))
(cl:intern
(cl:concatenate
'cl:string
fix
(cl:nreverse (helper (cl:concatenate 'cl:list name) cl:nil cl:nil))
fix)
package))))))
;;;SWIG wrapper code ends here
(cl:defconstant y 5)
(cl:defconstant x (cl:ash 5 -1))
(cffi:defcstruct bar
(p :short)
(q :short)
(a :char)
(b :char)
(z :pointer)
(n :pointer))
(cffi:defcvar ("my_struct" my_struct)
:pointer)
(cffi:defcstruct foo
(a :int)
(b :pointer))
(cffi:defcfun ("pointer_func" pointer_func) :int
(ClosureFun :pointer)
(p :int))
(cffi:defcfun ("func123" func123) :int
(p :pointer)
(q :pointer)
(r :pointer))
(cffi:defcfun ("lispsort_double" lispsort_double) :void
(n :int)
(array :pointer))
(cffi:defcenum color
:RED
:BLUE
:GREEN)
The SWIG wrapper code refers to the special code which SWIG may need to use while wrapping C code. You can turn on/off the generation of this code by using the -[no]swig-lisp option. You must have noticed that SWIG goes one extra step to ensure that CFFI does not do automatic lispification of the C function names. The reason SWIG does this is because quite often developers want to build a nice CLOS based lispy API, and this one to one correspondence between C function names and lisp function name helps.
Maybe you want to have your own convention for generating lisp function names for corresponding C function names, or you just want to lispify the names, also, before we forget you want to export the generated lisp names. To do this, we will use the SWIG feature directive. Let's edit the interface file such that the C type "div_t*" is changed to Lisp type ":my-pointer", we lispify all names, export everything, and do some more stuff.
%module test
%typemap(cin) div_t* ":my-pointer";
%feature("intern_function","1");
%feature("export");
%feature("inline") lispsort_double;
%feature("intern_function", "my-lispify") lispsort_double;
%rename func123 renamed_cool_func;
%ignore "pointer_func";
%include "test.h"
The typemap(cin) ensures that for all arguments which are input to C with the type "div_t*", the ":my-pointer" type be used. Similarly typemap(cout) are used for all types which are returned from C.
The feature intern_function ensures that all C names are interned using the swig-lispify function. The "1" given to the feature is optional. The use of feature like %feature("intern_function","1"); globally enables interning for everything. If you want to target a single function, or declaration then use the targeted version of feature, %feature("intern_function", "my-lispify") lispsort_double;, here we are using an additional feature which allows us to use our lispify function.
The export feature allows us to export the symbols. The inline feature declaims the declared function as inline. The rename directive allows us to change the name(it is useful when generating C wrapper code for handling overloaded functions). The ignore directive ignores a certain declaration.
There are several other things which are possible, to see some example of usage of SWIG look at the Lispbuilder and wxCL projects. The generated code with 'noswig-lisp' option is:
(cl:defconstant #.(swig-lispify "y" 'constant) 5)
(cl:export '#.(swig-lispify "y" 'constant))
(cl:defconstant #.(swig-lispify "x" 'constant) (cl:ash 5 -1))
(cl:export '#.(swig-lispify "x" 'constant))
(cffi:defcstruct #.(swig-lispify "bar" 'classname)
(#.(swig-lispify "p" 'slotname) :short)
(#.(swig-lispify "q" 'slotname) :short)
(#.(swig-lispify "a" 'slotname) :char)
(#.(swig-lispify "b" 'slotname) :char)
(#.(swig-lispify "z" 'slotname) :pointer)
(#.(swig-lispify "n" 'slotname) :pointer))
(cl:export '#.(swig-lispify "bar" 'classname))
(cl:export '#.(swig-lispify "p" 'slotname))
(cl:export '#.(swig-lispify "q" 'slotname))
(cl:export '#.(swig-lispify "a" 'slotname))
(cl:export '#.(swig-lispify "b" 'slotname))
(cl:export '#.(swig-lispify "z" 'slotname))
(cl:export '#.(swig-lispify "n" 'slotname))
(cffi:defcvar ("my_struct" #.(swig-lispify "my_struct" 'variable))
:pointer)
(cl:export '#.(swig-lispify "my_struct" 'variable))
(cffi:defcstruct #.(swig-lispify "foo" 'classname)
(#.(swig-lispify "a" 'slotname) :int)
(#.(swig-lispify "b" 'slotname) :pointer))
(cl:export '#.(swig-lispify "foo" 'classname))
(cl:export '#.(swig-lispify "a" 'slotname))
(cl:export '#.(swig-lispify "b" 'slotname))
(cffi:defcfun ("renamed_cool_func" #.(swig-lispify "renamed_cool_func" 'function)) :int
(p :my-pointer)
(q :pointer)
(r :pointer))
(cl:export '#.(swig-lispify "renamed_cool_func" 'function))
(cl:declaim (cl:inline #.(my-lispify "lispsort_double" 'function)))
(cffi:defcfun ("lispsort_double" #.(my-lispify "lispsort_double" 'function)) :void
(n :int)
(array :pointer))
(cl:export '#.(my-lispify "lispsort_double" 'function))
(cffi:defcenum #.(swig-lispify "color" 'enumname)
#.(swig-lispify "RED" 'enumvalue :keyword)
#.(swig-lispify "BLUE" 'enumvalue :keyword)
#.(swig-lispify "GREEN" 'enumvalue :keyword))
(cl:export '#.(swig-lispify "color" 'enumname))
This feature to SWIG (for CFFI) is very new and still far from complete. Pitch in with your patches, bug reports and feature requests to improve it.
Generating bindings for C++ code, requires -c++ option to be present and it first generates C binding which will wrap the C++ code, and then generates the corresponding CFFI wrapper code. In the generated C wrapper code, you will often want to put your own C code, such as the code to include various files. This can be done by making use of "%{" and "%}" as shown below.
%{
#include "Test/test.h"
%}
Also, while parsing the C++ file and generating C wrapper code SWIG may need to be able to understand various symbols used in other header files. To help SWIG in doing this while ensuring that wrapper code is generated for the target file, use the "import" directive. The "include" directive specifies the target file for which wrapper code will be generated.
%import "ancillary/header.h" %include "target/header.h"
namespace OpenDemo {
class Test
{
public:
float x;
// constructors
Test (void) {x = 0;}
Test (float X) {x = X;}
// vector addition
Test operator+ (const Test& v) const {return Test (x+v.x);}
// length squared
float lengthSquared (void) const {return this->dot (*this);}
static float distance (const Test& a, const Test& b){return(a-b).length();}
inline Test parallelComponent (const Test& unitBasis) const {
return unitBasis * projection;
}
Test setYtoZero (void) const {return Test (this->x);}
static const Test zero;
};
inline Test operator* (float s, const Test& v) {return v*s;}
inline std::ostream& operator<< (std::ostream& o, const Test& v)
{
return o << "(" << v.x << ")";
}
inline Test RandomUnitVectorOnXZPlane (void)
{
return RandomVectorInUnitRadiusSphere().setYtoZero().normalize();
}
}
The interface used is:
%module test %include "test.cpp"
(cffi:defcfun ("_wrap_Test_x_set" Test_x_set) :void
(self :pointer)
(x :float))
(cffi:defcfun ("_wrap_Test_x_get" Test_x_get) :float
(self :pointer))
(cffi:defcfun ("_wrap_new_Test__SWIG_0" new_Test) :pointer)
(cffi:defcfun ("_wrap_new_Test__SWIG_1" new_Test) :pointer
(X :float))
(cffi:defcfun ("_wrap_Test___add__" Test___add__) :pointer
(self :pointer)
(v :pointer))
(cffi:defcfun ("_wrap_Test_lengthSquared" Test_lengthSquared) :float
(self :pointer))
(cffi:defcfun ("_wrap_Test_distance" Test_distance) :float
(a :pointer)
(b :pointer))
(cffi:defcfun ("_wrap_Test_parallelComponent" Test_parallelComponent) :pointer
(self :pointer)
(unitBasis :pointer))
(cffi:defcfun ("_wrap_Test_setYtoZero" Test_setYtoZero) :pointer
(self :pointer))
(cffi:defcvar ("Test_zero" Test_zero)
:pointer)
(cffi:defcfun ("_wrap_delete_Test" delete_Test) :void
(self :pointer))
(cffi:defcfun ("_wrap___mul__" __mul__) :pointer
(s :float)
(v :pointer))
(cffi:defcfun ("_wrap___lshift__" __lshift__) :pointer
(o :pointer)
(v :pointer))
(cffi:defcfun ("_wrap_RandomUnitVectorOnXZPlane" RandomUnitVectorOnXZPlane) :pointer)
(clos:defclass test() ((ff :reader ff-pointer))) (clos:defmethod (cl:setf x) (arg0 (obj test)) (Test_x_set (ff-pointer obj) arg0)) (clos:defmethod x ((obj test)) (Test_x_get (ff-pointer obj))) (cl:shadow "+") (clos:defmethod + ((obj test) (self test) (v test)) (Test___add__ (ff-pointer obj) (ff-pointer self) (ff-pointer v))) (clos:defmethod length-squared ((obj test) (self test)) (Test_lengthSquared (ff-pointer obj) (ff-pointer self))) (clos:defmethod parallel-component ((obj test) (self test) (unitBasis test)) (Test_parallelComponent (ff-pointer obj) (ff-pointer self) (ff-pointer unitBasis))) (clos:defmethod set-yto-zero ((obj test) (self test)) (Test_setYtoZero (ff-pointer obj) (ff-pointer self)))
I agree that the CFFI C++ module needs lot more work. But I hope it provides a starting point, on which you can base your work of importing C++ libraries to Lisp.
If you have any questions, suggestions, patches, etc., related to CFFI module feel free to contact us on the SWIG mailing list, and also please add a "[CFFI]" tag in the subject line.
It is often necessary to include user-defined code into the automatically generated interface files. For example, when building a C++ interface, example_wrap.cxx will likely not compile unless you add a #include "header.h" directive. This can be done using the SWIG %insert(section) %{ ...code... %} directive:
%module example
%{
#include "header.h"
%}
%include "header.h"
int fact(int n);
Additional sections have been added for inserting into the generated lisp interface file:
Note that the block %{ ... %} is effectively a shortcut for %insert("header") %{ ... %}.
CLISP is a feature-loaded implementation of common lisp which is portable across most of the operating system environments and hardware. CLISP includes an interpreter, a compiler, a debugger, CLOS, MOP, a foreign language interface, i18n, regular expressions, a socket interface, and more. An X11 interface is available through CLX, Garnet and CLUE/CLIO. Command line editing is provided by readline. CLISP runs Maxima, ACL2 and many other Common Lisp packages.
To run the clisp module of SWIG requires very little effort, you just need to execute:
swig -clisp -module module-name file-name
Because of the high level nature of the CLISP FFI, the bindings generated by SWIG may not be absolutely correct, and you may need to modify them. The good thing is that you don't need to complex interface file for the CLISP module. The CLISP module tries to produce code which is both human readable and easily modifyable.
The following table list the additional commandline options available for the CLISP module. They can also be seen by using:
swig -clisp -help
| CLISP specific options | |
|---|---|
| -extern-all | If this option is given then clisp
definitions for all the functions
and global variables will be created otherwise only definitions for externed functions and variables are created. |
| -generate-typedef | If this option is given then
def-c-type will be used to generate
shortcuts according to the typedefs in the input. |
As mentioned earlier the CLISP bindings generated by SWIG may need
some modifications. The clisp module creates a lisp file with the same
name as the module name. This lisp file contains a 'defpackage'
declaration, with the package name same as the module name. This
package uses the 'common-lisp' and 'ffi' packages. Also, package
exports all the functions, structures and variables for which an ffi
binding was generated.
After generating the defpackage statement, the clisp module also
sets the default language.
(defpackage :test
(:use :common-lisp :ffi)
(:export
:make-bar
:bar-x
:bar-y
:bar-a
:bar-b
:bar-z
:bar-n
:pointer_func
:func123
:make-cfunr
:lispsort_double
:test123))
(in-package :test)
(default-foreign-language :stdc)
The ffi wrappers for functions and variables are generated as shown below. When functions have arguments of type "double * array", SWIG doesn't knows whether it is an 'out' argument or it is an array which will be passed, so SWIG plays it safe by declaring it as an '(array (ffi:c-ptr DOUBLE-FLOAT))'. For arguments of type "int **z[100]" where SWIG has more information, i.e., it knows that 'z' is an array of pointers to pointers of integers, SWIG defines it to be '(z (ffi:c-ptr (ffi:c-array (ffi:c-ptr (ffi:c-ptr ffi:int)) 100)))'
extern "C" {
int pointer_func(void (*ClosureFun)( void* _fun, void* _data, void* _evt ), int y);
int func123(div_t * x,int **z[100],int y[][1000][10]);
void lispsort_double (int n, double * array);
void test123(float x , double y);
}
(ffi:def-call-out pointer_func
(:name "pointer_func")
(:arguments (ClosureFun (ffi:c-function (:arguments (arg0 (ffi:c-pointer NIL))
(arg1 (ffi:c-pointer NIL))
(arg2 (ffi:c-pointer NIL)))
(:return-type NIL)))
(y ffi:int))
(:return-type ffi:int)
(:library +library-name+))
(ffi:def-call-out func123
(:name "func123")
(:arguments (x (ffi:c-pointer div_t))
(z (ffi:c-ptr (ffi:c-array (ffi:c-ptr (ffi:c-ptr ffi:int)) 100)))
(y (ffi:c-ptr (ffi:c-ptr (ffi:c-array ffi:int (1000 10))))))
(:return-type ffi:int)
(:library +library-name+))
(ffi:def-call-out lispsort_double
(:name "lispsort_double")
(:arguments (n ffi:int)
(array (ffi:c-ptr DOUBLE-FLOAT)))
(:return-type NIL)
(:library +library-name+))
(ffi:def-call-out test123
(:name "test")
(:arguments (x SINGLE-FLOAT)
(y DOUBLE-FLOAT))
(:return-type NIL)
(:library +library-name+))
The module also handles strutcures and #define constants as shown below. SWIG automatically adds the constructors and accessors created for the struct to the list of symbols exported by the package.
struct bar {
short x, y;
char a, b;
int *z[1000];
struct bar * n;
};
#define max 1000
(ffi:def-c-struct bar
(x :type ffi:short)
(y :type ffi:short)
(a :type character)
(b :type character)
(z :type (ffi:c-array (ffi:c-ptr ffi:int) 1000))
(n :type (ffi:c-pointer bar)))
(defconstant max 1000)
Lua is an extension programming language designed to support general procedural programming with data description facilities. It also offers good support for object-oriented programming, functional programming, and data-driven programming. Lua is intended to be used as a powerful, light-weight configuration language for any program that needs one. Lua is implemented as a library, written in clean C (that is, in the common subset of ANSI C and C++). It's also a really tiny language, less than 6000 lines of code, which compiles to <100 kilobytes of binary code. It can be found at http://www.lua.org
eLua stands for Embedded Lua (can be thought of as a flavor of Lua) and offers the full implementation of the Lua programming language to the embedded world, extending it with specific features for efficient and portable software embedded development. eLua runs on smaller devices like microcontrollers and provides the full features of the regular Lua desktop version. More information on eLua can be found here: http://www.eluaproject.net
The current SWIG implementation is designed to work with Lua 5.0.x, 5.1.x and 5.2.x. It should work with later versions of Lua, but certainly not with Lua 4.0 due to substantial API changes. It is possible to either static link or dynamic link a Lua module into the interpreter (normally Lua static links its libraries, as dynamic linking is not available on all platforms). SWIG also supports eLua and works with eLua 0.8. SWIG generated code for eLua has been tested on Stellaris ARM Cortex-M3 LM3S and Infineon TriCore.
Suppose that you defined a SWIG module such as the following:
%module example
%{
#include "example.h"
%}
int gcd(int x, int y);
extern double Foo;
To build a Lua module, run SWIG using the -lua option.
$ swig -lua example.i
If building a C++ extension, add the -c++ option:
$ swig -c++ -lua example.i
This creates a C/C++ source file example_wrap.c or example_wrap.cxx. The generated C source file contains the low-level wrappers that need to be compiled and linked with the rest of your C/C++ application to create an extension module.
The name of the wrapper file is derived from the name of the input file. For example, if the input file is example.i, the name of the wrapper file is example_wrap.c. To change this, you can use the -o option. The wrapped module will export one function "int luaopen_example(lua_State* L)" which must be called to register the module with the Lua interpreter. The name "luaopen_example" depends upon the name of the module.
To build an eLua module, run SWIG using -lua and add either -elua or -eluac.
$ swig -lua -elua example.i
or
$ swig -lua -eluac example.i
The -elua option puts all the C function wrappers and variable get/set wrappers in rotables. It also generates a metatable which will control the access to these variables from eLua. It also offers a significant amount of module size compression. On the other hand, the -eluac option puts all the wrappers in a single rotable. With this option, no matter how huge the module, it will consume no additional microcontroller SRAM (crass compression). There is a catch though: Metatables are not generated with -eluac. To access any value from eLua, one must directly call the wrapper function associated with that value.
The following table list the additional commandline options available for the Lua module. They can also be seen by using:
swig -lua -help
| Lua specific options | |
|---|---|
| -elua | Generates LTR compatible wrappers for smaller devices running elua. |
| -eluac | LTR compatible wrappers in "crass compress" mode for elua. |
| -nomoduleglobal | Do not register the module name as a global variable but return the module table from calls to require. |
Normally Lua is embedded into another program and will be statically linked. An extremely simple stand-alone interpreter (min.c) is given below:
#include <stdio.h>
#include "lua.h"
#include "lualib.h"
#include "lauxlib.h"
extern int luaopen_example(lua_State* L); // declare the wrapped module
int main(int argc,char* argv[])
{
lua_State *L;
if (argc<2)
{
printf("%s: <filename.lua>\n",argv[0]);
return 0;
}
L=lua_open();
luaopen_base(L); // load basic libs (eg. print)
luaopen_example(L); // load the wrapped module
if (luaL_loadfile(L,argv[1])==0) // load and run the file
lua_pcall(L,0,0,0);
else
printf("unable to load %s\n",argv[1]);
lua_close(L);
return 0;
}
A much improved set of code can be found in the Lua distribution src/lua/lua.c. Include your module, just add the external declaration & add a #define LUA_EXTRALIBS {"example",luaopen_example}, at the relevant place.
The exact commands for compiling and linking vary from platform to platform. Here is a possible set of commands of doing this:
$ swig -lua example.i -o example_wrap.c $ gcc -I/usr/include/lua -c min.c -o min.o $ gcc -I/usr/include/lua -c example_wrap.c -o example_wrap.o $ gcc -c example.c -o example.o $ gcc -I/usr/include/lua -L/usr/lib/lua min.o example_wrap.o example.o -o my_lua
For eLua, the source must be built along with the wrappers generated by SWIG. Make sure the eLua source files platform_conf.h and auxmods.h are updated with the entries of your new module. Please note: "mod" is the module name.
/* Sample platform_conf.h */ #define LUA_PLATFORM_LIBS_ROM\ _ROM( AUXLIB_PIO, luaopen_pio, pio_map )\ _ROM( AUXLIB_TMR, luaopen_tmr, tmr_map )\ _ROM( AUXLIB_MOD, luaopen_mod, mod_map )\ ....
/* Sample auxmods.h */ #define AUXLIB_PIO "pio" LUALIB_API int ( luaopen_pio )(lua_State *L ); #define AUXLIB_MOD "mod" LUALIB_API int ( luaopen_mod )(lua_State *L ); ....
More information on building and configuring eLua can be found here: http://www.eluaproject.net/doc/v0.8/en_building.html
Most, but not all platforms support the dynamic loading of modules (Windows & Linux do). Refer to the Lua manual to determine if your platform supports it. For compiling a dynamically loaded module the same wrapper can be used. Assuming you have code you need to link to in a file called example.c, the commands will be something like this:
$ swig -lua example.i -o example_wrap.c $ gcc -I/usr/include/lua -c example_wrap.c -o example_wrap.o $ gcc -c example.c -o example.o $ gcc -shared -I/usr/include/lua -L/usr/lib/lua example_wrap.o example.o -o example.so
The wrappers produced by SWIG can be compiled and linked with Lua 5.1.x and later. The loading is extremely simple.
require("example")
For those using Lua 5.0.x, you will also need an interpreter with the loadlib function (such as the default interpreter compiled with Lua). In order to dynamically load a module you must call the loadlib function with two parameters: the filename of the shared library, and the function exported by SWIG. Calling loadlib should return the function, which you then call to initialise the module
my_init=loadlib("example.so","luaopen_example") -- for Unix/Linux
--my_init=loadlib("example.dll","luaopen_example") -- for Windows
assert(my_init) -- make sure it's not nil
my_init() -- call the init fn of the lib
Or can be done in a single line of Lua code
assert(loadlib("example.so","luaopen_example"))()
If the code didn't work, don't panic. The best thing to do is to copy the module and your interpreter into a single directory and then execute the interpreter and try to manually load the module (take care, all this code is case sensitive).
a,b,c=package.loadlib("example.so","luaopen_example") -- for Unix/Linux
--a,b,c=package.loadlib("example.dll","luaopen_example") -- for Windows
print(a,b,c)
Note: for Lua 5.0:
The loadlib() function is in the global namespace, not in a
package. So it's just loadlib().
if 'a' is a function, this is all working fine, all you need to do is call it
a()
to load your library which will add a table 'example' with all the functions added.
If it doesn't work, look at the error messages, in particular
message 'b'
The specified module could not be found.
Means that is cannot find the module, check your the location and
spelling of the module.
The specified procedure could not be found.
Means that it loaded the module, but cannot find the named
function. Again check the spelling, and if possible check to make sure
the functions were exported correctly.
'loadlib' not installed/supported
Is quite obvious (Go back and consult the Lua documents on how to
enable loadlib for your platform).
Assuming all goes well, you will be able to this:
$ ./my_lua > print(example.gcd(4,6)) 2 > print(example.Foo) 3 > example.Foo=4 > print(example.Foo) 4 >
By default, SWIG tries to build a very natural Lua interface to your C/C++ code. This section briefly covers the essential aspects of this wrapping.
The SWIG module directive specifies the name of the Lua module. If you specify `module example', then everything is wrapped into a Lua table 'example' containing all the functions and variables. When choosing a module name, make sure you don't use the same name as a built-in Lua command or standard module name.
Global functions are wrapped as new Lua built-in functions. For example,
%module example int fact(int n);
creates a built-in function example.fact(n) that works exactly like you think it does:
> print example.fact(4) 24 >
To avoid name collisions, SWIG create a Lua table which it keeps all the functions and global variables in. It is possible to copy the functions out of this and into the global environment with the following code. This can easily overwrite existing functions, so this must be used with care.
> for k,v in pairs(example) do _G[k]=v end > print(fact(4)) 24 >
It is also possible to rename the module with an assignment.
> e=example > print(e.fact(4)) 24 > print(example.fact(4)) 24
Global variables (which are linked to C code) are supported, and appear to be just another variable in Lua. However the actual mechanism is more complex. Given a global variable:
%module example extern double Foo;
SWIG will effectively generate two functions example.Foo_set() and example.Foo_get(). It then adds a metatable to the table 'example' to call these functions at the correct time (when you attempt to set or get examples.Foo). Therefore if you were to attempt to assign the global to another variable, you will get a local copy within the interpreter, which is no longer linked to the C code.
> print(example.Foo) 3 > c=example.Foo -- c is a COPY of example.Foo, not the same thing > example.Foo=4 > print(c) 3 > c=5 -- this will not effect the original example.Foo > print(example.Foo,c) 4 5
It is therefore not possible to 'move' the global variable into the global namespace as it is with functions. It is however, possible to rename the module with an assignment, to make it more convenient.
> e=example > -- e and example are the same table > -- so e.Foo and example.Foo are the same thing > example.Foo=4 > print(e.Foo) 4
If a variable is marked with the %immutable directive then any attempts to set this variable will cause a Lua error. Given a global variable:
%module example %immutable; extern double Foo; %mutable;
SWIG will allow the reading of Foo but when a set attempt is made, an error function will be called.
> print(e.Foo) -- reading works ok
4
> example.Foo=40 -- but writing does not
This variable is immutable
stack traceback:
[C]: ?
[C]: ?
stdin:1: in main chunk
[C]: ?
For those people who would rather that SWIG silently ignore the setting of immutables (as previous versions of the Lua bindings did), adding a -DSWIGLUA_IGNORE_SET_IMMUTABLE compile option will remove this.
Unlike earlier versions of the binding, it is now possible to add new functions or variables to the module, just as if it were a normal table. This also allows the user to rename/remove existing functions and constants (but not linked variables, mutable or immutable). Therefore users are recommended to be careful when doing so.
> -- example.PI does not exist > print(example.PI) nil > example.PI=3.142 -- new value added > print(example.PI) 3.142
If you have used the -eluac option for your eLua module, you will have to follow a different approach while manipulating global variables. (This is not applicable for wrappers generated with -elua)
> -- Applicable only with -eluac. (num is defined) > print(example.num_get()) 20 > example.num_set(50) -- new value added > print(example.num_get()) 50
In general, functions of the form "variable_get()" and "variable_set()" are automatically generated by SWIG for use with -eluac.
Because Lua doesn't really have the concept of constants, C/C++ constants are not really constant in Lua. They are actually just a copy of the value into the Lua interpreter. Therefore they can be changed just as any other value. For example given some constants:
%module example
%constant int ICONST=42;
#define SCONST "Hello World"
enum Days{SUNDAY,MONDAY,TUESDAY,WEDNESDAY,THURSDAY,FRIDAY,SATURDAY};
This is 'effectively' converted into the following Lua code:
example.ICONST=42 example.SCONST="Hello World" example.SUNDAY=0 ....
Constants are not guaranteed to remain constant in Lua. The name of the constant could be accidentally reassigned to refer to some other object. Unfortunately, there is no easy way for SWIG to generate code that prevents this. You will just have to be careful.
If you're using eLua and have used -elua or -eluac to generate your wrapper, macro constants and enums should be accessed through a rotable called "const". In eLua, macro constants and enums are guaranteed to remain constants since they are all contained within a rotable. A regular C constant is accessed from eLua just as if it were a regular global variable, just that the property of value immutability is demonstrated if an attempt at modifying a C constant is made.
> print(example.ICONST) 10 > print(example.const.SUNDAY) 0 > print(example.const.SCONST) Hello World
C/C++ pointers are fully supported by SWIG. Furthermore, SWIG has no problem working with incomplete type information. Given a wrapping of the <file.h> interface:
%module example FILE *fopen(const char *filename, const char *mode); int fputs(const char *, FILE *); int fclose(FILE *);
When wrapped, you will be able to use the functions in a natural way from Lua. For example:
> f=example.fopen("junk","w")
> example.fputs("Hello World",f)
> example.fclose(f)
Unlike many scripting languages, Lua has had support for pointers to C/C++ object built in for a long time. They are called 'userdata'. Unlike many other SWIG versions which use some kind of encoded character string, all objects will be represented as a userdata. The SWIG-Lua bindings provides a special function swig_type(), which if given a userdata object will return the type of object pointed to as a string (assuming it was a SWIG wrapped object).
> print(f) userdata: 003FDA80 > print(swig_type(f)) FILE * -- it's a FILE*
Lua enforces the integrity of its userdata, so it is virtually impossible to corrupt the data. But as the user of the pointer, you are responsible for freeing it, or closing any resources associated with it (just as you would in a C program). This does not apply so strictly to classes & structs (see below). One final note: if a function returns a NULL pointer, this is not encoded as a userdata, but as a Lua nil.
> f=example.fopen("not there","r") -- this will return a NULL in C
> print(f)
nil
If you wrap a C structure, it is also mapped to a Lua userdata. By adding a metatable to the userdata, this provides a very natural interface. For example,
struct Point{
int x,y;
};
is used as follows:
> p=example.new_Point() > p.x=3 > p.y=5 > print(p.x,p.y) 3 5 >
Similar access is provided for unions and the data members of C++
classes.
C structures are created using a function new_Point(), but
for C++ classes are created using just the name Point().
If you print out the value of p in the above example, you will see something like this:
> print(p) userdata: 003FA320
Like the pointer in the previous section, this is held as a userdata. However, additional features have been added to make this more usable. SWIG effectively creates some accessor/mutator functions to get and set the data. These functions will be added to the userdata's metatable. This provides the natural access to the member variables that were shown above (see end of the document for full details).
const members of a structure are read-only. Data members can also be forced to be read-only using the immutable directive. As with other immutables, setting attempts will be cause an error. For example:
struct Foo {
...
%immutable;
int x; // Read-only members
char *name;
%mutable;
...
};
The mechanism for managing char* members as well as array members is similar to other languages. It is somewhat cumbersome and should probably be better handled by defining of typemaps (described later).
When a member of a structure is itself a structure, it is handled as a pointer. For example, suppose you have two structures like this:
struct Foo {
int a;
};
struct Bar {
Foo f;
};
Now, suppose that you access the f attribute of Bar like this:
> b = Bar() > x = b.f
In this case, x is a pointer that points to the Foo that is inside b. This is the same value as generated by this C code:
Bar b; Foo *x = &b->f; // Points inside b
Because the pointer points inside the structure, you can modify the contents and everything works just like you would expect. For example:
> b = Bar() > b.f.a = 3 -- Modify attribute of structure member > x = b.f > x.a = 3 -- Modifies the same structure
For eLua with the -eluac option, structure manipulation has to be performed with specific structure functions generated by SWIG. Let's say you have the following structure definition:
struct data {
int x, y;
double z;
};
> --From eLua
> a = example.new_data()
> example.data_x_set(a, 10)
> example.data_y_set(a, 20)
> print(example.data_x_get(a), example.data_y_get(a))
10 20
In general, functions of the form "new_struct()", "struct_member_get()", "struct_member_set()" and "free_struct()" are automatically generated by SWIG for each structure defined in C. (Please note: This doesn't apply for modules generated with the -elua option)
C++ classes are wrapped by a Lua userdata as well. For example, if you have this class,
class List {
public:
List();
~List();
int search(char *item);
void insert(char *item);
void remove(char *item);
char *get(int n);
int length;
};
you can use it in Lua like this:
> l = example.List()
> l:insert("Ale")
> l:insert("Stout")
> l:insert("Lager")
> print(l:get(1))
Stout
> print(l:length)
3
>
(Note: for calling methods of a class, you use class:method(args), not class.method(args), it's an easy mistake to make. However for data attributes it is class.attribute )
Class data members are accessed in the same manner as C structures. Static class members present a special problem for Lua, as Lua doesn't have support for such features. Therefore, SWIG generates wrappers that try to work around some of these issues. To illustrate, suppose you have a class like this:
class Spam {
public:
static void foo();
static int bar;
};
In Lua, the static members can be accessed as follows:
> example.Spam_foo() -- calling Spam::foo() > a=example.Spam_bar -- reading Spam::bar > example.Spam_bar=b -- writing to Spam::bar
It is not (currently) possible to access static members of an instance:
> s=example.Spam() -- s is a Spam instance
> s.foo() -- Spam::foo() via an instance
-- does NOT work
SWIG is fully aware of issues related to C++ inheritance. Therefore, if you have classes like this
class Foo {
...
};
class Bar : public Foo {
...
};
And if you have functions like this
void spam(Foo *f);
then the function spam() accepts a Foo pointer or a pointer to any class derived from Foo.
It is safe to use multiple inheritance with SWIG.
In C++, there are many different ways a function might receive and manipulate objects. For example:
void spam1(Foo *x); // Pass by pointer void spam2(Foo &x); // Pass by reference void spam3(Foo x); // Pass by value void spam4(Foo x[]); // Array of objects
In SWIG, there is no detailed distinction like this--specifically, there are only "objects". There are no pointers, references, arrays, and so forth. Because of this, SWIG unifies all of these types together in the wrapper code. For instance, if you actually had the above functions, it is perfectly legal to do this:
> f = Foo() -- Create a Foo > spam1(f) -- Ok. Pointer > spam2(f) -- Ok. Reference > spam3(f) -- Ok. Value. > spam4(f) -- Ok. Array (1 element)
Similar behaviour occurs for return values. For example, if you had functions like this,
Foo *spam5(); Foo &spam6(); Foo spam7();
then all three functions will return a pointer to some Foo object. Since the third function (spam7) returns a value, newly allocated memory is used to hold the result and a pointer is returned (Lua will release this memory when the return value is garbage collected). The other two are pointers which are assumed to be managed by the C code and so will not be garbage collected.
C++ overloaded functions, methods, and constructors are mostly supported by SWIG. For example, if you have two functions like this:
void foo(int); void foo(char *c);
You can use them in Lua in a straightforward manner:
> foo(3) -- foo(int)
> foo("Hello") -- foo(char *c)
However due to Lua's coercion mechanism is can sometimes do strange things.
> foo("3") -- "3" can be coerced into an int, so it calls foo(int)!
As this coercion mechanism is an integral part of Lua, there is no easy way to get around this other than renaming of functions (see below).
Similarly, if you have a class like this,
class Foo {
public:
Foo();
Foo(const Foo &);
...
};
you can write Lua code like this:
> f = Foo() -- Create a Foo > g = Foo(f) -- Copy f
Overloading support is not quite as flexible as in C++. Sometimes there are methods that SWIG can't disambiguate. For example:
void spam(int); void spam(short);
or
VOID FOO(bAR *B); void foo(Bar &b);
If declarations such as these appear, you will get a warning message like this:
example.i:12: Warning 509: Overloaded method spam(short) effectively ignored, example.i:11: Warning 509: as it is shadowed by spam(int).
To fix this, you either need to ignore or rename one of the methods. For example:
%rename(spam_short) spam(short); ... void spam(int); void spam(short); // Accessed as spam_short
or
%ignore spam(short); ... void spam(int); void spam(short); // Ignored
SWIG resolves overloaded functions and methods using a disambiguation scheme that ranks and sorts declarations according to a set of type-precedence rules. The order in which declarations appear in the input does not matter except in situations where ambiguity arises--in this case, the first declaration takes precedence.
Please refer to the "SWIG and C++" chapter for more information about overloading.
Dealing with the Lua coercion mechanism, the priority is roughly (integers, floats, strings, userdata). But it is better to rename the functions rather than rely upon the ordering.
Certain C++ overloaded operators can be handled automatically by SWIG. For example, consider a class like this:
class Complex {
private:
double rpart, ipart;
public:
Complex(double r = 0, double i = 0) : rpart(r), ipart(i) { }
Complex(const Complex &c) : rpart(c.rpart), ipart(c.ipart) { }
Complex &operator=(const Complex &c);
Complex operator+(const Complex &c) const;
Complex operator-(const Complex &c) const;
Complex operator*(const Complex &c) const;
Complex operator-() const;
double re() const { return rpart; }
double im() const { return ipart; }
};
When wrapped, it works like you expect:
> c = Complex(3,4) > d = Complex(7,8) > e = c + d > e:re() 10.0 > e:im() 12.0
One restriction with operator overloading support is that SWIG is not able to fully handle operators that aren't defined as part of the class. For example, if you had code like this
class Complex {
...
friend Complex operator+(double, const Complex &c);
...
};
then SWIG doesn't know what to do with the friend function--in fact, it simply ignores it and issues a warning. You can still wrap the operator, but you may have to encapsulate it in a special function. For example:
%rename(Complex_add_dc) operator+(double, const Complex &); ... Complex operator+(double, const Complex &c);
There are ways to make this operator appear as part of the class using the %extend directive. Keep reading.
Also, be aware that certain operators don't map cleanly to Lua, and some Lua operators don't map cleanly to C++ operators. For instance, overloaded assignment operators don't map to Lua semantics and will be ignored, and C++ doesn't support Lua's concatenation operator (.. ).
In order to keep maximum compatibility within the different languages in SWIG, the Lua bindings uses the same set of operator names as python. Although internally it renames the functions to something else (on order to work with Lua).
The current list of operators which can be overloaded (and the alternative function names) are:
Note: in Lua, only the equals, less than, and less than equals operators are defined. The other operators (!=,>,>=) are achieved by using a logical not applied to the results of other operators.
The following operators cannot be overloaded (mainly because they are not supported in Lua)
SWIG also accepts the __str__() member function which converts an object to a string. This function should return a const char*, preferably to static memory. This will be used for the print() and tostring() functions in Lua. Assuming the complex class has a function
const char* __str__()
{
static char buffer[255];
sprintf(buffer,"Complex(%g,%g)",this->re(),this->im());
return buffer;
}
Then this will support the following code in Lua
> c = Complex(3,4) > d = Complex(7,8) > e = c + d > print(e) Complex(10,12) > s=tostring(e) -- s is the number in string form > print(s) Complex(10,12)
It is also possible to overload the operator[], but currently this cannot be automatically performed. To overload the operator[] you need to provide two functions, __getitem__() and __setitem__()
class Complex
{
//....
double __getitem__(int i)const; // i is the index, returns the data
void __setitem__(int i,double d); // i is the index, d is the data
};
One of the more interesting features of SWIG is that it can extend structures and classes with new methods. In the previous section, the Complex class would have benefited greatly from an __str__() method as well as some repairs to the operator overloading. It can also be used to add additional functions to the class if they are needed.
Take the original Complex class
class Complex {
private:
double rpart, ipart;
public:
Complex(double r = 0, double i = 0) : rpart(r), ipart(i) { }
Complex(const Complex &c) : rpart(c.rpart), ipart(c.ipart) { }
Complex &operator=(const Complex &c);
Complex operator+(const Complex &c) const;
Complex operator-(const Complex &c) const;
Complex operator*(const Complex &c) const;
Complex operator-() const;
double re() const { return rpart; }
double im() const { return ipart; }
};
Now we extend it with some new code
%extend Complex {
const char *__str__() {
static char tmp[1024];
sprintf(tmp,"Complex(%g,%g)", $self->re(),$self->im());
return tmp;
}
bool operator==(const Complex& c)
{ return ($self->re()==c.re() && $self->im()==c.im();}
};
Now, in Lua
> c = Complex(3,4) > d = Complex(7,8) > e = c + d > print(e) -- print uses __str__ to get the string form to print Complex(10,12) > print(e==Complex(10,12)) -- testing the == operator true > print(e!=Complex(12,12)) -- the != uses the == operator true
Extend works with both C and C++ code, on classes and structs. It does not modify the underlying object in any way---the extensions only show up in the Lua interface. The only item to take note of is the code has to use the '$self' instead of 'this', and that you cannot access protected/private members of the code (as you are not officially part of the class).
If you have a function that allocates memory like this,
char *foo() {
char *result = (char *) malloc(...);
...
return result;
}
then the SWIG generated wrappers will have a memory leak--the returned data will be copied into a string object and the old contents ignored.
To fix the memory leak, use the %newobject directive.
%newobject foo; ... char *foo();
This will release the allocated memory.
C++ templates don't present a huge problem for SWIG. However, in order to create wrappers, you have to tell SWIG to create wrappers for a particular template instantiation. To do this, you use the template directive. For example:
%module example
%{
#include "pair.h"
%}
template<class T1, class T2>
struct pair {
typedef T1 first_type;
typedef T2 second_type;
T1 first;
T2 second;
pair();
pair(const T1&, const T2&);
~pair();
};
%template(pairii) pair<int,int>;
In Lua:
> p = example.pairii(3,4) > print(p.first,p.second) 3 4
Obviously, there is more to template wrapping than shown in this example. More details can be found in the SWIG and C++ chapter. Some more complicated examples will appear later.
In certain C++ programs, it is common to use classes that have been wrapped by so-called "smart pointers." Generally, this involves the use of a template class that implements operator->() like this:
template<class T> class SmartPtr {
...
T *operator->();
...
}
Then, if you have a class like this,
class Foo {
public:
int x;
int bar();
};
A smart pointer would be used in C++ as follows:
SmartPtr<Foo> p = CreateFoo(); // Created somehow (not shown) ... p->x = 3; // Foo::x int y = p->bar(); // Foo::bar
To wrap this, simply tell SWIG about the SmartPtr class and the low-level Foo object. Make sure you instantiate SmartPtr using template if necessary. For example:
%module example ... %template(SmartPtrFoo) SmartPtr<Foo>; ...
Now, in Lua, everything should just "work":
> p = example.CreateFoo() -- Create a smart-pointer somehow > p.x = 3 -- Foo::x > print(p:bar()) -- Foo::bar
If you ever need to access the underlying pointer returned by operator->() itself, simply use the __deref__() method. For example:
> f = p:__deref__() -- Returns underlying Foo *
Lua does not natively support exceptions, but it has errors which are similar. When a Lua function terminates with an error it returns one value back to the caller. SWIG automatically maps any basic type which is thrown into a Lua error. Therefore for a function:
int message() throw(const char *) {
throw("I died.");
return 1;
}
SWIG will automatically convert this to a Lua error.
> message()
I died.
stack traceback:
[C]: in function 'message'
stdin:1: in main chunk
[C]: ?
>
If you want to catch an exception, you must use either pcall() or xpcall(), which are documented in the Lua manual. Using xpcall will allow you to obtain additional debug information (such as a stacktrace).
> function a() b() end -- function a() calls function b()
> function b() message() end -- function b() calls C++ function message(), which throws
> ok,res=pcall(a) -- call the function
> print(ok,res)
false I died.
> ok,res=xpcall(a,debug.traceback) -- call the function
> print(ok,res)
false I died.
stack traceback:
[C]: in function 'message'
runme.lua:70: in function 'b'
runme.lua:67: in function <runme.lua:66>
[C]: in function 'xpcall'
runme.lua:95: in main chunk
[C]: ?
SWIG is able to throw numeric types, enums, chars, char*'s and std::string's without problem. It has also written typemaps for std::exception and its derived classes, which convert the exception into an error string.
However it's not so simple to throw other types of objects. Thrown objects are not valid outside the 'catch' block. Therefore they cannot be returned to the interpreter. The obvious ways to overcome this would be to either return a copy of the object, or to convert the object to a string and return that. Though it seems obvious to perform the former, in some cases this is not possible, most notably when SWIG has no information about the object, or the object is not copyable/creatable.
Therefore by default SWIG converts all thrown object into strings and returns them. So given a function:
void throw_A() throw(A*) {
throw new A();
}
SWIG will just convert it (poorly) to a string and use that as its error. (This is not that useful, but it always works).
> throw_A()
object exception:A *
stack traceback:
[C]: in function 'unknown'
stdin:1: in main chunk
[C]: ?
>
To get a more useful behaviour out of SWIG you must either: provide a way to convert your exceptions into strings, or throw objects which can be copied.
If you have your own class which you want output as a string you will need to add a typemap something like this:
%typemap(throws) my_except
%{
lua_pushstring(L,$1.what()); // assuming my_except::what() returns a const char* message
SWIG_fail; // trigger the error handler
%}
If you wish your exception to be returned to the interpreter, it must firstly be copyable. Then you must have an additional %apply statement, to tell SWIG to return a copy of this object to the interpreter. For example:
%apply SWIGTYPE EXCEPTION_BY_VAL {Exc}; // tell SWIG to return Exc by value to interpreter
class Exc {
public:
Exc(int c, const char *m) {
code = c;
strncpy(msg,m,256);
}
int code;
char msg[256];
};
void throw_exc() throw(Exc) {
throw(Exc(42,"Hosed"));
}
Then the following code can be used (note: we use pcall to catch the error so we can process the exception).
> ok,res=pcall(throw_exc) > print(ok) false > print(res) userdata: 0003D880 > print(res.code,res.msg) 42 Hosed >
Note: it is also possible (though tedious) to have a function throw several different kinds of exceptions. To process this will require a pcall, followed by a set of if statements checking the type of the error.
All of this code assumes that your C++ code uses exception specification (which a lot doesn't). If it doesn't consult the " Exception handling with %catches" section and the " Exception handling with %exception" section, for more details on how to add exception specification to functions or globally (respectively).
This section explains what typemaps are and how to use them. The default wrapping behaviour of SWIG is enough in most cases. However sometimes SWIG may need a little additional assistance to know which typemap to apply to provide the best wrapping. This section will be explaining how to use typemaps to best effect
A typemap is nothing more than a code generation rule that is attached to a specific C datatype. For example, to convert integers from Lua to C, you might define a typemap like this:
%module example
%typemap(in) int {
$1 = (int) lua_tonumber(L,$input);
printf("Received an integer : %d\n",$1);
}
%inline %{
extern int fact(int n);
%}
Note: you shouldn't use this typemap, as SWIG already has a typemap for this task. This is purely for example.
Typemaps are always associated with some specific aspect of code generation. In this case, the "in" method refers to the conversion of input arguments to C/C++. The datatype int is the datatype to which the typemap will be applied. The supplied C code is used to convert values. In this code a number of special variable prefaced by a $ are used. The $1 variable is placeholder for a local variable of type int. The $input is the index on the Lua stack for the value to be used.
When this example is compiled into a Lua module, it operates as follows:
> require "example" > print(example.fact(6)) Received an integer : 6 720
There are many ready written typemaps built into SWIG for all common types (int, float, short, long, char*, enum and more), which SWIG uses automatically, with no effort required on your part.
However for more complex functions which use input/output parameters or arrays, you will need to make use of <typemaps.i>, which contains typemaps for these situations. For example, consider these functions:
void add(int x, int y, int *result) {
*result = x + y;
}
int sub(int *x1, int *y1) {
return *x1-*y1;
}
void swap(int *sx, int *sy) {
int t=*sx;
*sx=*sy;
*sy=t;
}
It is clear to the programmer, that 'result' is an output parameter, 'x1' and 'y1' are input parameters and 'sx' and 'sy' are input/output parameters. However is not apparent to SWIG, so SWIG must to informed about which kind they are, so it can wrapper accordingly.
One means would be to rename the argument name to help SWIG, eg void add(int x, int y, int *OUTPUT), however it is easier to use the %apply to achieve the same result, as shown below.
%include <typemaps.i>
%apply int* OUTPUT {int *result}; // int *result is output
%apply int* INPUT {int *x1, int *y1}; // int *x1 and int *y1 are input
%apply int* INOUT {int *sx, int *sy}; // int *sx and int *sy are input and output
void add(int x, int y, int *result);
int sub(int *x1, int *y1);
void swap(int *sx, int *sy);
When wrapped, it gives the following results:
> require "example" > print(example.add(1,2)) 3 > print(demo.sub(1,2)) -1 > a,b=1,2 > c,d=demo.swap(a,b) > print(a,b,c,d) 1 2 2 1
Notice, that 'result' is not required in the arguments to call the function, as it an output parameter only. For 'sx' and 'sy' they must be passed in (as they are input), but the original value is not modified (Lua does not have a pass by reference feature). The modified results are then returned as two return values. All INPUT/OUTPUT/INOUT arguments will behave in a similar manner.
Note: C++ references must be handled exactly the same way. However SWIG will automatically wrap a const int& as an input parameter (since that it obviously input).
Arrays present a challenge for SWIG, because like pointers SWIG does not know whether these are input or output values, nor does SWIG have any indication of how large an array should be. However with the proper guidance SWIG can easily wrapper arrays for convenient usage.
Given the functions:
extern void sort_int(int* arr, int len); extern void sort_double(double* arr, int len);
There are basically two ways that SWIG can deal with this. The first way, uses the <carrays.i> library to create an array in C/C++ then this can be filled within Lua and passed into the function. It works, but it's a bit tedious. More details can be found in the carrays.i documentation.
The second and more intuitive way, would be to pass a Lua table directly into the function, and have SWIG automatically convert between Lua-table and C-array. Within the <typemaps.i> file there are typemaps ready written to perform this task. To use them is again a matter of using %apply in the correct manner.
The wrapper file below, shows both the use of carrays as well as the use of the typemap to wrap arrays.
// using the C-array
%include <carrays.i>
// this declares a batch of function for manipulating C integer arrays
%array_functions(int,int)
extern void sort_int(int* arr, int len); // the function to wrap
// using typemaps
%include <typemaps.i>
%apply (double *INOUT,int) {(double* arr,int len)};
extern void sort_double(double* arr, int len); // the function to wrap
Once wrapped, the functions can both be called, though with different ease of use:
require "example"
ARRAY_SIZE=10
-- passing a C array to the sort_int()
arr=example.new_int(ARRAY_SIZE) -- create the array
for i=0,ARRAY_SIZE-1 do -- index 0..9 (just like C)
example.int_setitem(arr,i,math.random(1000))
end
example.sort_int(arr,ARRAY_SIZE) -- call the function
example.delete_int(arr) -- must delete the allocated memory
-- use a typemap to call with a Lua-table
-- one item of note: the typemap creates a copy, rather than edit-in-place
t={} -- a Lua table
for i=1,ARRAY_SIZE do -- index 1..10 (Lua style)
t[i]=math.random(1000)/10
end
t=example.sort_double(t) -- replace t with the result
Obviously the first version could be made less tedious by writing a Lua function to perform the conversion from a table to a C-array. The %luacode directive is good for this. See SWIG\Examples\lua\arrays for an example of this.
Warning: in C indexes start at ZERO, in Lua indexes start at ONE. SWIG expects C-arrays to be filled for 0..N-1 and Lua tables to be 1..N, (the indexing follows the norm for the language). In the typemap when it converts the table to an array it quietly changes the indexing accordingly. Take note of this behaviour if you have a C function which returns indexes.
Note: SWIG also can support arrays of pointers in a similar manner.
Several C++ libraries use a pointer-pointer functions to create its objects. These functions require a pointer to a pointer which is then filled with the pointer to the new object. Microsoft's COM and DirectX as well as many other libraries have this kind of function. An example is given below:
struct iMath; // some structure int Create_Math(iMath** pptr); // its creator (assume it mallocs)
Which would be used with the following C code:
iMath* ptr; int ok; ok=Create_Math(&ptr); // do things with ptr //... free(ptr); // dispose of iMath
SWIG has a ready written typemap to deal with such a kind of function in <typemaps.i>. It provides the correct wrapping as well as setting the flag to inform Lua that the object in question should be garbage collected. Therefore the code is simply:
%include <typemaps.i>
%apply SWIGTYPE** OUTPUT{iMath **pptr }; // tell SWIG it's an output
struct iMath; // some structure
int Create_Math(iMath** pptr); // its creator (assume it mallocs)
The usage is as follows:
ok,ptr=Create_Math() -- ptr is an iMath* which is returned with the int (ok) ptr=nil -- the iMath* will be GC'ed as normal
This section describes how you can modify SWIG's default wrapping behavior for various C/C++ datatypes using the %typemap directive. This is an advanced topic that assumes familiarity with the Lua C API as well as the material in the "Typemaps " chapter.
Before proceeding, it should be stressed that writing typemaps is rarely needed unless you want to change some aspect of the wrapping, or to achieve an effect which in not available with the default bindings.
Before proceeding, you should read the previous section on using typemaps, and look at the existing typemaps found in luatypemaps.swg and typemaps.i. These are both well documented and fairly easy to read. You should not attempt to write your own typemaps until you have read and can understand both of these files (they may well also give you an idea to base your work on).
There are many different types of typemap that can be written, the full list can be found in the "Typemaps" chapter. However the following are the most commonly used ones.
This section explains the SWIG specific Lua-C API. It does not cover the main Lua-C api, as this is well documented and not worth covering.
int SWIG_ConvertPtr(lua_State* L,int index,void** ptr,swig_type_info *type,int flags);
void SWIG_NewPointerObj(lua_State* L,void* ptr,swig_type_info *type,int own);
void* SWIG_MustGetPtr(lua_State* L,int index,swig_type_info *type,int flags,int argnum,const char* func_name);
SWIG_fail
if (!SWIG_IsOK(SWIG_ConvertPtr( .....)){
lua_pushstring(L,"something bad happened");
SWIG_fail;
}
SWIG_fail_arg(char* func_name,int argnum,char* type)
"Error in func_name (arg argnum), expected 'type' got 'whatever the type was'"
SWIG_fail_ptr(const char* fn_name,int argnum,swig_type_info* type);
This section covers adding of some small extra bits to your module to add the last finishing touches.
Sometimes, it may be necessary to add your own special functions, which bypass the normal SWIG wrapper method, and just use the native Lua API calls. These 'native' functions allow direct adding of your own code into the module. This is performed with the %native directive as follows:
%native(my_func) int native_function(lua_State*L); // registers native_function() with SWIG
...
%{
int native_function(lua_State*L) // my native code
{
...
}
%}
The %native directive in the above example, tells SWIG that there is a function int native_function(lua_State*L); which is to be added into the module under the name 'my_func'. SWIG will not add any wrapper for this function, beyond adding it into the function table. How you write your code is entirely up to you.
As well as adding additional C/C++ code, it's also possible to add your own Lua code to the module as well. This code is executed once all other initialisation, including the %init code has been called.
The directive %luacode adds code into the module which is executed upon loading. Normally you would use this to add your own functions to the module. Though you could easily perform other tasks.
%module example;
%luacode {
function example.greet()
print "hello world"
end
print "Module loaded ok"
}
...
%}
Notice that the code is not part of the module table. Therefore any references to the module must have the module name added.
Should there be an error in the Lua code, this will not stop loading of the module. The default behaviour of SWIG is to print an error message to stderr and then continue. It is possible to change this behaviour by using a #define SWIG_DOSTRING_FAIL(STR) to define a different behaviour should the code fail.
Good uses for this feature is adding of new code, or writing helper functions to simplify some of the code. See Examples/lua/arrays for an example of this code.
In the previous section, a high-level view of Lua wrapping was presented. Obviously a lot of stuff happens behind the scenes to make this happen. This section will explain some of the low-level details on how this is achieved.
If you just want to use SWIG and don't care how it works, then stop reading here. This is going into the guts of the code and how it works. It's mainly for people who need to know what's going on within the code.
Assuming that you had some global data that you wanted to share between C and Lua. How does SWIG do it?
%module example; extern double Foo;
SWIG will effectively generate the pair of functions
void Foo_set(double); double Foo_get();
At initialisation time, it will then add to the interpreter a table called 'example', which represents the module. It will then add all its functions to the module. (Note: older versions of SWIG actually added the Foo_set() and Foo_get() functions, current implementation does not add these functions any more.) But it also adds a metatable to this table, which has two functions (__index and __newindex ) as well as two tables (.get and .set) The following Lua code will show these hidden features.
> print(example) table: 003F8F90 > m=getmetatable(example) > table.foreach(m,print) .set table: 003F9088 .get table: 003F9038 __index function: 003F8FE0 __newindex function: 003F8FF8 > g=m['.get'] > table.foreach(g,print) Foo function: 003FAFD8 >
The .get and .set tables are lookups connecting the variable name 'Foo' to the accessor/mutator functions (Foo_set,Foo_get)
The Lua equivalent of the code for the __index and __newindex looks a bit like this
function __index(mod,name)
local g=getmetatable(mod)['.get'] -- gets the table
if not g then return nil end
local f=g[name] -- looks for the function
-- calls it & returns the value
if type(f)=="function" then return f() end
return nil
end
function __newindex(mod,name,value)
local s=getmetatable(mod)['.set'] -- gets the table
if not s then return end
local f=s[name] -- looks for the function
-- calls it to set the value
if type(f)=="function" then f(value)
else rawset(mod,name,value) end
end
That way when you call 'a=example.Foo', the interpreter looks at the table 'example' sees that there is no field 'Foo' and calls __index. This will in turn check in '.get' table and find the existence of 'Foo' and then return the value of the C function call 'Foo_get()'. Similarly for the code 'example.Foo=10', the interpreter will check the table, then call the __newindex which will then check the '.set' table and call the C function 'Foo_set(10)'.
As mentioned earlier, classes and structures, are all held as pointer, using the Lua 'userdata' structure. This structure is actually a pointer to a C structure 'swig_lua_userdata', which contains the pointer to the data, a pointer to the swig_type_info (an internal SWIG struct) and a flag which marks if the object is to be disposed of when the interpreter no longer needs it. The actual accessing of the object is done via the metatable attached to this userdata.
The metatable is a Lua 5.0 feature (which is also why SWIG cannot wrap Lua 4.0). It's a table which holds a list of functions, operators and attributes. This is what gives the userdata the feeling that it is a real object and not just a hunk of memory.
Given a class
%module excpp;
class Point
{
public:
int x,y;
Point(){x=y=0;}
~Point(){}
virtual void Print(){printf("Point @%p (%d,%d)\n",this,x,y);}
};
SWIG will create a module excpp, with all the various functions inside. However to allow the intuitive use of the userdata, SWIG also creates up a set of metatables. As seen in the above section on global variables, use of the metatables allows for wrappers to be used intuitively. To save effort, the code creates one metatable per class and stores it inside Lua's registry. Then when a new object is instantiated, the metatable is found in the registry and the userdata associated with the metatable. Currently, derived classes make a complete copy of the base class' table and then add on their own additional functions.
Some of the internals can be seen by looking at the metatable of a class:
> p=excpp.Point() > print(p) userdata: 003FDB28 > m=getmetatable(p) > table.foreach(m,print) .type Point __gc function: 003FB6C8 __newindex function: 003FB6B0 __index function: 003FB698 .get table: 003FB4D8 .set table: 003FB500 .fn table: 003FB528
The '.type' attribute is the name of the class. The '.get' and '.set' tables work in a similar manner to the modules, the main difference is the '.fn' table which also holds all the member functions. (The '__gc' function is the class' destructor function)
The Lua equivalent of the code for enabling functions looks a little like this
function __index(obj,name)
local m=getmetatable(obj) -- gets the metatable
if not m then return nil end
local g=m['.get'] -- gets the attribute table
if not g then return nil end
local f=g[name] -- looks for the get_attribute function
-- calls it & returns the value
if type(f)=="function" then return f() end
-- ok, so it not an attribute, maybe it's a function
local fn=m['.fn'] -- gets the function table
if not fn then return nil end
local f=fn[name] -- looks for the function
-- if found the fn then return the function
-- so the interpreter can call it
if type(f)=="function" then return f end
return nil
end
So when 'p:Print()' is called, the __index looks on the object metatable for a 'Print' attribute, then looks for a 'Print' function. When it finds the function, it returns the function, and then interpreter can call 'Point_Print(p)'
In theory, you can play with this usertable & add new features, but remember that it is a shared table between all instances of one class, and you could very easily corrupt the functions in all the instances.
Note: Both the opaque structures (like the FILE*) and normal wrapped classes/structs use the same 'swig_lua_userdata' structure. Though the opaque structures has do not have a metatable attached, or any information on how to dispose of them when the interpreter has finished with them.
Note: Operator overloads are basically done in the same way, by adding functions such as '__add' & '__call' to the class' metatable. The current implementation is a bit rough as it will add any member function beginning with '__' into the metatable too, assuming its an operator overload.
Lua is very helpful with the memory management. The 'swig_lua_userdata' is fully managed by the interpreter itself. This means that neither the C code nor the Lua code can damage it. Once a piece of userdata has no references to it, it is not instantly collected, but will be collected when Lua deems is necessary. (You can force collection by calling the Lua function collectgarbage() ). Once the userdata is about to be free'ed, the interpreter will check the userdata for a metatable and for a function '__gc'. If this exists this is called. For all complete types (ie normal wrapped classes & structs) this should exist. The '__gc' function will check the 'swig_lua_userdata' to check for the 'own' field and if this is true (which is will be for all owned data) it will then call the destructor on the pointer.
It is currently not recommended to edit this field or add some user code, to change the behaviour. Though for those who wish to try, here is where to look.
It is also currently not possible to change the ownership flag on the data (unlike most other scripting languages, Lua does not permit access to the data from within the interpreter).
This chapter describes SWIG's support of Modula-3. You should be familiar with the basics of SWIG, especially typemaps.
Modula-3 is a compiled language in the tradition of Niklaus Wirth's Modula 2, which is in turn a successor to Pascal.
SWIG's Modula-3 support is currently very basic and highly experimental! Many features are still not designed satisfyingly and I need more discussion about the odds and ends. Don't rely on any feature, incompatible changes are likely in the future! However, the Modula-3 generator was already useful for interfacing to the libraries:
Although it is possible to write Modula-3 code that performs as well as C/C++ most existing libraries are not written in Modula-3 but in C or C++, and even libraries in other languages may provide C header files.
Fortunately Modula-3 can call C functions, but you have to write Modula-3 interfaces to them, and to make things comfortable you will also need wrappers that convert between high-level features of Modula-3 (garbage collecting, exceptions) and the explicit tracking of allocated memory and exception codes used by C APIs.
SWIG converts C headers to Modula-3 interfaces for you, and using typemaps you can pass TEXTs or open arrays, and convert error return codes into exceptions.
If the library API is ill designed writing appropriate typemaps can be still time-consuming. E.g. C programmers are very creative to work-around missing data types like (real) enumerations and sets. You should turn such work-arounds back to the Modula-3 way otherwise you lose static safety and consistency.
Without SWIG you would probably never consider trying to call C++ libraries from Modula-3, but with SWIG this is becomes feasible. SWIG can generate C wrappers to C++ functions and object methods that may throw exceptions, and then wrap these C wrappers for Module-3. To make it complete you can then hide the C interface with Modula-3 classes and exceptions.
SWIG allows you to call C and C++ libraries from Modula-3 (even with call back functions), but it doesn't allow you to easily integrate a Module-3 module into a C/C++ project.
Modula-3 has integrated support for calling C functions. This is also extensively used by the standard Modula-3 libraries to call OS functions. The Modula-3 part of SWIG and the corresponding SWIG library modula3.swg contain code that uses these features. Because of the built-in support there is no need for calling the SWIG kernel to generate wrappers written in C. All conversion and argument checking can be done in Modula-3 and the interfacing is quite efficient. All you have to do is to write pieces of Modula-3 code that SWIG puts together.
| C library support integrated in Modula-3 | ||
|---|---|---|
| Pragma <* EXTERNAL *> | Precedes a declaration of a PROCEDURE that is implemented in an external library instead of a Modula-3 module. | |
| Pragma <* CALLBACK *> | Precedes a declaration of a PROCEDURE that should be called by external library code. | |
| Module Ctypes | Contains Modula-3 types that match some basic C types. | |
| Module M3toC | Contains routines that convert between Modula-3's TEXT type and C's char * type. | |
In each run of SWIG the Modula-3 part generates several files:
| Module name scheme | Identifier for %insert | Description |
|---|---|---|
| ModuleRaw.i3 | m3rawintf | Declaration of types that are equivalent to those of the C library, EXTERNAL procedures as interface to the C library functions |
| ModuleRaw.m3 | m3rawimpl | Almost empty. |
| Module.i3 | m3wrapintf | Declaration of comfortable wrappers to the C library functions. |
| Module.m3 | m3wrapimpl | Implementation of the wrappers that convert between Modula-3 and C types, check for validity of values, hand-over resource management to the garbage collector using WeakRefs and raises exceptions. |
| m3makefile | m3makefile | Add the modules above to the Modula-3 project and specify the name of the Modula-3 wrapper library to be generated. Today I'm not sure if it is a good idea to create a m3makefile in each run, because SWIG must be started for each Modula-3 module it creates. Thus the m3makefile is overwritten each time. :-( |
Here's a scheme of how the function calls to Modula-3 wrappers are redirected to C library functions:
| Modula-3 wrapper
Module.i3 generated by Modula-3 part of SWIG | ||
|
|
v | ||
| Modula-3 interface to C
ModuleRaw.i3 generated by Modula-3 part of SWIG | --> | C library |
I have still no good conception how one can split C library interfaces into type oriented interfaces. A Module in Modula-3 represents an Abstract DataType (or call it a static classes, i.e. a class without virtual methods). E.g. if you have a principal type, say Database, it is good Modula-3 style to set up one Module with the name Database where the database type is declared with the name T and where all functions are declared that operates on it.
The normal operation of SWIG is to generate a fixed set of files per call. To generate multiple modules one has to write one SWIG interface (different SWIG interfaces can share common data) per module. Identifiers belonging to a different module may ignored (%ignore ) and the principal type must be renamed (%typemap).
Interfaces to C++ files are much more complicated and there are some more design decisions that are not made, yet. Modula-3 has no support for C++ functions but C++ compilers should support generating C++ functions with a C interface.
Here's a scheme of how the function calls to Modula-3 wrappers are redirected to C library functions:
| Modula-3 wrapper
Module.i3 generated by Modula-3 part of SWIG | C++ library | |
|
|
v | ^
| | |
| Modula-3 interface to C
ModuleRaw.i3 generated by Modula-3 part of SWIG | --> |
C interface to C++
module_wrap.cxx generated by the SWIG core |
Wrapping C++ libraries arises additional problems:
Be warned: There is no C++ library I wrote a SWIG interface for, so I'm not sure if this is possible or sensible, yet.
There are different Modula-3 compilers around: cm3, pm3, ezm3, Klagenfurth Modula-3, Cambridge Modula-3. SWIG itself does not contain compiler specific code but the modula3.swg library file may do so. For testing examples I use Critical Mass cm3.
There are some experimental command line options that prevent SWIG from generating interface files. Instead files are emitted that may assist you when writing SWIG interface files.
| Modula-3 specific options | Description |
|---|---|
| -generateconst <file> | Disable generation
of interfaces and wrappers. Instead write code for computing numeric
values of constants to the specified file.
C code may contain several constant definitions written as preprocessor macros. Other language modules of SWIG use compute-once-use-readonly variables or functions to wrap such definitions. All of them can invoke C code dynamically for computing the macro values. But if one wants to turn them into Modula-3 integer constants, enumerations or set types, the values of these expressions has to be known statically. Although definitions like (1 << FLAG_MAXIMIZEWINDOW) must be considered as good C style they are hard to convert to Modula-3 since the value computation can use every feature of C. Thus I implemented these switch to extract all constant definitions and write a C program that output the values of them. It works for numeric constants only and treats all of them as double. Future versions may generate a C++ program that can detect the type of the macros by overloaded output functions. Then strings can also be processed. |
| -generaterename <file> | Disable generation
of interfaces and wrappers. Instead generate suggestions for
%rename.
C libraries use a naming style that is neither homogeneous nor similar to that of Modula-3. C function names often contain a prefix denoting the library and some name components separated by underscores or capitalization changes. To get library interfaces that are really Modula-3 like you should rename the function names with the %rename directive. This switch outputs a list of such directives with a name suggestion generated by a simple heuristic. |
| -generatetypemap <file> | Disable generation of interfaces and wrappers. Instead generate templates for some basic typemaps. |
Each C procedure has a bunch of inputs and outputs. Inputs are passed as function arguments, outputs are updated referential arguments and the function value.
Each C type can have several typemaps that apply only in case if a type is used for an input argument, for an output argument, or for a return value. A further typemap may specify the direction that is used for certain parameters. I have chosen this separation in order to be able to write general typemaps for the modula3.swg typemap library. In the library code the final usage of the type is not known. Using separate typemaps for each possible use allows appropriate definitions for each case. If these pre-definitions are fine then the direction of the function parameter is the only hint the user must give.
The typemaps specific to Modula-3 have a common name scheme: A typemap name starts with "m3", followed by "raw" or "wrap" depending on whether it controls the generation of the ModuleRaw.i3 or the Module.i3, respectively. It follows an "in" for typemaps applied to input argument, "out" for output arguments, "arg" for all kind of arguments, "ret" for returned values.
The main task of SWIG is to build wrapper function, i.e. functions that convert values between C and Modula-3 and call the corresponding C function. Modula-3 wrapper functions generated by SWIG consist of the following parts:
| Typemap | Example | Description |
|---|---|---|
| m3wrapargvar | $1: INTEGER := $1_name; | Declaration of some variables needed for temporary results. |
| m3wrapargconst | $1 = "$1_name"; | Declaration of some constant, maybe for debug purposes. |
| m3wrapargraw | ORD($1_name) | The expression that should be passed as argument to the raw Modula-3 interface function. |
| m3wrapargdir | out | Referential arguments can be used for input, output, update. ??? |
| m3wrapinmode | READONLY | One of Modula-3 parameter modes VALUE (or empty), VAR, READONLY |
| m3wrapinname | New name of the input argument. | |
| m3wrapintype | Modula-3 type of the input argument. | |
| m3wrapindefault | Default value of the input argument | |
| m3wrapinconv | $1 := M3toC.SharedTtoS($1_name); | Statement for converting the Modula-3 input value to C compliant value. |
| m3wrapincheck | IF Text.Length($1_name) > 10 THEN RAISE E("str too long"); END; | Check the integrity of the input value. |
| m3wrapoutname | Name of the RECORD field to be used for returning multiple values. This applies to referential output arguments that shall be turned into return values. | |
| m3wrapouttype | Type of the value that is returned instead of a referential output argument. | |
| m3wrapoutconv | ||
| m3wrapoutcheck | ||
| m3wrapretraw | ||
| m3wrapretname | ||
| m3wraprettype | ||
| m3wrapretvar | ||
| m3wrapretconv | ||
| m3wrapretcheck | ||
| m3wrapfreearg | M3toC.FreeSharedS(str,arg1); | Free resources that were temporarily used in the wrapper. Since this step should never be skipped, SWIG will put it in the FINALLY branch of a TRY .. FINALLY structure. |
Subranges, enumerations, and sets are machine oriented types that make Modula very strong and expressive compared with the type systems of many other languages.
Using them extensively makes Modula code very safe and readable.
C supports enumerations, too, but they are not as safe as the ones of Modula. Thus they are abused for many things: For named choices, for integer constant definitions, for sets. To make it complete every way of defining a value in C (#define, const int, enum) is somewhere used for defining something that must be handled completely different in Modula-3 (INTEGER, enumeration, SET).
I played around with several %features and %pragma s that split the task up into converting the C bit patterns (integer or bit set) into Modula-3 bit patterns (integer or bit set) and change the type as requested. See the corresponding example in the Examples/modula3/enum/example.i file. This is quite messy and not satisfying. So the best what you can currently do is to rewrite constant definitions manually. Though this is a tedious work that I'd like to automate.
Declarations of C++ classes are mapped to OBJECT types while it is tried to retain the access hierarchy "public - protected - private" using partial revelation. Though the example in Examples/modula3/class/example.i is not really useful, yet.
Pieces of Modula-3 code provided by typemaps may contain identifiers from foreign modules. If the typemap m3wrapinconv for blah * contains code using the function M3toC.SharedTtoS you may declare %typemap("m3wrapinconv:import") blah * %{M3toC%}. Then the module M3toC is imported if the m3wrapinconv typemap for blah * is used at least once. Use %typemap("m3wrapinconv:import") blah * %{MyConversions AS M3toC%} if you need module renaming. Unqualified import is not supported.
It is cumbersome to add this typemap to each piece of Modula-3 code. It is especially useful when writing general typemaps for the modula3.swg typemap library. For a monolithic module you might be better off if you add the imports directly:
%insert(m3rawintf) %{
IMPORT M3toC;
%}
Modula-3 provides another possibility of an output of a function: exceptions.
Any piece of Modula-3 code that SWIG inserts due to a typemap can raise an exception. This way you can also convert an error code from a C function into a Modula-3 exception.
The RAISES clause is controlled by typemaps with the throws extension. If the typemap m3wrapinconv for blah * contains code that may raise the exceptions OSError.E you should declare %typemap("m3wrapinconv:throws") blah * %{OSError.E%}.
The generation of wrappers in Modula-3 needs very fine control to take advantage of the language features. Here is an example of a generated wrapper where almost everything is generated by a typemap:
(* %relabel m3wrapinmode m3wrapinname m3wrapintype m3wrapindefault *)
PROCEDURE Name (READONLY str : TEXT := "" )
(* m3wrapoutcheck:throws *)
: NameResult RAISES {E} =
CONST
arg1name = "str"; (* m3wrapargconst *)
VAR
arg0 : C.char_star; (* m3wrapretvar *)
arg1 : C.char_star; (* m3wrapargvar *)
arg2 : C.int;
result : RECORD
(*m3wrapretname m3wraprettype*)
unixPath : TEXT;
(*m3wrapoutname m3wrapouttype*)
checksum : CARDINAL;
END;
BEGIN
TRY
arg1 := M3toC.SharedTtoS(str); (* m3wrapinconv *)
IF Text.Length(arg1) > 10 THEN (* m3wrapincheck *)
RAISE E("str too long");
END;
(* m3wrapretraw m3wrapargraw *)
arg0 := MessyToUnix (arg1, arg2);
result.unixPath := M3toC.CopyStoT(arg0); (* m3wrapretconv *)
result.checksum := arg2; (* m3wrapoutconv *)
IF result.checksum = 0 THEN (* m3wrapoutcheck *)
RAISE E("invalid checksum");
END;
FINALLY
M3toC.FreeSharedS(str,arg1); (* m3wrapfreearg *)
END;
END Name;
| Feature | Example | Description |
|---|---|---|
| multiretval | %m3multiretval get_box; or %feature("modula3:multiretval") get_box; | Let the denoted function return a RECORD rather than a plain value. This RECORD contains all arguments with "out" direction including the return value of the C function (if there is one). If more than one argument is "out" then the function must have the multiretval feature activated, but it is explicitly requested from the user to prevent mistakes. |
| constnumeric | %constnumeric(12) twelve; or %feature("constnumeric","12") twelve; | This feature can be used to tell Modula-3's back-end of SWIG the value of an identifier. This is necessary in the cases where it was defined by a non-trivial C expression. This feature is used by the -generateconst option. In future it may be generalized to other kind of values such as strings. |
| Pragma | Example | Description |
|---|---|---|
| unsafe | %pragma(modula3) unsafe="true"; | Mark the raw interface modules as UNSAFE. This will be necessary in many cases. |
| library | %pragma(modula3) library="m3fftw"; | Specifies the library name for the wrapper library to be created. It should be distinct from the name of the library to be wrapped. |
This section contains information on SWIG's support of Racket, formally known as MzScheme.
Example interface file:
/* define a macro for the struct creation */
%define handle_ptr(TYPE,NAME)
%typemap(argout) TYPE *NAME{
Scheme_Object *o = SWIG_NewStructFromPtr($1, $*1_mangle);
SWIG_APPEND_VALUE(o);
}
%typemap(in,numinputs=0) TYPE *NAME (TYPE temp) {
$1 = &temp;
}
%enddef
/* setup the typemaps for the pointer to an output parameter cntrs */
handle_ptr(struct diag_cntrs, cntrs);
Then in scheme, you can use regular struct access procedures like
; suppose a function created a struct foo as ; (define foo (make-diag-cntrs (#x1 #x2 #x3) (make-inspector)) ; Then you can do (format "0x~x" (diag-cntrs-field1 foo)) (format "0x~x" (diag-cntrs-field2 foo)) ;etc...
A few examples are available in the Examples/mzscheme directory. The code and log of a session using SWIG below should help getting started.
C header file:
// example.h int fact(int n);
C source code:
// File: example.c
#include "example.h"
int fact(int n) {
if (n < 0) { /* This should probably return an error, but this is simpler */
return 0;
}
if (n == 0) {
return 1;
}
else {
/* testing for overflow would be a good idea here */
return n * fact(n-1);
}
}
SWIG interface file:
/* File: example.i */
%module example
%{
#include "example.h"
%}
int fact(int n);
The session below using the above files is on an OS X machine, but the points to be made are more general. On OS X, libtool is the tool which creates libraries, which are named .dylib, rather than .so on other unixes, or .dll on Windows.
% swig -mzscheme -declaremodule example.i % gcc -c -m32 -o example.o example.c # force 32-bit object file (mzscheme is 32-bit only) % libtool -dynamic -o libexample.dylib example.o # make it into a library % ls # what've we got so far? example.c example.o example.h example_wrap.c example.i libexample.dylib* % mzc --cgc --cc example_wrap.c # compile the wrapping code % LDFLAGS="-L. -lexample" mzc --ld example_wrap.dylib example_wrap.o # ...and link it % mzscheme -e '(path->string (build-path "compiled" "native" (system-library-subpath)))' "compiled/native/i386-macosx/3m" % mkdir -p compiled/native/i386-macosx/3m # move the extension library to a magic place % mv example_wrap.dylib compiled/native/i386-macosx/3m/example_ss.dylib % mzscheme Welcome to MzScheme v4.2.4 [3m], Copyright (c) 2004-2010 PLT Scheme Inc. > (require "example.ss") > (fact 5) 120 > ^D % echo 'It works!'
Some points of interest:
See the C API for more description of using the mechanism for adding extensions. The main documentation is here.
Tip: mzc's --vv option is very useful for debugging the inevitable library problems you'll encounter.
This chapter describes SWIG's support of Ocaml. Ocaml is a relatively recent addition to the ML family, and is a recent addition to SWIG. It's the second compiled, typed language to be added. Ocaml has widely acknowledged benefits for engineers, mostly derived from a sophisticated type system, compile-time checking which eliminates several classes of common programming errors, and good native performance. While all of this is wonderful, there are well-written C and C++ libraries that Ocaml users will want to take advantage of as part of their arsenal (such as SSL and gdbm), as well as their own mature C and C++ code. SWIG allows this code to be used in a natural, type-safe way with Ocaml, by providing the necessary, but repetitive glue code which creates and uses Ocaml values to communicate with C and C++ code. In addition, SWIG also produces the needed Ocaml source that binds variants, functions, classes, etc.
If you're not familiar with the Objective Caml language, you can visit The Ocaml Website.
SWIG 1.3 works with Ocaml 3.04 and above. Given the choice, you should use the latest stable release. The SWIG Ocaml module has been tested on Linux (x86,PPC,Sparc) and Cygwin on Windows. The best way to determine whether your system will work is to compile the examples and test-suite which come with SWIG. You can do this by running make check from the SWIG root directory after installing SWIG. The Ocaml module has been tested using the system's dynamic linking (the usual -lxxx against libxxx.so, as well as with Gerd Stolpmann's Dl package . The ocaml_dynamic and ocaml_dynamic_cpp targets in the file Examples/Makefile illustrate how to compile and link SWIG modules that will be loaded dynamically. This has only been tested on Linux so far.
The basics of getting a SWIG Ocaml module up and running can be seen from one of SWIG's example Makefiles, but is also described here. To build an Ocaml module, run SWIG using the -ocaml option.
%swig -ocaml example.i
This will produce 3 files. The file example_wrap.c contains all of the C code needed to build an Ocaml module. To build the module, you will compile the file example_wrap.c with ocamlc or ocamlopt to create the needed .o file. You will need to compile the resulting .ml and .mli files as well, and do the final link with -custom (not needed for native link).
The OCaml SWIG module now requires you to compile a module (Swig ) separately. In addition to aggregating common SWIG functionality, the Swig module contains the data structure that represents C/C++ values. This allows easier data sharing between modules if two or more are combined, because the type of each SWIG'ed module's c_obj is derived from Swig.c_obj_t. This also allows SWIG to acquire new conversions painlessly, as well as giving the user more freedom with respect to custom typing. Use ocamlc or ocamlopt to compile your SWIG interface like:
% swig -ocaml -co swig.mli ; swig -ocaml co swig.ml % ocamlc -c swig.mli ; ocamlc -c swig.ml % ocamlc -c -ccopt "-I/usr/include/foo" example_wrap.c % ocamlc -c example.mli % ocamlc -c example.ml
ocamlc is aware of .c files and knows how to handle them. Unfortunately, it does not know about .cxx, .cc, or .cpp files, so when SWIG is invoked in C++ mode, you must:
% cp example_wrap.cxx example_wrap.cxx.c
% ocamlc -c ... -ccopt -xc++ example_wrap.cxx.c
% ...
The camlp4 module (swigp4.ml -> swigp4.cmo) contains a simple rewriter which makes C++ code blend more seamlessly with objective caml code. It's use is optional, but encouraged. The source file is included in the Lib/ocaml directory of the SWIG source distribution. You can checkout this file with "swig -ocaml -co swigp4.ml". You should compile the file with "ocamlc -I `camlp4 -where` -pp 'camlp4o pa_extend.cmo q_MLast.cmo' -c swigp4.ml"
The basic principle of the module is to recognize certain non-caml expressions and convert them for use with C++ code as interfaced by SWIG. The camlp4 module is written to work with generated SWIG interfaces, and probably isn't great to use with anything else.
Here are the main rewriting rules:
| Input | Rewritten to | |
|---|---|---|
| f'( ... ) as in
atoi'("0") or _exit'(0) | f(C_list [ ... ]) as in
atoi (C_list [ C_string "0" ]) or _exit (C_list [ C_int 0 ]) | |
| object -> method ( ... ) | (invoke object) "method" (C_list [ ... ]) | |
| object 'binop argument as in
a '+= b | (invoke object) "+=" argument as in
(invoke a) "+=" b | |
| Note that because camlp4 always recognizes << and >>, they are replaced by lsl and lsr in operator names. | ||
| 'unop object as in
'! a | (invoke a) "!" C_void | |
| Smart pointer access like this
object '-> method ( args ) | (invoke (invoke object "->" C_void)) | |
| Invoke syntax
object . '( ... ) | (invoke object) "()" (C_list [ ... ]) | |
| Array syntax
object '[ 10 ] | (invoke object) "[]" (C_int 10) | |
| Assignment syntax
let a = '10 and b = '"foo" and c = '1.0 and d = 'true | let a = C_int 10 and b = C_string "foo" and c = C_double 1.0 and d = C_bool true | |
| Cast syntax
let a = _atoi '("2") as int let b = (getenv "PATH") to string This works for int, string, float, bool | let a = get_int
(_atoi (C_string "2"))
let b = C_string (getenv "PATH") | |
You can test-drive your module by building a toplevel ocaml interpreter. Consult the ocaml manual for details.
When linking any ocaml bytecode with your module, use the -custom option to build your functions into the primitive list. This option is not needed when you build native code.
As mentioned above, .cxx files need special handling to be compiled with ocamlc. Other than that, C code that uses class as a non-keyword, and C code that is too liberal with pointer types may not compile under the C++ compiler. Most code meant to be compiled as C++ will not have problems.
In order to provide access to overloaded functions, and provide sensible outputs from them, all C entities are represented as members of the c_obj type:
In the code as seen by the typemap writer, there is a value,
swig_result, that always contains the current return data. It is a
list, and must be appended with the caml_list_append function, or with
functions and macros provided by objective caml.
type c_obj =
C_void
| C_bool of bool
| C_char of char
| C_uchar of char
| C_short of int
| C_ushort of int
| C_int of int
| C_uint of int32
| C_int32 of int32
| C_int64 of int64
| C_float of float
| C_double of float
| C_ptr of int64 * int64
| C_array of c_obj array
| C_list of c_obj list
| C_obj of (string -> c_obj -> c_obj)
| C_string of string
| C_enum of c_enum_t
A few functions exist which generate and return these:
Because of this style, a typemap can return any kind of value it wants from a function. This enables out typemaps and inout typemaps to work well. The one thing to remember about outputting values is that you must append them to the return list with swig_result = caml_list_append(swig_result,v).
This function will return a new list that has your element appended. Upon return to caml space, the fnhelper function beautifies the result. A list containing a single item degrades to only that item (i.e. [ C_int 3 ] -> C_int 3), and a list containing more than one item is wrapped in C_list (i.e. [ C_char 'a' ; C_char 'b' -> C_list [ C_char 'a' ; C_char b ]). This is in order to make return values easier to handle when functions have only one return value, such as constructors, and operators. In addition, string, pointer, and object values are interchangeable with respect to caml_ptr_val, so you can allocate memory as caml strings and still use the resulting pointers for C purposes, even using them to construct simple objects on. Note, though, that foreign C++ code does not respect the garbage collector, although the SWIG interface does.
The wild card type that you can use in lots of different ways is C_obj. It allows you to wrap any type of thing you like as an object using the same mechanism that the ocaml module does. When evaluated in caml_ptr_val, the returned value is the result of a call to the object's "&" operator, taken as a pointer.
You should only construct values using objective caml, or using the functions caml_val_* functions provided as static functions to a SWIG ocaml module, as well as the caml_list_* functions. These functions provide everything a typemap needs to produce values. In addition, value items pass through directly, but you must make your own type signature for a function that uses value in this way.
The SWIG %module directive specifies the name of the Ocaml module to be generated. If you specified `%module example', then your Ocaml code will be accessible in the module Example. The module name is always capitalized as is the ocaml convention. Note that you must not use any Ocaml keyword to name your module. Remember that the keywords are not the same as the C++ ones.
You can introduce extra code into the output wherever you like with SWIG. These are the places you can introduce code:
| "header" | This code is inserted near the beginning of the C wrapper file, before any function definitions. |
| "wrapper" | This code is inserted in the function definition section. |
| "runtime" | This code is inserted near the end of the C wrapper file. |
| "mli" | This code is inserted into the caml interface file. Special signatures should be inserted here. |
| "ml" | This code is inserted in the caml code defining the interface to your C code. Special caml code, as well as any initialization which should run when the module is loaded may be inserted here. |
| "classtemplate" | The "classtemplate" place is special because it describes the output SWIG will generate for class definitions. |
SWIG will wrap enumerations as polymorphic variants in the output Ocaml code, as above in C_enum. In order to support all C++-style uses of enums, the function int_to_enum and enum_to_int are provided for ocaml code to produce and consume these values as integers. Other than that, correct uses of enums will not have a problem. Since enum labels may overlap between enums, the enum_to_int and int_to_enum functions take an enum type label as an argument. Example:
%module enum_test
%{
enum c_enum_type { a = 1, b, c = 4, d = 8 };
%}
enum c_enum_type { a = 1, b, c = 4, d = 8 };
The output mli contains:
type c_enum_type = [ `unknown | `c_enum_type ] type c_enum_tag = [ `int of int | `a | `b | `c | `d ] val int_to_enum c_enum_type -> int -> c_obj val enum_to_int c_enum_type -> c_obj -> c_obj
So it's possible to do this:
bash-2.05a$ ocamlmktop -custom enum_test_wrap.o enum_test.cmo -o enum_test_top
bash-2.05a$ ./enum_test_top
Objective Caml version 3.04
# open Enum_test ;;
# let x = C_enum `a ;;
val x : Enum_test.c_obj = C_enum `a
# enum_to_int `c_enum_type x ;;
- : Enum_test.c_obj = C_int 1
# int_to_enum `c_enum_type 4 ;;
- : Enum_test.c_obj = C_enum `c
The ocaml SWIG module now has support for loading and using multiple SWIG modules at the same time. This enhances modularity, but presents problems when used with a language which assumes that each module's types are complete at compile time. In order to achieve total soundness enum types are now isolated per-module. The type issue matters when values are shared between functions imported from different modules. You must convert values to master values using the swig_val function before sharing them with another module.
SWIG has support for array types, but you generally will need to provide a typemap to handle them. You can currently roll your own, or expand some of the macros provided (but not included by default) with the SWIG distribution.
By including "carray.i", you will get access to some macros that help you create typemaps for array types fairly easily.
%make_simple_array_typemap is the easiest way to get access to arrays of simple types with known bounds in your code, but this only works for arrays whose bounds are completely specified.
Unfortunately, unbounded arrays and pointers can't be handled in a completely general way by SWIG, because the end-condition of such an array can't be predicted. In some cases, it will be by consent (e.g. an array of four or more chars), sometimes by explicit length (char *buffer, int len), and sometimes by sentinel value (0,-1,etc.). SWIG can't predict which of these methods will be used in the array, so you have to specify it for yourself in the form of a typemap.
It's possible to use C++ to your advantage by creating a simple object that provides access to your array. This may be more desirable in some cases, since the object can provide bounds checking, etc., that prevents crashes.
Consider writing an object when the ending condition of your array is complex, such as using a required sentinel, etc.
This is a simple example in typemap for an array of float, where the length of the array is specified as an extra parameter. Other such typemaps will work similarly. In the example, the function printfloats is called with a float array, and specified length. The actual length reported in the len argument is the length of the array passed from ocaml, making passing an array into this type of function convenient.
|
|
|---|
%module tarray
%{
#include <stdio.h>
void printfloats( float *tab, int len ) {
int i;
for( i = 0; i < len; i++ ) {
printf( "%f ", tab[i] );
}
printf( "\n" );
}
%}
%typemap(in) (float *tab, int len) {
int i;
/* $*1_type */
$2 = caml_array_len($input);
$1 = ($*1_type *)malloc( $2 * sizeof( float ) );
for( i = 0; i < $2; i++ ) {
$1[i] = caml_double_val(caml_array_nth($input,i));
}
}
void printfloats( float *tab, int len );
|
| Sample Run |
# open Tarray ;; # _printfloats (C_array [| C_double 1.0 ; C_double 3.0 ; C_double 5.6666 |]) ;; 1.000000 3.000000 5.666600 - : Tarray.c_obj = C_void |
C++ classes, along with structs and unions are represented by C_obj (string -> c_obj -> c_obj) wrapped closures. These objects contain a method list, and a type, which allow them to be used like C++ objects. When passed into typemaps that use pointers, they degrade to pointers through their "&" method. Every method an object has is represented as a string in the object's method table, and each method table exists in memory only once. In addition to any other operators an object might have, certain builtin ones are provided by SWIG: (all of these take no arguments (C_void))
| "~" | Delete this object |
| "&" | Return an ordinary C_ptr value representing this object's address |
| "sizeof" | If enabled with ("sizeof"="1") on the module node, return the object's size in char. |
| ":methods" | Returns a list of strings containing the names of the methods this object contains |
| ":classof" | Returns the name of the class this object belongs to. |
| ":parents" | Returns a list of all direct parent classes which have been wrapped by SWIG. |
| "::[parent-class]" | Returns a view of the object as the indicated parent class. This is mainly used internally by the SWIG module, but may be useful to client programs. |
| "[member-variable]" | Each member variable is wrapped as a method with an optional parameter. Called with one argument, the member variable is set to the value of the argument. With zero arguments, the value is returned. |
Note that this string belongs to the wrapper object, and not the underlying pointer, so using create_[x]_from_ptr alters the returned value for the same object.
Standard typemaps are now provided for STL vector and string. More are in the works. STL strings are passed just like normal strings, and returned as strings. STL string references don't mutate the original string, (which might be surprising), because Ocaml strings are mutable but have fixed length. Instead, use multiple returns, as in the argout_ref example.
|
|
|---|
%module example
%{
#include "example.h"
%}
%include <stl.i>
namespace std {
%template(StringVector) std::vector < string >;
};
%include "example.h"
|
| This example is in Examples/ocaml/stl |
Since there's a makefile in that directory, the example is easy to build.
Here's a sample transcript of an interactive session using a string vector after making a toplevel (make toplevel). This example uses the camlp4 module.
bash-2.05a$ ./example_top
Objective Caml version 3.06
Camlp4 Parsing version 3.06
# open Swig ;;
# open Example ;;
# let x = new_StringVector '() ;;
val x : Example.c_obj = C_obj <fun>
# x -> ":methods" () ;;
- : Example.c_obj =
C_list
[C_string "nop"; C_string "size"; C_string "empty"; C_string "clear";
C_string "push_back"; C_string "[]"; C_string "="; C_string "set";
C_string "~"; C_string "&"; C_string ":parents"; C_string ":classof";
C_string ":methods"]
# x -> push_back ("foo") ;;
- : Example.c_obj = C_void
# x -> push_back ("bar") ;;
- : Example.c_obj = C_void
# x -> push_back ("baz") ;;
- : Example.c_obj = C_void
# x '[1] ;;
- : Example.c_obj = C_string "bar"
# x -> set (1,"spam") ;;
- : Example.c_obj = C_void
# x '[1] ;;
- : Example.c_obj = C_string "spam"
# for i = 0 to (x -> size() as int) - 1 do
print_endline ((x '[i to int]) as string)
done ;;
foo
bar
baz
- : unit = ()
#
Here's a simple example using Trolltech's Qt Library:
|
|
|---|
%module qt
%{
#include <qapplication.h>
#include <qpushbutton.h>
%}
class QApplication {
public:
QApplication( int argc, char **argv );
void setMainWidget( QWidget *widget );
void exec();
};
class QPushButton {
public:
QPushButton( char *str, QWidget *w );
void resize( int x, int y );
void show();
};
|
bash-2.05a$ QTPATH=/your/qt/path bash-2.05a$ for file in swig.mli swig.ml swigp4.ml ; do swig -ocaml -co $file ; done bash-2.05a$ ocamlc -c swig.mli ; ocamlc -c swig.ml bash-2.05a$ ocamlc -I `camlp4 -where` -pp "camlp4o pa_extend.cmo q_MLast.cmo" -c swigp4.ml bash-2.05a$ swig -ocaml -c++ -I$QTPATH/include qt.i bash-2.05a$ mv qt_wrap.cxx qt_wrap.c bash-2.05a$ ocamlc -c -ccopt -xc++ -ccopt -g -g -ccopt -I$QTPATH/include qt_wrap.c bash-2.05a$ ocamlc -c qt.mli bash-2.05a$ ocamlc -c qt.ml bash-2.05a$ ocamlmktop -custom swig.cmo -I `camlp4 -where` \ camlp4o.cma swigp4.cmo qt_wrap.o qt.cmo -o qt_top -cclib \ -L$QTPATH/lib -cclib -lqt
bash-2.05a$ ./qt_top
Objective Caml version 3.06
Camlp4 Parsing version 3.06
# open Swig ;;
# open Qt ;;
# let a = new_QApplication '(0,0) ;;
val a : Qt.c_obj = C_obj <fun>
# let hello = new_QPushButton '("hi",0) ;;
val hello : Qt.c_obj = C_obj <fun>
# hello -> resize (100,30) ;;
- : Qt.c_obj = C_void
# hello -> show () ;;
- : Qt.c_obj = C_void
# a -> exec () ;;
Assuming you have a working installation of QT, you will see a window containing the string "hi" in a button.
Director classes are classes which allow Ocaml code to override the public methods of a C++ object. This facility allows the user to use C++ libraries that require a derived class to provide application specific functionality in the context of an application or utility framework.
You can turn on director classes by using an optional module argument like this:
%module(directors="1")
...
// Turn on the director class for a specific class like this:
%feature("director")
class foo {
...
};
Because the Ocaml language module treats C++ method calls as calls to a certain function, all you need to do is to define the function that will handle the method calls in terms of the public methods of the object, and any other relevant information. The function new_derived_object uses a stub class to call your methods in place of the ones provided by the underlying implementation. The object you receive is the underlying object, so you are free to call any methods you want from within your derived method. Note that calls to the underlying object do not invoke Ocaml code. You need to handle that yourself.
new_derived_object receives your function, the function that creates the underlying object, and any constructor arguments, and provides an object that you can use in any usual way. When C++ code calls one of the object's methods, the object invokes the Ocaml function as if it had been invoked from Ocaml, allowing any method definitions to override the C++ ones.
In this example, I'll examine the objective caml code involved in providing an overloaded class. This example is contained in Examples/ocaml/shapes.
|
|
|---|
open Swig
open Example
...
let triangle_class pts ob meth args =
match meth with
"cover" ->
(match args with
C_list [ x_arg ; y_arg ] ->
let xa = x_arg as float
and ya = y_arg as float in
(point_in_triangle pts xa ya) to bool
| _ -> raise (Failure "cover needs two double arguments."))
| _ -> (invoke ob) meth args ;;
let triangle =
new_derived_object
new_shape
(triangle_class ((0.0,0.0),(0.5,1.0),(1.0,0.0)))
'() ;;
let _ = _draw_shape_coverage '(triangle, C_int 60, C_int 20) ;;
|
This is the meat of what you need to do. The actual "class" definition containing the overloaded method is defined in the function triangle_class. This is a lot like the class definitions emitted by SWIG, if you look at example.ml, which is generated when SWIG consumes example.i. Basically, you are given the arguments as a c_obj and the method name as a string, and you must intercept the method you are interested in and provide whatever return value you need. Bear in mind that the underlying C++ code needs the right return type, or an exception will be thrown. This exception will generally be Failure, or NotObject. You must call other ocaml methods that you rely on yourself. Due to the way directors are implemented, method calls on your object from with ocaml code will always invoke C++ methods even if they are overridden in ocaml.
In the example, the draw_shape_coverage function plots the indicated number of points as either covered (x) or uncovered ( ) between 0 and 1 on the X and Y axes. Your shape implementation can provide any coverage map it likes, as long as it responds to the "cover" method call with a boolean return (the underlying method returns bool). This might allow a tricky shape implementation, such as a boolean combination, to be expressed in a more effortless style in ocaml, while leaving the "engine" part of the program in C++.
The definition of the actual object triangle can be described this way:
let triangle =
new_derived_object
new_shape
(triangle_class ((0.0,0.0),(0.5,1.0),(1.0,0.0)))
'()
The first argument to new_derived_object, new_shape is the method which returns a shape instance. This function will be invoked with the third argument will be appended to the argument list [ C_void ]. In the example, the actual argument list is sent as (C_list [ C_void ; C_void ]). The augmented constructor for a director class needs the first argument to determine whether it is being constructed as a derived object, or as an object of the indicated type only (in this case shape). The Second argument is a closure that will be added to the final C_obj.
The actual object passed to the self parameter of the director object will be a C_director_core, containing a c_obj option ref and a c_obj. The c_obj provided is the same object that will be returned from new_derived object, that is, the object exposing the overridden methods. The other part is an option ref that will have its value extracted before becoming the ob parameter of your class closure. This ref will contain None if the C++ object underlying is ever destroyed, and will consequently trigger an exception when any method is called on the object after that point (the actual raise is from an inner function used by new_derived_object, and throws NotObject). This prevents a deleted C++ object from causing a core dump, as long as the object is destroyed properly.
Special typemaps exist for use with directors, the directorin, directorout, directorargout are used in place of in, out, argout typemaps, except that their direction is reversed. They provide for you to provide argout values, as well as a function return value in the same way you provide function arguments, and to receive arguments the same way you normally receive function returns.
The directorin typemap is used when you will receive arguments from a call made by C++ code to you, therefore, values will be translated from C++ to ocaml. You must provide some valid C_obj value. This is the value your ocaml code receives when you are called. In general, a simple directorin typemap can use the same body as a simple out typemap.
The directorout typemap is used when you will send an argument from your code back to the C++ caller. That is; directorout specifies a function return conversion. You can usually use the same body as an in typemap for the same type, except when there are special requirements for object ownership, etc.
C++ allows function arguments which are by pointer (*) and by reference (&) to receive a value from the called function, as well as sending one there. Sometimes, this is the main purpose of the argument given. directorargout typemaps allow your caml code to emulate this by specifying additional return values to be put into the output parameters. The SWIG ocaml module is a bit loose in order to make code easier to write. In this case, your return to the caller must be a list containing the normal function return first, followed by any argout values in order. These argout values will be taken from the list and assigned to the values to be returned to C++ through directorargout typemaps. In the event that you don't specify all of the necessary values, integral values will read zero, and struct or object returns have undefined results.
Catching exceptions is now supported using SWIG's %exception feature. A simple but not too useful example is provided by the throw_exception testcase in Examples/test-suite. You can provide your own exceptions, too.
Octave is a high-level language intended for numerical programming that is mostly compatible with MATLAB. More information can be found at Octave web site.
This chapter is intended to give an introduction to using the module. You should also read the SWIG documentation that is not specific to Octave. Also, there are a dozen or so examples in the Examples/octave directory, and hundreds in the test suite (Examples/test-suite and Examples/test-suite/octave).
As of SWIG 3.0.0, the Octave module has been tested with Octave versions 3.0.5, 3.2.4, 3.4.3, 3.6.4, and 3.8.0. Use of Octave versions older than 3.x.x is not recommended, as these versions are no longer tested with SWIG.
Let's start with a very simple SWIG interface file, example.i:
%module swigexample
%{
#include "example.h"
%}
int gcd(int x, int y);
extern double Foo;
To build an Octave module when wrapping C code, run SWIG using the -octave option:
$ swig -octave -o example_wrap.cpp example.i
The -c++ option is also required when wrapping C++ code:
$ swig -octave -c++ -o example_wrap.cpp example.i
This creates a C++ source file "example_wrap.cpp". A C++ file is generated even when wrapping C code as Octave is itself written in C++ and requires wrapper code to be in the same language. The generated C++ source file contains the low-level wrappers that need to be compiled and linked with the rest of your C/C++ application (in this case, the gcd implementation) to create an extension module.
The swig command line has a number of options you can use, like to redirect its output. Use swig -help to learn about these. Options specific to the Octave module are:
$ swig -octave -help
...
Octave Options (available with -octave)
-globals name - Set name used to access C global variables [default: 'cvar']
Use '.' to load C global variables into module namespace
-opprefix str - Prefix str for global operator functions [default: 'op_']
The -globals option sets the name of the variable which is the namespace for C global variables exported by the module. The special name "." loads C global variables into the module namespace, i.e. alongside C functions and structs exported by the module. The -opprefix options sets the prefix of the names of global/friend operator functions.
Octave modules are DLLs/shared objects having the ".oct" suffix. Building an oct file is usually done with the mkoctfile command (either within Octave itself, or from the shell). For example,
$ swig -octave -c++ -o example_wrap.cpp example.i $ mkoctfile example_wrap.cpp example.c
where "example.c" is the file containing the gcd() implementation.
mkoctfile can also be used to extract the build parameters required to invoke the compiler and linker yourself. See the Octave manual and mkoctfile man page.
mkoctfile will produce "swigexample.oct", which contains the compiled extension module. Loading it into Octave is then a matter of invoking
octave:1> swigexample
Assuming all goes well, you will be able to do this:
$ octave -q octave:1> swigexample octave:2> swigexample.gcd(4,6) ans = 2 octave:3> swigexample.cvar.Foo ans = 3 octave:4> swigexample.cvar.Foo=4; octave:5> swigexample.cvar.Foo ans = 4
The SWIG module directive specifies the name of the Octave module. If you specify "module swigexample", then in Octave everything in the module will be accessible under "swigexample", as in the above example. When choosing a module name, make sure you don't use the same name as a built-in Octave command or standard module name.
When Octave is asked to invoke swigexample, it will try to find the ".m" or ".oct" file that defines the function "swigexample". You therefore need to make sure that "swigexample.oct" is in Octave's search path, which can be specified with the environment variable "OCTAVE_PATH".
To load an Octave module, simply type its name:
octave:1> swigexample; octave:2> gcd(4,6) ans = 2 octave:3> cvar.Foo ans = 3 octave:4> cvar.Foo=4; octave:5> cvar.Foo ans = 4
Modules can also be loaded from within functions, even before being loaded in the base context. If the module is also used in the base context, however, it must first be loaded again:
octave:1> function l = my_lcm(a,b) > swigexample > l = abs(a*b)/swigexample.gcd(a,b); > endfunction octave:2> my_lcm(4,6) ans = 12 octave:3> swigexample.gcd(4,6) error: can't perform indexing operations for <unknown type> type octave:3> swigexample; octave:4> swigexample.gcd(4,6) ans = 2
Global functions are wrapped as new Octave built-in functions. For example,
%module swigexample int fact(int n);
creates a built-in function swigexample.fact(n) that works exactly like you think it does:
octave:1> swigexample.fact(4) 24
Global variables are a little special in Octave. Given a global variable:
%module swigexample extern double Foo;
To expose variables, SWIG actually generates two functions, to get and set the value. In this case, Foo_set and Foo_set would be generated. SWIG then automatically calls these functions when you get and set the variable-- in the former case creating a local copy in the interpreter of the C variables, and in the latter case copying an interpreter variables onto the C variable.
octave:1> swigexample; octave:2> c=swigexample.cvar.Foo c = 3 octave:3> swigexample.cvar.Foo=4; octave:4> c c = 3 octave:5> swigexample.cvar.Foo ans = 4
If a variable is marked with the %immutable directive then any attempts to set this variable will cause an Octave error. Given a global variable:
%module swigexample %immutable; extern double Foo; %mutable;
SWIG will allow the reading of Foo but when a set attempt is made, an error function will be called.
octave:1> swigexample octave:2> swigexample.Foo=4 error: attempt to set immutable member variable error: assignment failed, or no method for `swig_type = scalar' error: evaluating assignment expression near line 2, column 12
It is possible to add new functions or variables to the module. This also allows the user to rename/remove existing functions and constants (but not linked variables, mutable or immutable). Therefore users are recommended to be careful when doing so.
octave:1> swigexample; octave:2> swigexample.PI=3.142; octave:3> swigexample.PI ans = 3.1420
Because Octave doesn't really have the concept of constants, C/C++ constants are not really constant in Octave. They are actually just a copy of the value into the Octave interpreter. Therefore they can be changed just as any other value. For example given some constants:
%module swigexample
%constant int ICONST=42;
#define SCONST "Hello World"
enum Days{SUNDAY,MONDAY,TUESDAY,WEDNESDAY,THURSDAY,FRIDAY,SATURDAY};
This is 'effectively' converted into the following Octave code:
swigexample.ICONST=42 swigexample.SCONST="Hello World" swigexample.SUNDAY=0 ....
C/C++ pointers are fully supported by SWIG. Furthermore, SWIG has no problem working with incomplete type information. Given a wrapping of the <file.h> interface: C/C++ pointers are fully supported by SWIG. Furthermore, SWIG has no problem working with incomplete type information. Given a wrapping of the <file.h> interface:
%module swigexample FILE *fopen(const char *filename, const char *mode); int fputs(const char *, FILE *); int fclose(FILE *);
When wrapped, you will be able to use the functions in a natural way from Octave. For example:
octave:1> swigexample;
octave:2> f=swigexample.fopen("w","junk");
octave:3> swigexample.fputs("Hello world",f);
octave:4> swigexample.fclose(f);
Simply printing the value of a wrapped C++ type will print it's typename. E.g.,
octave:1> swigexample;
octave:2> f=swigexample.fopen("junk","w");
octave:3> f
f =
{
_p_FILE, ptr = 0x9b0cd00
}
As the user of the pointer, you are responsible for freeing it, or closing any resources associated with it (just as you would in a C program). This does not apply so strictly to classes and structs (see below).
octave:1> swigexample;
octave:2> f=swigexample.fopen("not there","r");
error: value on right hand side of assignment is undefined
error: evaluating assignment expression near line 2, column 2
SWIG wraps C structures and C++ classes by using a special Octave type called a swig_ref. A swig_ref contains a reference to one or more instances of C/C++ objects, or just the type information for an object. For each wrapped structure and class, a swig_ref will be exposed that has the name of the type. When invoked as a function, it creates a new object of its type and returns a swig_ref that points to that instance. This provides a very natural interface. For example,
struct Point{
int x,y;
};
is used as follows:
octave:1> swigexample; octave:2> p=swigexample.Point(); octave:3> p.x=3; octave:4> p.y=5; octave:5> p.x, p.y ans = 3 ans = 5
In C++, invoking the type object in this way calls the object's constructor. swig_ref objects can also be acquired by having a wrapped function return a pointer, reference, or value of a non-primitive type.
The swig_ref type handles indexing operations such that usage maps closely to what you would have in C/C++. Structure members are accessed as in the above example, by calling set and get methods for C++ variables. Methods also work as expected. For example, code wrapped in the following way
class Point{
public:
int x,y;
Point(int _x,int _y) : x(_x),y(_y) {}
double distance(const Point& rhs) {
return sqrt(pow(x-rhs.x,2)+pow(y-rhs.y,2));
}
void set(int _x,int _y) {
x=_x; y=_y;
}
};
can be used from Octave like this
octave:1> swigexample; octave:2> p1=swigexample.Point(3,5); octave:3> p2=swigexample.Point(1,2); octave:4> p1.distance(p2) ans = 3.6056
By using the swig_this() and swig_type() functions, one can discover the pointers to and types of the underlying C/C++ object.
octave:5> swig_this(p1) ans = 162504808 octave:6> swig_type(p1) ans = Point
Note that swig_ref is a reference-counted pointer to a C/C++ object/type, and as such has pass-by-reference semantics. For example if one has a allocated a single object but has two swig_ref 's pointing to it, modifying the object through either of them will change the single allocated object. This differs from the usual pass-by-value (copy-on-write) semantics that Octave maintains for built-in types. For example, in the following snippet, modifying b does not modify a,
octave:7> a=struct('x',4)
a =
{
x = 4
}
octave:8> b=a
b =
{
x = 4
}
octave:9> b.y=4
b =
{
x = 4
y = 4
}
octave:10> a
a =
{
x = 4
}
However, when dealing with wrapped objects, one gets the behavior
octave:2> a=Point(3,5)
a =
{
Point, ptr = 0x9afbbb0
}
octave:3> b=a
b =
{
Point, ptr = 0x9afbbb0
}
octave:4> b.set(2,1);
octave:5> b.x, b.y
ans = 2
ans = 1
octave:6> a.x, a.y
ans = 2
ans = 1
Depending on the ownership setting of a swig_ref, it may call C++ destructors when its reference count goes to zero. See the section on memory management below for details.
Single and multiple inheritance are fully supported. The swig_ref type carries type information along with any C++ object pointer it holds. This information contains the full class hierarchy. When an indexing operation (such as a method invocation) occurs, the tree is walked to find a match in the current class as well as any of its bases. The lookup is then cached in the swig_ref.
Overloaded functions are supported, and handled as in other modules. That is, each overload is wrapped separately (under internal names), and a dispatch function is also emitted under the external/visible name. The dispatch function selects which overload to call (if any) based on the passed arguments. typecheck typemaps are used to analyze each argument, as well as assign precedence. See the chapter on typemaps for details.
C++ operator overloading is supported, in a way similar to other modules. The swig_ref type supports all unary and binary operators between itself and all other types that exist in the system at module load time. When an operator is used (where one of the operands is a swig_ref), the runtime routes the call to either a member function of the given object, or to a global function whose named is derived from the types of the operands (either both or just the lhs or rhs).
For example, if a and b are SWIG variables in Octave, a+b becomes a.__add(b). The wrapper is then free to implement __add to do whatever it wants. A wrapper may define the __add function manually, %rename some other function to it, or %rename a C++ operator to it.
By default the C++ operators are renamed to their corresponding Octave operators. So without doing any work, the following interface
%inline {
struct A {
int value;
A(int _value) : value(_value) {}
A operator+ (const A& x) {
return A(value+x.value);
}
};
}
is usable from Octave like this:
a=A(2), b=A(3), c=a+b assert(c.value==5);
Octave operators are mapped in the following way:
__brace a{args}
__brace_asgn a{args} = rhs
__paren a(args)
__paren_asgn a(args) = rhs
__str generates string rep
__not !a
__uplus +a
__uminus -a
__transpose a.'
__hermitian a'
__incr a++
__decr a--
__add a + b
__sub a - b
__mul a * b
__div a / b
__pow a ^ b
__ldiv a \ b
__lshift a <<b
__rshift a >> b
__lt a <b
__le a <= b
__eq a == b
__ge a >= b
__gt a > b
__ne a != b
__el_mul a .* b
__el_div a ./ b
__el_pow a .^ b
__el_ldiv a .\ b
__el_and a & b
__el_or a | b
On the C++ side, the default mappings are as follows:
%rename(__add) *::operator+; %rename(__add) *::operator+(); %rename(__add) *::operator+() const; %rename(__sub) *::operator-; %rename(__uminus) *::operator-(); %rename(__uminus) *::operator-() const; %rename(__mul) *::operator*; %rename(__div) *::operator/; %rename(__mod) *::operator%; %rename(__lshift) *::operator< >; %rename(__el_and) *::operator&&; %rename(__el_or) *::operator||; %rename(__xor) *::operator^; %rename(__invert) *::operator~; %rename(__lt) *::operator ; %rename(__ge) *::operator>=; %rename(__eq) *::operator==; %rename(__ne) *::operator!=; %rename(__not) *::operator!; %rename(__incr) *::operator++; %rename(__decr) *::operator--; %rename(__paren) *::operator(); %rename(__brace) *::operator[];
Octave can also utilise friend (i.e. non-member) operators with a simple %rename: see the example in the Examples/octave/operator directory.
The %extend directive works the same as in other modules.
You can use it to define special behavior, like for example defining Octave operators not mapped to C++ operators, or defining certain Octave mechanisms such as how an object prints. For example, the octave_value::{is_string,string_value,print} functions are routed to a special method __str that can be defined inside an %extend.
%extend A {
string __str() {
stringstream sout;
sout<<$self->value;
return sout.str();
}
}
Then in Octave one gets,
octave:1> a=A(4);
octave:2> a
a = 4
octave:3> printf("%s\n",a);
4
octave:4> a.__str()
4
C++ class and function templates are fully supported as in other modules, in that the %template directive may used to create explicit instantiations of templated types. For example, function templates can be instantiated as follows:
%module swigexample
%inline {
template<class __scalar>
__scalar mul(__scalar a,__scalar b) {
return a*b;
}
}
%include <std_complex.i>
%template(mul) mul<std::complex<double> >
%template(mul) mul<double>
and then used from Octave
octave:1> mul(4,3) ans = 12 octave:2> mul(4.2,3.6) ans = 15.120 octave:3> mul(3+4i,10+2i) ans = 22 + 46i
Similarly, class templates can be instantiated as in the following example,
%module swigexample
%include <std_complex.i>
%include <std_string.i>
%inline {
#include <sstream>
template<class __scalar> class sum {
__scalar s;
public:
sum(__scalar _s=0) : s(_s) {}
sum& add(__scalar _s) {
s+=_s;
return *this;
}
std::string __str() const {
std::stringstream sout;
sout<<s;
return sout.str();
}
};
}
%template(sum_complex) sum<std::complex<double> >;
%template(sum_double) sum<double>;
and then used from Octave
octave:2> a=sum_complex(2+3i); octave:3> a.add(2) ans = (4,3) octave:4> a.add(3+i) ans = (7,4)
C++ smart pointers are fully supported as in other modules.
There is full support for SWIG Directors, which permits Octave code to subclass C++ classes, and implement their virtual methods.
Octave has no direct support for object oriented programming, however the swig_ref type provides some of this support. You can manufacture a swig_ref using the subclass function (provided by the SWIG/Octave runtime).
For example,
octave:1> a=subclass();
octave:2> a.my_var = 4;
octave:3> a.my_method = @(self) printf("my_var = ",self.my_var);
octave:4> a.my_method();
my_var = 4
subclass() can also be used to subclass one or more C++ types. Suppose you have an interface defined by
%inline {
class A {
public:
virtual my_method() {
printf("c-side routine called\n");
}
};
void call_your_method(A& a) {
a.my_method();
}
}
Then from Octave you can say:
octave:1> B=@() subclass(A(),@my_method);
octave:2> function my_method(self)
octave:3> printf("octave-side routine called\n");
octave:4> end
octave:5> call_your_method(B());
octave-side routine called
or more concisely,
octave:1> B=@() subclass(A(),'my_method',@(self) printf("octave-side routine called\n"));
octave:2> call_your_method(B());
octave-side routine called
Note that you have to enable directors via the %feature directive (see other modules for this).
subclass() will accept any number of C++ bases or other subclass()'ed objects, (string,octave_value) pairs, and function_handles. In the first case, these are taken as base classes; in the second case, as named members (either variables or functions, depending on whether the given value is a function handle); in the third case, as member functions whose name is taken from the given function handle. E.g.,
octave:1> B=@(some_var=2) subclass(A(),'some_var',some_var,@some_func,'another_func', @(self) do_stuff())
You can also assign non-C++ member variables and functions after construct time. There is no support for non-C++ static members.
There is limited support for explicitly referencing C++ bases. So, in the example above, we could have
octave:1> B=@() subclass(A(),@my_method);
octave:2> function my_method(self)
octave:3> self.A.my_method();
octave:4> printf("octave-side routine called\n");
octave:5> end
octave:6> call_your_method(B());
c-side routine called
octave-side routine called
The use of threads in wrapped Director code is not supported; i.e., an Octave-side implementation of a C++ class must be called from the Octave interpreter's thread. Anything fancier (apartment/queue model, whatever) is left to the user. Without anything fancier, this amounts to the limitation that Octave must drive the module... like, for example, an optimization package that calls Octave to evaluate an objective function.
As noted above, swig_ref represents a reference counted pointer to a C/C++-side object. It also contains a flag indicating whether Octave or the C/C++ code owns the object. If Octave owns it, any destructors will be called when the reference count reaches zero. If the C/C++ side owns the object, then destructors will not be called when the reference count goes to zero.
For example,
%inline {
class A {
public:
A() { printf("A constructing\n"); }
~A() { printf("A destructing\n"); }
};
}
Would produce this behavior in Octave:
octave:1> a=A(); A constructing octave:2> b=a; octave:3> clear a; octave:4> b=4; A destructing
The %newobject directive may be used to control this behavior for pointers returned from functions.
In the case where one wishes for the C++ side to own an object that was created in Octave (especially a Director object), one can use the __disown() method to invert this logic. Then letting the Octave reference count go to zero will not destroy the object, but destroying the object will invalidate the Octave-side object if it still exists (and call destructors of other C++ bases in the case of multiple inheritance/subclass()'ing).
Various STL library files are provided for wrapping STL containers.
Octave provides a rich set of classes for dealing with matrices. Currently there are no built-in typemaps to deal with those. However, these are relatively straight forward for users to add themselves (see the docs on typemaps). Without much work (a single typemap decl-- say, 5 lines of code in the interface file), it would be possible to have a function
double my_det(const double* mat,int m,int n);
that is accessed from Octave as,
octave:1> my_det(rand(4)); ans = -0.18388
Caution: This chapter is under repair!
This chapter describes SWIG's support of Perl5. Although the Perl5 module is one of the earliest SWIG modules, it has continued to evolve and has been improved greatly with the help of SWIG users. For the best results, it is recommended that SWIG be used with Perl 5.8 or later. We're no longer testing regularly with older versions, but Perl 5.6 seems to mostly work, while older versions don't.
To build Perl extension modules, SWIG uses a layered approach. At the lowest level, simple procedural wrappers are generated for functions, classes, methods, and other declarations in the input file. Then, for structures and classes, an optional collection of Perl proxy classes can be generated in order to provide a more natural object oriented Perl interface. These proxy classes simply build upon the low-level interface.
In describing the Perl interface, this chapter begins by covering the essentials. First, the problem of configuration, compiling, and installing Perl modules is discussed. Next, the low-level procedural interface is presented. Finally, proxy classes are described. Advanced customization features, typemaps, and other options are found near the end of the chapter.
To build a Perl5 module, run SWIG using the -perl option as follows:
swig -perl example.i
This produces two files. The first file, example_wrap.c contains all of the C code needed to build a Perl5 module. The second file, example.pm contains supporting Perl code needed to properly load the module.
To build the module, you will need to compile the file example_wrap.c and link it with the rest of your program.
In order to compile, SWIG extensions need the following Perl5 header files:
#include "Extern.h" #include "perl.h" #include "XSUB.h"
These are typically located in a directory like this
/usr/lib/perl/5.14/CORE
The SWIG configuration script automatically tries to locate this directory so that it can compile examples. However, if you need to find out where the directory is located, an easy way to find out is to ask Perl itself:
$ perl -e 'use Config; print "$Config{archlib}\n";'
/usr/lib/perl/5.14
The preferred approach to building an extension module is to compile it into a shared object file or DLL. Assuming you have code you need to link to in a file called example.c, you will need to compile your program using commands like this (shown for Linux):
$ swig -perl example.i $ gcc -fPIC example.c $ gcc -fPIC -c example_wrap.c -I/usr/lib/perl/5.14/CORE -Dbool=char $ gcc -shared example.o example_wrap.o -o example.so
The exact compiler options vary from platform to platform. SWIG tries to guess the right options when it is installed. Therefore, you may want to start with one of the examples in the SWIG/Examples/perl5 directory. If that doesn't work, you will need to read the man-pages for your compiler and linker to get the right set of options. You might also check the SWIG Wiki for additional information.
When linking the module, the name of the shared object file must match the module name used in the SWIG interface file. If you used ` %module example', then the target should be named `example.so ', `example.sl', or the appropriate dynamic module name on your system.
It is also possible to use Perl to build dynamically loadable modules for you using the MakeMaker utility. To do this, write a Perl script such as the following:
# File : Makefile.PL use ExtUtils::MakeMaker; WriteMakefile( `NAME' => `example', # Name of package `LIBS' => [`-lm'], # Name of custom libraries `OBJECT' => `example.o example_wrap.o' # Object files );
Now, to build a module, simply follow these steps:
$ perl Makefile.PL $ make $ make install
If you are planning to distribute a SWIG-generated module, this is the preferred approach to compilation. More information about MakeMaker can be found in "Programming Perl, 2nd ed." by Larry Wall, Tom Christiansen, and Randal Schwartz.
If you machine does not support dynamic loading or if you've tried to use it without success, you can build a new version of the Perl interpreter with your SWIG extensions added to it. To build a static extension, you first need to invoke SWIG as follows:
$ swig -perl -static example.i
By default SWIG includes code for dynamic loading, but the -static option takes it out.
Next, you will need to supply a main() function that initializes your extension and starts the Perl interpreter. While, this may sound daunting, SWIG can do this for you automatically as follows:
%module example
%inline %{
extern double My_variable;
extern int fact(int);
%}
// Include code for rebuilding Perl
%include <perlmain.i>
The same thing can be accomplished by running SWIG as follows:
$ swig -perl -static -lperlmain.i example.i
The perlmain.i file inserts Perl's main() function into the wrapper code and automatically initializes the SWIG generated module. If you just want to make a quick a dirty module, this may be the easiest way. By default, the perlmain.i code does not initialize any other Perl extensions. If you need to use other packages, you will need to modify it appropriately. You can do this by just copying perlmain.i out of the SWIG library, placing it in your own directory, and modifying it to suit your purposes.
To build your new Perl executable, follow the exact same procedure as for a dynamic module, but change the link line to something like this:
$ gcc example.o example_wrap.o -L/usr/lib/perl/5.14/CORE \ -lperl -lsocket -lnsl -lm -o myperl
This will produce a new version of Perl called myperl. It should be functionality identical to Perl with your C/C++ extension added to it. Depending on your machine, you may need to link with additional libraries such as -lsocket, -lnsl, -ldl, etc.
To use the module, simply use the Perl use statement. If all goes well, you will be able to do this:
$ perl use example; print example::fact(4),"\n"; 24
A common error received by first-time users is the following:
use example; Can't locate example.pm in @INC (@INC contains: /etc/perl /usr/local/lib/perl/5.14.2 /usr/local/share/perl/5.14.2 /usr/lib/perl5 /usr/share/perl5 /usr/lib/perl/5.14 /usr/share/perl/5.14 /usr/local/lib/site_perl .) at - line 1. BEGIN failed--compilation aborted at - line 1.
This error is almost caused when the name of the shared object file you created doesn't match the module name you specified with the %module directive.
A somewhat related, but slightly different error is this:
use example; Can't find 'boot_example' symbol in ./example.so at - line 1 BEGIN failed--compilation aborted at - line 1.
This error is generated because Perl can't locate the module bootstrap function in the SWIG extension module. This could be caused by a mismatch between the module name and the shared library name. However, another possible cause is forgetting to link the SWIG-generated wrapper code with the rest of your application when you linked the extension module.
Another common error is the following:
use example; Can't load './example.so' for module example: ./example.so: undefined symbol: Foo at /usr/lib/perl/5.14/i386-linux/DynaLoader.pm line 169. at - line 1 BEGIN failed--compilation aborted at - line 1.
This error usually indicates that you forgot to include some object files or libraries in the linking of the shared library file. Make sure you compile both the SWIG wrapper file and your original program into a shared library file. Make sure you pass all of the required libraries to the linker.
Sometimes unresolved symbols occur because a wrapper has been created for a function that doesn't actually exist in a library. This usually occurs when a header file includes a declaration for a function that was never actually implemented or it was removed from a library without updating the header file. To fix this, you can either edit the SWIG input file to remove the offending declaration or you can use the %ignore directive to ignore the declaration. Better yet, update the header file so that it doesn't have an undefined declaration.
Finally, suppose that your extension module is linked with another library like this:
$ gcc -shared example.o example_wrap.o -L/home/beazley/projects/lib -lfoo \
-o example.so
If the foo library is compiled as a shared library, you might get the following error when you try to use your module:
use example; Can't load './example.so' for module example: libfoo.so: cannot open shared object file: No such file or directory at /usr/lib/perl/5.14/i386-linux/DynaLoader.pm line 169. at - line 1 BEGIN failed--compilation aborted at - line 1. >>>
This error is generated because the dynamic linker can't locate the libfoo.so library. When shared libraries are loaded, the system normally only checks a few standard locations such as /usr/lib and /usr/local/lib. To get the loader to look in other locations, there are several things you can do. First, you can recompile your extension module with extra path information. For example, on Linux you can do this:
$ gcc -shared example.o example_wrap.o -L/home/beazley/projects/lib -lfoo \
-Xlinker -rpath /home/beazley/projects/lib \
-o example.so
Alternatively, you can set the LD_LIBRARY_PATH environment variable to include the directory with your shared libraries. If setting LD_LIBRARY_PATH, be aware that setting this variable can introduce a noticeable performance impact on all other applications that you run. To set it only for Perl, you might want to do this instead:
$ env LD_LIBRARY_PATH=/home/beazley/projects/lib perl
Finally, you can use a command such as ldconfig (Linux) or crle (Solaris) to add additional search paths to the default system configuration (this requires root access and you will need to read the man pages).
Compilation of C++ extensions has traditionally been a tricky problem. Since the Perl interpreter is written in C, you need to take steps to make sure C++ is properly initialized and that modules are compiled correctly.
On most machines, C++ extension modules should be linked using the C++ compiler. For example:
$ swig -c++ -perl example.i $ g++ -fPIC -c example.cxx $ g++ -fPIC -c example_wrap.cxx -I/usr/lib/perl/5.14/i386-linux/CORE $ g++ -shared example.o example_wrap.o -o example.so
In addition to this, you may need to include additional library files to make it work. For example, if you are using the Sun C++ compiler on Solaris, you often need to add an extra library -lCrun like this:
$ swig -c++ -perl example.i $ CC -c example.cxx $ CC -c example_wrap.cxx -I/usr/lib/perl/5.14/i386-linux/CORE $ CC -shared example.o example_wrap.o -o example.so -lCrun
Of course, the names of the extra libraries are completely non-portable---you will probably need to do some experimentation.
Another possible compile problem comes from recent versions of Perl (5.8.0) and the GNU tools. If you see errors having to do with _crypt_struct, that means _GNU_SOURCE is not defined and it needs to be. So you should compile the wrapper like:
$ g++ -fPIC -c example_wrap.cxx -I/usr/lib/perl/5.8.0/CORE -D_GNU_SOURCE
-D_GNU_SOURCE is also included in the Perl ccflags, which can be found by running
$ perl -e 'use Config; print "$Config{ccflags}\n";'
So you could also compile the wrapper like
$ g++ -fPIC -c example_wrap.cxx -I/usr/lib/perl/5.8.0/CORE \
`perl -MConfig -e 'print $Config{ccflags}'`
Sometimes people have suggested that it is necessary to relink the Perl interpreter using the C++ compiler to make C++ extension modules work. In the experience of this author, this has never actually appeared to be necessary on most platforms. Relinking the interpreter with C++ really only includes the special run-time libraries described above---as long as you link your extension modules with these libraries, it should not be necessary to rebuild Perl.
If you aren't entirely sure about the linking of a C++ extension, you might look at an existing C++ program. On many Unix machines, the ldd command will list library dependencies. This should give you some clues about what you might have to include when you link your extension module. For example, notice the first line of output here:
$ ldd swig
libstdc++-libc6.1-1.so.2 => /usr/lib/libstdc++-libc6.1-1.so.2 (0x40019000)
libm.so.6 => /lib/libm.so.6 (0x4005b000)
libc.so.6 => /lib/libc.so.6 (0x40077000)
/lib/ld-linux.so.2 => /lib/ld-linux.so.2 (0x40000000)
$
If linking wasn't enough of a problem, another major complication of C++ is that it does not define any sort of standard for binary linking of libraries. This means that C++ code compiled by different compilers will not link together properly as libraries nor is the memory layout of classes and data structures implemented in any kind of portable manner. In a monolithic C++ program, this problem may be unnoticed. However, in Perl, it is possible for different extension modules to be compiled with different C++ compilers. As long as these modules are self-contained, this probably won't matter. However, if these modules start sharing data, you will need to take steps to avoid segmentation faults and other erratic program behavior. Also, be aware that certain C++ features, especially RTTI, can behave strangely when working with multiple modules.
It should be noted that you may get a lot of error messages about the 'bool' datatype when compiling a C++ Perl module. If you experience this problem, you can try the following:
Finally, recent versions of Perl (5.8.0) have namespace conflict problems. Perl defines a bunch of short macros to make the Perl API function names shorter. For example, in /usr/lib/perl/5.8.0/CORE/embed.h there is a line:
#define do_open Perl_do_open
The problem is, in the <iostream> header from GNU libstdc++v3 there is a private function named do_open. If <iostream> is included after the perl headers, then the Perl macro causes the iostream do_open to be renamed, which causes compile errors. Hopefully in the future Perl will support a PERL_NO_SHORT_NAMES flag, but for now the only solution is to undef the macros that conflict. Lib/perl5/noembed.h in the SWIG source has a list of macros that are known to conflict with either standard headers or other headers. But if you get macro type conflicts from other macros not included in Lib/perl5/noembed.h while compiling the wrapper, you will have to find the macro that conflicts and add an #undef into the .i file. Please report any conflicting macros you find to swig-user mailing list.
On platforms that support 64-bit applications (Solaris, Irix, etc.), special care is required when building extension modules. On these machines, 64-bit applications are compiled and linked using a different set of compiler/linker options. In addition, it is not generally possible to mix 32-bit and 64-bit code together in the same application.
To utilize 64-bits, the Perl executable will need to be recompiled as a 64-bit application. In addition, all libraries, wrapper code, and every other part of your application will need to be compiled for 64-bits. If you plan to use other third-party extension modules, they will also have to be recompiled as 64-bit extensions.
If you are wrapping commercial software for which you have no source code, you will be forced to use the same linking standard as used by that software. This may prevent the use of 64-bit extensions. It may also introduce problems on platforms that support more than one linking standard (e.g., -o32 and -n32 on Irix).
Building a SWIG extension to Perl under Windows is roughly similar to the process used with Unix. Normally, you will want to produce a DLL that can be loaded into the Perl interpreter. This section assumes you are using SWIG with Microsoft Visual C++ although the procedure may be similar with other compilers.
If you are developing your application within Microsoft developer studio, SWIG can be invoked as a custom build option. The process roughly requires these steps:
Now, assuming you made it this far, SWIG will be automatically invoked when you build your project. Any changes made to the interface file will result in SWIG being automatically invoked to produce a new version of the wrapper file. To run your new Perl extension, simply run Perl and use the use command as normal. For example:
DOS > perl use example; $a = example::fact(4); print "$a\n";
SWIG is known to work with Cygwin and may work with other compilers on Windows. For general hints and suggestions refer to the Windows chapter.
At its core, the Perl module uses a simple low-level interface to C function, variables, constants, and classes. This low-level interface can be used to control your application. However, it is also used to construct more user-friendly proxy classes as described in the next section.
C functions are converted into new Perl built-in commands (or subroutines). For example:
%module example int fact(int a); ...
Now, in Perl:
use example; $a = &example::fact(2);
Global variables are handled using Perl's magic variable mechanism. SWIG generates a pair of functions that intercept read/write operations and attaches them to a Perl variable with the same name as the C global variable. Thus, an interface like this
%module example; ... double Spam; ...
is accessed as follows:
use example; print $example::Spam,"\n"; $example::Spam = $example::Spam + 4 # ... etc ...
If a variable is declared as const, it is wrapped as a read-only variable. Attempts to modify its value will result in an error.
To make ordinary variables read-only, you can also use the %immutable directive. For example:
%{
extern char *path;
%}
%immutable;
extern char *path;
%mutable;
The %immutable directive stays in effect until it is explicitly disabled or cleared using %mutable. See the Creating read-only variables section for further details.
It is also possible to tag a specific variable as read-only like this:
%{
extern char *path;
%}
%immutable path;
...
...
extern char *path; // Declared later in the input
By default, constants are wrapped as read-only Perl variables. For example:
%module example #define FOO 42
In Perl:
use example; print $example::FOO,"\n"; # OK $example::FOO = 2; # Error
Alternatively, if you use swig's -const option, constants are wrapped such that the leading $ isn't required (by using a constant subroutine), which usually gives a more natural Perl interface, for example:
use example; print example::FOO,"\n";
SWIG represents pointers as blessed references. A blessed reference is the same as a Perl reference except that it has additional information attached to it indicating what kind of reference it is. That is, if you have a C declaration like this:
Matrix *new_Matrix(int n, int m);
The module returns a value generated as follows:
$ptr = new_Matrix(int n, int m); # Save pointer return result bless $ptr, "p_Matrix"; # Bless it as a pointer to Matrix
SWIG uses the "blessing" to check the datatype of various pointers. In the event of a mismatch, an error or warning message is generated.
To check to see if a value is the NULL pointer, use the defined() command:
if (defined($ptr)) {
print "Not a NULL pointer.";
} else {
print "Is a NULL pointer.";
}
To create a NULL pointer, you should pass the undef value to a function.
The "value" of a Perl reference is not the same as the underlying C pointer that SWIG wrapper functions return. Suppose that $a and $b are two references that point to the same C object. In general, $a and $b will be different--since they are different references. Thus, it is a mistake to check the equality of $a and $b to check the equality of two C pointers. The correct method to check equality of C pointers is to dereference them as follows:
if ($$a == $$b) {
print "a and b point to the same thing in C";
} else {
print "a and b point to different objects.";
}
As much as you might be inclined to modify a pointer value directly from Perl, don't. Manipulating pointer values is architecture dependent and could cause your program to crash. Similarly, don't try to manually cast a pointer to a new type by reblessing a pointer. This may not work like you expect and it is particularly dangerous when casting C++ objects. If you need to cast a pointer or change its value, consider writing some helper functions instead. For example:
%inline %{
/* C-style cast */
Bar *FooToBar(Foo *f) {
return (Bar *) f;
}
/* C++-style cast */
Foo *BarToFoo(Bar *b) {
return dynamic_cast<Foo*>(b);
}
Foo *IncrFoo(Foo *f, int i) {
return f+i;
}
%}
Also, if working with C++, you should always try to use the new C++ style casts. For example, in the above code, the C-style cast may return a bogus result whereas as the C++-style cast will return NULL if the conversion can't be performed.
Compatibility Note: In earlier versions, SWIG tried to preserve the same pointer naming conventions as XS and xsubpp. Given the advancement of the SWIG typesystem and the growing differences between SWIG and XS, this is no longer supported.
Access to the contents of a structure are provided through a set of low-level accessor functions as described in the "SWIG Basics" chapter. For example,
struct Vector {
double x,y,z;
};
gets mapped into the following collection of accessor functions:
struct Vector *new_Vector(); void delete_Vector(Vector *v); double Vector_x_get(Vector *obj) void Vector_x_set(Vector *obj, double x) double Vector_y_get(Vector *obj) void Vector_y_set(Vector *obj, double y) double Vector_z_get(Vector *obj) void Vector_z_set(Vector *obj, double z)
These functions are then used to access structure data from Perl as follows:
$v = example::new_Vector(); print example::Vector_x_get($v),"\n"; # Get x component example::Vector_x_set($v,7.8); # Change x component
Similar access is provided for unions and the data members of C++ classes.
const members of a structure are read-only. Data members can also be forced to be read-only using the %immutable directive. For example:
struct Foo {
...
%immutable;
int x; /* Read-only members */
char *name;
%mutable;
...
};
When char * members of a structure are wrapped, the contents are assumed to be dynamically allocated using malloc or new (depending on whether or not SWIG is run with the -c++ option). When the structure member is set, the old contents will be released and a new value created. If this is not the behavior you want, you will have to use a typemap (described later).
Array members are normally wrapped as read-only. For example,
struct Foo {
int x[50];
};
produces a single accessor function like this:
int *Foo_x_get(Foo *self) {
return self->x;
};
If you want to set an array member, you will need to supply a "memberin" typemap described later in this chapter. As a special case, SWIG does generate code to set array members of type char (allowing you to store a Python string in the structure).
When structure members are wrapped, they are handled as pointers. For example,
struct Foo {
...
};
struct Bar {
Foo f;
};
generates accessor functions such as this:
Foo *Bar_f_get(Bar *b) {
return &b->f;
}
void Bar_f_set(Bar *b, Foo *val) {
b->f = *val;
}
C++ classes are wrapped by building a set of low level accessor functions. Consider the following class:
class List {
public:
List();
~List();
int search(char *item);
void insert(char *item);
void remove(char *item);
char *get(int n);
int length;
static void print(List *l);
};
When wrapped by SWIG, the following functions are created:
List *new_List(); void delete_List(List *l); int List_search(List *l, char *item); void List_insert(List *l, char *item); void List_remove(List *l, char *item); char *List_get(List *l, int n); int List_length_get(List *l); void List_length_set(List *l, int n); void List_print(List *l);
In Perl, these functions are used in a straightforward manner:
use example; $l = example::new_List(); example::List_insert($l,"Ale"); example::List_insert($l,"Stout"); example::List_insert($l,"Lager") example::List_print($l) Lager Stout Ale print example::List_length_get($l),"\n"; 3
At this low level, C++ objects are really just typed pointers. Member functions are accessed by calling a C-like wrapper with an instance pointer as the first argument. Although this interface is fairly primitive, it provides direct access to C++ objects. A higher level interface using Perl proxy classes can be built using these low-level accessors. This is described shortly.
The SWIG type-checker is fully aware of C++ inheritance. Therefore, if you have classes like this
class Foo {
...
};
class Bar : public Foo {
...
};
and a function
void spam(Foo *f);
then the function spam() accepts Foo * or a pointer to any class derived from Foo. If necessary, the type-checker also adjusts the value of the pointer (as is necessary when multiple inheritance is used).
If you have a C++ program with overloaded functions or methods, you will need to disambiguate those methods using %rename. For example:
/* Forward renaming declarations */
%rename(foo_i) foo(int);
%rename(foo_d) foo(double);
...
void foo(int); // Becomes 'foo_i'
void foo(char *c); // Stays 'foo' (not renamed)
class Spam {
public:
void foo(int); // Becomes 'foo_i'
void foo(double); // Becomes 'foo_d'
...
};
Now, in Perl, the methods are accessed as follows:
use example; example::foo_i(3); $s = example::new_Spam(); example::Spam_foo_i($s,3); example::Spam_foo_d($s,3.14);
Please refer to the "SWIG Basics" chapter for more information.
As of version 1.3.27 SWIG automatically renames the most common C++ operators, and maps them into the perl module with the proper 'use overload ...' so you don't need to do any work.
The following C++ operators are currently supported by the Perl module:
When you create a SWIG extension, everything gets placed into a single Perl module. The name of the module is determined by the %module directive. To use the module, do the following:
$ perl5 use example; # load the example module print example::fact(4),"\n" # Call a function in it 24
Usually, a module consists of a collection of code that is contained within a single file. A package, on the other hand, is the Perl equivalent of a namespace. A package is a lot like a module, except that it is independent of files. Any number of files may be part of the same package--or a package may be broken up into a collection of modules if you prefer to think about it in this way.
SWIG installs its functions into a package with the same name as the module.
Incompatible Change: previous versions of SWIG enabled you to change the name of the package by using the -package option, this feature has been removed in order to properly support modules that used nested namespaces, e.g. Foo::Bar::Baz. To give your module a nested namespace simply provide the fully qualified name in your %module directive:
%module "Foo::Bar::Baz"
NOTE: the double quotes are necessary.
Using the package option of the %module directive allows you to specify what Perl namespace that the module will be living in when installed. This is useful in the situation where a module maintainer wants to split a large module into smaller pieces to make maintenance easier, but doesn't want to have that affect the module name used by applications. So for example, if I wanted to split XML::Xerces into XML::Xerces::SAX, etc. , but I wanted all the applications to be able to access the classes using the XML::Xerces namespace I could use:
%module(package="XML::Xerces") "XML::Xerces::SAX
And now all the applications could use the class XML::Xerces::SAXParser. Without the package directive splitting the module would force applications to use the class XML::Xerces::SAX::SAXParser. This could break compatibility for existing applications that are already using the class under the name XML::Xerces::SAXParser.
A common problem in some C programs is handling parameters passed as simple pointers. For example:
void add(int x, int y, int *result) {
*result = x + y;
}
or perhaps
int sub(int *x, int *y) {
return *x+*y;
}
The easiest way to handle these situations is to use the typemaps.i file. For example:
%module example %include "typemaps.i" void add(int, int, int *OUTPUT); int sub(int *INPUT, int *INPUT);
In Perl, this allows you to pass simple values. For example:
$a = example::add(3,4); print "$a\n"; 7 $b = example::sub(7,4); print "$b\n"; 3
Notice how the INPUT parameters allow integer values to be passed instead of pointers and how the OUTPUT parameter creates a return result.
If you don't want to use the names INPUT or OUTPUT , use the %apply directive. For example:
%module example
%include "typemaps.i"
%apply int *OUTPUT { int *result };
%apply int *INPUT { int *x, int *y};
void add(int x, int y, int *result);
int sub(int *x, int *y);
If a function mutates one of its parameters like this,
void negate(int *x) {
*x = -(*x);
}
you can use INOUT like this:
%include "typemaps.i" ... void negate(int *INOUT);
In Perl, a mutated parameter shows up as a return value. For example:
$a = example::negate(3); print "$a\n"; -3
The most common use of these special typemap rules is to handle functions that return more than one value. For example, sometimes a function returns a result as well as a special error code:
/* send message, return number of bytes sent, along with success code */ int send_message(char *text, int len, int *success);
To wrap such a function, simply use the OUTPUT rule above. For example:
%module example
%include "typemaps.i"
%apply int *OUTPUT { int *success };
...
int send_message(char *text, int *success);
When used in Perl, the function will return multiple values.
($bytes, $success) = example::send_message("Hello World");
Another common use of multiple return values are in query functions. For example:
void get_dimensions(Matrix *m, int *rows, int *columns);
To wrap this, you might use the following:
%module example
%include "typemaps.i"
%apply int *OUTPUT { int *rows, int *columns };
...
void get_dimensions(Matrix *m, int *rows, *columns);
Now, in Perl:
($r,$c) = example::get_dimensions($m);
In certain cases, it is possible to treat Perl references as C pointers. To do this, use the REFERENCE typemap. For example:
%module example %include "typemaps.i" void add(int x, int y, int *REFERENCE);
In Perl:
use example; $c = 0.0; example::add(3,4,\$c); print "$c\n"; 7
Note: The REFERENCE feature is only currently supported for numeric types (integers and floating point).
The SWIG %exception directive can be used to create a user-definable exception handler for converting exceptions in your C/C++ program into Perl exceptions. The chapter on customization features contains more details, but suppose you have a C++ class like the following:
class RangeError {}; // Used for an exception
class DoubleArray {
private:
int n;
double *ptr;
public:
// Create a new array of fixed size
DoubleArray(int size) {
ptr = new double[size];
n = size;
}
// Destroy an array
~DoubleArray() {
delete ptr;
}
// Return the length of the array
int length() {
return n;
}
// Get an item from the array and perform bounds checking.
double getitem(int i) {
if ((i >= 0) && (i < n))
return ptr[i];
else
throw RangeError();
}
// Set an item in the array and perform bounds checking.
void setitem(int i, double val) {
if ((i >= 0) && (i < n))
ptr[i] = val;
else {
throw RangeError();
}
}
};
Since several methods in this class can throw an exception for an out-of-bounds access, you might want to catch this in the Perl extension by writing the following in an interface file:
%exception {
try {
$action
}
catch (RangeError) {
croak("Array index out-of-bounds");
}
}
class DoubleArray {
...
};
The exception handling code is inserted directly into generated wrapper functions. The $action variable is replaced with the C/C++ code being executed by the wrapper. When an exception handler is defined, errors can be caught and used to gracefully generate a Perl error instead of forcing the entire program to terminate with an uncaught error.
As shown, the exception handling code will be added to every wrapper function. Since this is somewhat inefficient. You might consider refining the exception handler to only apply to specific methods like this:
%exception getitem {
try {
$action
}
catch (RangeError) {
croak("Array index out-of-bounds");
}
}
%exception setitem {
try {
$action
}
catch (RangeError) {
croak("Array index out-of-bounds");
}
}
In this case, the exception handler is only attached to methods and functions named getitem and setitem.
If you had a lot of different methods, you can avoid extra typing by using a macro. For example:
%define RANGE_ERROR
{
try {
$action
}
catch (RangeError) {
croak("Array index out-of-bounds");
}
}
%enddef
%exception getitem RANGE_ERROR;
%exception setitem RANGE_ERROR;
Since SWIG's exception handling is user-definable, you are not limited to C++ exception handling. See the chapter on " Customization features" for more examples.
Compatibility note: In SWIG1.1, exceptions were defined using the older %except directive:
%except(python) {
try {
$function
}
catch (RangeError) {
croak("Array index out-of-bounds");
}
}
This is still supported, but it is deprecated. The newer %exception directive provides the same functionality, but it has additional capabilities that make it more powerful.
This section describes how you can modify SWIG's default wrapping behavior for various C/C++ datatypes using the %typemap directive. This is an advanced topic that assumes familiarity with the Perl C API as well as the material in the "Typemaps " chapter.
Before proceeding, it should be stressed that typemaps are not a required part of using SWIG---the default wrapping behavior is enough in most cases. Typemaps are only used if you want to change some aspect of the primitive C-Perl interface.
A typemap is nothing more than a code generation rule that is attached to a specific C datatype. For example, to convert integers from Perl to C, you might define a typemap like this:
%module example
%typemap(in) int {
$1 = (int) SvIV($input);
printf("Received an integer : %d\n", $1);
}
...
%inline %{
extern int fact(int n);
%}
Typemaps are always associated with some specific aspect of code generation. In this case, the "in" method refers to the conversion of input arguments to C/C++. The datatype int is the datatype to which the typemap will be applied. The supplied C code is used to convert values. In this code a number of special variable prefaced by a $ are used. The $1 variable is placeholder for a local variable of type int. The $input variable is the input object (usually a SV *).
When this example is used in Perl5, it will operate as follows:
use example; $n = example::fact(6); print "$n\n"; ... Output: Received an integer : 6 720
The application of a typemap to specific datatypes and argument names involves more than simple text-matching--typemaps are fully integrated into the SWIG type-system. When you define a typemap for int, that typemap applies to int and qualified variations such as const int. In addition, the typemap system follows typedef declarations. For example:
%typemap(in) int n {
$1 = (int) SvIV($input);
printf("n = %d\n",$1);
}
%inline %{
typedef int Integer;
extern int fact(Integer n); // Above typemap is applied
%}
It should be noted that the matching of typedef only occurs in one direction. If you defined a typemap for Integer, it is not applied to arguments of type int.
Typemaps can also be defined for groups of consecutive arguments. For example:
%typemap(in) (char *str, unsigned len) {
$1 = SvPV($input,$2);
};
int count(char c, char *str, unsigned len);
When a multi-argument typemap is defined, the arguments are always handled as a single Perl object. This allows the function to be used like this (notice how the length parameter is omitted):
example::count("e","Hello World");
1
>>>
The previous section illustrated an "in" typemap for converting Perl objects to C. A variety of different typemap methods are defined by the Perl module. For example, to convert a C integer back into a Perl object, you might define an "out" typemap like this:
%typemap(out) int {
$result = sv_newmortal();
set_setiv($result, (IV) $1);
argvi++;
}
The following typemap methods are available:
%typemap(in)
%typemap(out)
%typemap(varin)
%typemap(varout)
%typemap(freearg)
%typemap(argout)
%typemap(ret)
%typemap(memberin)
%typemap(memberout)
%typemap(check)
Within typemap code, a number of special variables prefaced with a $ may appear. A full list of variables can be found in the " Typemaps" chapter. This is a list of the most common variables:
$1
$input
$result
$1_name
$1_type
$1_ltype
$symname
When writing typemaps, it is necessary to work directly with Perl5 objects. This, unfortunately, can be a daunting task. Consult the "perlguts" man-page for all of the really ugly details. A short summary of commonly used functions is provided here for reference. It should be stressed that SWIG can be used quite effectively without knowing any of these details--especially now that there are typemap libraries that can already been written.
Perl Integer Functions
int SvIV(SV *); void sv_setiv(SV *sv, IV value); SV *newSViv(IV value); int SvIOK(SV *);
Perl Floating Point Functions
double SvNV(SV *); void sv_setnv(SV *, double value); SV *newSVnv(double value); int SvNOK(SV *);
Perl String Functions
char *SvPV(SV *, STRLEN len); void sv_setpv(SV *, char *val); void sv_setpvn(SV *, char *val, STRLEN len); SV *newSVpv(char *value, STRLEN len); int SvPOK(SV *); void sv_catpv(SV *, char *); void sv_catpvn(SV *, char *, STRLEN);
Perl References
void sv_setref_pv(SV *, char *, void *ptr); int sv_isobject(SV *); SV *SvRV(SV *); int sv_isa(SV *, char *0;
This section includes a few examples of typemaps. For more examples, you might look at the files "perl5.swg" and "typemaps.i " in the SWIG library.
A common problem in many C programs is the processing of command line arguments, which are usually passed in an array of NULL terminated strings. The following SWIG interface file allows a Perl5 array reference to be used as a char ** datatype.
%module argv
// This tells SWIG to treat char ** as a special case
%typemap(in) char ** {
AV *tempav;
I32 len;
int i;
SV **tv;
if (!SvROK($input))
croak("Argument $argnum is not a reference.");
if (SvTYPE(SvRV($input)) != SVt_PVAV)
croak("Argument $argnum is not an array.");
tempav = (AV*)SvRV($input);
len = av_len(tempav);
$1 = (char **) malloc((len+2)*sizeof(char *));
for (i = 0; i <= len; i++) {
tv = av_fetch(tempav, i, 0);
$1[i] = (char *) SvPV(*tv,PL_na);
}
$1[i] = NULL;
};
// This cleans up the char ** array after the function call
%typemap(freearg) char ** {
free($1);
}
// Creates a new Perl array and places a NULL-terminated char ** into it
%typemap(out) char ** {
AV *myav;
SV **svs;
int i = 0,len = 0;
/* Figure out how many elements we have */
while ($1[len])
len++;
svs = (SV **) malloc(len*sizeof(SV *));
for (i = 0; i < len ; i++) {
svs[i] = sv_newmortal();
sv_setpv((SV*)svs[i],$1[i]);
};
myav = av_make(len,svs);
free(svs);
$result = newRV_noinc((SV*)myav);
sv_2mortal($result);
argvi++;
}
// Now a few test functions
%inline %{
int print_args(char **argv) {
int i = 0;
while (argv[i]) {
printf("argv[%d] = %s\n", i,argv[i]);
i++;
}
return i;
}
// Returns a char ** list
char **get_args() {
static char *values[] = { "Dave", "Mike", "Susan", "John", "Michelle", 0};
return &values[0];
}
%}
When this module is compiled, the wrapped C functions can be used in a Perl script as follows:
use argv;
@a = ("Dave", "Mike", "John", "Mary"); # Create an array of strings
argv::print_args(\@a); # Pass it to our C function
$b = argv::get_args(); # Get array of strings from C
print @$b,"\n"; # Print it out
Return values are placed on the argument stack of each wrapper function. The current value of the argument stack pointer is contained in a variable argvi. Whenever a new output value is added, it is critical that this value be incremented. For multiple output values, the final value of argvi should be the total number of output values.
The total number of return values should not exceed the number of input values unless you explicitly extend the argument stack. This can be done using the EXTEND() macro as in:
%typemap(argout) int *OUTPUT {
if (argvi >= items) {
EXTEND(sp,1); /* Extend the stack by 1 object */
}
$result = sv_newmortal();
sv_setiv($target,(IV) *($1));
argvi++;
}
Sometimes it is desirable for a function to return a value in one of its arguments. This example describes the implementation of the OUTPUT typemap.
%module return
// This tells SWIG to treat an double * argument with name 'OutDouble' as
// an output value.
%typemap(argout) double *OUTPUT {
$result = sv_newmortal();
sv_setnv($result, *$input);
argvi++; /* Increment return count -- important! */
}
// We don't care what the input value is. Ignore, but set to a temporary variable
%typemap(in,numinputs=0) double *OUTPUT(double junk) {
$1 = &junk;
}
// Now a function to test it
%{
/* Returns the first two input arguments */
int multout(double a, double b, double *out1, double *out2) {
*out1 = a;
*out2 = b;
return 0;
};
%}
// If we name both parameters OutDouble both will be output
int multout(double a, double b, double *OUTPUT, double *OUTPUT);
...
When this function is called, the output arguments are appended to the stack used to return results. This shows up an array in Perl. For example:
@r = multout(7,13); print "multout(7,13) = @r\n"; ($x,$y) = multout(7,13);
Consider the following data structure:
#define SIZE 8
typedef struct {
int values[SIZE];
...
} Foo;
By default, SWIG doesn't know how to the handle the values structure member it's an array, not a pointer. In this case, SWIG makes the array member read-only. Reading will simply return a pointer to the first item in the array. To make the member writable, a "memberin" typemap can be used.
%typemap(memberin) int [SIZE] {
int i;
for (i = 0; i < SIZE; i++) {
$1[i] = $input[i];
}
}
Whenever a int [SIZE] member is encountered in a structure or class, this typemap provides a safe mechanism for setting its value.
As in the previous example, the typemap can be generalized for any dimension. For example:
%typemap(memberin) int [ANY] {
int i;
for (i = 0; i < $1_dim0; i++) {
$1[i] = $input[i];
}
}
When setting structure members, the input object is always assumed to be a C array of values that have already been converted from the target language. Because of this, the memberin typemap is almost always combined with the use of an "in" typemap. For example, the "in" typemap in the previous section would be used to convert an int[] array to C whereas the "memberin" typemap would be used to copy the converted array into a C data structure.
A frequent confusion on the SWIG mailing list is errors caused by the mixing of Perl references and C pointers. For example, suppose you have a C function that modifies its arguments like this:
void add(double a, double b, double *c) {
*c = a + b;
}
A common misinterpretation of this function is the following Perl script:
# Perl script $a = 3.5; $b = 7.5; $c = 0.0; # Output value add($a,$b,\$c); # Place result in c (Except that it doesn't work)
To make this work with a reference, you can use a typemap such as this:
%typemap(in) double * (double dvalue) {
SV* tempsv;
if (!SvROK($input)) {
croak("expected a reference\n");
}
tempsv = SvRV($input);
if ((!SvNOK(tempsv)) && (!SvIOK(tempsv))) {
croak("expected a double reference\n");
}
dvalue = SvNV(tempsv);
$1 = &dvalue;
}
%typemap(argout) double * {
SV *tempsv;
tempsv = SvRV($input);
sv_setnv(tempsv, *$1);
}
Now, if you place this before the add function, you can do this:
$a = 3.5; $b = 7.5; $c = 0.0; add($a,$b,\$c); # Now it works! print "$c\n";
Occasionally, it might be necessary to convert pointer values that have been stored using the SWIG typed-pointer representation. To convert a pointer from Perl to C, the following function is used:
int SWIG_ConvertPtr(SV *obj, void **ptr, swig_type_info *ty, int flags)
void *SWIG_MakePtr(SV *obj, void *ptr, swig_type_info *ty, int flags)
Both of these functions require the use of a special SWIG type-descriptor structure. This structure contains information about the mangled name of the datatype, type-equivalence information, as well as information about converting pointer values under C++ inheritance. For a type of Foo *, the type descriptor structure is usually accessed as follows:
Foo *f; if (SWIG_ConvertPtr($input, (void **) &f, SWIGTYPE_p_Foo, 0) == -1) return NULL; SV *sv = sv_newmortal(); SWIG_MakePtr(sv, f, SWIGTYPE_p_Foo, 0);
In a typemap, the type descriptor should always be accessed using the special typemap variable $1_descriptor. For example:
%typemap(in) Foo * {
if ((SWIG_ConvertPtr($input,(void **) &$1, $1_descriptor,0)) == -1) return NULL;
}
If necessary, the descriptor for any type can be obtained using the $descriptor() macro in a typemap. For example:
%typemap(in) Foo * {
if ((SWIG_ConvertPtr($input,(void **) &$1, $descriptor(Foo *), 0)) == -1) return NULL;
}
Out of date. Needs update.
Using the low-level procedural interface, SWIG can also construct a high-level object oriented interface to C structures and C++ classes. This is done by constructing a Perl proxy class (also known as a shadow class) that provides an OO wrapper to the underlying code. This section describes the implementation details of the proxy interface.
Proxy classes, are generated by default. If you want to turn them off, use the -noproxy command line option. For example:
$ swig -c++ -perl -noproxy example.i
When proxy classes are used, SWIG moves all of the low-level procedural wrappers to another package name. By default, this package is named 'modulec' where 'module' is the name of the module you provided with the %module directive. Then, in place of the original module, SWIG creates a collection of high-level Perl wrappers. In your scripts, you will use these high level wrappers. The wrappers, in turn, interact with the low-level procedural module.
Suppose you have the following SWIG interface file:
%module example
struct Vector {
Vector(double x, double y, double z);
~Vector();
double x,y,z;
};
When wrapped, SWIG creates the following set of low-level accessor functions as described in previous sections.
Vector *new_Vector(double x, double y, double z); void delete_Vector(Vector *v); double Vector_x_get(Vector *v); double Vector_x_set(Vector *v, double value); double Vector_y_get(Vector *v); double Vector_y_set(Vector *v, double value); double Vector_z_get(Vector *v); double Vector_z_set(Vector *v, double value);
However, when proxy classes are enabled, these accessor functions are wrapped inside a Perl class like this:
package example::Vector;
@ISA = qw( example );
%OWNER = ();
%BLESSEDMEMBERS = ();
sub new () {
my $self = shift;
my @args = @_;
$self = vectorc::new_Vector(@args);
return undef if (!defined($self));
bless $self, "example::Vector";
$OWNER{$self} = 1;
my %retval;
tie %retval, "example::Vector", $self;
return bless \%retval,"Vector";
}
sub DESTROY {
return unless $_[0]->isa('HASH');
my $self = tied(%{$_[0]});
delete $ITERATORS{$self};
if (exists $OWNER{$self}) {
examplec::delete_Vector($self));
delete $OWNER{$self};
}
sub FETCH {
my ($self,$field) = @_;
my $member_func = "vectorc::Vector_${field}_get";
my $val = &$member_func($self);
if (exists $BLESSEDMEMBERS{$field}) {
return undef if (!defined($val));
my %retval;
tie %retval,$BLESSEDMEMBERS{$field},$val;
return bless \%retval, $BLESSEDMEMBERS{$field};
}
return $val;
}
sub STORE {
my ($self,$field,$newval) = @_;
my $member_func = "vectorc::Vector_${field}_set";
if (exists $BLESSEDMEMBERS{$field}) {
&$member_func($self,tied(%{$newval}));
} else {
&$member_func($self,$newval);
}
}
Each structure or class is mapped into a Perl package of the same name. The C++ constructors and destructors are mapped into constructors and destructors for the package and are always named "new" and "DESTROY". The constructor always returns a tied hash table. This hash table is used to access the member variables of a structure in addition to being able to invoke member functions. The %OWNER and %BLESSEDMEMBERS hash tables are used internally and described shortly.
To use our new proxy class we can simply do the following:
# Perl code using Vector class
$v = new Vector(2,3,4);
$w = Vector->new(-1,-2,-3);
# Assignment of a single member
$v->{x} = 7.5;
# Assignment of all members
%$v = ( x=>3,
y=>9,
z=>-2);
# Reading members
$x = $v->{x};
# Destruction
$v->DESTROY();
In order for proxy classes to work properly, it is necessary for Perl to manage some mechanism of object ownership. Here's the crux of the problem---suppose you had a function like this:
Vector *Vector_get(Vector *v, int index) {
return &v[i];
}
This function takes a Vector pointer and returns a pointer to another Vector. Such a function might be used to manage arrays or lists of vectors (in C). Now contrast this function with the constructor for a Vector object:
Vector *new_Vector(double x, double y, double z) {
Vector *v;
v = new Vector(x,y,z); // Call C++ constructor
return v;
}
Both functions return a Vector, but the constructor is returning a brand-new Vector while the other function is returning a Vector that was already created (hopefully). In Perl, both vectors will be indistinguishable---clearly a problem considering that we would probably like the newly created Vector to be destroyed when we are done with it.
To manage these problems, each class contains two methods that access an internal hash table called %OWNER. This hash keeps a list of all of the objects that Perl knows that it has created. This happens in two cases: (1) when the constructor has been called, and (2) when a function implicitly creates a new object (as is done when SWIG needs to return a complex datatype by value). When the destructor is invoked, the Perl proxy class module checks the %OWNER hash to see if Perl created the object. If so, the C/C++ destructor is invoked. If not, we simply destroy the Perl object and leave the underlying C object alone (under the assumption that someone else must have created it).
This scheme works remarkably well in practice but it isn't foolproof. In fact, it will fail if you create a new C object in Perl, pass it on to a C function that remembers the object, and then destroy the corresponding Perl object (this situation turns out to come up frequently when constructing objects like linked lists and trees). When C takes possession of an object, you can change Perl's ownership by simply deleting the object from the %OWNER hash. This is done using the DISOWN method.
# Perl code to change ownership of an object $v = new Vector(x,y,z); $v->DISOWN();
To acquire ownership of an object, the ACQUIRE method can be used.
# Given Perl ownership of a file $u = Vector_get($v); $u->ACQUIRE();
As always, a little care is in order. SWIG does not provide reference counting, garbage collection, or advanced features one might find in sophisticated languages.
Suppose that we have a new object that looks like this:
struct Particle {
Vector r;
Vector v;
Vector f;
int type;
}
In this case, the members of the structure are complex objects that have already been encapsulated in a Perl proxy class. To handle these correctly, we use the %BLESSEDMEMBERS hash which would look like this (along with some supporting code):
package Particle; ... %BLESSEDMEMBERS = ( r => `Vector', v => `Vector', f => `Vector', );
When fetching members from the structure, %BLESSEDMEMBERS is checked. If the requested field is present, we create a tied-hash table and return it. If not, we just return the corresponding member unmodified.
This implementation allows us to operate on nested structures as follows:
# Perl access of nested structure
$p = new Particle();
$p->{f}->{x} = 0.0;
%${$p->{v}} = ( x=>0, y=>0, z=>0);
When functions take arguments involving a complex object, it is sometimes necessary to write a proxy function. For example:
double dot_product(Vector *v1, Vector *v2);
Since Vector is an object already wrapped into a proxy class, we need to modify this function to accept arguments that are given in the form of tied hash tables. This is done by creating a Perl function like this:
sub dot_product {
my @args = @_;
$args[0] = tied(%{$args[0]}); # Get the real pointer values
$args[1] = tied(%{$args[1]});
my $result = vectorc::dot_product(@args);
return $result;
}
This function replaces the original function, but operates in an identical manner.
Simple C++ inheritance is handled using the Perl @ISA array in each class package. For example, if you have the following interface file:
// shapes.i
// SWIG interface file for shapes class
%module shapes
%{
#include "shapes.h"
%}
class Shape {
public:
virtual double area() = 0;
virtual double perimeter() = 0;
void set_location(double x, double y);
};
class Circle : public Shape {
public:
Circle(double radius);
~Circle();
double area();
double perimeter();
};
class Square : public Shape {
public:
Square(double size);
~Square();
double area();
double perimeter();
}
The resulting, Perl wrapper class will create the following code:
Package Shape; @ISA = (shapes); ... Package Circle; @ISA = (shapes Shape); ... Package Square; @ISA = (shapes Shape);
The @ISA array determines where to look for methods of a particular class. In this case, both the Circle and Square classes inherit functions from Shape so we'll want to look in the Shape base class for them. All classes also inherit from the top-level module shapes. This is because certain common operations needed to implement proxy classes are implemented only once and reused in the wrapper code for various classes and structures.
Since SWIG proxy classes are implemented in Perl, it is easy to subclass from any SWIG generated class. To do this, simply put the name of a SWIG class in the @ISA array for your new class. However, be forewarned that this is not a trivial problem. In particular, inheritance of data members is extremely tricky (and I'm not even sure if it really works).
It is possible to override the SWIG generated proxy/shadow methods, using %feature("shadow"). It works like all the other %feature directives. Here is a simple example showing how to add some Perl debug code to the constructor:
/* Let's make the constructor of the class Square more verbose */
%feature("shadow") Square(double w)
%{
sub new {
my $pkg = shift;
my $self = examplec::new_Square(@_);
print STDERR "Constructed an @{[ref($self)]}\n";
bless $self, $pkg if defined($self);
}
%}
class Square {
public:
Square(double w);
...
};
If writing support code in C isn't enough, it is also possible to write code in Perl. This code gets inserted in to the .pm file created by SWIG. One use of Perl code might be to supply a high-level interface to certain functions. For example:
void set_transform(Image *im, double x[4][4]);
...
/* Rewrite the high level interface to set_transform */
%perlcode %{
sub set_transform
{
my ($im, $x) = @_;
my $a = new_mat44();
for (my $i = 0; $i < 4, $i++)
{
for (my $j = 0; $j < 4, $j++)
{
mat44_set($a, $i, $j, $x->[i][j])
}
}
example.set_transform($im, $a);
free_mat44($a);
}
%}
In this example, set_transform() provides a high-level Perl interface built on top of low-level helper functions. For example, this code now seems to work:
my $a = [[1,0,0,0], [0,1,0,0], [0,0,1,0], [0,0,0,1]]; set_transform($im, $a);
SWIG supports generating wrappers for PHP5. Support for PHP4 was removed in SWIG 1.3.37. The PHP developers are no longer making new PHP4 releases, and won't even be patching critical security issues after 2008-08-08, so it doesn't make much sense for SWIG to continue to support PHP4 now. If you really need to continue to use PHP4, just stick with SWIG 1.3.36.
Currently any PHP5 release should work, but we don't regularly test with PHP < 5.3.
In this chapter, we discuss SWIG's support of PHP. The PHP module was extensively rewritten in release 1.3.26, and support for generating OO wrappers for PHP5 was added in 1.3.30. The PHP module now supports most of the features available in some of the other languages.
In order to use this module, you will need to have a copy of the PHP5 include files to compile the SWIG generated files. If you installed PHP from a binary package, you may need to install a "php-dev" or "php-devel" package for these to be installed. You can find out where these files are by running php-config --includes . To use the built PHP module you will need either the php binary or the Apache php module. If you want to build your extension into php directly, you will need the complete PHP source tree available.
To build a PHP extension, run swig using the -php option as follows:
swig -php example.i
This will produce 3 files example_wrap.c, php_example.h and example.php. The first file, example_wrap.c contains all of the C code needed to build a PHP extension. The second file, php_example.h contains the header information needed if you wish to statically link the extension into the php interpreter. The third file, example.php can be included by PHP scripts. It attempts to dynamically load the extension and contains extra php code specified in the interface file. If wrapping C++ code with PHP classes, it will also contain PHP5 class wrappers.
SWIG can generate PHP extensions from C++ libraries as well when given the -c++ option. The support for C++ is discussed in more detail in section 27.2.6.
The usual (and recommended) way is to build the extension as a separate dynamically loaded module (which is supported by all modern operating systems). You can then specify that this be loaded automatically in php.ini or load it explicitly for any script which needs it.
It is also possible to rebuild PHP from source so that your module is statically linked into the php executable/library. This is a lot more work, and also requires a full rebuild of PHP to update your module, and it doesn't play nicely with package system. We don't recommend this approach, or provide explicit support for it.
To build your module as a dynamically loadable extension, use compilation commands like these (if you aren't using GCC, the commands will be different, and there may be some variation between platforms - these commands should at least work for Linux though):
gcc `php-config --includes` -fpic -c example_wrap.c gcc -shared example_wrap.o -o example.so
To test the extension from a PHP script, you need to load it first. You can load it for every script by adding this line to the [PHP] section of php.ini:
extension=/path/to/modulename.so
Alternatively, you can load it explicitly only for scripts which need it by adding this line to the start of each such PHP script::
dl("/path/to/modulename.so"); // Load the module
SWIG also generates a php module, which attempts to do the dl() call for you:
include("example.php");
It is important to understand that PHP uses a single global namespace into which all symbols from extension modules are loaded. It is quite possible for names of symbols in one extension module to clash with other symbols unless care is taken to %rename them. At present SWIG doesn't have support for the namespace feature added in PHP 5.3.
These work in much the same way as in C/C++. Constants can be defined by using either the normal C pre-processor declarations, or the %constant SWIG directive. These will then be available from your PHP script as a PHP constant, (i.e. no dollar sign is needed to access them.) For example, with a swig interface file like this,
%module example #define PI 3.14159 %constant int E = 2.71828
you can access the constants in your PHP script like this,
include("example.php");
echo "PI = " . PI . "\n";
echo "E = " . E . "\n";
There's one peculiarity of how constants work in PHP which it is useful to note (this is not specific to SWIG though) - if you try to use an undeclared constant, PHP will issue a warning and then expand the constant to a string version of the constant's name. The warning will often be missed though as if you're using PHP in a webserver, it will probably end up in error.log or similar.
For example,
%module example #define EASY_TO_MISPELL 0
accessed incorrectly in PHP,
include("example.php");
if(EASY_TO_MISPEL) {
....
} else {
....
}
The mis-spelled constant will become the string 'EASY_TO_MISPEL', which is treated as true by the if test, when the value of the intended constant would be treated as false!
Because PHP does not provide a mechanism to intercept access and assignment of global variables, global variables are supported through the use of automatically generated accessor functions.
%module example;
%inline %{
double seki = 2;
void print_seki() {
zend_printf("seki is now %f\n",seki);
}
%}
is accessed as follows:
include("example.php");
print seki_get();
seki_set( seki_get() * 2); # The C variable is now 4.
print seki_get();
SWIG supports global variables of all C datatypes including pointers and complex objects. Additional types can be supported by using the varinit typemap.
SWIG honors the %immutable modifier by not generating code for the _set method. This provides read-only access to the variable from the php script. Attempting to access the _set method will result in a php fatal error because the function is undefined.
At this time SWIG does not support custom accessor methods.
C functions are converted into PHP functions. Default/optional arguments are also allowed. An interface file like this :
%module example int foo(int a); double bar(double, double b = 3.0); ...
Will be accessed in PHP like this :
include("example.php");
$a = foo(2);
$b = bar(3.5, -1.5);
$c = bar(3.5); # Use default argument for 2nd parameter
Although PHP does not support overloading functions natively, swig will generate dispatch functions which will use %typecheck typemaps to allow overloading. This dispatch function's operation and precedence is described in Wrapping Overloaded Functions and Methods.
Pointers to C/C++ objects are represented as PHP resources, rather like MySQL connection handles.
There are multiple ways to wrap pointers to simple types. Given the following C method:
void add( int *in1, int *in2, int *result);
One can include cpointer.i to generate PHP wrappers to int *.
%module example %include "cpointer.i" %pointer_functions(int,intp) void add( int *in1, int *in2, int *result);
This will result in the following usage in PHP:
<?php
include("example.php");
$in1=copy_intp(3);
$in2=copy_intp(5);
$result=new_intp();
add( $in1, $in2, $result );
echo "The sum " . intp_value($in1) . " + " . intp_value($in2) . " = " . intp_value( $result) . "\n";
?>
An alternative would be to use the include typemaps.i which defines named typemaps for INPUT, OUTPUT and INOUT variables. One needs to either %apply the appropriate typemap or adjust the parameter names as appropriate.
%module example %include "typemaps.i" void add( int *INPUT, int *INPUT, int *OUTPUT);
This will result in the following usage in PHP:
<?php
include("example.php");
$in1 = 3;
$in2 = 5;
$result= add($in1,$in2); # Note using variables for the input is unnecessary.
echo "The sum $in1 + $in2 = $result\n";
?>
Because PHP has a native concept of reference, it may seem more natural to the PHP developer to use references to pass pointers. To enable this, one needs to include phppointers.i which defines the named typemap REFERENCE.
However, this relies on call-time pass-by-reference, which has been deprecated in PHP for some time, and was finally removed in PHP 5.4 . So you should avoid creating new wrappers which rely on this approach.
%module example %include "phppointers.i" void add( int *REF, int *REF, int *REF);
This will result in the following usage in PHP:
<?php
include("example.php");
$in1 = 3;
$in2 = 5;
$result = 0;
add(&$in1,&$in2,&$result);
echo "The sum $in1 + $in2 = $result\n";
?>
It is important to note that a php variable which is NULL when passed by reference would end up passing a NULL pointer into the function. In PHP, an unassigned variable (i.e. where the first reference to the variable is not an assignment) is NULL. In the above example, if any of the three variables had not been assigned, a NULL pointer would have been passed into add. Depending on the implementation of the function, this may or may not be a good thing.
We chose to allow passing NULL pointers into functions because that is sometimes required in C libraries. A NULL pointer can be created in PHP in a number of ways: by using unset on an existing variable, or assigning NULL to a variable.
SWIG defaults to wrapping C++ structs and classes with PHP classes - this is done by generating a PHP wrapper script which defines proxy classes which calls a set of flat functions which actually wrap the C++ class. You can disable this wrapper layer by passing the command-line option "-noproxy" in which case you'll just get the flat functions.
This interface file
%module vector
class Vector {
public:
double x,y,z;
Vector();
~Vector();
double magnitude();
};
struct Complex {
double re, im;
};
Would be used in the following way from PHP5:
<?php require "vector.php"; $v = new Vector(); $v->x = 3; $v->y = 4; $v->z = 5; echo "Magnitude of ($v->x,$v->y,$v->z) = " . $v->magnitude() . "\n"; $v = NULL; # destructor called. $c = new Complex(); $c->re = 0; $c->im = 0; # $c destructor called when $c goes out of scope. ?>
Member variables and methods are accessed using the -> operator.
The -noproxy option flattens the object structure and generates collections of named functions (these are the functions which the PHP5 class wrappers call). The above example results in the following PHP functions:
new_Vector(); Vector_x_set($obj,$d); Vector_x_get($obj); Vector_y_set($obj,$d); Vector_y_get($obj); Vector_z_set($obj,$d); Vector_z_get($obj); Vector_magnitude($obj); new_Complex(); Complex_re_set($obj,$d); Complex_re_get($obj); Complex_im_set($obj,$d); Complex_im_get($obj);
The constructor is called when new Object() (or new_Object() if using -noproxy) is used to create an instance of the object. If multiple constructors are defined for an object, function overloading will be used to determine which constructor to execute.
Because PHP uses reference counting to manage resources, simple assignment of one variable to another such as:
$ref = $v;
causes the symbol $ref to refer to the same underlying object as $v. This does not result in a call to the C++ copy constructor or copy assignment operator.
One can force execution of the copy constructor by using:
$o_copy = new Object($o);
Destructors are automatically called when all variables referencing the instance are reassigned or go out of scope. The destructor is not available to be called manually. To force a destructor to be called the programmer can either reassign the variable or call unset($v)
Static member variables in C++ are not wrapped as such in PHP as it does not appear to be possible to intercept accesses to such variables. Therefore, static member variables are wrapped using a class function with the same name, which returns the current value of the class variable. For example
%module example
class Ko {
static int threats;
};
would be accessed in PHP as,
include("example.php");
echo "There have now been " . Ko::threats() . " threats\n";
To set the static member variable, pass the value as the argument to the class function, e.g.
Ko::threats(10); echo "There have now been " . Ko::threats() . " threats\n";
Static member functions are supported in PHP using the class::function() syntax. For example
%module example
class Ko {
static void threats();
};
include("example.php");
Ko::threats();
To place PHP code in the generated "example.php" file one can use the code pragma. The code is inserted after loading the shared object.
%module example %pragma(php) code=" # This code is inserted into example.php echo \"example.php execution\\n\"; "
Results in the following in "example.php"
# This code is inserted into example.php echo "example.php execution\n";
The include pragma is a short cut to add include statements to the example.php file.
%module example %pragma(php) code=" include \"include.php\"; " %pragma(php) include="include.php" // equivalent.
The phpinfo pragma inserts code in the PHP_MINFO_FUNCTION which is called from PHP's phpinfo() function.
%module example;
%pragma(php) phpinfo="
zend_printf("An example of PHP support through SWIG\n");
php_info_print_table_start();
php_info_print_table_header(2, \"Directive\", \"Value\");
php_info_print_table_row(2, \"Example support\", \"enabled\");
php_info_print_table_end();
"
To insert code into the PHP_MINIT_FUNCTION, one can use either %init or %minit.
%module example;
%init {
zend_printf("Inserted into PHP_MINIT_FUNCTION\n");
}
%minit {
zend_printf("Inserted into PHP_MINIT_FUNCTION\n");
}
To insert code into the PHP_MSHUTDOWN_FUNCTION, one can use either %shutdown or %mshutdown.
%module example;
%mshutdown {
zend_printf("Inserted into PHP_MSHUTDOWN_FUNCTION\n");
}
The %rinit and %rshutdown statements are very similar but insert code into the request init (PHP_RINIT_FUNCTION) and request shutdown (PHP_RSHUTDOWN_FUNCTION) code respectively.
Proxy classes provide a more natural, object-oriented way to access extension classes. As described above, each proxy instance has an associated C++ instance, and method calls to the proxy are passed to the C++ instance transparently via C wrapper functions.
This arrangement is asymmetric in the sense that no corresponding mechanism exists to pass method calls down the inheritance chain from C++ to PHP. In particular, if a C++ class has been extended in PHP (by extending the proxy class), these extensions will not be visible from C++ code. Virtual method calls from C++ are thus not able access the lowest implementation in the inheritance chain.
Changes have been made to SWIG 1.3.18 to address this problem and make the relationship between C++ classes and proxy classes more symmetric. To achieve this goal, new classes called directors are introduced at the bottom of the C++ inheritance chain. Support for generating PHP classes has been added in SWIG 1.3.40. The job of the directors is to route method calls correctly, either to C++ implementations higher in the inheritance chain or to PHP implementations lower in the inheritance chain. The upshot is that C++ classes can be extended in PHP and from C++ these extensions look exactly like native C++ classes. Neither C++ code nor PHP code needs to know where a particular method is implemented: the combination of proxy classes, director classes, and C wrapper functions takes care of all the cross-language method routing transparently.
The director feature is disabled by default. To use directors you must make two changes to the interface file. First, add the "directors" option to the %module directive, like this:
%module(directors="1") modulename
Without this option no director code will be generated. Second, you must use the %feature("director") directive to tell SWIG which classes and methods should get directors. The %feature directive can be applied globally, to specific classes, and to specific methods, like this:
// generate directors for all classes that have virtual methods
%feature("director");
// generate directors for all virtual methods in class Foo
%feature("director") Foo;
You can use the %feature("nodirector") directive to turn off directors for specific classes or methods. So for example,
%feature("director") Foo;
%feature("nodirector") Foo::bar;
will generate directors for all virtual methods of class Foo except bar().
Directors can also be generated implicitly through inheritance. In the following, class Bar will get a director class that handles the methods one() and two() (but not three()):
%feature("director") Foo;
class Foo {
public:
Foo(int foo);
virtual void one();
virtual void two();
};
class Bar: public Foo {
public:
virtual void three();
};
then at the PHP side you can define
require("mymodule.php");
class MyFoo extends Foo {
function one() {
print "one from php\n";
}
}
For each class that has directors enabled, SWIG generates a new class that derives from both the class in question and a special Swig::Director class. These new classes, referred to as director classes, can be loosely thought of as the C++ equivalent of the PHP proxy classes. The director classes store a pointer to their underlying PHP object. Indeed, this is quite similar to the "_cPtr" and "thisown" members of the PHP proxy classes.
For simplicity let's ignore the Swig::Director class and refer to the original C++ class as the director's base class. By default, a director class extends all virtual methods in the inheritance chain of its base class (see the preceding section for how to modify this behavior). Thus all virtual method calls, whether they originate in C++ or in PHP via proxy classes, eventually end up in at the implementation in the director class. The job of the director methods is to route these method calls to the appropriate place in the inheritance chain. By "appropriate place" we mean the method that would have been called if the C++ base class and its extensions in PHP were seamlessly integrated. That seamless integration is exactly what the director classes provide, transparently skipping over all the messy extension API glue that binds the two languages together.
In reality, the "appropriate place" is one of only two possibilities: C++ or PHP. Once this decision is made, the rest is fairly easy. If the correct implementation is in C++, then the lowest implementation of the method in the C++ inheritance chain is called explicitly. If the correct implementation is in PHP, the Zend API is used to call the method of the underlying PHP object (after which the usual virtual method resolution in PHP automatically finds the right implementation).
Now how does the director decide which language should handle the method call? The basic rule is to handle the method in PHP, unless there's a good reason not to. The reason for this is simple: PHP has the most "extended" implementation of the method. This assertion is guaranteed, since at a minimum the PHP proxy class implements the method. If the method in question has been extended by a class derived from the proxy class, that extended implementation will execute exactly as it should. If not, the proxy class will route the method call into a C wrapper function, expecting that the method will be resolved in C++. The wrapper will call the virtual method of the C++ instance, and since the director extends this the call will end up right back in the director method. Now comes the "good reason not to" part. If the director method were to blindly call the PHP method again, it would get stuck in an infinite loop. We avoid this situation by adding special code to the C wrapper function that tells the director method to not do this. The C wrapper function compares the called and the declaring class name of the given method. If these are not the same, then the C wrapper function tells the director to resolve the method by calling up the C++ inheritance chain, preventing an infinite loop.
One more point needs to be made about the relationship between director classes and proxy classes. When a proxy class instance is created in PHP, SWIG creates an instance of the original C++ class and assigns it to ->_cPtr. This is exactly what happens without directors and is true even if directors are enabled for the particular class in question. When a class derived from a proxy class is created, however, SWIG then creates an instance of the corresponding C++ director class. The reason for this difference is that user-defined subclasses may override or extend methods of the original class, so the director class is needed to route calls to these methods correctly. For unmodified proxy classes, all methods are ultimately implemented in C++ so there is no need for the extra overhead involved with routing the calls through PHP.
Memory management issues are slightly more complicated with directors than for proxy classes alone. PHP instances hold a pointer to the associated C++ director object, and the director in turn holds a pointer back to the PHP object. By default, proxy classes own their C++ director object and take care of deleting it when they are garbage collected.
This relationship can be reversed by calling the special ->thisown property of the proxy class. After setting this property to 0, the director class no longer destroys the PHP object. Assuming no outstanding references to the PHP object remain, the PHP object will be destroyed at the same time. This is a good thing, since directors and proxies refer to each other and so must be created and destroyed together. Destroying one without destroying the other will likely cause your program to segfault.
Here is an example:
class Foo {
public:
...
};
class FooContainer {
public:
void addFoo(Foo *);
...
};
$c = new FooContainer(); $a = new Foo(); $a->thisown = 0; $c->addFoo($a);
In this example, we are assuming that FooContainer will take care of deleting all the Foo pointers it contains at some point.
With directors routing method calls to PHP, and proxies routing them to C++, the handling of exceptions is an important concern. By default, the directors ignore exceptions that occur during method calls that are resolved in PHP. To handle such exceptions correctly, it is necessary to temporarily translate them into C++ exceptions. This can be done with the %feature("director:except") directive. The following code should suffice in most cases:
%feature("director:except") {
if ($error == FAILURE) {
throw Swig::DirectorMethodException();
}
}
This code will check the PHP error state after each method call from a director into PHP, and throw a C++ exception if an error occurred. This exception can be caught in C++ to implement an error handler. Currently no information about the PHP error is stored in the Swig::DirectorMethodException object, but this will likely change in the future.
It may be the case that a method call originates in PHP, travels up to C++ through a proxy class, and then back into PHP via a director method. If an exception occurs in PHP at this point, it would be nice for that exception to find its way back to the original caller. This can be done by combining a normal %exception directive with the director:except handler shown above. Here is an example of a suitable exception handler:
%exception {
try { $action }
catch (Swig::DirectorException &e) { SWIG_fail; }
}
The class Swig::DirectorException used in this example is actually a base class of Swig::DirectorMethodException, so it will trap this exception. Because the PHP error state is still set when Swig::DirectorMethodException is thrown, PHP will register the exception as soon as the C wrapper function returns.
Enabling directors for a class will generate a new director method for every virtual method in the class' inheritance chain. This alone can generate a lot of code bloat for large hierarchies. Method arguments that require complex conversions to and from target language types can result in large director methods. For this reason it is recommended that you selectively enable directors only for specific classes that are likely to be extended in PHP and used in C++.
Compared to classes that do not use directors, the call routing in the director methods does add some overhead. In particular, at least one dynamic cast and one extra function call occurs per method call from PHP. Relative to the speed of PHP execution this is probably completely negligible. For worst case routing, a method call that ultimately resolves in C++ may take one extra detour through PHP in order to ensure that the method does not have an extended PHP implementation. This could result in a noticeable overhead in some cases.
Although directors make it natural to mix native C++ objects with PHP objects (as director objects) via a common base class pointer, one should be aware of the obvious fact that method calls to PHP objects will be much slower than calls to C++ objects. This situation can be optimized by selectively enabling director methods (using the %feature directive) for only those methods that are likely to be extended in PHP.
Typemaps for input and output of most of the basic types from director classes have been written. These are roughly the reverse of the usual input and output typemaps used by the wrapper code. The typemap operation names are 'directorin', 'directorout', and 'directorargout'. The director code does not currently use any of the other kinds of typemaps. It is not clear at this point which kinds are appropriate and need to be supported.
Director typemaps for STL classes are mostly in place, and hence you should be able to use std::string, etc., as you would any other type.
This chapter describes SWIG support for Pike. As of this writing, the SWIG Pike module is still under development and is not considered ready for prime time. The Pike module is being developed against the Pike 7.4.10 release and may not be compatible with previous versions of Pike.
This chapter covers most SWIG features, but certain low-level
details are covered in less depth than in earlier chapters. At the very
least, make sure you read the "SWIG Basics"
chapter.
Suppose that you defined a SWIG module such as the following:
%module example
%{
#include "example.h"
%}
int fact(int n);
To build a C extension module for Pike, run SWIG using the -pike option :
$ swig -pike example.i
If you're building a C++ extension, be sure to add the -c++ option:
$ swig -c++ -pike example.i
This creates a single source file named example_wrap.c (or example_wrap.cxx, if you ran SWIG with the -c++ option). The SWIG-generated source file contains the low-level wrappers that need to be compiled and linked with the rest of your C/C++ application to create an extension module.
The name of the wrapper file is derived from the name of the input file. For example, if the input file is example.i, the name of the wrapper file is example_wrap.c. To change this, you can use the -o option:
$ swig -pike -o pseudonym.c example.i
In order to compile the C/C++ wrappers, the compiler needs to know the path to the Pike header files. These files are usually contained in a directory such as
/usr/local/pike/7.4.10/include/pike
There doesn't seem to be any way to get Pike itself to reveal the location of these files, so you may need to hunt around for them. You're looking for files with the names global.h, program.h and so on.
To use your module, simply use Pike's import statement:
$ pike Pike v7.4 release 10 running Hilfe v3.5 (Incremental Pike Frontend) > import example; > fact(4); (1) Result: 24
All of the code for a given SWIG module is wrapped into a single Pike module. Since the name of the shared library that implements your module ultimately determines the module's name (as far as Pike is concerned), SWIG's %module directive doesn't really have any significance.
Global functions are wrapped as new Pike built-in functions. For example,
%module example int fact(int n);
creates a new built-in function example.fact(n) that works exactly as you'd expect it to:
> import example; > fact(4); (1) Result: 24
Global variables are currently wrapped as a pair of functions, one to get the current value of the variable and another to set it. For example, the declaration
%module example double Foo;
will result in two functions, Foo_get() and Foo_set() :
> import example; > Foo_get(); (1) Result: 3.000000 > Foo_set(3.14159); (2) Result: 0 > Foo_get(); (3) Result: 3.141590
Enumerated types in C/C++ declarations are wrapped as Pike constants, not as Pike enums.
Constructors are wrapped as create() methods, and destructors are wrapped as destroy() methods, for Pike classes.
Since Pike doesn't support static methods or data for Pike classes, static member functions in your C++ classes are wrapped as regular functions and static member variables are wrapped as pairs of functions (one to get the value of the static member variable, and another to set it). The names of these functions are prepended with the name of the class. For example, given this C++ class declaration:
class Shape
{
public:
static void print();
static int nshapes;
};
SWIG will generate a Shape_print() method that invokes the static Shape::print() member function, as well as a pair of methods, Shape_nshapes_get() and Shape_nshapes_set(), to get and set the value of Shape::nshapes.
Caution: This chapter is under repair!
This chapter describes SWIG's support of Python. SWIG is compatible with most recent Python versions including Python 3.0 and Python 2.6, as well as older versions dating back to Python 2.0. For the best results, consider using Python 2.3 or newer.
This chapter covers most SWIG features, but certain low-level details are covered in less depth than in earlier chapters. At the very least, make sure you read the "SWIG Basics" chapter.
To build Python extension modules, SWIG uses a layered approach in which parts of the extension module are defined in C and other parts are defined in Python. The C layer contains low-level wrappers whereas Python code is used to define high-level features.
This layered approach recognizes the fact that certain aspects of extension building are better accomplished in each language (instead of trying to do everything in C or C++). Furthermore, by generating code in both languages, you get a lot more flexibility since you can enhance the extension module with support code in either language.
In describing the Python interface, this chapter starts by covering the basics of configuration, compiling, and installing Python modules. Next, the Python interface to common C and C++ programming features is described. Advanced customization features such as typemaps are then described followed by a discussion of low-level implementation details.
Suppose that you defined a SWIG module such as the following:
/* File: example.i */
%module example
%{
#define SWIG_FILE_WITH_INIT
#include "example.h"
%}
int fact(int n);
The #define SWIG_FILE_WITH_INIT line inserts a macro that specifies that the resulting C file should be built as a python extension, inserting the module init code. This .i file wraps the following simple C file:
/* File: example.c */
#include "example.h"
int fact(int n) {
if (n < 0){ /* This should probably return an error, but this is simpler */
return 0;
}
if (n == 0) {
return 1;
}
else {
/* testing for overflow would be a good idea here */
return n * fact(n-1);
}
}
With the header file:
/* File: example.h */ int fact(int n);
To build a Python module, run SWIG using the -python option:
$ swig -python example.i
If building a C++ extension, add the -c++ option:
$ swig -c++ -python example.i
This creates two different files; a C/C++ source file example_wrap.c or example_wrap.cxx and a Python source file example.py. The generated C source file contains the low-level wrappers that need to be compiled and linked with the rest of your C/C++ application to create an extension module. The Python source file contains high-level support code. This is the file that you will import to use the module.
The name of the wrapper file is derived from the name of the input file. For example, if the input file is example.i, the name of the wrapper file is example_wrap.c. To change this, you can use the -o option. The name of the Python file is derived from the module name specified with %module. If the module name is example, then a file example.py is created.
The following sections have further practical examples and details on how you might go about compiling and using the generated files.
The preferred approach to building an extension module for python is to compile it with distutils, which comes with all recent versions of python (Distutils Docs).
Distutils takes care of making sure that your extension is built with all the correct flags, headers, etc. for the version of Python it is run with. Distutils will compile your extension into a shared object file or DLL (.so on Linux, .pyd on Windows, etc). In addition, distutils can handle installing your package into site-packages, if that is desired. A configuration file (conventionally called: setup.py) describes the extension (and related python modules). The distutils will then generate all the right compiler directives to build it for you.
Here is a sample setup.py file for the above example:
#!/usr/bin/env python
"""
setup.py file for SWIG example
"""
from distutils.core import setup, Extension
example_module = Extension('_example',
sources=['example_wrap.c', 'example.c'],
)
setup (name = 'example',
version = '0.1',
author = "SWIG Docs",
description = """Simple swig example from docs""",
ext_modules = [example_module],
py_modules = ["example"],
)
In this example, the line: example_module = Extension(....) creates an Extension module object, defining the name as _example , and using the source code files: example_wrap.c, generated by swig, and example.c, your original c source. The swig (and other python extension modules) tradition is for the compiled extension to have the name of the python portion, prefixed by an underscore. If the name of your python module is "example.py", then the name of the corresponding object file will be"_example.so"
The setup call then sets up distutils to build your package, defining some meta data, and passing in your extension module object. Once this is saved as setup.py, you can build your extension with these commands:
$ swig -python example.i $ python setup.py build_ext --inplace
And a .so, or .pyd or... will be created for you. It will build a version that matches the python that you run the command with. Taking apart the command line:
The distutils have many other features, consult the python distutils docs for details.
This same approach works on all platforms if the appropriate compiler is installed. (it can even build extensions to the standard Windows Python using MingGW)
While the preferred approach to building an extension module is to use the distutils, some people like to integrate building extensions with a larger build system, and thus may wish to compile their modules without the distutils. To do this, you need to compile your program using commands like this (shown for Linux):
$ swig -python example.i $ gcc -O2 -fPIC -c example.c $ gcc -O2 -fPIC -c example_wrap.c -I/usr/local/include/python2.5 $ gcc -shared example.o example_wrap.o -o _example.so
The exact commands for doing this vary from platform to platform. However, SWIG tries to guess the right options when it is installed. Therefore, you may want to start with one of the examples in the SWIG/Examples/python directory. If that doesn't work, you will need to read the man-pages for your compiler and linker to get the right set of options. You might also check the SWIG Wiki for additional information.
When linking the module, the name of the output file has to match the name of the module prefixed by an underscore. If the name of your module is "example", then the name of the corresponding object file should be "_example.so" or "_examplemodule.so ". The name of the module is specified using the %module directive or the -module command line option.
Compatibility Note: In SWIG-1.3.13 and earlier releases, module names did not include the leading underscore. This is because modules were normally created as C-only extensions without the extra Python support file (instead, creating Python code was supported as an optional feature). This has been changed in SWIG-1.3.14 and is consistent with other Python extension modules. For example, the socket module actually consists of two files; socket.py and _socket.so. Many other built-in Python modules follow a similar convention.
An alternative approach to dynamic linking is to rebuild the Python interpreter with your extension module added to it. In the past, this approach was sometimes necessary due to limitations in dynamic loading support on certain machines. However, the situation has improved greatly over the last few years and you should not consider this approach unless there is really no other option.
The usual procedure for adding a new module to Python involves finding the Python source, adding an entry to the Modules/Setup file, and rebuilding the interpreter using the Python Makefile. However, newer Python versions have changed the build process. You may need to edit the 'setup.py' file in the Python distribution instead.
In earlier versions of SWIG, the embed.i library file could be used to rebuild the interpreter. For example:
%module example
%inline %{
extern int fact(int);
extern int mod(int, int);
extern double My_variable;
%}
%include "embed.i" // Include code for a static version of Python
The embed.i library file includes supporting code that contains everything needed to rebuild Python. To rebuild the interpreter, you simply do something like this:
$ swig -python example.i
$ gcc example.c example_wrap.c \
-Xlinker -export-dynamic \
-DHAVE_CONFIG_H -I/usr/local/include/python2.1 \
-I/usr/local/lib/python2.1/config \
-L/usr/local/lib/python2.1/config -lpython2.1 -lm -ldl \
-o mypython
You will need to supply the same libraries that were used to build Python the first time. This may include system libraries such as -lsocket, -lnsl, and -lpthread. Assuming this actually works, the new version of Python should be identical to the default version except that your extension module will be a built-in part of the interpreter.
Comment: In practice, you should probably try to avoid static linking if possible. Some programmers may be inclined to use static linking in the interest of getting better performance. However, the performance gained by static linking tends to be rather minimal in most situations (and quite frankly not worth the extra hassle in the opinion of this author).
Compatibility note: The embed.i library file is deprecated and has not been maintained for several years. Even though it appears to "work" with Python 2.1, no future support is guaranteed. If using static linking, you might want to rely on a different approach (perhaps using distutils).
To use your module, simply use the Python import statement. If all goes well, you will be able to this:
$ python >>> import example >>> example.fact(4) 24 >>>
A common error received by first-time users is the following:
>>> import example
Traceback (most recent call last):
File "<stdin>", line 1, in ?
File "example.py", line 2, in ?
import _example
ImportError: No module named _example
If you get this message, it means that you either forgot to compile the wrapper code into an extension module or you didn't give the extension module the right name. Make sure that you compiled the wrappers into a module called _example.so. And don't forget the leading underscore (_).
Another possible error is the following:
>>> import example Traceback (most recent call last): File "<stdin>", line 1, in ? ImportError: dynamic module does not define init function (init_example) >>>
This error is almost always caused when a bad name is given to the shared object file. For example, if you created a file example.so instead of _example.so you would get this error. Alternatively, this error could arise if the name of the module is inconsistent with the module name supplied with the %module directive. Double-check the interface to make sure the module name and the shared object filename match. Another possible cause of this error is forgetting to link the SWIG-generated wrapper code with the rest of your application when creating the extension module.
Another common error is something similar to the following:
Traceback (most recent call last):
File "example.py", line 3, in ?
import example
ImportError: ./_example.so: undefined symbol: fact
This error usually indicates that you forgot to include some object files or libraries in the linking of the shared library file. Make sure you compile both the SWIG wrapper file and your original program into a shared library file. Make sure you pass all of the required libraries to the linker.
Sometimes unresolved symbols occur because a wrapper has been created for a function that doesn't actually exist in a library. This usually occurs when a header file includes a declaration for a function that was never actually implemented or it was removed from a library without updating the header file. To fix this, you can either edit the SWIG input file to remove the offending declaration or you can use the %ignore directive to ignore the declaration.
Finally, suppose that your extension module is linked with another library like this:
$ gcc -shared example.o example_wrap.o -L/home/beazley/projects/lib -lfoo \
-o _example.so
If the foo library is compiled as a shared library, you might encounter the following problem when you try to use your module:
>>> import example Traceback (most recent call last): File "<stdin>", line 1, in ? ImportError: libfoo.so: cannot open shared object file: No such file or directory >>>
This error is generated because the dynamic linker can't locate the libfoo.so library. When shared libraries are loaded, the system normally only checks a few standard locations such as /usr/lib and /usr/local/lib. To fix this problem, there are several things you can do. First, you can recompile your extension module with extra path information. For example, on Linux you can do this:
$ gcc -shared example.o example_wrap.o -L/home/beazley/projects/lib -lfoo \
-Xlinker -rpath /home/beazley/projects/lib \
-o _example.so
Alternatively, you can set the LD_LIBRARY_PATH environment variable to include the directory with your shared libraries. If setting LD_LIBRARY_PATH, be aware that setting this variable can introduce a noticeable performance impact on all other applications that you run. To set it only for Python, you might want to do this instead:
$ env LD_LIBRARY_PATH=/home/beazley/projects/lib python
Finally, you can use a command such as ldconfig (Linux) or crle (Solaris) to add additional search paths to the default system configuration (this requires root access and you will need to read the man pages).
Compilation of C++ extensions has traditionally been a tricky problem. Since the Python interpreter is written in C, you need to take steps to make sure C++ is properly initialized and that modules are compiled correctly. This should be a non-issue if you're using distutils, as it takes care of all that for you. The following is included for historical reasons, and in case you need to compile on your own.
On most machines, C++ extension modules should be linked using the C++ compiler. For example:
$ swig -c++ -python example.i $ g++ -O2 -fPIC -c example.cxx $ g++ -O2 -fPIC -c example_wrap.cxx -I/usr/local/include/python2.5 $ g++ -shared example.o example_wrap.o -o _example.so
The -fPIC option tells GCC to generate position-independent code (PIC) which is required for most architectures (it's not vital on x86, but still a good idea as it allows code pages from the library to be shared between processes). Other compilers may need a different option specified instead of -fPIC.
In addition to this, you may need to include additional library files to make it work. For example, if you are using the Sun C++ compiler on Solaris, you often need to add an extra library -lCrun like this:
$ swig -c++ -python example.i $ CC -c example.cxx $ CC -c example_wrap.cxx -I/usr/local/include/python2.5 $ CC -G example.o example_wrap.o -L/opt/SUNWspro/lib -o _example.so -lCrun
Of course, the extra libraries to use are completely non-portable---you will probably need to do some experimentation.
Sometimes people have suggested that it is necessary to relink the Python interpreter using the C++ compiler to make C++ extension modules work. In the experience of this author, this has never actually appeared to be necessary. Relinking the interpreter with C++ really only includes the special run-time libraries described above---as long as you link your extension modules with these libraries, it should not be necessary to rebuild Python.
If you aren't entirely sure about the linking of a C++ extension, you might look at an existing C++ program. On many Unix machines, the ldd command will list library dependencies. This should give you some clues about what you might have to include when you link your extension module. For example:
$ ldd swig
libstdc++-libc6.1-1.so.2 => /usr/lib/libstdc++-libc6.1-1.so.2 (0x40019000)
libm.so.6 => /lib/libm.so.6 (0x4005b000)
libc.so.6 => /lib/libc.so.6 (0x40077000)
/lib/ld-linux.so.2 => /lib/ld-linux.so.2 (0x40000000)
As a final complication, a major weakness of C++ is that it does not define any sort of standard for binary linking of libraries. This means that C++ code compiled by different compilers will not link together properly as libraries nor is the memory layout of classes and data structures implemented in any kind of portable manner. In a monolithic C++ program, this problem may be unnoticed. However, in Python, it is possible for different extension modules to be compiled with different C++ compilers. As long as these modules are self-contained, this probably won't matter. However, if these modules start sharing data, you will need to take steps to avoid segmentation faults and other erratic program behavior. If working with lots of software components, you might want to investigate using a more formal standard such as COM.
On platforms that support 64-bit applications (Solaris, Irix, etc.), special care is required when building extension modules. On these machines, 64-bit applications are compiled and linked using a different set of compiler/linker options. In addition, it is not generally possible to mix 32-bit and 64-bit code together in the same application.
To utilize 64-bits, the Python executable will need to be recompiled as a 64-bit application. In addition, all libraries, wrapper code, and every other part of your application will need to be compiled for 64-bits. If you plan to use other third-party extension modules, they will also have to be recompiled as 64-bit extensions.
If you are wrapping commercial software for which you have no source code, you will be forced to use the same linking standard as used by that software. This may prevent the use of 64-bit extensions. It may also introduce problems on platforms that support more than one linking standard (e.g., -o32 and -n32 on Irix).
On the Linux x86_64 platform (Opteron or EM64T), besides of the required compiler option -fPIC discussed above, you will need to be careful about the libraries you link with or the library path you use. In general, a Linux distribution will have two set of libraries, one for native x86_64 programs (under /usr/lib64), and another for 32 bits compatibility (under /usr/lib). Also, the compiler options -m32 and -m64 allow you to choose the desired binary format for your python extension.
Building a SWIG extension to Python under Windows is roughly similar to the process used with Unix. Using the distutils, it is essentially identical. If you have the same version of the MS compiler that Python was built with (the python2.4 and python2.5 distributed by python.org are built with Visual Studio 2003), the standard python setup.py build should just work.
As of python2.5, the distutils support building extensions with MingGW out of the box. Following the instruction here: Building Python extensions for Windows with only free tools should get you started.
If you need to build it on your own, the following notes are provided:
You will need to create a DLL that can be loaded into the interpreter. This section briefly describes the use of SWIG with Microsoft Visual C++. As a starting point, many of SWIG's examples include project files (.dsp files) for Visual C++ 6. These can be opened by more recent versions of Visual Studio. You might want to take a quick look at these examples in addition to reading this section.
In Developer Studio, SWIG should be invoked as a custom build option. This is usually done as follows:
If all went well, SWIG will be automatically invoked whenever you build your project. Any changes made to the interface file will result in SWIG being automatically executed to produce a new version of the wrapper file.
To run your new Python extension, simply run Python and use the import command as normal. For example :
$ python >>> import example >>> print example.fact(4) 24 >>>
If you get an ImportError exception when importing the module, you may have forgotten to include additional library files when you built your module. If you get an access violation or some kind of general protection fault immediately upon import, you have a more serious problem. This is often caused by linking your extension module against the wrong set of Win32 debug or thread libraries. You will have to fiddle around with the build options of project to try and track this down.
A 'Debug' build of the wrappers requires a debug build of the Python interpreter. This normally requires building the Python interpreter from source, which is not a job for the feint-hearted. Alternatively you can use the 'Release' build of the Python interpreter with a 'Debug' build of your wrappers by defining the SWIG_PYTHON_INTERPRETER_NO_DEBUG symbol under the preprocessor options. Or you can ensure this macro is defined at the beginning of the wrapper code using the following in your interface file, where _MSC_VER ensures it is only used by the Visual Studio compiler:
%begin %{
#ifdef _MSC_VER
#define SWIG_PYTHON_INTERPRETER_NO_DEBUG
#endif
%}
Some users have reported success in building extension modules using Cygwin and other compilers. However, the problem of building usable DLLs with these compilers tends to be rather problematic. For the latest information, you may want to consult the SWIG Wiki.
By default, SWIG tries to build a very natural Python interface to your C/C++ code. Functions are wrapped as functions, classes are wrapped as classes, and so forth. This section briefly covers the essential aspects of this wrapping.
The SWIG %module directive specifies the name of the Python module. If you specify `%module example', then everything is wrapped into a Python 'example' module. Underneath the covers, this module consists of a Python source file example.py and a low-level extension module _example.so. When choosing a module name, make sure you don't use the same name as a built-in Python command or standard module name.
Global functions are wrapped as new Python built-in functions. For example,
%module example int fact(int n);
creates a built-in function example.fact(n) that works exactly like you think it does:
>>> import example >>> print example.fact(4) 24 >>>
C/C++ global variables are fully supported by SWIG. However, the underlying mechanism is somewhat different than you might expect due to the way that Python assignment works. When you type the following in Python
a = 3.4
"a" becomes a name for an object containing the value 3.4. If you later type
b = a
then "a" and "b" are both names for the object containing the value 3.4. Thus, there is only one object containing 3.4 and "a" and "b" are both names that refer to it. This is quite different than C where a variable name refers to a memory location in which a value is stored (and assignment copies data into that location). Because of this, there is no direct way to map variable assignment in C to variable assignment in Python.
To provide access to C global variables, SWIG creates a special object called `cvar' that is added to each SWIG generated module. Global variables are then accessed as attributes of this object. For example, consider this interface
// SWIG interface file with global variables
%module example
...
%inline %{
extern int My_variable;
extern double density;
%}
...
Now look at the Python interface:
>>> import example >>> # Print out value of a C global variable >>> print example.cvar.My_variable 4 >>> # Set the value of a C global variable >>> example.cvar.density = 0.8442 >>> # Use in a math operation >>> example.cvar.density = example.cvar.density*1.10
If you make an error in variable assignment, you will receive an error message. For example:
>>> example.cvar.density = "Hello" Traceback (most recent call last): File "<stdin>", line 1, in ? TypeError: C variable 'density (double )' >>>
If a variable is declared as const, it is wrapped as a read-only variable. Attempts to modify its value will result in an error.
To make ordinary variables read-only, you can use the %immutable directive. For example:
%{
extern char *path;
%}
%immutable;
extern char *path;
%mutable;
The %immutable directive stays in effect until it is explicitly disabled or cleared using %mutable. See the Creating read-only variables section for further details.
If you just want to make a specific variable immutable, supply a declaration name. For example:
%{
extern char *path;
%}
%immutable path;
...
extern char *path; // Read-only (due to %immutable)
If you would like to access variables using a name other than " cvar", it can be changed using the -globals option :
$ swig -python -globals myvar example.i
Some care is in order when importing multiple SWIG modules. If you use the "from <file> import *" style of importing, you will get a name clash on the variable `cvar' and you will only be able to access global variables from the last module loaded. To prevent this, you might consider renaming cvar or making it private to the module by giving it a name that starts with a leading underscore. SWIG does not create cvar if there are no global variables in a module.
C/C++ constants are installed as Python objects containing the appropriate value. To create a constant, use #define, enum , or the %constant directive. For example:
#define PI 3.14159
#define VERSION "1.0"
enum Beverage { ALE, LAGER, STOUT, PILSNER };
%constant int FOO = 42;
%constant const char *path = "/usr/local";
For enums, make sure that the definition of the enumeration actually appears in a header file or in the wrapper file somehow---if you just stick an enum in a SWIG interface without also telling the C compiler about it, the wrapper code won't compile.
Note: declarations declared as const are wrapped as read-only variables and will be accessed using the cvar object described in the previous section. They are not wrapped as constants. For further discussion about this, see the SWIG Basics chapter.
Constants are not guaranteed to remain constant in Python---the name of the constant could be accidentally reassigned to refer to some other object. Unfortunately, there is no easy way for SWIG to generate code that prevents this. You will just have to be careful.
C/C++ pointers are fully supported by SWIG. Furthermore, SWIG has no problem working with incomplete type information. Here is a rather simple interface:
%module example FILE *fopen(const char *filename, const char *mode); int fputs(const char *, FILE *); int fclose(FILE *);
When wrapped, you will be able to use the functions in a natural way from Python. For example:
>>> import example
>>> f = example.fopen("junk","w")
>>> example.fputs("Hello World\n", f)
>>> example.fclose(f)
If this makes you uneasy, rest assured that there is no deep magic involved. Underneath the covers, pointers to C/C++ objects are simply represented as opaque values using an especial python container object:
>>> print f <Swig Object of type 'FILE *' at 0xb7d6f470>
This pointer value can be freely passed around to different C functions that expect to receive an object of type FILE *. The only thing you can't do is dereference the pointer from Python. Of course, that isn't much of a concern in this example.
In older versions of SWIG (1.3.22 or older), pointers were represented using a plain string object. If you have an old package that still requires that representation, or you just feel nostalgic, you can always retrieve it by casting the pointer object to a string:
>>> print str(f) _c0671108_p_FILE
Also, if you need to pass the raw pointer value to some external python library, you can do it by casting the pointer object to an integer:
>>> print int(f) 135833352
However, the inverse operation is not possible, i.e., you can't build a SWIG pointer object from a raw integer value.
Note also that the '0' or NULL pointer is always represented by None, no matter what type swig is addressing. In the previous example, you can call:
>>> example.fclose(None)
and that will be equivalent to the following, but not really useful, C code:
FILE *f = NULL; fclose(f);
As much as you might be inclined to modify a pointer value directly from Python, don't. The hexadecimal encoding is not necessarily the same as the logical memory address of the underlying object. Instead it is the raw byte encoding of the pointer value. The encoding will vary depending on the native byte-ordering of the platform (i.e., big-endian vs. little-endian). Similarly, don't try to manually cast a pointer to a new type by simply replacing the type-string. This may not work like you expect, it is particularly dangerous when casting C++ objects. If you need to cast a pointer or change its value, consider writing some helper functions instead. For example:
%inline %{
/* C-style cast */
Bar *FooToBar(Foo *f) {
return (Bar *) f;
}
/* C++-style cast */
Foo *BarToFoo(Bar *b) {
return dynamic_cast<Foo*>(b);
}
Foo *IncrFoo(Foo *f, int i) {
return f+i;
}
%}
Also, if working with C++, you should always try to use the new C++ style casts. For example, in the above code, the C-style cast may return a bogus result whereas as the C++-style cast will return None if the conversion can't be performed.
If you wrap a C structure, it is wrapped by a Python class. This provides a very natural interface. For example,
struct Vector {
double x,y,z;
};
is used as follows:
>>> v = example.Vector() >>> v.x = 3.5 >>> v.y = 7.2 >>> print v.x, v.y, v.z 7.8 -4.5 0.0 >>>
Similar access is provided for unions and the data members of C++ classes.
If you print out the value of v in the above example, you will see something like this:
>>> print v <C Vector instance at _18e31408_p_Vector>
This object is actually a Python instance that has been wrapped around a pointer to the low-level C structure. This instance doesn't actually do anything--it just serves as a proxy. The pointer to the C object can be found in the .this attribute. For example:
>>> print v.this _18e31408_p_Vector >>>
Further details about the Python proxy class are covered a little later.
const members of a structure are read-only. Data members can also be forced to be read-only using the %immutable directive. For example:
struct Foo {
...
%immutable;
int x; /* Read-only members */
char *name;
%mutable;
...
};
When char * members of a structure are wrapped, the contents are assumed to be dynamically allocated using malloc or new (depending on whether or not SWIG is run with the -c++ option). When the structure member is set, the old contents will be released and a new value created. If this is not the behavior you want, you will have to use a typemap (described later).
If a structure contains arrays, access to those arrays is managed through pointers. For example, consider this:
struct Bar {
int x[16];
};
If accessed in Python, you will see behavior like this:
>>> b = example.Bar() >>> print b.x _801861a4_p_int >>>
This pointer can be passed around to functions that expect to receive an int * (just like C). You can also set the value of an array member using another pointer. For example:
>>> c = example.Bar() >>> c.x = b.x # Copy contents of b.x to c.x
For array assignment, SWIG copies the entire contents of the array starting with the data pointed to by b.x. In this example, 16 integers would be copied. Like C, SWIG makes no assumptions about bounds checking---if you pass a bad pointer, you may get a segmentation fault or access violation.
When a member of a structure is itself a structure, it is handled as a pointer. For example, suppose you have two structures like this:
struct Foo {
int a;
};
struct Bar {
Foo f;
};
Now, suppose that you access the f attribute of Bar like this:
>>> b = Bar() >>> x = b.f
In this case, x is a pointer that points to the Foo that is inside b. This is the same value as generated by this C code:
Bar b; Foo *x = &b->f; /* Points inside b */
Because the pointer points inside the structure, you can modify the contents and everything works just like you would expect. For example:
>>> b = Bar() >>> b.f.a = 3 # Modify attribute of structure member >>> x = b.f >>> x.a = 3 # Modifies the same structure
C++ classes are wrapped by Python classes as well. For example, if you have this class,
class List {
public:
List();
~List();
int search(char *item);
void insert(char *item);
void remove(char *item);
char *get(int n);
int length;
};
you can use it in Python like this:
>>> l = example.List()
>>> l.insert("Ale")
>>> l.insert("Stout")
>>> l.insert("Lager")
>>> l.get(1)
'Stout'
>>> print l.length
3
>>>
Class data members are accessed in the same manner as C structures.
Static class members present a special problem for Python. Prior to Python-2.2, Python classes had no support for static methods and no version of Python supports static member variables in a manner that SWIG can utilize. Therefore, SWIG generates wrappers that try to work around some of these issues. To illustrate, suppose you have a class like this:
class Spam {
public:
static void foo();
static int bar;
};
In Python, the static member can be access in three different ways:
>>> example.Spam_foo() # Spam::foo() >>> s = example.Spam() >>> s.foo() # Spam::foo() via an instance >>> example.Spam.foo() # Spam::foo(). Python-2.2 only
The first two methods of access are supported in all versions of Python. The last technique is only available in Python-2.2 and later versions.
Static member variables are currently accessed as global variables. This means, they are accessed through cvar like this:
>>> print example.cvar.Spam_bar 7
SWIG is fully aware of issues related to C++ inheritance. Therefore, if you have classes like this
class Foo {
...
};
class Bar : public Foo {
...
};
those classes are wrapped into a hierarchy of Python classes that reflect the same inheritance structure. All of the usual Python utility functions work normally:
>>> b = Bar() >>> instance(b,Foo) 1 >>> issubclass(Bar,Foo) 1 >>> issubclass(Foo,Bar) 0
Furthermore, if you have functions like this
void spam(Foo *f);
then the function spam() accepts Foo * or a pointer to any class derived from Foo.
It is safe to use multiple inheritance with SWIG.
In C++, there are many different ways a function might receive and manipulate objects. For example:
void spam1(Foo *x); // Pass by pointer void spam2(Foo &x); // Pass by reference void spam3(const Foo &x);// Pass by const reference void spam4(Foo x); // Pass by value void spam5(Foo x[]); // Array of objects
In Python, there is no detailed distinction like this--specifically, there are only "objects". There are no pointers, references, arrays, and so forth. Because of this, SWIG unifies all of these types together in the wrapper code. For instance, if you actually had the above functions, it is perfectly legal to do this:
>>> f = Foo() # Create a Foo >>> spam1(f) # Ok. Pointer >>> spam2(f) # Ok. Reference >>> spam3(f) # Ok. Const reference >>> spam4(f) # Ok. Value. >>> spam5(f) # Ok. Array (1 element)
Similar behavior occurs for return values. For example, if you had functions like this,
Foo *spam6(); Foo &spam7(); Foo spam8(); const Foo &spam9();
then all three functions will return a pointer to some Foo object. Since the third function (spam8) returns a value, newly allocated memory is used to hold the result and a pointer is returned (Python will release this memory when the return value is garbage collected). The fourth case (spam9) which returns a const reference, in most of the cases will be treated as a returning value, and it will follow the same allocation/deallocation process.
C++ overloaded functions, methods, and constructors are mostly supported by SWIG. For example, if you have two functions like this:
void foo(int); void foo(char *c);
You can use them in Python in a straightforward manner:
>>> foo(3) # foo(int)
>>> foo("Hello") # foo(char *c)
Similarly, if you have a class like this,
class Foo {
public:
Foo();
Foo(const Foo &);
...
};
you can write Python code like this:
>>> f = Foo() # Create a Foo >>> g = Foo(f) # Copy f
Overloading support is not quite as flexible as in C++. Sometimes there are methods that SWIG can't disambiguate. For example:
void spam(int); void spam(short);
or
void foo(Bar *b); void foo(Bar &b);
If declarations such as these appear, you will get a warning message like this:
example.i:12: Warning 509: Overloaded method spam(short) effectively ignored, example.i:11: Warning 509: as it is shadowed by spam(int).
To fix this, you either need to ignore or rename one of the methods. For example:
%rename(spam_short) spam(short); ... void spam(int); void spam(short); // Accessed as spam_short
or
%ignore spam(short); ... void spam(int); void spam(short); // Ignored
SWIG resolves overloaded functions and methods using a disambiguation scheme that ranks and sorts declarations according to a set of type-precedence rules. The order in which declarations appear in the input does not matter except in situations where ambiguity arises--in this case, the first declaration takes precedence.
Please refer to the "SWIG and C++" chapter for more information about overloading.
Certain C++ overloaded operators can be handled automatically by SWIG. For example, consider a class like this:
class Complex {
private:
double rpart, ipart;
public:
Complex(double r = 0, double i = 0) : rpart(r), ipart(i) { }
Complex(const Complex &c) : rpart(c.rpart), ipart(c.ipart) { }
Complex &operator=(const Complex &c);
Complex operator+=(const Complex &c) const;
Complex operator+(const Complex &c) const;
Complex operator-(const Complex &c) const;
Complex operator*(const Complex &c) const;
Complex operator-() const;
double re() const { return rpart; }
double im() const { return ipart; }
};
When wrapped, it works like you expect:
>>> c = Complex(3,4) >>> d = Complex(7,8) >>> e = c + d >>> e.re() 10.0 >>> e.im() 12.0 >>> c += d >>> c.re() 10.0 >>> c.im() 12.0
One restriction with operator overloading support is that SWIG is not able to fully handle operators that aren't defined as part of the class. For example, if you had code like this
class Complex {
...
friend Complex operator+(double, const Complex &c);
...
};
then SWIG ignores it and issues a warning. You can still wrap the operator, but you may have to encapsulate it in a special function. For example:
%rename(Complex_add_dc) operator+(double, const Complex &);
There are ways to make this operator appear as part of the class using the %extend directive. Keep reading.
Also, be aware that certain operators don't map cleanly to Python. For instance, overloaded assignment operators don't map to Python semantics and will be ignored.
SWIG is aware of C++ namespaces, but namespace names do not appear in the module nor do namespaces result in a module that is broken up into submodules or packages. For example, if you have a file like this,
%module example
namespace foo {
int fact(int n);
struct Vector {
double x,y,z;
};
};
it works in Python as follows:
>>> import example >>> example.fact(3) 6 >>> v = example.Vector() >>> v.x = 3.4 >>> print v.y 0.0 >>>
If your program has more than one namespace, name conflicts (if any) can be resolved using %rename For example:
%rename(Bar_spam) Bar::spam;
namespace Foo {
int spam();
}
namespace Bar {
int spam();
}
If you have more than one namespace and your want to keep their symbols separate, consider wrapping them as separate SWIG modules. For example, make the module name the same as the namespace and create extension modules for each namespace separately. If your program utilizes thousands of small deeply nested namespaces each with identical symbol names, well, then you get what you deserve.
C++ templates don't present a huge problem for SWIG. However, in order to create wrappers, you have to tell SWIG to create wrappers for a particular template instantiation. To do this, you use the %template directive. For example:
%module example
%{
#include "pair.h"
%}
template<class T1, class T2>
struct pair {
typedef T1 first_type;
typedef T2 second_type;
T1 first;
T2 second;
pair();
pair(const T1&, const T2&);
~pair();
};
%template(pairii) pair<int,int>;
In Python:
>>> import example >>> p = example.pairii(3,4) >>> p.first 3 >>> p.second 4
Obviously, there is more to template wrapping than shown in this example. More details can be found in the SWIG and C++ chapter. Some more complicated examples will appear later.
In certain C++ programs, it is common to use classes that have been wrapped by so-called "smart pointers." Generally, this involves the use of a template class that implements operator->() like this:
template<class T> class SmartPtr {
...
T *operator->();
...
}
Then, if you have a class like this,
class Foo {
public:
int x;
int bar();
};
A smart pointer would be used in C++ as follows:
SmartPtr<Foo> p = CreateFoo(); // Created somehow (not shown) ... p->x = 3; // Foo::x int y = p->bar(); // Foo::bar
To wrap this in Python, simply tell SWIG about the SmartPtr class and the low-level Foo object. Make sure you instantiate SmartPtr using %template if necessary. For example:
%module example ... %template(SmartPtrFoo) SmartPtr<Foo>; ...
Now, in Python, everything should just "work":
>>> p = example.CreateFoo() # Create a smart-pointer somehow >>> p.x = 3 # Foo::x >>> p.bar() # Foo::bar
If you ever need to access the underlying pointer returned by operator->() itself, simply use the __deref__() method. For example:
>>> f = p.__deref__() # Returns underlying Foo *
The C++ reference counted objects section contains Python examples of memory management using referencing counting.
In the previous section, a high-level view of Python wrapping was presented. A key component of this wrapping is that structures and classes are wrapped by Python proxy classes. This provides a very natural Python interface and allows SWIG to support a number of advanced features such as operator overloading. However, a number of low-level details were omitted. This section provides a brief overview of how the proxy classes work.
New in SWIG version 2.0.4: The use of Python proxy classes has performance implications that may be unacceptable for a high-performance library. The new -builtin option instructs SWIG to forego the use of proxy classes, and instead create wrapped types as new built-in Python types. When this option is used, the following section ("Proxy classes") does not apply. Details on the use of the -builtin option are in the Built-in Types section.
In the "SWIG basics" and "SWIG and C++" chapters, details of low-level structure and class wrapping are described. To summarize those chapters, if you have a class like this
class Foo {
public:
int x;
int spam(int);
...
then SWIG transforms it into a set of low-level procedural wrappers. For example:
Foo *new_Foo() {
return new Foo();
}
void delete_Foo(Foo *f) {
delete f;
}
int Foo_x_get(Foo *f) {
return f->x;
}
void Foo_x_set(Foo *f, int value) {
f->x = value;
}
int Foo_spam(Foo *f, int arg1) {
return f->spam(arg1);
}
These wrappers can be found in the low-level extension module (e.g., _example).
Using these wrappers, SWIG generates a high-level Python proxy class (also known as a shadow class) like this (shown for Python 2.2):
import _example
class Foo(object):
def __init__(self):
self.this = _example.new_Foo()
self.thisown = 1
def __del__(self):
if self.thisown:
_example.delete_Foo(self.this)
def spam(self,arg1):
return _example.Foo_spam(self.this,arg1)
x = property(_example.Foo_x_get, _example.Foo_x_set)
This class merely holds a pointer to the underlying C++ object ( .this) and dispatches methods and member variable access to that object using the low-level accessor functions. From a user's point of view, it makes the class work normally:
>>> f = example.Foo() >>> f.x = 3 >>> y = f.spam(5)
The fact that the class has been wrapped by a real Python class offers certain advantages. For instance, you can attach new Python methods to the class and you can even inherit from it (something not supported by Python built-in types until Python 2.2).
The -builtin option provides a significant performance improvement in the wrapped code. To understand the difference between proxy classes and built-in types, let's take a look at what a wrapped object looks like under both circumstances.
When proxy classes are used, each wrapped object in python is an instance of a pure python class. As a reminder, here is what the __init__ method looks like in a proxy class:
class Foo(object):
def __init__(self):
self.this = _example.new_Foo()
self.thisown = 1
When a Foo instance is created, the call to _example.new_Foo() creates a new C++ Foo instance; wraps that C++ instance inside an instance of a python built-in type called SwigPyObject; and stores the SwigPyObject instance in the 'this' field of the python Foo object. Did you get all that? So, the python Foo object is composed of three parts:
When -builtin is used, the pure python layer is stripped off. Each wrapped class is turned into a new python built-in type which inherits from SwigPyObject, and SwigPyObject instances are returned directly from the wrapped methods. For more information about python built-in extensions, please refer to the python documentation:
http://docs.python.org/extending/newtypes.html
Use of the -builtin option implies a couple of limitations:
python version support:
Some legacy syntax is no longer supported; in particular:
Wrapped types may not be raised as python exceptions. Here's why: the python internals expect that all sub-classes of Exception will have this struct layout:
typedef struct {
PyObject_HEAD
PyObject *dict;
PyObject *args;
PyObject *message;
} PyBaseExceptionObject;
But swig-generated wrappers expect that all swig-wrapped classes will have this struct layout:
typedef struct {
PyObject_HEAD
void *ptr;
swig_type_info *ty;
int own;
PyObject *next;
PyObject *dict;
} SwigPyObject;
There are workarounds for this. For example, if you wrap this class:
class MyException {
public:
MyException (const char *msg_);
~MyException ();
const char *what () const;
private:
char *msg;
};
... you can define this python class, which may be raised as an exception:
class MyPyException (Exception) :
def __init__(self, msg, *args) :
Exception.__init__(self, *args)
self.myexc = MyException(msg)
def what (self) :
return self.myexc.what()
Reverse binary operators (e.g., __radd__) are not supported.
To illustrate this point, if you have a wrapped class called MyString, and you want to use instances of MyString interchangeably with native python strings, you can define an 'operator+ (const char*)' method :
class MyString {
public:
MyString (const char *init);
MyString operator+ (const char *other) const;
...
};
SWIG will automatically create an operator overload in python that will allow this:
from MyModule import MyString
mystr = MyString("No one expects")
episode = mystr + " the Spanish Inquisition"
This works because the first operand (mystr) defines a way to add a native string to itself. However, the following will not work:
from MyModule import MyString
mystr = MyString("Parrot")
episode = "Dead " + mystr
The above code fails, because the first operand -- a native python string -- doesn't know how to add an instance of MyString to itself.
If you have multiple SWIG modules that share type information ( more info), the -builtin option requires a bit of extra discipline to ensure that base classes are initialized before derived classes. Specifically:
There must be an unambiguous dependency graph for the modules.
Module dependencies must be explicitly stated with %import statements in the SWIG interface file.
As an example, suppose module A has this interface in A.i :
%module "A";
class Base {
...
};
If you want to wrap another module containing a class that inherits from A, this is how it would look :
%module "B";
%import "A.i"
class Derived : public Base {
...
};
The import "A.i" statement is required, because module B depends on module A.
As long as you obey these requirements, your python code may import the modules in any order :
import B import A assert(issubclass(B.Derived, A.Base))
The entire justification for the -builtin option is improved performance. To that end, the best way to squeeze maximum performance out of your wrappers is to use operator overloads. Named method dispatch is slow in python, even when compared to other scripting languages. However, python built-in types have a large number of "slots", analogous to C++ operator overloads, which allow you to short-circuit named method dispatch for certain common operations.
By default, SWIG will translate most C++ arithmetic operator overloads into python slot entries. For example, suppose you have this class:
class Twit {
public:
Twit operator+ (const Twit& twit) const;
// Forward to operator+
Twit add (const Twit& twit) const
{ return *this + twit; }
};
SWIG will automatically register operator+ as a python slot operator for addition. You may write python code like this:
from MyModule import Twit nigel = Twit() emily = Twit() percival = nigel + emily percival = nigel.add(emily)
The last two lines of the python code are equivalent, but the line that uses the '+' operator is much faster.
In-place operators (e.g., operator+=) and comparison operators (operator==, operator<, etc.) are also converted to python slot operators. For a complete list of C++ operators that are automatically converted to python slot operators, refer to the file python/pyopers.swig in the SWIG library.
There are other very useful python slots that you may explicitly define using %feature directives. For example, suppose you want to use instances of a wrapped class as keys in a native python dict. That will work as long as you define a hash function for instances of your class, and use it to define the python tp_hash slot:
%feature("python:slot", "tp_hash", functype="hashfunc") Cheese::cheeseHashFunc;
class Cheese {
public:
Cheese (const char *name);
long cheeseHashFunc () const;
};
This will allow you to write python code like this:
from my MyPackage import Cheese
inventory = {
Cheese("cheddar") : 0,
Cheese("gouda") : 0,
Cheese("camembert") : 0
}
Because you defined the tp_hash slot, Cheese objects may be used as hash keys; and when the cheeseHashFunc method is invoked by a python dict, it will not go through named method dispatch. A more detailed discussion about %feature("python:slot") can be found in the file python/pyopers.swig in the SWIG library. You can read about all of the available python slots here:
http://docs.python.org/c-api/typeobj.html
You may override (almost) all of the slots defined in the PyTypeObject, PyNumberMethods, PyMappingMethods, PySequenceMethods, and PyBufferProcs structs.
NOTE: Although this section refers to proxy objects, everything here also applies when the -builtin option is used.
Associated with proxy object, is an ownership flag .thisown The value of this flag determines who is responsible for deleting the underlying C++ object. If set to 1, the Python interpreter will destroy the C++ object when the proxy class is garbage collected. If set to 0 (or if the attribute is missing), then the destruction of the proxy class has no effect on the C++ object.
When an object is created by a constructor or returned by value, Python automatically takes ownership of the result. For example:
class Foo {
public:
Foo();
Foo bar();
};
In Python:
>>> f = Foo() >>> f.thisown 1 >>> g = f.bar() >>> g.thisown 1
On the other hand, when pointers are returned to Python, there is often no way to know where they came from. Therefore, the ownership is set to zero. For example:
class Foo {
public:
...
Foo *spam();
...
};
>>> f = Foo() >>> s = f.spam() >>> print s.thisown 0 >>>
This behavior is especially important for classes that act as containers. For example, if a method returns a pointer to an object that is contained inside another object, you definitely don't want Python to assume ownership and destroy it!
A good way to indicate that ownership should be set for a returned pointer is to use the %newobject directive.
Related to containers, ownership issues can arise whenever an object is assigned to a member or global variable. For example, consider this interface:
%module example
struct Foo {
int value;
Foo *next;
};
Foo *head = 0;
When wrapped in Python, careful observation will reveal that ownership changes whenever an object is assigned to a global variable. For example:
>>> f = example.Foo() >>> f.thisown 1 >>> example.cvar.head = f >>> f.thisown 0 >>>
In this case, C is now holding a reference to the object---you probably don't want Python to destroy it. Similarly, this occurs for members. For example:
>>> f = example.Foo() >>> g = example.Foo() >>> f.thisown 1 >>> g.thisown 1 >>> f.next = g >>> g.thisown 0 >>>
For the most part, memory management issues remain hidden. However, there are occasionally situations where you might have to manually change the ownership of an object. For instance, consider code like this:
class Node {
Object *value;
public:
void set_value(Object *v) { value = v; }
...
};
Now, consider the following Python code:
>>> v = Object() # Create an object >>> n = Node() # Create a node >>> n.set_value(v) # Set value >>> v.thisown 1 >>> del v
In this case, the object n is holding a reference to v internally. However, SWIG has no way to know that this has occurred. Therefore, Python still thinks that it has ownership of the object. Should the proxy object be destroyed, then the C++ destructor will be invoked and n will be holding a stale-pointer. If you're lucky, you will only get a segmentation fault.
To work around this, it is always possible to flip the ownership flag. For example,
>>> v.thisown = 0
It is also possible to deal with situations like this using typemaps--an advanced topic discussed later.
SWIG makes every attempt to preserve backwards compatibility with older versions of Python to the extent that it is possible. However, in Python-2.2, an entirely new type of class system was introduced. This new-style class system offers many enhancements including static member functions, properties (managed attributes), and class methods. Details about all of these changes can be found on www.python.org and is not repeated here.
To address differences between Python versions, SWIG currently emits dual-mode proxy class wrappers. In Python-2.2 and newer releases, these wrappers encapsulate C++ objects in new-style classes that take advantage of new features (static methods and properties). However, if these very same wrappers are imported into an older version of Python, old-style classes are used instead.
This dual-nature of the wrapper code means that you can create extension modules with SWIG and those modules will work with all versions of Python ranging from Python-1.4 to the very latest release. Moreover, the wrappers take advantage of Python-2.2 features when available.
For the most part, the interface presented to users is the same regardless of what version of Python is used. The only incompatibility lies in the handling of static member functions. In Python-2.2, they can be accessed via the class itself. In Python-2.1 and earlier, they have to be accessed as a global function or through an instance (see the earlier section).
Proxy classes provide a more natural, object-oriented way to access extension classes. As described above, each proxy instance has an associated C++ instance, and method calls to the proxy are passed to the C++ instance transparently via C wrapper functions.
This arrangement is asymmetric in the sense that no corresponding mechanism exists to pass method calls down the inheritance chain from C++ to Python. In particular, if a C++ class has been extended in Python (by extending the proxy class), these extensions will not be visible from C++ code. Virtual method calls from C++ are thus not able access the lowest implementation in the inheritance chain.
Changes have been made to SWIG 1.3.18 to address this problem and make the relationship between C++ classes and proxy classes more symmetric. To achieve this goal, new classes called directors are introduced at the bottom of the C++ inheritance chain. The job of the directors is to route method calls correctly, either to C++ implementations higher in the inheritance chain or to Python implementations lower in the inheritance chain. The upshot is that C++ classes can be extended in Python and from C++ these extensions look exactly like native C++ classes. Neither C++ code nor Python code needs to know where a particular method is implemented: the combination of proxy classes, director classes, and C wrapper functions takes care of all the cross-language method routing transparently.
The director feature is disabled by default. To use directors you must make two changes to the interface file. First, add the "directors" option to the %module directive, like this:
%module(directors="1") modulename
Without this option no director code will be generated. Second, you must use the %feature("director") directive to tell SWIG which classes and methods should get directors. The %feature directive can be applied globally, to specific classes, and to specific methods, like this:
// generate directors for all classes that have virtual methods
%feature("director");
// generate directors for all virtual methods in class Foo
%feature("director") Foo;
You can use the %feature("nodirector") directive to turn off directors for specific classes or methods. So for example,
%feature("director") Foo;
%feature("nodirector") Foo::bar;
will generate directors for all virtual methods of class Foo except bar().
Directors can also be generated implicitly through inheritance. In the following, class Bar will get a director class that handles the methods one() and two() (but not three()):
%feature("director") Foo;
class Foo {
public:
Foo(int foo);
virtual void one();
virtual void two();
};
class Bar: public Foo {
public:
virtual void three();
};
then at the python side you can define
import mymodule
class MyFoo(mymodule.Foo):
def __init__(self, foo):
mymodule.Foo(self, foo)
def one(self):
print "one from python"
For each class that has directors enabled, SWIG generates a new class that derives from both the class in question and a special Swig::Director class. These new classes, referred to as director classes, can be loosely thought of as the C++ equivalent of the Python proxy classes. The director classes store a pointer to their underlying Python object and handle various issues related to object ownership. Indeed, this is quite similar to the "this" and "thisown" members of the Python proxy classes.
For simplicity let's ignore the Swig::Director class and refer to the original C++ class as the director's base class. By default, a director class extends all virtual methods in the inheritance chain of its base class (see the preceding section for how to modify this behavior). Thus all virtual method calls, whether they originate in C++ or in Python via proxy classes, eventually end up in at the implementation in the director class. The job of the director methods is to route these method calls to the appropriate place in the inheritance chain. By "appropriate place" we mean the method that would have been called if the C++ base class and its extensions in Python were seamlessly integrated. That seamless integration is exactly what the director classes provide, transparently skipping over all the messy extension API glue that binds the two languages together.
In reality, the "appropriate place" is one of only two possibilities: C++ or Python. Once this decision is made, the rest is fairly easy. If the correct implementation is in C++, then the lowest implementation of the method in the C++ inheritance chain is called explicitly. If the correct implementation is in Python, the Python API is used to call the method of the underlying Python object (after which the usual virtual method resolution in Python automatically finds the right implementation).
Now how does the director decide which language should handle the method call? The basic rule is to handle the method in Python, unless there's a good reason not to. The reason for this is simple: Python has the most "extended" implementation of the method. This assertion is guaranteed, since at a minimum the Python proxy class implements the method. If the method in question has been extended by a class derived from the proxy class, that extended implementation will execute exactly as it should. If not, the proxy class will route the method call into a C wrapper function, expecting that the method will be resolved in C++. The wrapper will call the virtual method of the C++ instance, and since the director extends this the call will end up right back in the director method. Now comes the "good reason not to" part. If the director method were to blindly call the Python method again, it would get stuck in an infinite loop. We avoid this situation by adding special code to the C wrapper function that tells the director method to not do this. The C wrapper function compares the pointer to the Python object that called the wrapper function to the pointer stored by the director. If these are the same, then the C wrapper function tells the director to resolve the method by calling up the C++ inheritance chain, preventing an infinite loop.
One more point needs to be made about the relationship between director classes and proxy classes. When a proxy class instance is created in Python, SWIG creates an instance of the original C++ class and assigns it to .this. This is exactly what happens without directors and is true even if directors are enabled for the particular class in question. When a class derived from a proxy class is created, however, SWIG then creates an instance of the corresponding C++ director class. The reason for this difference is that user-defined subclasses may override or extend methods of the original class, so the director class is needed to route calls to these methods correctly. For unmodified proxy classes, all methods are ultimately implemented in C++ so there is no need for the extra overhead involved with routing the calls through Python.
Memory management issues are slightly more complicated with directors than for proxy classes alone. Python instances hold a pointer to the associated C++ director object, and the director in turn holds a pointer back to the Python object. By default, proxy classes own their C++ director object and take care of deleting it when they are garbage collected.
This relationship can be reversed by calling the special __disown__() method of the proxy class. After calling this method, the .thisown flag is set to zero, and the director class increments the reference count of the Python object. When the director class is deleted it decrements the reference count. Assuming no outstanding references to the Python object remain, the Python object will be destroyed at the same time. This is a good thing, since directors and proxies refer to each other and so must be created and destroyed together. Destroying one without destroying the other will likely cause your program to segfault.
To help ensure that no references to the Python object remain after calling __disown__(), this method returns a weak reference to the Python object. Weak references are only available in Python versions 2.1 and higher, so for older versions you must explicitly delete all references. Here is an example:
class Foo {
public:
...
};
class FooContainer {
public:
void addFoo(Foo *);
...
};
>>> c = FooContainer() >>> a = Foo().__disown__() >>> c.addFoo(a) >>> b = Foo() >>> b = b.__disown__() >>> c.addFoo(b) >>> c.addFoo(Foo().__disown__())
In this example, we are assuming that FooContainer will take care of deleting all the Foo pointers it contains at some point. Note that no hard references to the Foo objects remain in Python.
With directors routing method calls to Python, and proxies routing them to C++, the handling of exceptions is an important concern. By default, the directors ignore exceptions that occur during method calls that are resolved in Python. To handle such exceptions correctly, it is necessary to temporarily translate them into C++ exceptions. This can be done with the %feature("director:except") directive. The following code should suffice in most cases:
%feature("director:except") {
if ($error != NULL) {
throw Swig::DirectorMethodException();
}
}
This code will check the Python error state after each method call from a director into Python, and throw a C++ exception if an error occurred. This exception can be caught in C++ to implement an error handler. Currently no information about the Python error is stored in the Swig::DirectorMethodException object, but this will likely change in the future.
It may be the case that a method call originates in Python, travels up to C++ through a proxy class, and then back into Python via a director method. If an exception occurs in Python at this point, it would be nice for that exception to find its way back to the original caller. This can be done by combining a normal %exception directive with the director:except handler shown above. Here is an example of a suitable exception handler:
%exception {
try { $action }
catch (Swig::DirectorException &e) { SWIG_fail; }
}
The class Swig::DirectorException used in this example is actually a base class of Swig::DirectorMethodException, so it will trap this exception. Because the Python error state is still set when Swig::DirectorMethodException is thrown, Python will register the exception as soon as the C wrapper function returns.
Enabling directors for a class will generate a new director method for every virtual method in the class' inheritance chain. This alone can generate a lot of code bloat for large hierarchies. Method arguments that require complex conversions to and from target language types can result in large director methods. For this reason it is recommended that you selectively enable directors only for specific classes that are likely to be extended in Python and used in C++.
Compared to classes that do not use directors, the call routing in the director methods does add some overhead. In particular, at least one dynamic cast and one extra function call occurs per method call from Python. Relative to the speed of Python execution this is probably completely negligible. For worst case routing, a method call that ultimately resolves in C++ may take one extra detour through Python in order to ensure that the method does not have an extended Python implementation. This could result in a noticeable overhead in some cases.
Although directors make it natural to mix native C++ objects with Python objects (as director objects) via a common base class pointer, one should be aware of the obvious fact that method calls to Python objects will be much slower than calls to C++ objects. This situation can be optimized by selectively enabling director methods (using the %feature directive) for only those methods that are likely to be extended in Python.
Typemaps for input and output of most of the basic types from director classes have been written. These are roughly the reverse of the usual input and output typemaps used by the wrapper code. The typemap operation names are 'directorin', 'directorout', and 'directorargout'. The director code does not currently use any of the other kinds of typemaps. It is not clear at this point which kinds are appropriate and need to be supported.
Director typemaps for STL classes are in place, and hence you should be able to use std::vector, std::string, etc., as you would any other type.
Note: The director typemaps for return types based in const references, such as
class Foo {
…
virtual const int& bar();
…
};
will work only for simple call scenarios. Usually the resulting code is neither thread or reentrant safe. Hence, the user is advised to avoid returning const references in director methods. For example, the user could modify the method interface to use lvalue return types, wherever possible, for example
class Foo {
…
virtual int bar();
…
};
If that is not possible, the user should avoid enabling the director feature for reentrant, recursive or threaded member methods that return const references.
The last section presented the absolute basics of C/C++ wrapping. If you do nothing but feed SWIG a header file, you will get an interface that mimics the behavior described. However, sometimes this isn't enough to produce a nice module. Certain types of functionality might be missing or the interface to certain functions might be awkward. This section describes some common SWIG features that are used to improve your the interface to an extension module.
Sometimes when you create a module, it is missing certain bits of functionality. For example, if you had a function like this
void set_transform(Image *im, double m[4][4]);
it would be accessible from Python, but there may be no easy way to call it. For example, you might get errors like this:
>>> a = [ ... [1,0,0,0], ... [0,1,0,0], ... [0,0,1,0], ... [0,0,0,1]] >>> set_transform(im,a) Traceback (most recent call last): File "<stdin>", line 1, in ? TypeError: Type error. Expected _p_a_4__double
The problem here is that there is no easy way to construct and manipulate a suitable double [4][4] value to use. To fix this, you can write some extra C helper functions. Just use the %inline directive. For example:
%inline %{
/* Note: double[4][4] is equivalent to a pointer to an array double (*)[4] */
double (*new_mat44())[4] {
return (double (*)[4]) malloc(16*sizeof(double));
}
void free_mat44(double (*x)[4]) {
free(x);
}
void mat44_set(double x[4][4], int i, int j, double v) {
x[i][j] = v;
}
double mat44_get(double x[4][4], int i, int j) {
return x[i][j];
}
%}
From Python, you could then write code like this:
>>> a = new_mat44() >>> mat44_set(a,0,0,1.0) >>> mat44_set(a,1,1,1.0) >>> mat44_set(a,2,2,1.0) ... >>> set_transform(im,a) >>>
Admittedly, this is not the most elegant looking approach. However, it works and it wasn't too hard to implement. It is possible to clean this up using Python code, typemaps, and other customization features as covered in later sections.
If writing support code in C isn't enough, it is also possible to write code in Python. This code gets inserted in to the .py file created by SWIG. One use of Python code might be to supply a high-level interface to certain functions. For example:
void set_transform(Image *im, double x[4][4]);
...
/* Rewrite the high level interface to set_transform */
%pythoncode %{
def set_transform(im,x):
a = new_mat44()
for i in range(4):
for j in range(4):
mat44_set(a,i,j,x[i][j])
_example.set_transform(im,a)
free_mat44(a)
%}
In this example, set_transform() provides a high-level Python interface built on top of low-level helper functions. For example, this code now seems to work:
>>> a = [ ... [1,0,0,0], ... [0,1,0,0], ... [0,0,1,0], ... [0,0,0,1]] >>> set_transform(im,a) >>>
Admittedly, this whole scheme for wrapping the two-dimension array argument is rather ad-hoc. Besides, shouldn't a Python list or a Numeric Python array just work normally? We'll get to those examples soon enough. For now, think of this example as an illustration of what can be done without having to rely on any of the more advanced customization features.
There is also %pythonbegin which is another directive very similar to %pythoncode, but generates the given Python code at the beginning of the .py file. This directive works in the same way as %pythoncode, except the code is copied just after the SWIG banner (comment) at the top of the file, before any real code. This provides an opportunity to add your own description in a comment near the top of the file as well as Python imports that have to appear at the top of the file, such as "from __future__ import" statements.
The following shows example usage for Python 2.6 to use print as it can in Python 3, that is, as a function instead of a statement:
%pythonbegin %{
# This module provides wrappers to the Whizz Bang library
%}
%pythonbegin %{
from __future__ import print_function
print("Loading", "Whizz", "Bang", sep=' ... ')
%}
which can be seen when viewing the first few lines of the generated .py file:
# This file was automatically generated by SWIG (http://www.swig.org).
# Version 2.0.11
#
# Do not make changes to this file unless you know what you are doing--modify
# the SWIG interface file instead.
# This module provides wrappers to the Whizz Bang library
from __future__ import print_function
print("Loading", "Whizz", "Bang", sep=' ... ')
Sometimes you may want to replace or modify the wrapper function that SWIG creates in the proxy .py file. The Python module in SWIG provides some features that enable you to do this. First, to entirely replace a proxy function you can use %feature("shadow"). For example:
%module example
// Rewrite bar() python code
%feature("shadow") Foo::bar(int) %{
def bar(*args):
#do something before
$action
#do something after
%}
class Foo {
public:
int bar(int x);
}
where $action will be replaced by the call to the C/C++ proper method.
Often the proxy function created by SWIG is fine, but you simply want to add code to it without touching the rest of the generated function body. For these cases SWIG provides the pythonprepend and pythonappend features which do exactly as their names suggest. The pythonprepend feature will insert its value at the beginning of the proxy function, and pythonappend will insert code at the end of the proxy, just before the return statement.
%module example
// Add python code to bar()
%feature("pythonprepend") Foo::bar(int) %{
#do something before C++ call
%}
%feature("pythonappend") Foo::bar(int) %{
#do something after C++ call
%}
class Foo {
public:
int bar(int x);
}
Notes: Usually the pythonappend and pythonprepend features are safer to use than the shadow feature. Also, from SWIG version 1.3.28 you can use the directive forms %pythonappend and %pythonprepend as follows:
%module example
// Add python code to bar()
%pythonprepend Foo::bar(int) %{
#do something before C++ call
%}
%pythonappend Foo::bar(int) %{
#do something after C++ call
%}
class Foo {
public:
int bar(int x);
}
Note that when the underlying C++ method is overloaded, there is only one proxy Python method for multiple C++ methods. In this case, only one of parsed methods is examined for the feature. You are better off specifying the feature without the argument list to ensure it will get used, as it will then get attached to all the overloaded C++ methods. For example:
%module example
// Add python code to bar()
%pythonprepend Foo::bar %{
#do something before C++ call
%}
%pythonappend Foo::bar %{
#do something after C++ call
%}
class Foo {
public:
int bar(int x);
int bar();
}
The same applies for overloaded constructors.
One of the more interesting features of SWIG is that it can extend structures and classes with new methods--at least in the Python interface. Here is a simple example:
%module example
%{
#include "someheader.h"
%}
struct Vector {
double x,y,z;
};
%extend Vector {
char *__str__() {
static char tmp[1024];
sprintf(tmp,"Vector(%g,%g,%g)", $self->x,$self->y,$self->z);
return tmp;
}
Vector(double x, double y, double z) {
Vector *v = (Vector *) malloc(sizeof(Vector));
v->x = x;
v->y = y;
v->z = z;
return v;
}
};
Now, in Python
>>> v = example.Vector(2,3,4) >>> print v Vector(2,3,4) >>>
%extend can be used for many more tasks than this. For example, if you wanted to overload a Python operator, you might do this:
%extend Vector {
Vector __add__(Vector *other) {
Vector v;
v.x = $self->x + other->x;
v.y = $self->y + other->y;
v.z = $self->z + other->z;
return v;
}
};
Use it like this:
>>> import example >>> v = example.Vector(2,3,4) >>> w = example.Vector(10,11,12) >>> print v+w Vector(12,14,16) >>>
%extend works with both C and C++ code. It does not modify the underlying object in any way---the extensions only show up in the Python interface.
If a C or C++ function throws an error, you may want to convert that error into a Python exception. To do this, you can use the %exception directive. %exception simply lets you rewrite part of the generated wrapper code to include an error check.
In C, a function often indicates an error by returning a status code (a negative number or a NULL pointer perhaps). Here is a simple example of how you might handle that:
%exception malloc {
$action
if (!result) {
PyErr_SetString(PyExc_MemoryError,"Not enough memory");
return NULL;
}
}
void *malloc(size_t nbytes);
In Python,
>>> a = example.malloc(2000000000) Traceback (most recent call last): File "<stdin>", line 1, in ? MemoryError: Not enough memory >>>
If a library provides some kind of general error handling framework, you can also use that. For example:
%exception {
$action
if (err_occurred()) {
PyErr_SetString(PyExc_RuntimeError, err_message());
return NULL;
}
}
No declaration name is given to %exception, it is applied to all wrapper functions.
C++ exceptions are also easy to handle. For example, you can write code like this:
%exception getitem {
try {
$action
} catch (std::out_of_range &e) {
PyErr_SetString(PyExc_IndexError, const_cast<char*>(e.what()));
return NULL;
}
}
class Base {
public:
Foo *getitem(int index); // Exception handled added
...
};
When raising a Python exception from C, use the PyErr_SetString() function as shown above. The following exception types can be used as the first argument.
PyExc_ArithmeticError PyExc_AssertionError PyExc_AttributeError PyExc_EnvironmentError PyExc_EOFError PyExc_Exception PyExc_FloatingPointError PyExc_ImportError PyExc_IndexError PyExc_IOError PyExc_KeyError PyExc_KeyboardInterrupt PyExc_LookupError PyExc_MemoryError PyExc_NameError PyExc_NotImplementedError PyExc_OSError PyExc_OverflowError PyExc_RuntimeError PyExc_StandardError PyExc_SyntaxError PyExc_SystemError PyExc_TypeError PyExc_UnicodeError PyExc_ValueError PyExc_ZeroDivisionError
The language-independent exception.i library file can also be used to raise exceptions. See the SWIG Library chapter.
Although SWIG is largely automatic, there are certain types of wrapping problems that require additional user input. Examples include dealing with output parameters, strings, binary data, and arrays. This chapter discusses the common techniques for solving these problems.
A common problem in some C programs is handling parameters passed as simple pointers. For example:
void add(int x, int y, int *result) {
*result = x + y;
}
or perhaps
int sub(int *x, int *y) {
return *x-*y;
}
The easiest way to handle these situations is to use the typemaps.i file. For example:
%module example %include "typemaps.i" void add(int, int, int *OUTPUT); int sub(int *INPUT, int *INPUT);
In Python, this allows you to pass simple values. For example:
>>> a = add(3,4) >>> print a 7 >>> b = sub(7,4) >>> print b 3 >>>
Notice how the INPUT parameters allow integer values to be passed instead of pointers and how the OUTPUT parameter creates a return result.
If you don't want to use the names INPUT or OUTPUT , use the %apply directive. For example:
%module example
%include "typemaps.i"
%apply int *OUTPUT { int *result };
%apply int *INPUT { int *x, int *y};
void add(int x, int y, int *result);
int sub(int *x, int *y);
If a function mutates one of its parameters like this,
void negate(int *x) {
*x = -(*x);
}
you can use INOUT like this:
%include "typemaps.i" ... void negate(int *INOUT);
In Python, a mutated parameter shows up as a return value. For example:
>>> a = negate(3) >>> print a -3 >>>
Note: Since most primitive Python objects are immutable, it is not possible to perform in-place modification of a Python object passed as a parameter.
The most common use of these special typemap rules is to handle functions that return more than one value. For example, sometimes a function returns a result as well as a special error code:
/* send message, return number of bytes sent, along with success code */ int send_message(char *text, int len, int *success);
To wrap such a function, simply use the OUTPUT rule above. For example:
%module example
%include "typemaps.i"
%apply int *OUTPUT { int *success };
...
int send_message(char *text, int *success);
When used in Python, the function will return multiple values.
bytes, success = send_message("Hello World")
if not success:
print "Whoa!"
else:
print "Sent", bytes
Another common use of multiple return values are in query functions. For example:
void get_dimensions(Matrix *m, int *rows, int *columns);
To wrap this, you might use the following:
%module example
%include "typemaps.i"
%apply int *OUTPUT { int *rows, int *columns };
...
void get_dimensions(Matrix *m, int *rows, *columns);
Now, in Python:
>>> r,c = get_dimensions(m)
Be aware that the primary purpose of the typemaps.i file is to support primitive datatypes. Writing a function like this
void foo(Bar *OUTPUT);
may not have the intended effect since typemaps.i does not define an OUTPUT rule for Bar.
If you must work with simple pointers such as int * or double * and you don't want to use typemaps.i, consider using the cpointer.i library file. For example:
%module example
%include "cpointer.i"
%inline %{
extern void add(int x, int y, int *result);
%}
%pointer_functions(int, intp);
The %pointer_functions(type,name) macro generates five helper functions that can be used to create, destroy, copy, assign, and dereference a pointer. In this case, the functions are as follows:
int *new_intp(); int *copy_intp(int *x); void delete_intp(int *x); void intp_assign(int *x, int value); int intp_value(int *x);
In Python, you would use the functions like this:
>>> result = new_intp() >>> print result _108fea8_p_int >>> add(3,4,result) >>> print intp_value(result) 7 >>>
If you replace %pointer_functions() by %pointer_class(type,name), the interface is more class-like.
>>> result = intp() >>> add(3,4,result) >>> print result.value() 7
See the SWIG Library chapter for further details.
Sometimes a C function expects an array to be passed as a pointer. For example,
int sumitems(int *first, int nitems) {
int i, sum = 0;
for (i = 0; i < nitems; i++) {
sum += first[i];
}
return sum;
}
To wrap this into Python, you need to pass an array pointer as the first argument. A simple way to do this is to use the carrays.i library file. For example:
%include "carrays.i" %array_class(int, intArray);
The %array_class(type, name) macro creates wrappers for an unbounded array object that can be passed around as a simple pointer like int * or double *. For instance, you will be able to do this in Python:
>>> a = intArray(10000000) # Array of 10-million integers >>> for i in xrange(10000): # Set some values ... a[i] = i >>> sumitems(a,10000) 49995000 >>>
The array "object" created by %array_class() does not encapsulate pointers inside a special array object. In fact, there is no bounds checking or safety of any kind (just like in C). Because of this, the arrays created by this library are extremely low-level indeed. You can't iterate over them nor can you even query their length. In fact, any valid memory address can be accessed if you want (negative indices, indices beyond the end of the array, etc.). Needless to say, this approach is not going to suit all applications. On the other hand, this low-level approach is extremely efficient and well suited for applications in which you need to create buffers, package binary data, etc.
If a C function has an argument of char *, then a Python string can be passed as input. For example:
// C void foo(char *s);
# Python
>>> foo("Hello")
When a Python string is passed as a parameter, the C function receives a pointer to the raw data contained in the string. Since Python strings are immutable, it is illegal for your program to change the value. In fact, doing so will probably crash the Python interpreter.
If your program modifies the input parameter or uses it to return data, consider using the cstring.i library file described in the SWIG Library chapter.
When functions return a char *, it is assumed to be a NULL-terminated string. Data is copied into a new Python string and returned.
If your program needs to work with binary data, you can use a typemap to expand a Python string into a pointer/length argument pair. As luck would have it, just such a typemap is already defined. Just do this:
%apply (char *STRING, int LENGTH) { (char *data, int size) };
...
int parity(char *data, int size, int initial);
Now in Python:
>>> parity("e\x09ffss\x00\x00\x01\nx", 0)
If you need to return binary data, you might use the cstring.i library file. The cdata.i library can also be used to extra binary data from arbitrary pointers.
This section describes how you can modify SWIG's default wrapping behavior for various C/C++ datatypes using the %typemap directive. This is an advanced topic that assumes familiarity with the Python C API as well as the material in the " Typemaps" chapter.
Before proceeding, it should be stressed that typemaps are not a required part of using SWIG---the default wrapping behavior is enough in most cases. Typemaps are only used if you want to change some aspect of the primitive C-Python interface or if you want to elevate your guru status.
A typemap is nothing more than a code generation rule that is attached to a specific C datatype. For example, to convert integers from Python to C, you might define a typemap like this:
%module example
%typemap(in) int {
$1 = (int) PyLong_AsLong($input);
printf("Received an integer : %d\n",$1);
}
%inline %{
extern int fact(int n);
%}
Typemaps are always associated with some specific aspect of code generation. In this case, the "in" method refers to the conversion of input arguments to C/C++. The datatype int is the datatype to which the typemap will be applied. The supplied C code is used to convert values. In this code a number of special variable prefaced by a $ are used. The $1 variable is placeholder for a local variable of type int. The $input variable is the input object of type PyObject *.
When this example is compiled into a Python module, it operates as follows:
>>> from example import * >>> fact(6) Received an integer : 6 720
In this example, the typemap is applied to all occurrences of the int datatype. You can refine this by supplying an optional parameter name. For example:
%module example
%typemap(in) int nonnegative {
$1 = (int) PyLong_AsLong($input);
if ($1 < 0) {
PyErr_SetString(PyExc_ValueError,"Expected a nonnegative value.");
return NULL;
}
}
%inline %{
extern int fact(int nonnegative);
%}
In this case, the typemap code is only attached to arguments that exactly match int nonnegative.
The application of a typemap to specific datatypes and argument names involves more than simple text-matching--typemaps are fully integrated into the SWIG C++ type-system. When you define a typemap for int, that typemap applies to int and qualified variations such as const int. In addition, the typemap system follows typedef declarations. For example:
%typemap(in) int n {
$1 = (int) PyLong_AsLong($input);
printf("n = %d\n",$1);
}
%inline %{
typedef int Integer;
extern int fact(Integer n); // Above typemap is applied
%}
Typemaps can also be defined for groups of consecutive arguments. For example:
%typemap(in) (char *str, int len) {
$1 = PyString_AsString($input);
$2 = PyString_Size($input);
};
int count(char c, char *str, int len);
When a multi-argument typemap is defined, the arguments are always handled as a single Python object. This allows the function to be used like this (notice how the length parameter is omitted):
>>> example.count('e','Hello World')
1
>>>
The previous section illustrated an "in" typemap for converting Python objects to C. A variety of different typemap methods are defined by the Python module. For example, to convert a C integer back into a Python object, you might define an "out" typemap like this:
%typemap(out) int {
$result = PyInt_FromLong((long) $1);
}
A detailed list of available methods can be found in the " Typemaps" chapter.
However, the best source of typemap information (and examples) is probably the Python module itself. In fact, all of SWIG's default type handling is defined by typemaps. You can view these typemaps by looking at the files in the SWIG library. Just take into account that in the latest versions of swig (1.3.22+), the library files are not very pristine clear for the casual reader, as they used to be. The extensive use of macros and other ugly techniques in the latest version produce a very powerful and consistent python typemap library, but at the cost of simplicity and pedagogic value.
To learn how to write a simple or your first typemap, you better take a look at the SWIG library version 1.3.20 or so.
Within typemap code, a number of special variables prefaced with a $ may appear. A full list of variables can be found in the " Typemaps" chapter. This is a list of the most common variables:
$1
$input
$result
$1_name
$1_type
$1_ltype
$symname
When you write a typemap, you usually have to work directly with Python objects. The following functions may prove to be useful.
Python Integer Functions
PyObject *PyInt_FromLong(long l); long PyInt_AsLong(PyObject *); int PyInt_Check(PyObject *);
Python Floating Point Functions
PyObject *PyFloat_FromDouble(double); double PyFloat_AsDouble(PyObject *); int PyFloat_Check(PyObject *);
Python String Functions
PyObject *PyString_FromString(char *); PyObject *PyString_FromStringAndSize(char *, lint len); int PyString_Size(PyObject *); char *PyString_AsString(PyObject *); int PyString_Check(PyObject *);
Python List Functions
PyObject *PyList_New(int size); int PyList_Size(PyObject *list); PyObject *PyList_GetItem(PyObject *list, int i); int PyList_SetItem(PyObject *list, int i, PyObject *item); int PyList_Insert(PyObject *list, int i, PyObject *item); int PyList_Append(PyObject *list, PyObject *item); PyObject *PyList_GetSlice(PyObject *list, int i, int j); int PyList_SetSlice(PyObject *list, int i, int , PyObject *list2); int PyList_Sort(PyObject *list); int PyList_Reverse(PyObject *list); PyObject *PyList_AsTuple(PyObject *list); int PyList_Check(PyObject *);
Python Tuple Functions
PyObject *PyTuple_New(int size); int PyTuple_Size(PyObject *); PyObject *PyTuple_GetItem(PyObject *, int i); int PyTuple_SetItem(PyObject *, int i, PyObject *item); PyObject *PyTuple_GetSlice(PyObject *t, int i, int j); int PyTuple_Check(PyObject *);
Python Dictionary Functions
PyObject *PyDict_New(); int PyDict_Check(PyObject *); int PyDict_SetItem(PyObject *p, PyObject *key, PyObject *val); int PyDict_SetItemString(PyObject *p, const char *key, PyObject *val); int PyDict_DelItem(PyObject *p, PyObject *key); int PyDict_DelItemString(PyObject *p, char *key); PyObject* PyDict_Keys(PyObject *p); PyObject* PyDict_Values(PyObject *p); PyObject* PyDict_GetItem(PyObject *p, PyObject *key); PyObject* PyDict_GetItemString(PyObject *p, const char *key); int PyDict_Next(PyObject *p, Py_ssize_t *ppos, PyObject **pkey, PyObject **pvalue); Py_ssize_t PyDict_Size(PyObject *p); int PyDict_Update(PyObject *a, PyObject *b); int PyDict_Merge(PyObject *a, PyObject *b, int override); PyObject* PyDict_Items(PyObject *p);
Python File Conversion Functions
PyObject *PyFile_FromFile(FILE *f); FILE *PyFile_AsFile(PyObject *); int PyFile_Check(PyObject *);
Abstract Object Interface
write me
This section includes a few examples of typemaps. For more examples, you might look at the files "python.swg" and "typemaps.i " in the SWIG library.
A common problem in many C programs is the processing of command line arguments, which are usually passed in an array of NULL terminated strings. The following SWIG interface file allows a Python list object to be used as a char ** object.
%module argv
// This tells SWIG to treat char ** as a special case
%typemap(in) char ** {
/* Check if is a list */
if (PyList_Check($input)) {
int size = PyList_Size($input);
int i = 0;
$1 = (char **) malloc((size+1)*sizeof(char *));
for (i = 0; i < size; i++) {
PyObject *o = PyList_GetItem($input,i);
if (PyString_Check(o))
$1[i] = PyString_AsString(PyList_GetItem($input,i));
else {
PyErr_SetString(PyExc_TypeError,"list must contain strings");
free($1);
return NULL;
}
}
$1[i] = 0;
} else {
PyErr_SetString(PyExc_TypeError,"not a list");
return NULL;
}
}
// This cleans up the char ** array we malloc'd before the function call
%typemap(freearg) char ** {
free((char *) $1);
}
// Now a test function
%inline %{
int print_args(char **argv) {
int i = 0;
while (argv[i]) {
printf("argv[%d] = %s\n", i,argv[i]);
i++;
}
return i;
}
%}
When this module is compiled, the wrapped C function now operates as follows :
>>> from argv import * >>> print_args(["Dave","Mike","Mary","Jane","John"]) argv[0] = Dave argv[1] = Mike argv[2] = Mary argv[3] = Jane argv[4] = John 5
In the example, two different typemaps are used. The "in" typemap is used to receive an input argument and convert it to a C array. Since dynamic memory allocation is used to allocate memory for the array, the "freearg" typemap is used to later release this memory after the execution of the C function.
Suppose that you had a collection of C functions with arguments such as the following:
int foo(int argc, char **argv);
In the previous example, a typemap was written to pass a Python list as the char **argv. This allows the function to be used from Python as follows:
>>> foo(4, ["foo","bar","spam","1"])
Although this works, it's a little awkward to specify the argument count. To fix this, a multi-argument typemap can be defined. This is not very difficult--you only have to make slight modifications to the previous example:
%typemap(in) (int argc, char **argv) {
/* Check if is a list */
if (PyList_Check($input)) {
int i;
$1 = PyList_Size($input);
$2 = (char **) malloc(($1+1)*sizeof(char *));
for (i = 0; i < $1; i++) {
PyObject *o = PyList_GetItem($input,i);
if (PyString_Check(o))
$2[i] = PyString_AsString(PyList_GetItem($input,i));
else {
PyErr_SetString(PyExc_TypeError,"list must contain strings");
free($2);
return NULL;
}
}
$2[i] = 0;
} else {
PyErr_SetString(PyExc_TypeError,"not a list");
return NULL;
}
}
%typemap(freearg) (int argc, char **argv) {
free((char *) $2);
}
When writing a multiple-argument typemap, each of the types is referenced by a variable such as $1 or $2. The typemap code simply fills in the appropriate values from the supplied Python object.
With the above typemap in place, you will find it no longer necessary to supply the argument count. This is automatically set by the typemap code. For example:
>>> foo(["foo","bar","spam","1"])
A common problem in some C programs is that values may be returned in arguments rather than in the return value of a function. For example:
/* Returns a status value and two values in out1 and out2 */
int spam(double a, double b, double *out1, double *out2) {
... Do a bunch of stuff ...
*out1 = result1;
*out2 = result2;
return status;
};
A typemap can be used to handle this case as follows :
%module outarg
// This tells SWIG to treat an double * argument with name 'OutValue' as
// an output value. We'll append the value to the current result which
// is guaranteed to be a List object by SWIG.
%typemap(argout) double *OutValue {
PyObject *o, *o2, *o3;
o = PyFloat_FromDouble(*$1);
if ((!$result) || ($result == Py_None)) {
$result = o;
} else {
if (!PyTuple_Check($result)) {
PyObject *o2 = $result;
$result = PyTuple_New(1);
PyTuple_SetItem(target,0,o2);
}
o3 = PyTuple_New(1);
PyTuple_SetItem(o3,0,o);
o2 = $result;
$result = PySequence_Concat(o2,o3);
Py_DECREF(o2);
Py_DECREF(o3);
}
}
int spam(double a, double b, double *OutValue, double *OutValue);
The typemap works as follows. First, a check is made to see if any previous result exists. If so, it is turned into a tuple and the new output value is concatenated to it. Otherwise, the result is returned normally. For the sample function spam(), there are three output values--meaning that the function will return a 3-tuple of the results.
As written, the function must accept 4 arguments as input values, last two being pointers to doubles. If these arguments are only used to hold output values (and have no meaningful input value), an additional typemap can be written. For example:
%typemap(in,numinputs=0) double *OutValue(double temp) {
$1 = &temp;
}
By specifying numinputs=0, the input value is ignored. However, since the argument still has to be set to some meaningful value before calling C, it is set to point to a local variable temp. When the function stores its output value, it will simply be placed in this local variable. As a result, the function can now be used as follows:
>>> a = spam(4,5) >>> print a (0, 2.45, 5.0) >>> x,y,z = spam(4,5) >>>
In some applications, it is sometimes desirable to pass small arrays of numbers as arguments. For example :
extern void set_direction(double a[4]); // Set direction vector
This too, can be handled used typemaps as follows :
// Grab a 4 element array as a Python 4-tuple
%typemap(in) double[4](double temp[4]) { // temp[4] becomes a local variable
int i;
if (PyTuple_Check($input)) {
if (!PyArg_ParseTuple($input,"dddd",temp,temp+1,temp+2,temp+3)) {
PyErr_SetString(PyExc_TypeError,"tuple must have 4 elements");
return NULL;
}
$1 = &temp[0];
} else {
PyErr_SetString(PyExc_TypeError,"expected a tuple.");
return NULL;
}
}
This allows our set_direction function to be called from Python as follows :
>>> set_direction((0.5,0.0,1.0,-0.25))
Since our mapping copies the contents of a Python tuple into a C array, such an approach would not be recommended for huge arrays, but for small structures, this approach works fine.
Suppose that you wanted to generalize the previous example to handle C arrays of different sizes. To do this, you might write a typemap as follows:
// Map a Python sequence into any sized C double array
%typemap(in) double[ANY](double temp[$1_dim0]) {
int i;
if (!PySequence_Check($input)) {
PyErr_SetString(PyExc_TypeError,"Expecting a sequence");
return NULL;
}
if (PyObject_Length($input) != $1_dim0) {
PyErr_SetString(PyExc_ValueError,"Expecting a sequence with $1_dim0 elements");
return NULL;
}
for (i =0; i < $1_dim0; i++) {
PyObject *o = PySequence_GetItem($input,i);
if (!PyFloat_Check(o)) {
Py_XDECREF(o);
PyErr_SetString(PyExc_ValueError,"Expecting a sequence of floats");
return NULL;
}
temp[i] = PyFloat_AsDouble(o);
Py_DECREF(o);
}
$1 = &temp[0];
}
In this case, the variable $1_dim0 is expanded to match the array dimensions actually used in the C code. This allows the typemap to be applied to types such as:
void foo(double x[10]); void bar(double a[4], double b[8]);
Since the above typemap code gets inserted into every wrapper function where used, it might make sense to use a helper function instead. This will greatly reduce the amount of wrapper code. For example:
%{
static int convert_darray(PyObject *input, double *ptr, int size) {
int i;
if (!PySequence_Check(input)) {
PyErr_SetString(PyExc_TypeError,"Expecting a sequence");
return 0;
}
if (PyObject_Length(input) != size) {
PyErr_SetString(PyExc_ValueError,"Sequence size mismatch");
return 0;
}
for (i =0; i < size; i++) {
PyObject *o = PySequence_GetItem(input,i);
if (!PyFloat_Check(o)) {
Py_XDECREF(o);
PyErr_SetString(PyExc_ValueError,"Expecting a sequence of floats");
return 0;
}
ptr[i] = PyFloat_AsDouble(o);
Py_DECREF(o);
}
return 1;
}
%}
%typemap(in) double [ANY](double temp[$1_dim0]) {
if (!convert_darray($input,temp,$1_dim0)) {
return NULL;
}
$1 = &temp[0];
}
Occasionally, it might be necessary to convert pointer values that have been stored using the SWIG typed-pointer representation. Since there are several ways in which pointers can be represented, the following two functions are used to safely perform this conversion:
int SWIG_ConvertPtr(PyObject *obj, void **ptr, swig_type_info *ty, int flags)
PyObject *SWIG_NewPointerObj(void *ptr, swig_type_info *ty, int own)
Both of these functions require the use of a special SWIG type-descriptor structure. This structure contains information about the mangled name of the datatype, type-equivalence information, as well as information about converting pointer values under C++ inheritance. For a type of Foo *, the type descriptor structure is usually accessed as follows:
Foo *f; if (SWIG_ConvertPtr($input, (void **) &f, SWIGTYPE_p_Foo, SWIG_POINTER_EXCEPTION) == -1) return NULL; PyObject *obj; obj = SWIG_NewPointerObj(f, SWIGTYPE_p_Foo, 0);
In a typemap, the type descriptor should always be accessed using the special typemap variable $1_descriptor. For example:
%typemap(in) Foo * {
if ((SWIG_ConvertPtr($input,(void **) &$1, $1_descriptor,SWIG_POINTER_EXCEPTION)) == -1)
return NULL;
}
If necessary, the descriptor for any type can be obtained using the $descriptor() macro in a typemap. For example:
%typemap(in) Foo * {
if ((SWIG_ConvertPtr($input,(void **) &$1, $descriptor(Foo *),
SWIG_POINTER_EXCEPTION)) == -1)
return NULL;
}
Although the pointer handling functions are primarily intended for manipulating low-level pointers, both functions are fully aware of Python proxy classes. Specifically, SWIG_ConvertPtr() will retrieve a pointer from any object that has a this attribute. In addition, SWIG_NewPointerObj() can automatically generate a proxy class object (if applicable).
Using docstrings in Python code is becoming more and more important and more tools are coming on the scene that take advantage of them, everything from full-blown documentation generators to class browsers and popup call-tips in Python-aware IDEs. Given the way that SWIG generates the proxy code by default, your users will normally get something like "function_name(*args)" in the popup calltip of their IDE which is next to useless when the real function prototype might be something like this:
bool function_name(int x, int y, Foo* foo=NULL, Bar* bar=NULL);
The features described in this section make it easy for you to add docstrings to your modules, functions and methods that can then be used by the various tools out there to make the programming experience of your users much simpler.
Python allows a docstring at the beginning of the .py file before any other statements, and it is typically used to give a general description of the entire module. SWIG supports this by setting an option of the %module directive. For example:
%module(docstring="This is the example module's docstring") example
When you have more than just a line or so then you can retain the easy readability of the %module directive by using a macro. For example:
%define DOCSTRING "The `XmlResource` class allows program resources defining menus, layout of controls on a panel, etc. to be loaded from an XML file." %enddef %module(docstring=DOCSTRING) xrc
As alluded to above SWIG will generate all the function and method proxy wrappers with just "*args" (or "*args, **kwargs" if the -keyword option is used) for a parameter list and will then sort out the individual parameters in the C wrapper code. This is nice and simple for the wrapper code, but makes it difficult to be programmer and tool friendly as anyone looking at the .py file will not be able to find out anything about the parameters that the functions accept.
But since SWIG does know everything about the function it is possible to generate a docstring containing the parameter types, names and default values. Since many of the docstring tools are adopting a standard of recognizing if the first thing in the docstring is a function prototype then using that instead of what they found from introspection, then life is good once more.
SWIG's Python module provides support for the "autodoc" feature, which when attached to a node in the parse tree will cause a docstring to be generated that includes the name of the function, parameter names, default values if any, and return type if any. There are also four levels for autodoc controlled by the value given to the feature, %feature("autodoc", "level"). The four values for level are covered in the following sub-sections.
When level "0" is used then the types of the parameters will not be included in the autodoc string. For example, given this function prototype:
%feature("autodoc", "0");
bool function_name(int x, int y, Foo* foo=NULL, Bar* bar=NULL);
Then Python code like this will be generated:
def function_name(*args, **kwargs):
"""function_name(x, y, foo=None, bar=None) -> bool"""
...
When level "1" is used then the parameter types will be used in the autodoc string. In addition, an attempt is made to simplify the type name such that it makes more sense to the Python user. Pointer, reference and const info is removed if the associated type is has an associated Python type (%rename's are thus shown correctly). This works most of the time, otherwise a C/C++ type will be used. See the next section for the "docstring" feature for tweaking the docstrings to your liking. Given the example above, then turning on the parameter types with level "1" will result in Python code like this:
def function_name(*args, **kwargs):
"""function_name(int x, int y, Foo foo=None, Bar bar=None) -> bool"""
...
Level "2" results in the function prototype as per level "0". In addition, a line of documentation is generated for each parameter. Using the previous example, the generated code will be:
def function_name(*args, **kwargs):
"""
function_name(x, y, foo=None, bar=None) -> bool
Parameters:
x: int
y: int
foo: Foo *
bar: Bar *
"""
...
Note that the documentation for each parameter is sourced from the "doc" typemap which by default shows the C/C++ type rather than the simplified Python type name described earlier for level "1". Typemaps can of course change the output for any particular type, for example the int x parameter:
%feature("autodoc", "2");
%typemap("doc") int x "$1_name (C++ type: $1_type) -- Input $1_name dimension"
bool function_name(int x, int y, Foo* foo=NULL, Bar* bar=NULL);
resulting in
def function_name(*args, **kwargs):
"""
function_name(x, y, foo=None, bar=None) -> bool
Parameters:
x (C++ type: int) -- Input x dimension
y: int
foo: Foo *
bar: Bar *
"""
Level "3" results in the function prototype as per level "1" but also contains the same additional line of documentation for each parameter as per level "2". Using our earlier example again, the generated code will be:
def function_name(*args, **kwargs):
"""
function_name(int x, int y, Foo foo=None, Bar bar=None) -> bool
Parameters:
x: int
y: int
foo: Foo *
bar: Bar *
"""
...
Finally, there are times when the automatically generated autodoc string will make no sense for a Python programmer, particularly when a typemap is involved. So if you give an explicit value for the autodoc feature then that string will be used in place of the automatically generated string. For example:
%feature("autodoc", "GetPosition() -> (x, y)") GetPosition;
void GetPosition(int* OUTPUT, int* OUTPUT);
In addition to the autodoc strings described above, you can also attach any arbitrary descriptive text to a node in the parse tree with the "docstring" feature. When the proxy module is generated then any docstring associated with classes, function or methods are output. If an item already has an autodoc string then it is combined with the docstring and they are output together. If the docstring is all on a single line then it is output like this::
"""This is the docstring"""
Otherwise, to aid readability it is output like this:
""" This is a multi-line docstring with more than one line. """
Using the package option of the %module directive allows you to specify what Python package that the module will be living in when installed.
%module(package="wx") xrc
This is useful when the .i file is %imported by another .i file. By default SWIG will assume that the importer is able to find the importee with just the module name, but if they live in separate Python packages then that won't work. However if the importee specifies what its package is with the %module option then the Python code generated for the importer will use that package name when importing the other module and also in base class declarations, etc. if the package name is different than its own.
SWIG is able to support Python 3.0. The wrapper code generated by SWIG can be compiled with both Python 2.x or 3.0. Further more, by passing the -py3 command line option to SWIG, wrapper code with some Python 3 specific features can be generated (see below subsections for details of these features). The -py3 option also disables some incompatible features for Python 3, such as -classic.
There is a list of known-to-be-broken features in Python 3:
The following are Python 3.0 new features that are currently supported by SWIG.
The -py3 option will enable function annotation support. When used SWIG is able to generate proxy method definitions like this:
def foo(self, bar : "int"=0) -> "void" : ...
Also, even if without passing SWIG the -py3 option, the parameter list still could be generated:
def foo(self, bar=0): ...
But for overloaded function or method, the parameter list would fallback to *args or self, *args, and **kwargs may be append depend on whether you enabled the keyword argument. This fallback is due to all overloaded functions share the same function in SWIG generated proxy class.
For detailed usage of function annotation, see PEP 3107.
Buffer protocols were revised in Python 3. SWIG also gains a series of new typemaps to support buffer interfaces. These typemap macros are defined in pybuffer.i, which must be included in order to use them. By using these typemaps, your wrapped function will be able to accept any Python object that exposes a suitable buffer interface.
For example, the get_path() function puts the path string into the memory pointed to by its argument:
void get_path(char *s);
Then you can write a typemap like this: (the following example is applied to both Python 3.0 and 2.6, since the bytearray type is backported to 2.6.
%include <pybuffer.i> %pybuffer_mutable_string(char *str); void get_path(char *s);
And then on the Python side the wrapped get_path could be used in this way:
>>> p = bytearray(10) >>> get_path(p) >>> print(p) bytearray(b'/Foo/Bar/\x00')
The macros defined in pybuffer.i are similar to those in cstring.i:
%pybuffer_mutable_binary(parm, size_parm)
The macro can be used to generate a typemap which maps a buffer of an object to a pointer provided by parm and a size argument provided by size_parm. For example:
%pybuffer_mutable_binary(char *str, size_t size); ... int snprintf(char *str, size_t size, const char *format, ...);
In Python:
>>> buf = bytearray(6) >>> snprintf(buf, "Hello world!") >>> print(buf) bytearray(b'Hello\x00') >>>
%pybuffer_mutable_string(parm)
This typemap macro requires the buffer to be a zero terminated string, and maps the pointer of the buffer to parm. For example:
%pybuffer_mutable_string(char *str); ... size_t make_upper(char *str);
In Python:
>>> buf = bytearray(b'foo\x00') >>> make_upper(buf) >>> print(buf) bytearray(b'FOO\x00') >>>
Both %pybuffer_mutable_binary and %pybuffer_mutable_string require the provided buffer to be mutable, eg. they can accept a bytearray type but can't accept an immutable byte type.
%pybuffer_binary(parm, size_parm)
This macro maps an object's buffer to a pointer parm and a size size_parm. It is similar to %pybuffer_mutable_binary , except the %pybuffer_binary an accept both mutable and immutable buffers. As a result, the wrapped function should not modify the buffer.
%pybuffer_string(parm)
This macro maps an object's buffer as a string pointer parm . It is similar to %pybuffer_mutable_string but the buffer could be both mutable and immutable. And your function should not modify the buffer.
By including pyabc.i and using the -py3 command line option when calling SWIG, the proxy classes of the STL containers will automatically gain an appropriate abstract base class. For example, the following SWIG interface:
%include <pyabc.i>
%include <std_map.i>
%include <std_list.i>
namespace std {
%template(Mapii) map<int, int>;
%template(IntList) list<int>;
}
will generate a Python proxy class Mapii inheriting from collections.MutableMap and a proxy class IntList inheriting from collections.MutableSequence.
pyabc.i also provides a macro %pythonabc that could be used to define an abstract base class for your own C++ class:
%pythonabc(MySet, collections.MutableSet);
For details of abstract base class, please see PEP 3119.
R is a GPL'ed open source statistical and plotting environment. Information about R can be found at www.r-project.org. The R bindings are under active development. They have been used to compile and run an R interface to QuantLib running on Mandriva Linux with gcc. The R bindings also work on Microsoft Windows using Visual C++.
Currently the following features are not implemented or broken:
To use R and SWIG in C mode, execute the following commands where example.c is the name of the file with the functions in them
swig -r example.i R CMD SHLIB example_wrap.c example.c
The corresponding options for C++ mode are
swig -c++ -r -o example_wrap.cpp example.i R CMD SHLIB example_wrap.cpp example.cpp
Note that R is sensitive to the names of the files. The name of the wrapper file must be the name of the library unless you use the -o option to R when building the library, for example:
swig -c++ -r -o example_wrap.cpp example.i R CMD SHLIB -o example.so example_wrap.cpp example.cpp
R is also sensitive to the name of the file extension in C and C++ mode. In C++ mode, the file extension must be .cpp rather than .cxx for the R compile command to recognize it. If your C++ code is in a file using something other than a .cpp extension, then it may still work using PKG_LIBS:
swig -c++ -r -o example_wrap.cpp example.i PKG_LIBS="example.cxx" R CMD SHLIB -o example example_wrap.cpp
The commands produces two files. A dynamic shared object file called example.so, or example.dll, and an R wrapper file called example.R. To load these files, start up R and type in the following commands
dyn.load(paste("example", .Platform$dynlib.ext, sep=""))
source("example.R")
cacheMetaData(1)
These two files can be loaded in any order
source('BigFile.R')
save(list=ls(all=TRUE),file="BigFile.RData", compress=TRUE)
q(save="no")
This will generate a compiled R file called BigFile.RData that will
save a large amount of loading time.
The general policy of the module is to treat the C/C++ as a basic wrapping over the underlying functions and rely on the R type system to provide R syntax.
getitem and setitem use C++ conventions (i.e. zero based indices). [
C++ objects are implemented as external pointer objects with the class being the mangled name of the class. The C++ classes are encapsulated as an SEXP with an external pointer type. The class is the mangled name of the class. The nice thing about R is that is allows you to keep track of the pointer object which removes the necessity for a lot of the proxy class baggage you see in other languages.
enumerations are characters which are then converted back and forth to ints before calling the C routines. All of the enumeration code is done in R.
This chapter describes SWIG's support of Ruby.
SWIG 1.3 is known to work with Ruby versions 1.6 and later. Given the choice, you should use the latest stable version of Ruby. You should also determine if your system supports shared libraries and dynamic loading. SWIG will work with or without dynamic loading, but the compilation process will vary.
This chapter covers most SWIG features, but in less depth than is found in earlier chapters. At the very least, make sure you also read the "SWIG Basics" chapter. It is also assumed that the reader has a basic understanding of Ruby.
To build a Ruby module, run SWIG using the -ruby option:
$ swig -ruby example.i
If building a C++ extension, add the -c++ option:
$ swig -c++ -ruby example.i
This creates a file example_wrap.c (example_wrap.cxx if compiling a C++ extension) that contains all of the code needed to build a Ruby extension module. To finish building the module, you need to compile this file and link it with the rest of your program.
In order to compile the wrapper code, the compiler needs the ruby.h header file. This file is usually contained in a directory such as
/usr/lib/ruby/1.8/x86_64-linux-gnu/ruby.h /usr/local/lib/ruby/1.6/i686-linux/ruby.h
The exact location may vary on your machine, but the above location is typical. If you are not entirely sure where Ruby is installed, you can run Ruby to find out. For example:
$ ruby -e 'puts $:.join("\n")'
/usr/local/lib/ruby/site_ruby/1.6 /usr/local/lib/ruby/site_ruby/1.6/i686-linux
/usr/local/lib/ruby/site_ruby /usr/local/lib/ruby/1.6 /usr/local/lib/ruby/1.6/i686-linux .
Ruby extension modules are typically compiled into shared libraries that the interpreter loads dynamically at runtime. Since the exact commands for doing this vary from platform to platform, your best bet is to follow the steps described in the README.EXT file from the Ruby distribution:
Create a file called extconf.rb that looks like the following:
require 'mkmf'
create_makefile('example')
Type the following to build the extension:
$ ruby extconf.rb
$ make
$ make install
Of course, there is the problem that mkmf does not work correctly on all platforms, e.g, HPUX. If you need to add your own make rules to the file that extconf.rb produces, you can add this:
open("Makefile", "a") { |mf|
puts <<EOM
# Your make rules go here
EOM
}
to the end of the extconf.rb file. If for some reason you don't want to use the standard approach, you'll need to determine the correct compiler and linker flags for your build platform. For example, assuming you have code you need to link to in a file called example.c, a typical sequence of commands for the Linux operating system would look something like this:
$ swig -ruby example.i $ gcc -c example.c $ gcc -c example_wrap.c -I/usr/local/lib/ruby/1.6/i686-linux $ gcc -shared example.o example_wrap.o -o example.so
For other platforms it may be necessary to compile with the -fPIC option to generate position-independent code. If in doubt, consult the manual pages for your compiler and linker to determine the correct set of options. You might also check the SWIG Wiki for additional information.
Ruby module names must be capitalized, but the convention for Ruby feature names is to use lowercase names. So, for example, the Etc extension module is imported by requiring the etc feature:
# The feature name begins with a lowercase letter...
require 'etc'
# ... but the module name begins with an uppercase letter
puts "Your login name: #{Etc.getlogin}"
To stay consistent with this practice, you should always specify a lowercase module name with SWIG's %module directive. SWIG will automatically correct the resulting Ruby module name for your extension. So for example, a SWIG interface file that begins with:
%module example
will result in an extension module using the feature name "example" and Ruby module name "Example".
An alternative approach to dynamic linking is to rebuild the Ruby interpreter with your extension module added to it. In the past, this approach was sometimes necessary due to limitations in dynamic loading support on certain machines. However, the situation has improved greatly over the last few years and you should not consider this approach unless there is really no other option.
The usual procedure for adding a new module to Ruby involves finding the Ruby source, adding an entry to the ext/Setup file, adding your directory to the list of extensions in the file, and finally rebuilding Ruby.
On most machines, C++ extension modules should be linked using the C++ compiler. For example:
$ swig -c++ -ruby example.i $ g++ -c example.cxx $ g++ -c example_wrap.cxx -I/usr/local/lib/ruby/1.6/i686-linux $ g++ -shared example.o example_wrap.o -o example.so
If you've written an extconf.rb script to automatically generate a Makefile for your C++ extension module, keep in mind that (as of this writing) Ruby still uses gcc and not g++ as its linker. As a result, the required C++ runtime library support will not be automatically linked into your extension module and it may fail to load on some platforms. A workaround for this problem is use the mkmf module's append_library() method to add one of the C++ runtime libraries to the list of libraries linked into your extension, e.g.
require 'mkmf'
$libs = append_library($libs, "supc++")
create_makefile('example')
Building a SWIG extension to Ruby under Windows 95/NT is roughly similar to the process used with Unix. Normally, you will want to produce a DLL that can be loaded into the Ruby interpreter. For all recent versions of Ruby, the procedure described above (i.e. using an extconf.rb script) will work with Windows as well; you should be able to build your code into a DLL by typing:
C:\swigtest> ruby extconf.rb C:\swigtest> nmake C:\swigtest> nmake install
The remainder of this section covers the process of compiling SWIG-generated Ruby extensions with Microsoft Visual C++ 6 (i.e. within the Developer Studio IDE, instead of using the command line tools). In order to build extensions, you may need to download the source distribution to the Ruby package, as you will need the Ruby header files.
If you are developing your application within Microsoft developer studio, SWIG can be invoked as a custom build option. The process roughly follows these steps :
Now, assuming all went well, SWIG will be automatically invoked when you build your project. Any changes made to the interface file will result in SWIG being automatically invoked to produce a new version of the wrapper file. To run your new Ruby extension, simply run Ruby and use the require command as normal. For example if you have this ruby file run.rb:
# file: run.rb require 'Example' # Call a c function print "Foo = ", Example.Foo, "\n"
Ensure the dll just built is in your path or current directory, then run the Ruby script from the DOS/Command prompt:
C:\swigtest> ruby run.rb Foo = 3.0
This section describes the basics of how SWIG maps C or C++ declarations in your SWIG interface files to Ruby constructs.
The SWIG %module directive specifies the name of the Ruby module. If you specify:
%module example
then everything is wrapped into a Ruby module named Example that is nested directly under the global module. You can specify a more deeply nested module by specifying the fully-qualified module name in quotes, e.g.
%module "foo::bar::spam"
An alternate method of specifying a nested module name is to use the -prefix option on the SWIG command line. The prefix that you specify with this option will be prepended to the module name specified with the %module directive in your SWIG interface file. So for example, this declaration at the top of your SWIG interface file:
%module "foo::bar::spam"
will result in a nested module name of Foo::Bar::Spam, but you can achieve the same effect by specifying:
%module spam
and then running SWIG with the -prefix command line option:
$ swig -ruby -prefix "foo::bar::" example.i
Starting with SWIG 1.3.20, you can also choose to wrap everything into the global module by specifying the -globalmodule option on the SWIG command line, i.e.
$ swig -ruby -globalmodule example.i
Note that this does not relieve you of the requirement of specifying the SWIG module name with the %module directive (or the -module command-line option) as described earlier.
When choosing a module name, do not use the same name as a built-in Ruby command or standard module name, as the results may be unpredictable. Similarly, if you're using the -globalmodule option to wrap everything into the global module, take care that the names of your constants, classes and methods don't conflict with any of Ruby's built-in names.
Global functions are wrapped as Ruby module methods. For example, given the SWIG interface file example.i:
%module example int fact(int n);
and C source file example.c:
int fact(int n) {
if (n == 0)
return 1;
return (n * fact(n-1));
}
SWIG will generate a method fact in the Example module that can be used like so:
$ irb irb(main):001:0> require 'example' true irb(main):002:0> Example.fact(4) 24
C/C++ global variables are wrapped as a pair of singleton methods for the module: one to get the value of the global variable and one to set it. For example, the following SWIG interface file declares two global variables:
// SWIG interface file with global variables
%module example
...
%inline %{
extern int variable1;
extern double Variable2;
%}
...
Now look at the Ruby interface:
$ irb irb(main):001:0> require 'Example' true irb(main):002:0> Example.variable1 = 2 2 irb(main):003:0> Example.Variable2 = 4 * 10.3 41.2 irb(main):004:0> Example.Variable2 41.2
If you make an error in variable assignment, you will receive an error message. For example:
irb(main):005:0> Example.Variable2 = "hello" TypeError: no implicit conversion to float from string from (irb):5:in `Variable2=' from (irb):5
If a variable is declared as const, it is wrapped as a read-only variable. Attempts to modify its value will result in an error.
To make ordinary variables read-only, you can also use the %immutable directive. For example:
%immutable;
%inline %{
extern char *path;
%}
%mutable;
The %immutable directive stays in effect until it is explicitly disabled using %mutable.
C/C++ constants are wrapped as module constants initialized to the appropriate value. To create a constant, use #define or the %constant directive. For example:
#define PI 3.14159 #define VERSION "1.0" %constant int FOO = 42; %constant const char *path = "/usr/local"; const int BAR = 32;
Remember to use the :: operator in Ruby to get at these constant values, e.g.
$ irb irb(main):001:0> require 'Example' true irb(main):002:0> Example::PI 3.14159
"Opaque" pointers to arbitrary C/C++ types (i.e. types that aren't explicitly declared in your SWIG interface file) are wrapped as data objects. So, for example, consider a SWIG interface file containing only the declarations:
Foo *get_foo(); void set_foo(Foo *foo);
For this case, the get_foo() method returns an instance of an internally generated Ruby class:
irb(main):001:0> foo = Example::get_foo() #<SWIG::TYPE_p_Foo:0x402b1654>
A NULL pointer is always represented by the Ruby nil object.
C/C++ structs are wrapped as Ruby classes, with accessor methods (i.e. "getters" and "setters") for all of the struct members. For example, this struct declaration:
struct Vector {
double x, y;
};
gets wrapped as a Vector class, with Ruby instance methods x, x=, y and y=. These methods can be used to access structure data from Ruby as follows:
$ irb irb(main):001:0> require 'Example' true irb(main):002:0> f = Example::Vector.new #<Example::Vector:0x4020b268> irb(main):003:0> f.x = 10 nil irb(main):004:0> f.x 10.0
Similar access is provided for unions and the public data members of C++ classes.
const members of a structure are read-only. Data members can also be forced to be read-only using the %immutable directive (in C++, private may also be used). For example:
struct Foo {
...
%immutable;
int x; /* Read-only members */
char *name;
%mutable;
...
};
When char * members of a structure are wrapped, the contents are assumed to be dynamically allocated using malloc or new (depending on whether or not SWIG is run with the -c++ option). When the structure member is set, the old contents will be released and a new value created. If this is not the behavior you want, you will have to use a typemap (described shortly).
Array members are normally wrapped as read-only. For example, this code:
struct Foo {
int x[50];
};
produces a single accessor function like this:
int *Foo_x_get(Foo *self) {
return self->x;
};
If you want to set an array member, you will need to supply a "memberin" typemap described in the section on typemaps. As a special case, SWIG does generate code to set array members of type char (allowing you to store a Ruby string in the structure).
When structure members are wrapped, they are handled as pointers. For example,
struct Foo {
...
};
struct Bar {
Foo f;
};
generates accessor functions such as this:
Foo *Bar_f_get(Bar *b) {
return &b->f;
}
void Bar_f_set(Bar *b, Foo *val) {
b->f = *val;
}
Like structs, C++ classes are wrapped by creating a new Ruby class of the same name with accessor methods for the public class member data. Additionally, public member functions for the class are wrapped as Ruby instance methods, and public static member functions are wrapped as Ruby singleton methods. So, given the C++ class declaration:
class List {
public:
List();
~List();
int search(char *item);
void insert(char *item);
void remove(char *item);
char *get(int n);
int length;
static void print(List *l);
};
SWIG would create a List class with:
In Ruby, these functions are used as follows:
require 'Example'
l = Example::List.new
l.insert("Ale")
l.insert("Stout")
l.insert("Lager")
Example.print(l)
l.length()
----- produces the following output
Lager
Stout
Ale
3
The SWIG type-checker is fully aware of C++ inheritance. Therefore, if you have classes like this:
class Parent {
...
};
class Child : public Parent {
...
};
those classes are wrapped into a hierarchy of Ruby classes that reflect the same inheritance structure. All of the usual Ruby utility methods work normally:
irb(main):001:0> c = Child.new #<Bar:0x4016efd4> irb(main):002:0> c.instance_of? Child true irb(main):003:0> b.instance_of? Parent false irb(main):004:0> b.is_a? Child true irb(main):005:0> b.is_a? Parent true irb(main):006:0> Child < Parent true irb(main):007:0> Child > Parent false
Furthermore, if you have a function like this:
void spam(Parent *f);
then the function spam() accepts Parent* or a pointer to any class derived from Parent.
Until recently, the Ruby module for SWIG didn't support multiple inheritance, and this is still the default behavior. This doesn't mean that you can't wrap C++ classes which inherit from multiple base classes; it simply means that only the first base class listed in the class declaration is considered, and any additional base classes are ignored. As an example, consider a SWIG interface file with a declaration like this:
class Derived : public Base1, public Base2
{
...
};
For this case, the resulting Ruby class (Derived) will only consider Base1 as its superclass. It won't inherit any of Base2's member functions or data and it won't recognize Base2 as an "ancestor" of Derived (i.e. the is_a? relationship would fail). When SWIG processes this interface file, you'll see a warning message like:
example.i:5: Warning 802: Warning for Derived: Base Base2 ignored. Multiple inheritance is not supported in Ruby.
Starting with SWIG 1.3.20, the Ruby module for SWIG provides limited support for multiple inheritance. Because the approach for dealing with multiple inheritance introduces some limitations, this is an optional feature that you can activate with the -minherit command-line option:
$ swig -c++ -ruby -minherit example.i
Using our previous example, if your SWIG interface file contains a declaration like this:
class Derived : public Base1, public Base2
{
...
};
and you run SWIG with the -minherit command-line option, then you will end up with a Ruby class Derived that appears to "inherit" the member data and functions from both Base1 and Base2. What actually happens is that three different top-level classes are created, with Ruby's Object class as their superclass. Each of these classes defines a nested module named Impl, and it's in these nested Impl modules that the actual instance methods for the classes are defined, i.e.
class Base1 module Impl # Define Base1 methods here end include Impl end class Base2 module Impl # Define Base2 methods here end include Impl end class Derived module Impl include Base1::Impl include Base2::Impl # Define Derived methods here end include Impl end
Observe that after the nested Impl module for a class is defined, it is mixed-in to the class itself. Also observe that the Derived::Impl module first mixes-in its base classes' Impl modules, thus "inheriting" all of their behavior.
The primary drawback is that, unlike the default mode of operation, neither Base1 nor Base2 is a true superclass of Derived anymore:
obj = Derived.new obj.is_a? Base1 # this will return false... obj.is_a? Base2 # ... and so will this
In most cases, this is not a serious problem since objects of type Derived will otherwise behave as though they inherit from both Base1 and Base2 (i.e. they exhibit "Duck Typing").
C++ overloaded functions, methods, and constructors are mostly supported by SWIG. For example, if you have two functions like this:
void foo(int); void foo(char *c);
You can use them in Ruby in a straightforward manner:
irb(main):001:0> foo(3) # foo(int)
irb(main):002:0> foo("Hello") # foo(char *c)
Similarly, if you have a class like this,
class Foo {
public:
Foo();
Foo(const Foo &);
...
};
you can write Ruby code like this:
irb(main):001:0> f = Foo.new # Create a Foo irb(main):002:0> g = Foo.new(f) # Copy f
Overloading support is not quite as flexible as in C++. Sometimes there are methods that SWIG can't disambiguate. For example:
void spam(int); void spam(short);
or
void foo(Bar *b); void foo(Bar &b);
If declarations such as these appear, you will get a warning message like this:
example.i:12: Warning 509: Overloaded method spam(short) effectively ignored, example.i:11: Warning 509: as it is shadowed by spam(int).
To fix this, you either need to ignore or rename one of the methods. For example:
%rename(spam_short) spam(short); ... void spam(int); void spam(short); // Accessed as spam_short
or
%ignore spam(short); ... void spam(int); void spam(short); // Ignored
SWIG resolves overloaded functions and methods using a disambiguation scheme that ranks and sorts declarations according to a set of type-precedence rules. The order in which declarations appear in the input does not matter except in situations where ambiguity arises--in this case, the first declaration takes precedence.
Please refer to the "SWIG and C++" chapter for more information about overloading.
For the most part, overloaded operators are handled automatically by SWIG and do not require any special treatment on your part. So if your class declares an overloaded addition operator, e.g.
class Complex {
...
Complex operator+(Complex &);
...
};
the resulting Ruby class will also support the addition (+) method correctly.
For cases where SWIG's built-in support is not sufficient, C++ operators can be wrapped using the %rename directive (available on SWIG 1.3.10 and later releases). All you need to do is give the operator the name of a valid Ruby identifier. For example:
%rename(add_complex) operator+(Complex &, Complex &); ... Complex operator+(Complex &, Complex &);
Now, in Ruby, you can do this:
a = Example::Complex.new(2, 3) b = Example::Complex.new(4, -1) c = Example.add_complex(a, b)
More details about wrapping C++ operators into Ruby operators is discussed in the section on operator overloading.
SWIG is aware of C++ namespaces, but namespace names do not appear in the module nor do namespaces result in a module that is broken up into submodules or packages. For example, if you have a file like this,
%module example
namespace foo {
int fact(int n);
struct Vector {
double x,y,z;
};
};
it works in Ruby as follows:
irb(main):001:0> require 'example' true irb(main):002:0> Example.fact(3) 6 irb(main):003:0> v = Example::Vector.new #<Example::Vector:0x4016f4d4> irb(main):004:0> v.x = 3.4 3.4 irb(main):004:0> v.y 0.0
If your program has more than one namespace, name conflicts (if any) can be resolved using %rename For example:
%rename(Bar_spam) Bar::spam;
namespace Foo {
int spam();
}
namespace Bar {
int spam();
}
If you have more than one namespace and your want to keep their symbols separate, consider wrapping them as separate SWIG modules. For example, make the module name the same as the namespace and create extension modules for each namespace separately. If your program utilizes thousands of small deeply nested namespaces each with identical symbol names, well, then you get what you deserve.
C++ templates don't present a huge problem for SWIG. However, in order to create wrappers, you have to tell SWIG to create wrappers for a particular template instantiation. To do this, you use the %template directive. For example:
%module example
%{
#include "pair.h"
%}
template<class T1, class T2>
struct pair {
typedef T1 first_type;
typedef T2 second_type;
T1 first;
T2 second;
pair();
pair(const T1&, const T2&);
~pair();
};
%template(Pairii) pair<int,int>;
In Ruby:
irb(main):001:0> require 'example' true irb(main):002:0> p = Example::Pairii.new(3, 4) #<Example:Pairii:0x4016f4df> irb(main):003:0> p.first 3 irb(main):004:0> p.second 4
On a related note, the standard SWIG library contains a number of modules that provide typemaps for standard C++ library classes (such as std::pair, std::string and std::vector). These library modules don't provide wrappers around the templates themselves, but they do make it convenient for users of your extension module to pass Ruby objects (such as arrays and strings) to wrapped C++ code that expects instances of standard C++ templates. For example, suppose the C++ library you're wrapping has a function that expects a vector of floats:
%module example float sum(const std::vector<float>& values);
Rather than go through the hassle of writing an "in" typemap to convert an array of Ruby numbers into a std::vector<float>, you can just use the std_vector.i module from the standard SWIG library:
%module example %include std_vector.i float sum(const std::vector<float>& values);
Ruby's STL wrappings provide additional methods to make them behave more similarly to Ruby's native classes.
Thus, you can do, for example:
v = IntVector.new
v << 2
v << 3
v << 4
v.each { |x| puts x }
=> 2
3
4
v.delete_if { |x| x == 3 }
=> [2,4]
The SWIG Ruby module provides also the ability for all the STL containers to carry around Ruby native objects (Fixnum, Classes, etc) making them act almost like Ruby's own Array, Hash, etc. To do that, you need to define a container that contains a swig::GC_VALUE, like:
%module nativevector
%{
std::vector< swig::GC_VALUE > NativeVector;
%}
%template(NativeVector) std::vector< swig::GC_VALUE >;
This vector can then contain any Ruby object, making them almost identical to Ruby's own Array class.
require 'nativevector' include NativeVector v = NativeVector.new v << 1 v << [1,2] v << 'hello' class A; end v << A.new puts v => [1, [1,2], 'hello', #<A:0x245325>]
Obviously, there is a lot more to template wrapping than shown in these examples. More details can be found in the SWIG and C++ chapter.
Some containers in the STL allow you to modify their default behavior by using so called functors or function objects. Functors are often just a very simple struct with operator() redefined or an actual C/C++ function. This allows you, for example, to always keep the sort order of a STL container to your liking.
The Ruby STL mappings allows you to modify those containers that support functors using Ruby procs or methods, instead. Currently, this includes std::set, set::map, std::multiset and std::multimap.
The functors in swig are called swig::UnaryFunction and swig::BinaryFunction. For C++ predicates (ie. functors that must return bool as a result) swig::UnaryPredicate and swig::BinaryPredicate are provided.
As an example, if given this swig file:
%module intset; %include <std_set.i> %typemap(IntSet) std::set< int, swig::BinaryPredicate >;
You can then use the set from Ruby with or without a proc object as a predicate:
require 'intset'
include Intset
# Default sorting behavior defined in C++
a = IntSet.new
a << 1
a << 2
a << 3
a
=> [1,2,3]
# Custom sorting behavior defined by a Ruby proc
b = IntSet.new( proc { |a,b| a > b } )
b << 1
b << 2
b << 3
b
=> [3,2,1]
The STL is well known for the use of iterators. There are a number of iterators possible with different properties, but in general there are two main categories: const iterators and non-const iterators. The const iterators can access and not modify the values they point at, while the non-const iterators can both read and modify the values.
The Ruby STL wrappings support both type of iterators by using a proxy class in-between. This proxy class is swig::Iterator or swig::ConstIterator. Derived from them are template classes that need to be initialized with the actual iterator for the container you are wrapping and often times with the beginning and ending points of the iteration range.
The SWIG STL library already provides typemaps to all the standard containers to do this wrapping automatically for you, but if you have your own STL-like iterator, you will need to write your own typemap for them. For out typemaps, the special functions make_const_iterator and make_nonconst_iterator are provided.
These can be used either like:
make_const_iterator( iterator, rubyclass ); make_const_iterator( iterator, iterator_begin, iterator_end, rubyclass );
The iterators support a next() and previous() member function to just change the iterator without returning anything. previous() should obviously only be used for bidirectional iterators. You can also advance the iterator multiple steps by using standard math operations like +=.
The value the iterator points at can be accessed with value() -- this is equivalent to dereferencing it with *i. For non-const iterators, a value=() function is also provided which allows you to change the value pointed by the iterator. This is equivalent to the C++ construct of dereferencing and assignment, like *i = something.
Thus, given say a vector class of doubles defined as:
%module doublevector %include std_vector.i %template(DoubleVector) std::vector<double>;
Its iterator can then be used from Ruby like:
require 'doublevector'
include Doublevector
v = DoubleVector.new
v << 1
v << 2
v << 3
#
# an elaborate and less efficient way of doing v.map! { |x| x+2 }
#
i = v.begin
e = v.end
while i != e
val = i.value
val += 2
i.value = val
i.next
end
i
>> [3, 4, 5 ]
If you'd rather have STL classes without any iterators, you should define -DSWIG_NO_EXPORT_ITERATOR_METHODS when running swig.
In certain C++ programs, it is common to use classes that have been wrapped by so-called "smart pointers." Generally, this involves the use of a template class that implements operator->() like this:
template<class T> class SmartPtr {
...
T *operator->();
...
}
Then, if you have a class like this,
class Foo {
public:
int x;
int bar();
};
A smart pointer would be used in C++ as follows:
SmartPtr<Foo> p = CreateFoo(); // Created somehow (not shown) ... p->x = 3; // Foo::x int y = p->bar(); // Foo::bar
To wrap this in Ruby, simply tell SWIG about the SmartPtr class and the low-level Foo object. Make sure you instantiate SmartPtr using %template if necessary. For example:
%module example ... %template(SmartPtrFoo) SmartPtr<Foo>; ...
Now, in Ruby, everything should just "work":
irb(main):001:0> p = Example::CreateFoo() # Create a smart-pointer somehow #<Example::SmartPtrFoo:0x4016f4df> irb(main):002:0> p.x = 3 # Foo::x 3 irb(main):003:0> p.bar() # Foo::bar
If you ever need to access the underlying pointer returned by operator->() itself, simply use the __deref__() method. For example:
irb(main):004:0> f = p.__deref__() # Returns underlying Foo *
SWIG's Ruby module supports cross-language polymorphism (a.k.a. the "directors" feature) similar to that for SWIG's Python module. Rather than duplicate the information presented in the Python chapter, this section just notes the differences that you need to be aware of when using this feature with Ruby.
Whenever a C++ director class routes one of its virtual member function calls to a Ruby instance method, there's always the possibility that an exception will be raised in the Ruby code. By default, those exceptions are ignored, which simply means that the exception will be exposed to the Ruby interpreter. If you would like to change this behavior, you can use the %feature("director:except") directive to indicate what action should be taken when a Ruby exception is raised. The following code should suffice in most cases:
%feature("director:except") {
throw Swig::DirectorMethodException($error);
}
When this feature is activated, the call to the Ruby instance method is "wrapped" using the rb_rescue2() function from Ruby's C API. If any Ruby exception is raised, it will be caught here and a C++ exception is raised in its place.
Ruby has several common naming conventions. Constants are generally in upper case, module and class names are in camel case and methods are in lower case with underscores. For example:
Prior to version 1.3.28, SWIG did not support these Ruby conventions. The only modifications it made to names was to capitalize the first letter of constants (which includes module and class names).
SWIG 1.3.28 introduces the new -autorename command line parameter. When this parameter is specified, SWIG will automatically change constant, class and method names to conform with the standard Ruby naming conventions. For example:
$ swig -ruby -autorename example.i
To disable renaming use the -noautorename command line option.
Since this change significantly changes the wrapper code generated by SWIG, it is turned off by default in SWIG 1.3.28. However, it is planned to become the default option in future releases.
It's a fairly common practice in the Ruby built-ins and standard library to provide aliases for method names. For example, Array#size is an alias for Array#length. If you would like to provide an alias for one of your class' instance methods, one approach is to use SWIG's %extend directive to add a new method of the aliased name that calls the original function. For example:
class MyArray {
public:
// Construct an empty array
MyArray();
// Return the size of this array
size_t length() const;
};
%extend MyArray {
// MyArray#size is an alias for MyArray#length
size_t size() const {
return $self->length();
}
}
A better solution is to use the %alias directive (unique to SWIG's Ruby module). The previous example could then be rewritten as:
// MyArray#size is an alias for MyArray#length
%alias MyArray::length "size";
class MyArray {
public:
// Construct an empty array
MyArray();
// Return the size of this array
size_t length() const;
};
Multiple aliases can be associated with a method by providing a comma-separated list of aliases to the %alias directive, e.g.
%alias MyArray::length "amount,quantity,size";
From an end-user's standpoint, there's no functional difference between these two approaches; i.e. they should get the same result from calling either MyArray#size or MyArray#length. However, when the %alias directive is used, SWIG doesn't need to generate all of the wrapper code that's usually associated with added methods like our MyArray::size() example.
Note that the %alias directive is implemented using SWIG's "features" mechanism and so the same name matching rules used for other kinds of features apply (see the chapter on "Customization Features") for more details).
Ruby methods that return a boolean value and end in a question mark are known as predicate methods. Examples of predicate methods in standard Ruby classes include Array#empty? (which returns true for an array containing no elements) and Object#instance_of? (which returns true if the object is an instance of the specified class). For consistency with Ruby conventions, methods that return boolean values should be marked as predicate methods.
One cumbersome solution to this problem is to rename the method (using SWIG's %rename directive) and provide a custom typemap that converts the function's actual return type to Ruby's true or false. For example:
%rename("is_it_safe?") is_it_safe();
%typemap(out) int is_it_safe "$result = ($1 != 0) ? Qtrue : Qfalse;";
int is_it_safe();
A better solution is to use the %predicate directive (unique to SWIG's Ruby module) to designate a method as a predicate method. For the previous example, this would look like:
%predicate is_it_safe(); int is_it_safe();
This method would be invoked from Ruby code like this:
irb(main):001:0> Example::is_it_safe? true
The %predicate directive is implemented using SWIG's "features" mechanism and so the same name matching rules used for other kinds of features apply (see the chapter on "Customization Features") for more details).
Ruby methods that modify an object in-place and end in an exclamation mark are known as bang methods. An example of a bang method is Array#sort! which changes the ordering of items in an array. Contrast this with Array#sort, which returns a copy of the array with the items sorted instead of modifying the original array. For consistency with Ruby conventions, methods that modify objects in place should be marked as bang methods.
Bang methods can be marked using the %bang directive which is unique to the Ruby module and was introduced in SWIG 1.3.28. For example:
%bang sort(int arr[]); int sort(int arr[]);
This method would be invoked from Ruby code like this:
irb(main):001:0> Example::sort!(arr)
The %bang directive is implemented using SWIG's "features" mechanism and so the same name matching rules used for other kinds of features apply (see the chapter on "Customization Features") for more details).
Often times a C++ library will expose properties through getter and setter methods. For example:
class Foo {
Foo() {}
int getValue() { return value_; }
void setValue(int value) { value_ = value; }
private:
int value_;
};
By default, SWIG will expose these methods to Ruby as get_value and set_value. However, it more natural for these methods to be exposed in Ruby as value and value=. That allows the methods to be used like this:
irb(main):001:0> foo = Foo.new() irb(main):002:0> foo.value = 5 irb(main):003:0> puts foo.value
This can be done by using the %rename directive:
%rename("value") Foo::getValue();
%rename("value=") Foo::setValue(int value);
A common problem in some C programs is handling parameters passed as simple pointers. For example:
void add(int x, int y, int *result) {
*result = x + y;
}
or
int sub(int *x, int *y) {
return *x-*y;
}
The easiest way to handle these situations is to use the typemaps.i file. For example:
%module Example %include "typemaps.i" void add(int, int, int *OUTPUT); int sub(int *INPUT, int *INPUT);
In Ruby, this allows you to pass simple values. For example:
a = Example.add(3,4) puts a 7 b = Example.sub(7,4) puts b 3
Notice how the INPUT parameters allow integer values to be passed instead of pointers and how the OUTPUT parameter creates a return result.
If you don't want to use the names INPUT or OUTPUT, use the %apply directive. For example:
%module Example
%include "typemaps.i"
%apply int *OUTPUT { int *result };
%apply int *INPUT { int *x, int *y};
void add(int x, int y, int *result);
int sub(int *x, int *y);
If a function mutates one of its parameters like this,
void negate(int *x) {
*x = -(*x);
}
you can use INOUT like this:
%include "typemaps.i" ... void negate(int *INOUT);
In Ruby, a mutated parameter shows up as a return value. For example:
a = Example.negate(3) print a -3
The most common use of these special typemap rules is to handle functions that return more than one value. For example, sometimes a function returns a result as well as a special error code:
/* send message, return number of bytes sent, success code, and error_code */ int send_message(char *text, int *success, int *error_code);
To wrap such a function, simply use the OUTPUT rule above. For example:
%module example %include "typemaps.i" ... int send_message(char *, int *OUTPUT, int *OUTPUT);
When used in Ruby, the function will return an array of multiple values.
bytes, success, error_code = send_message("Hello World")
if not success
print "error #{error_code} : in send_message"
else
print "Sent", bytes
end
Another way to access multiple return values is to use the %apply rule. In the following example, the parameters rows and columns are related to SWIG as OUTPUT values through the use of %apply
%module Example
%include "typemaps.i"
%apply int *OUTPUT { int *rows, int *columns };
...
void get_dimensions(Matrix *m, int *rows, int*columns);
In Ruby:
r, c = Example.get_dimensions(m)
The SWIG %exception directive can be used to define a user-definable exception handler that can convert C/C++ errors into Ruby exceptions. The chapter on Customization Features contains more details, but suppose you have a C++ class like the following :
class DoubleArray {
private:
int n;
double *ptr;
public:
// Create a new array of fixed size
DoubleArray(int size) {
ptr = new double[size];
n = size;
}
// Destroy an array
~DoubleArray() {
delete ptr;
}
// Return the length of the array
int length() {
return n;
}
// Get an array item and perform bounds checking.
double getitem(int i) {
if ((i >= 0) && (i < n))
return ptr[i];
else
throw RangeError();
}
// Set an array item and perform bounds checking.
void setitem(int i, double val) {
if ((i >= 0) && (i < n))
ptr[i] = val;
else {
throw RangeError();
}
}
};
Since several methods in this class can throw an exception for an out-of-bounds access, you might want to catch this in the Ruby extension by writing the following in an interface file:
%exception {
try {
$action
}
catch (const RangeError&) {
static VALUE cpperror = rb_define_class("CPPError", rb_eStandardError);
rb_raise(cpperror, "Range error.");
}
}
class DoubleArray {
...
};
The exception handling code is inserted directly into generated wrapper functions. When an exception handler is defined, errors can be caught and used to gracefully raise a Ruby exception instead of forcing the entire program to terminate with an uncaught error.
As shown, the exception handling code will be added to every wrapper function. Because this is somewhat inefficient, you might consider refining the exception handler to only apply to specific methods like this:
%exception getitem {
try {
$action
} catch (const RangeError&) {
static VALUE cpperror = rb_define_class("CPPError", rb_eStandardError);
rb_raise(cpperror, "Range error in getitem.");
}
}
%exception setitem {
try {
$action
} catch (const RangeError&) {
static VALUE cpperror = rb_define_class("CPPError", rb_eStandardError);
rb_raise(cpperror, "Range error in setitem.");
}
}
In this case, the exception handler is only attached to methods and functions named getitem and setitem.
Since SWIG's exception handling is user-definable, you are not limited to C++ exception handling. See the chapter on Customization Features for more examples.
One of the highlights of Ruby and most of its standard library is the use of blocks, which allow the easy creation of continuations and other niceties. Blocks in ruby are also often used to simplify the passing of many arguments to a class.
In order to make your class constructor support blocks, you can take advantage of the %exception directive, which will get run after the C++ class' constructor was called.
For example, this yields the class over after its construction:
class Window
{
public:
Window(int x, int y, int w, int h);
// .... other methods here ....
};
// Add support for yielding self in the Class' constructor.
%exception Window::Window {
$action
if (rb_block_given_p()) {
rb_yield(self);
}
}
Then, in ruby, it can be used like:
Window.new(0,0,360,480) { |w|
w.color = Fltk::RED
w.border = false
}
For other methods, you can usually use a dummy parameter with a special in typemap, like:
//
// original function was:
//
// void func(int x);
%typemap(in,numinputs=0) int RUBY_YIELD_SELF {
if ( !rb_block_given_p() )
rb_raise("No block given");
return rb_yield(self);
}
%extend {
void func(int x, int RUBY_YIELD_SELF );
}
For more information on typemaps, see Typemaps .
There are three ways to raise exceptions from C++ code to Ruby.
The first way is to use SWIG_exception(int code, const char *msg) . The following table shows the mappings from SWIG error codes to Ruby exceptions:
SWIG_MemoryError |
rb_eNoMemError |
SWIG_IOError | rb_eIOError
|
SWIG_RuntimeError |
rb_eRuntimeError |
SWIG_IndexError |
rb_eIndexError |
SWIG_TypeError |
rb_eTypeError |
SWIG_DivisionByZero |
rb_eZeroDivError |
SWIG_OverflowError |
rb_eRangeError |
SWIG_SyntaxError |
rb_eSyntaxError |
SWIG_ValueError |
rb_eArgError |
SWIG_SystemError |
rb_eFatal |
SWIG_AttributeError |
rb_eRuntimeError |
SWIG_NullReferenceError |
rb_eNullReferenceError* |
SWIG_ObjectPreviouslyDeletedError |
rb_eObjectPreviouslyDeleted* |
SWIG_UnknownError |
rb_eRuntimeError |
* These error classes are
created by SWIG and are not built-in Ruby exception classes | |
The second way to raise errors is to use SWIG_Raise(obj, type, desc). Obj is a C++ instance of an exception class, type is a string specifying the type of exception (for example, "MyError") and desc is the SWIG description of the exception class. For example:
%raise(SWIG_NewPointerObj(e, SWIGTYPE_p_AssertionFailedException, 0), ":AssertionFailedException", SWIGTYPE_p_AssertionFailedException);
This is useful when you want to pass the current exception object directly to Ruby, particularly when the object is an instance of class marked as an %exceptionclass (see the next section for more information).
Last, you can raise an exception by directly calling Ruby's C api. This is done by invoking the rb_raise() function. The first argument passed to rb_raise() is the exception type. You can raise a custom exception type or one of the built-in Ruby exception types.
Starting with SWIG 1.3.28, the Ruby module supports the %exceptionclass directive, which is used to identify C++ classes that are used as exceptions. Classes that are marked with the %exceptionclass directive are exposed in Ruby as child classes of rb_eRuntimeError. This allows C++ exceptions to be directly mapped to Ruby exceptions, providing for a more natural integration between C++ code and Ruby code.
%exceptionclass CustomError;
%inline %{
class CustomError { };
class Foo {
public:
void test() { throw CustomError; }
};
%}
From Ruby you can now call this method like this:
foo = Foo.new begin foo.test() rescue CustomError => e puts "Caught custom error" end
For another example look at swig/Examples/ruby/exception_class.
This section describes how you can modify SWIG's default wrapping behavior for various C/C++ datatypes using the %typemap directive. This is an advanced topic that assumes familiarity with the Ruby C API as well as the material in the "Typemaps " chapter.
Before proceeding, it should be stressed that typemaps are not a required part of using SWIG---the default wrapping behavior is enough in most cases. Typemaps are only used if you want to change some aspect of the primitive C-Ruby interface.
A typemap is nothing more than a code generation rule that is attached to a specific C datatype. The general form of this declaration is as follows ( parts enclosed in [...] are optional ):
%typemap( method [, modifiers...] ) typelist code;
method is a simply a name that specifies what kind of typemap is being defined. It is usually a name like "in", "out", or "argout" (or its director variations). The purpose of these methods is described later.
modifiers is an optional comma separated list of name="value" values. These are sometimes to attach extra information to a typemap and is often target-language dependent.
typelist is a list of the C++ type patterns that the typemap will match. The general form of this list is as follows:
typelist : typepattern [, typepattern, typepattern, ... ] ; typepattern : type [ (parms) ] | type name [ (parms) ] | ( typelist ) [ (parms) ]
Each type pattern is either a simple type, a simple type and argument name, or a list of types in the case of multi-argument typemaps. In addition, each type pattern can be parameterized with a list of temporary variables (parms). The purpose of these variables will be explained shortly.
code specifies the C code used in the typemap. It can take any one of the following forms:
code : { ... }
| " ... "
| %{ ... %}
For example, to convert integers from Ruby to C, you might define a typemap like this:
%module example
%typemap(in) int {
$1 = (int) NUM2INT($input);
printf("Received an integer : %d\n",$1);
}
%inline %{
extern int fact(int n);
%}
Typemaps are always associated with some specific aspect of code generation. In this case, the "in" method refers to the conversion of input arguments to C/C++. The datatype int is the datatype to which the typemap will be applied. The supplied C code is used to convert values. In this code a number of special variables prefaced by a $ are used. The $1 variable is placeholder for a local variable of type int. The $input variable is the input Ruby object.
When this example is compiled into a Ruby module, the following sample code:
require 'example' puts Example.fact(6)
prints the result:
Received an integer : 6 720
In this example, the typemap is applied to all occurrences of the int datatype. You can refine this by supplying an optional parameter name. For example:
%module example
%typemap(in) int n {
$1 = (int) NUM2INT($input);
printf("n = %d\n",$1);
}
%inline %{
extern int fact(int n);
%}
In this case, the typemap code is only attached to arguments that exactly match "int n".
The application of a typemap to specific datatypes and argument names involves more than simple text-matching--typemaps are fully integrated into the SWIG type-system. When you define a typemap for int, that typemap applies to int and qualified variations such as const int. In addition, the typemap system follows typedef declarations. For example:
%typemap(in) int n {
$1 = (int) NUM2INT($input);
printf("n = %d\n",$1);
}
typedef int Integer;
extern int fact(Integer n); // Above typemap is applied
However, the matching of typedef only occurs in one direction. If you defined a typemap for Integer, it is not applied to arguments of type int.
Typemaps can also be defined for groups of consecutive arguments. For example:
%typemap(in) (char *str, int len) {
$1 = StringValuePtr($input);
$2 = (int) RSTRING($input)->len;
};
int count(char c, char *str, int len);
When a multi-argument typemap is defined, the arguments are always handled as a single Ruby object. This allows the function count to be used as follows (notice how the length parameter is omitted):
puts Example.count('o','Hello World')
2
Once defined, a typemap remains in effect for all of the declarations that follow. A typemap may be redefined for different sections of an input file. For example:
// typemap1
%typemap(in) int {
...
}
int fact(int); // typemap1
int gcd(int x, int y); // typemap1
// typemap2
%typemap(in) int {
...
}
int isprime(int); // typemap2
One exception to the typemap scoping rules pertains to the %extend declaration. %extend is used to attach new declarations to a class or structure definition. Because of this, all of the declarations in an %extend block are subject to the typemap rules that are in effect at the point where the class itself is defined. For example:
class Foo {
...
};
%typemap(in) int {
...
}
%extend Foo {
int blah(int x); // typemap has no effect. Declaration is attached to Foo which
// appears before the %typemap declaration.
};
A typemap is copied by using assignment. For example:
%typemap(in) Integer = int;
or this:
%typemap(in) Integer, Number, int32_t = int;
Types are often managed by a collection of different typemaps. For example:
%typemap(in) int { ... }
%typemap(out) int { ... }
%typemap(varin) int { ... }
%typemap(varout) int { ... }
To copy all of these typemaps to a new type, use %apply. For example:
%apply int { Integer }; // Copy all int typemaps to Integer
%apply int { Integer, Number }; // Copy all int typemaps to both Integer and Number
The patterns for %apply follow the same rules as for %typemap. For example:
%apply int *output { Integer *output }; // Typemap with name
%apply (char *buf, int len) { (char *buffer, int size) }; // Multiple arguments
A typemap can be deleted by simply defining no code. For example:
%typemap(in) int; // Clears typemap for int %typemap(in) int, long, short; // Clears typemap for int, long, short %typemap(in) int *output;
The %clear directive clears all typemaps for a given type. For example:
%clear int; // Removes all types for int %clear int *output, long *output;
Note: Since SWIG's default behavior is defined by typemaps, clearing a fundamental type like int will make that type unusable unless you also define a new set of typemaps immediately after the clear operation.
Typemap declarations can be declared in the global scope, within a C++ namespace, and within a C++ class. For example:
%typemap(in) int {
...
}
namespace std {
class string;
%typemap(in) string {
...
}
}
class Bar {
public:
typedef const int & const_reference;
%typemap(out) const_reference {
...
}
};
When a typemap appears inside a namespace or class, it stays in effect until the end of the SWIG input (just like before). However, the typemap takes the local scope into account. Therefore, this code
namespace std {
class string;
%typemap(in) string {
...
}
}
is really defining a typemap for the type std::string. You could have code like this:
namespace std {
class string;
%typemap(in) string { /* std::string */
...
}
}
namespace Foo {
class string;
%typemap(in) string { /* Foo::string */
...
}
}
In this case, there are two completely distinct typemaps that apply to two completely different types (std::string and Foo::string).
It should be noted that for scoping to work, SWIG has to know that string is a typename defined within a particular namespace. In this example, this is done using the class declaration class string .
The following list details all of the typemap methods that can be used by the Ruby module:
Converts Ruby objects to input function arguments. For example:
%typemap(in) int {
$1 = NUM2INT($input);
}
The following special variables are available:
| $input | Input object holding value to be converted. |
| $symname | Name of function/method being wrapped |
| $1...n | Argument being sent to the function |
| $1_name | Name of the argument (if provided) |
| $1_type | The actual C datatype matched by the typemap. |
| $1_ltype | The assignable version of the C datatype matched by the typemap. |
This is probably the most commonly redefined typemap because it can be used to implement customized conversions.
In addition, the "in" typemap allows the number of converted arguments to be specified. For example:
// Ignored argument.
%typemap(in, numinputs=0) int *out (int temp) {
$1 = &temp;
}
At this time, only zero or one arguments may be converted.
The "typecheck" typemap is used to support overloaded functions and methods. It merely checks an argument to see whether or not it matches a specific type. For example:
%typemap(typecheck,precedence=SWIG_TYPECHECK_INTEGER) int {
$1 = FIXNUM_P($input) ? 1 : 0;
}
For typechecking, the $1 variable is always a simple integer that is set to 1 or 0 depending on whether or not the input argument is the correct type.
If you define new "in" typemaps and your program uses overloaded methods, you should also define a collection of "typecheck" typemaps. More details about this follow in a later section on "Typemaps and Overloading."
Converts return value of a C function to a Ruby object.
%typemap(out) int {
$result = INT2NUM( $1 );
}
The following special variables are available.
| $result | Result object returned to target language. |
| $symname | Name of function/method being wrapped |
| $1...n | Argument being wrapped |
| $1_name | Name of the argument (if provided) |
| $1_type | The actual C datatype matched by the typemap. |
| $1_ltype | The assignable version of the C datatype matched by the typemap. |
The "arginit" typemap is used to set the initial value of a function argument--before any conversion has occurred. This is not normally necessary, but might be useful in highly specialized applications. For example:
// Set argument to NULL before any conversion occurs
%typemap(arginit) int *data {
$1 = NULL;
}
The "default" typemap is used to turn an argument into a default argument. For example:
%typemap(default) int flags {
$1 = DEFAULT_FLAGS;
}
...
int foo(int x, int y, int flags);
The primary use of this typemap is to either change the wrapping of default arguments or specify a default argument in a language where they aren't supported (like C). Target languages that do not support optional arguments, such as Java and C#, effectively ignore the value specified by this typemap as all arguments must be given.
Once a default typemap has been applied to an argument, all arguments that follow must have default values. See the Default/optional arguments section for further information on default argument wrapping.
The "check" typemap is used to supply value checking code during argument conversion. The typemap is applied after arguments have been converted. For example:
%typemap(check) int positive {
if ($1 <= 0) {
SWIG_exception(SWIG_ValueError,"Expected positive value.");
}
}
The "argout" typemap is used to return values from arguments. This is most commonly used to write wrappers for C/C++ functions that need to return multiple values. The "argout" typemap is almost always combined with an "in" typemap---possibly to ignore the input value. For example:
/* Set the input argument to point to a temporary variable */
%typemap(in, numinputs=0) int *out (int temp) {
$1 = &temp;
}
%typemap(argout, fragment="output_helper") int *out {
// Append output value $1 to $result (assuming a single integer in this case)
$result = output_helper( $result, INT2NUM(*$1) );
}
The following special variables are available.
| $result | Result object returned to target language. |
| $input | The original input object passed. |
| $symname | Name of function/method being wrapped. |
The code supplied to the "argout" typemap is always placed after the "out" typemap. If multiple return values are used, the extra return values are often appended to return value of the function.
Output helper is a fragment that usually defines a macro to some function like SWIG_Ruby_AppendOutput.
See the typemaps.i library for examples.
The "freearg" typemap is used to cleanup argument data. It is only used when an argument might have allocated resources that need to be cleaned up when the wrapper function exits. The "freearg" typemap usually cleans up argument resources allocated by the "in" typemap. For example:
// Get a list of integers
%typemap(in) int *items {
int nitems = Length($input);
$1 = (int *) malloc(sizeof(int)*nitems);
}
// Free the list
%typemap(freearg) int *items {
free($1);
}
The "freearg" typemap inserted at the end of the wrapper function, just before control is returned back to the target language. This code is also placed into a special variable $cleanup that may be used in other typemaps whenever a wrapper function needs to abort prematurely.
The "newfree" typemap is used in conjunction with the %newobject directive and is used to deallocate memory used by the return result of a function. For example:
%typemap(newfree) string * {
delete $1;
}
%typemap(out) string * {
$result = PyString_FromString($1->c_str());
}
...
%newobject foo;
...
string *foo();
See Object ownership and %newobject for further details.
The "memberin" typemap is used to copy data from an already converted input value into a structure member. It is typically used to handle array members and other special cases. For example:
%typemap(memberin) int [4] {
memmove($1, $input, 4*sizeof(int));
}
It is rarely necessary to write "memberin" typemaps---SWIG already provides a default implementation for arrays, strings, and other objects.
The "varin" typemap is used to convert objects in the target language to C for the purposes of assigning to a C/C++ global variable. This is implementation specific.
The "varout" typemap is used to convert a C/C++ object to an object in the target language when reading a C/C++ global variable. This is implementation specific.
The "throws" typemap is only used when SWIG parses a C++ method with an exception specification or has the %catches feature attached to the method. It provides a default mechanism for handling C++ methods that have declared the exceptions they will throw. The purpose of this typemap is to convert a C++ exception into an error or exception in the target language. It is slightly different to the other typemaps as it is based around the exception type rather than the type of a parameter or variable. For example:
%typemap(throws) const char * %{
rb_raise(rb_eRuntimeError, $1);
SWIG_fail;
%}
void bar() throw (const char *);
As can be seen from the generated code below, SWIG generates an exception handler with the catch block comprising the "throws" typemap content.
...
try {
bar();
}
catch(char const *_e) {
rb_raise(rb_eRuntimeError, _e);
SWIG_fail;
}
...
Note that if your methods do not have an exception specification yet they do throw exceptions, SWIG cannot know how to deal with them. For a neat way to handle these, see the Exception handling with %exception section.
Converts C++ objects in director member functions to ruby objects. It is roughly the opposite of the "in" typemap, making its typemap rule often similar to the "out" typemap.
%typemap(directorin) int {
$result = INT2NUM($1);
}
The following special variables are available.
| $result | Result object returned to target language. |
| $symname | Name of function/method being wrapped |
| $1...n | Argument being wrapped |
| $1_name | Name of the argument (if provided) |
| $1_type | The actual C datatype matched by the typemap. |
| $1_ltype | The assignable version of the C datatype matched by the typemap. |
| this | C++ this, referring to the class itself. |
Converts Ruby objects in director member functions to C++ objects. It is roughly the opposite of the "out" typemap, making its rule often similar to the "in" typemap.
%typemap(directorout) int {
$result = NUM2INT($1);
}
The following special variables are available:
| $input | Ruby object being sent to the function |
| $symname | Name of function/method being wrapped |
| $1...n | Argument being sent to the function |
| $1_name | Name of the argument (if provided) |
| $1_type | The actual C datatype matched by the typemap. |
| $1_ltype | The assignable version of the C datatype matched by the typemap. |
| this | C++ this, referring to the class itself. |
Currently, the directorout nor the out typemap support the option numoutputs, but the Ruby module provides that functionality through a %feature directive. Thus, a function can be made to return "nothing" if you do:
%feature("numoutputs","0") MyClass::function;
This feature can be useful if a function returns a status code, which you want to discard but still use the typemap to raise an exception.
Output argument processing in director member functions.
%typemap(directorargout,
fragment="output_helper") int {
$result = output_helper( $result, NUM2INT($1) );
}
The following special variables are available:
| $result | Result that the director function returns |
| $input | Ruby object being sent to the function |
| $symname | name of the function/method being wrapped |
| $1...n | Argument being sent to the function |
| $1_name | Name of the argument (if provided) |
| $1_type | The actual C datatype matched by the typemap |
| $1_ltype | The assignable version of the C datatype matched by the typemap |
| this | C++ this, referring to the instance of the class itself |
Cleanup of function return values
Setting of C global variables
Within a typemap, a number of special variables prefaced with a $ may appear. A full list of variables can be found in the " Typemaps" chapter. This is a list of the most common variables:
$1
$input
$result
$1_name
$1_type
$1_ltype
$symname
When you write a typemap, you usually have to work directly with Ruby objects. The following functions may prove to be useful. (These functions plus many more can be found in Programming Ruby book, by David Thomas and Andrew Hunt.)
In addition, we list equivalent functions that SWIG defines, which provide a language neutral conversion (these functions are defined for each swig language supported). If you are trying to create a swig file that will work under multiple languages, it is recommended you stick to the swig functions instead of the native Ruby functions. That should help you avoid having to rewrite a lot of typemaps across multiple languages.
| RUBY | SWIG | |
|---|---|---|
| INT2NUM(long or int) | SWIG_From_int(int x) | int to Fixnum or Bignum |
| INT2FIX(long or int) | int to Fixnum (faster than INT2NUM) | |
| CHR2FIX(char) | SWIG_From_char(char x) | char to Fixnum |
| rb_str_new2(char*) | SWIG_FromCharPtrAndSize(char*, size_t) | char* to String |
| rb_float_new(double) | SWIG_From_double(double),
SWIG_From_float(float) | float/double to Float |
Here, while the Ruby versions return the value directly, the SWIG versions do not, but return a status value to indicate success ( SWIG_OK). While more akward to use, this allows you to write typemaps that report more helpful error messages, like:
%typemap(in) size_t (int ok)
ok = SWIG_AsVal_size_t($input, &$1);
if (!SWIG_IsOK(ok)) {
SWIG_exception_fail(SWIG_ArgError(ok), Ruby_Format_TypeError( "$1_name", "$1_type","$symname", $argnum, $input));
}
}
| int NUM2INT(Numeric) | SWIG_AsVal_int(VALUE, int*) |
| int FIX2INT(Numeric) | SWIG_AsVal_int(VALUE, int*) |
| unsigned int NUM2UINT(Numeric) | SWIG_AsVal_unsigned_SS_int(VALUE, int*) |
| unsigned int FIX2UINT(Numeric) | SWIG_AsVal_unsigned_SS_int(VALUE, int*) |
| long NUM2LONG(Numeric) | SWIG_AsVal_long(VALUE, long*) |
| long FIX2LONG(Numeric) | SWIG_AsVal_long(VALUE, long*) |
| unsigned long FIX2ULONG(Numeric) | SWIG_AsVal_unsigned_SS_long(VALUE, unsigned long*) |
| char NUM2CHR(Numeric or String) | SWIG_AsVal_char(VALUE, int*) |
| char * StringValuePtr(String) | SWIG_AsCharPtrAndSize(VALUE, char*, size_t, int* alloc) |
| char * rb_str2cstr(String, int*length) | |
| double NUM2DBL(Numeric) | (double) SWIG_AsVal_int(VALUE) or similar |
RSTRING_LEN(str)
RSTRING_PTR(str)
RARRAY_LEN(arr)
RARRAY(arr)->capa
RARRAY_PTR(arr)
void rb_raise(VALUE exception, const char *fmt, ...)
void rb_fatal(const char *fmt, ...)
void rb_bug(const char *fmt, ...)
void rb_sys_fail(const char *msg)
VALUE rb_rescue(VALUE (*body)(VALUE), VALUE args, VALUE(*rescue)(VALUE, VALUE), VALUE rargs)
VALUE rb_ensure(VALUE(*body)(VALUE), VALUE args, VALUE(*ensure)(VALUE), VALUE eargs)
VALUE rb_protect(VALUE (*body)(VALUE), VALUE args, int *result)
void rb_notimplement()
void rb_exit(int status)
void rb_warn(const char *fmt, ...)
void rb_warning(const char *fmt, ...)
void rb_iter_break()
VALUE rb_each(VALUE obj)
VALUE rb_yield(VALUE arg)
int rb_block_given_p()
VALUE rb_iterate(VALUE (*method)(VALUE), VALUE args, VALUE (*block)(VALUE, VALUE), VALUE arg2)
VALUE rb_catch(const char *tag, VALUE (*proc)(VALUE, VALUE), VALUE value)
void rb_throw(const char *tag, VALUE value)
This section includes a few examples of typemaps. For more examples, you might look at the examples in the Example/ruby directory.
A common problem in many C programs is the processing of command line arguments, which are usually passed in an array of NULL terminated strings. The following SWIG interface file allows a Ruby Array instance to be used as a char ** object.
%module argv
// This tells SWIG to treat char ** as a special case
%typemap(in) char ** {
/* Get the length of the array */
int size = RARRAY($input)->len;
int i;
$1 = (char **) malloc((size+1)*sizeof(char *));
/* Get the first element in memory */
VALUE *ptr = RARRAY($input)->ptr;
for (i=0; i < size; i++, ptr++) {
/* Convert Ruby Object String to char* */
$1[i]= StringValuePtr(*ptr);
}
$1[i]=NULL; /* End of list */
}
// This cleans up the char ** array created before
// the function call
%typemap(freearg) char ** {
free((char *) $1);
}
// Now a test function
%inline %{
int print_args(char **argv) {
int i = 0;
while (argv[i]) {
printf("argv[%d] = %s\n", i,argv[i]);
i++;
}
return i;
}
%}
When this module is compiled, the wrapped C function now operates as follows :
require 'Argv' Argv.print_args(["Dave","Mike","Mary","Jane","John"]) argv[0] = Dave argv[1] = Mike argv[2] = Mary argv[3] = Jane argv[4] = John
In the example, two different typemaps are used. The "in" typemap is used to receive an input argument and convert it to a C array. Since dynamic memory allocation is used to allocate memory for the array, the "freearg" typemap is used to later release this memory after the execution of the C function.
Ruby's solution to the "keyword arguments" capability of some other languages is to allow the programmer to pass in one or more key-value pairs as arguments to a function. All of those key-value pairs are collected in a single Hash argument that's presented to the function. If it makes sense, you might want to provide similar functionality for your Ruby interface. For example, suppose you'd like to wrap this C function that collects information about people's vital statistics:
void setVitalStats(const char *person, int nattributes, const char **names, int *values);
and you'd like to be able to call it from Ruby by passing in an arbitrary number of key-value pairs as inputs, e.g.
setVitalStats("Fred",
'weight' => 270,
'age' => 42
)
To make this work, you need to write a typemap that expects a Ruby Hash as its input and somehow extracts the last three arguments ( nattributes, names and values) needed by your C function. Let's start with the basics:
%typemap(in) (int nattributes, const char **names, const int *values)
(VALUE keys_arr, int i, VALUE key, VALUE val) {
}
This %typemap directive tells SWIG that we want to match any function declaration that has the specified types and names of arguments somewhere in the argument list. The fact that we specified the argument names (nattributes, names and values) in our typemap is significant; this ensures that SWIG won't try to apply this typemap to other functions it sees that happen to have a similar declaration with different argument names. The arguments that appear in the second set of parentheses (keys_arr, i , key and val) define local variables that our typemap will need.
Since we expect the input argument to be a Hash, let's next add a check for that:
%typemap(in) (int nattributes, const char **names, const int *values)
(VALUE keys_arr, int i, VALUE key, VALUE val) {
Check_Type($input, T_HASH);
}
Check_Type() is just a macro (defined in the Ruby header files) that confirms that the input argument is of the correct type; if it isn't, an exception will be raised.
The next task is to determine how many key-value pairs are present in the hash; we'll assign this number to the first typemap argument ( $1). This is a little tricky since the Ruby/C API doesn't provide a public function for querying the size of a hash, but we can get around that by calling the hash's size method directly and converting its result to a C int value:
%typemap(in) (int nattributes, const char **names, const int *values)
(VALUE keys_arr, int i, VALUE key, VALUE val) {
Check_Type($input, T_HASH);
$1 = NUM2INT(rb_funcall($input, rb_intern("size"), 0, NULL));
}
So now we know the number of attributes. Next we need to initialize the second and third typemap arguments (i.e. the two C arrays) to NULL and set the stage for extracting the keys and values from the hash:
%typemap(in) (int nattributes, const char **names, const int *values)
(VALUE keys_arr, int i, VALUE key, VALUE val) {
Check_Type($input, T_HASH);
$1 = NUM2INT(rb_funcall($input, rb_intern("size"), 0, NULL));
$2 = NULL;
$3 = NULL;
if ($1 > 0) {
$2 = (char **) malloc($1*sizeof(char *));
$3 = (int *) malloc($1*sizeof(int));
}
}
There are a number of ways we could extract the keys and values from the input hash, but the simplest approach is to first call the hash's keys method (which returns a Ruby array of the keys) and then start looping over the elements in that array:
%typemap(in) (int nattributes, const char **names, const int *values)
(VALUE keys_arr, int i, VALUE key, VALUE val) {
Check_Type($input, T_HASH);
$1 = NUM2INT(rb_funcall($input, rb_intern("size"), 0, NULL));
$2 = NULL;
$3 = NULL;
if ($1 > 0) {
$2 = (char **) malloc($1*sizeof(char *));
$3 = (int *) malloc($1*sizeof(int));
keys_arr = rb_funcall($input, rb_intern("keys"), 0, NULL);
for (i = 0; i < $1; i++) {
}
}
}
Recall that keys_arr and i are local variables for this typemap. For each element in the keys_arr array, we want to get the key itself, as well as the value corresponding to that key in the hash:
%typemap(in) (int nattributes, const char **names, const int *values)
(VALUE keys_arr, int i, VALUE key, VALUE val) {
Check_Type($input, T_HASH);
$1 = NUM2INT(rb_funcall($input, rb_intern("size"), 0, NULL));
$2 = NULL;
$3 = NULL;
if ($1 > 0) {
$2 = (char **) malloc($1*sizeof(char *));
$3 = (int *) malloc($1*sizeof(int));
keys_arr = rb_funcall($input, rb_intern("keys"), 0, NULL);
for (i = 0; i < $1; i++) {
key = rb_ary_entry(keys_arr, i);
val = rb_hash_aref($input, key);
}
}
}
To be safe, we should again use the Check_Type() macro to confirm that the key is a String and the value is a Fixnum :
%typemap(in) (int nattributes, const char **names, const int *values)
(VALUE keys_arr, int i, VALUE key, VALUE val) {
Check_Type($input, T_HASH);
$1 = NUM2INT(rb_funcall($input, rb_intern("size"), 0, NULL));
$2 = NULL;
$3 = NULL;
if ($1 > 0) {
$2 = (char **) malloc($1*sizeof(char *));
$3 = (int *) malloc($1*sizeof(int));
keys_arr = rb_funcall($input, rb_intern("keys"), 0, NULL);
for (i = 0; i < $1; i++) {
key = rb_ary_entry(keys_arr, i);
val = rb_hash_aref($input, key);
Check_Type(key, T_STRING);
Check_Type(val, T_FIXNUM);
}
}
}
Finally, we can convert these Ruby objects into their C equivalents and store them in our local C arrays:
%typemap(in) (int nattributes, const char **names, const int *values)
(VALUE keys_arr, int i, VALUE key, VALUE val) {
Check_Type($input, T_HASH);
$1 = NUM2INT(rb_funcall($input, rb_intern("size"), 0, NULL));
$2 = NULL;
$3 = NULL;
if ($1 > 0) {
$2 = (char **) malloc($1*sizeof(char *));
$3 = (int *) malloc($1*sizeof(int));
keys_arr = rb_funcall($input, rb_intern("keys"), 0, NULL);
for (i = 0; i < $1; i++) {
key = rb_ary_entry(keys_arr, i);
val = rb_hash_aref($input, key);
Check_Type(key, T_STRING);
Check_Type(val, T_FIXNUM);
$2[i] = StringValuePtr(key);
$3[i] = NUM2INT(val);
}
}
}
We're not done yet. Since we used malloc() to dynamically allocate the memory used for the names and values arguments, we need to provide a corresponding "freearg" typemap to free that memory so that there is no memory leak. Fortunately, this typemap is a lot easier to write:
%typemap(freearg) (int nattributes, const char **names, const int *values) {
free((void *) $2);
free((void *) $3);
}
All of the code for this example, as well as a sample Ruby program that uses the extension, can be found in the Examples/ruby/hashargs directory of the SWIG distribution.
Occasionally, it might be necessary to convert pointer values that have been stored using the SWIG typed-pointer representation. Since there are several ways in which pointers can be represented, the following two functions are used to safely perform this conversion:
int SWIG_ConvertPtr(VALUE obj, void **ptr, swig_type_info *ty, int flags)
VALUE SWIG_NewPointerObj(void *ptr, swig_type_info *ty, int own)
Both of these functions require the use of a special SWIG type-descriptor structure. This structure contains information about the mangled name of the datatype, type-equivalence information, as well as information about converting pointer values under C++ inheritance. For a type of Foo *, the type descriptor structure is usually accessed as follows:
Foo *foo; SWIG_ConvertPtr($input, (void **) &foo, SWIGTYPE_p_Foo, 1); VALUE obj; obj = SWIG_NewPointerObj(f, SWIGTYPE_p_Foo, 0);
In a typemap, the type descriptor should always be accessed using the special typemap variable $1_descriptor. For example:
%typemap(in) Foo * {
SWIG_ConvertPtr($input, (void **) &$1, $1_descriptor, 1);
}
VALUE Data_Wrap_Struct(VALUE class, void (*mark)(void *), void (*free)(void *), void *ptr)
VALUE Data_Make_Struct(VALUE class, c-type, void (*mark)(void *), void (*free)(void *), c-type *ptr)
Data_Get_Struct(VALUE obj, c-type, c-type *ptr)
Another use for macros and type maps is to create a Ruby array from a STL vector of pointers. In essence, copy of all the pointers in the vector into a Ruby array. The use of the macro is to make the typemap so generic that any vector with pointers can use the type map. The following is an example of how to construct this type of macro/typemap and should give insight into constructing similar typemaps for other STL structures:
%define PTR_VECTOR_TO_RUBY_ARRAY(vectorclassname, classname)
%typemap(out) vectorclassname &, const vectorclassname & {
VALUE arr = rb_ary_new2($1->size());
vectorclassname::iterator i = $1->begin(), iend = $1->end();
for ( ; i!=iend; i++ )
rb_ary_push(arr, Data_Wrap_Struct(c ## classname.klass, 0, 0, *i));
$result = arr;
}
%typemap(out) vectorclassname, const vectorclassname {
VALUE arr = rb_ary_new2($1.size());
vectorclassname::iterator i = $1.begin(), iend = $1.end();
for ( ; i!=iend; i++ )
rb_ary_push(arr, Data_Wrap_Struct(c ## classname.klass, 0, 0, *i));
$result = arr;
}
%enddef
Note, that the "c ## classname.klass" is used in the preprocessor step to determine the actual object from the class name.
To use the macro with a class Foo, the following is used:
PTR_VECTOR_TO_RUBY_ARRAY(vector<foo *="">, Foo)
It is also possible to create a STL vector of Ruby objects:
%define RUBY_ARRAY_TO_PTR_VECTOR(vectorclassname, classname)
%typemap(in) vectorclassname &, const vectorclassname & {
Check_Type($input, T_ARRAY);
vectorclassname *vec = new vectorclassname;
int len = RARRAY($input)->len;
for (int i=0; i!=len; i++) {
VALUE inst = rb_ary_entry($input, i);
//The following _should_ work but doesn't on HPUX
// Check_Type(inst, T_DATA);
classname *element = NULL;
Data_Get_Struct(inst, classname, element);
vec->push_back(element);
}
$1 = vec;
}
%typemap(freearg) vectorclassname &, const vectorclassname & {
delete $1;
}
%enddef
It is also possible to create a Ruby array from a vector of static data types:
%define VECTOR_TO_RUBY_ARRAY(vectorclassname, classname)
%typemap(out) vectorclassname &, const vectorclassname & {
VALUE arr = rb_ary_new2($1->size());
vectorclassname::iterator i = $1->begin(), iend = $1->end();
for ( ; i!=iend; i++ )
rb_ary_push(arr, Data_Wrap_Struct(c ## classname.klass, 0, 0, &(*i)));
$result = arr;
}
%typemap(out) vectorclassname, const vectorclassname {
VALUE arr = rb_ary_new2($1.size());
vectorclassname::iterator i = $1.begin(), iend = $1.end();
for ( ; i!=iend; i++ )
rb_ary_push(arr, Data_Wrap_Struct(c ## classname.klass, 0, 0, &(*i)));
$result = arr;
}
%enddef
Using ri and rdoc web pages in Ruby libraries is a common practice. Given the way that SWIG generates the extensions by default, your users will normally not get any documentation for it, even if they run 'rdoc' on the resulting .c or .cxx file.
The features described in this section make it easy for you to add rdoc strings to your modules, functions and methods that can then be read by Ruby's rdoc tool to generate html web pages, ri documentation, Windows chm file and an .xml description.
rdoc can then be run from a console or shell window on a swig generated file.
For example, to generate html web pages from a C++ file, you'd do:
$ rdoc -E cxx=c -f html file_wrap.cxx
To generate ri documentation from a c wrap file, you could do:
$ rdoc -r file_wrap.c
Ruby allows a docstring at the beginning of the file before any other statements, and it is typically used to give a general description of the entire module. SWIG supports this by setting an option of the %module directive. For example:
%module(docstring="This is the example module's docstring") example
When you have more than just a line or so then you can retain the easy readability of the %module directive by using a macro. For example:
%define DOCSTRING "The `XmlResource` class allows program resources defining menus, layout of controls on a panel, etc. to be loaded from an XML file." %enddef %module(docstring=DOCSTRING) xrc
Since SWIG does know everything about the function it wraps, it is possible to generate an rdoc containing the parameter types, names and default values. Since Ruby ships with one of the best documentation systems of any language, it makes sense to take advantage of it.
SWIG's Ruby module provides support for the "autodoc" feature, which when attached to a node in the parse tree will cause an rdoc comment to be generated in the wrapper file that includes the name of the function, parameter names, default values if any, and return type if any. There are also several options for autodoc controlled by the value given to the feature, described below.
When the "0" option is given then the types of the parameters will not be included in the autodoc string. For example, given this function prototype:
%feature("autodoc", "0");
bool function_name(int x, int y, Foo* foo=NULL, Bar* bar=NULL);
Then Ruby code like this will be generated:
function_name(x, y, foo=nil, bar=nil) -> bool ...
When the "1" option is used then the parameter types will be used in the rdoc string. In addition, an attempt is made to simplify the type name such that it makes more sense to the Ruby user. Pointer, reference and const info is removed, %rename's are evaluated, etc. (This is not always successful, but works most of the time. See the next section for what to do when it doesn't.) Given the example above, then turning on the parameter types with the "1" option will result in rdoc code like this:
function_name(int x, int y, Foo foo=nil, Bar bar=nil) -> bool ...
When the "2" option is used then the parameter types will not be used in the rdoc string. However, they will be listed in full after the function. Given the example above, then turning on the parameter types with the "2" option will result in Ruby code like this:
When the "3" option is used then the function will be documented using a combination of "1" and "2" above. Given the example above, then turning on the parameter types with the "2" option will result in Ruby code like this:
function_name(int x, int y, Foo foo=nil, Bar bar=nil) -> bool Parameters: x - int y - int foo - Foo bar - Bar
Finally, there are times when the automatically generated autodoc string will make no sense for a Ruby programmer, particularly when a typemap is involved. So if you give an explicit value for the autodoc feature then that string will be used in place of the automatically generated string. For example:
%feature("autodoc", "GetPosition() -> (x, y)") GetPosition;
void GetPosition(int* OUTPUT, int* OUTPUT);
In addition to the autodoc strings described above, you can also attach any arbitrary descriptive text to a node in the parse tree with the "docstring" feature. When the proxy module is generated then any docstring associated with classes, function or methods are output. If an item already has an autodoc string then it is combined with the docstring and they are output together.
SWIG allows operator overloading with, by using the %extend or %rename commands in SWIG and the following operator names (derived from Python):
| General | ||
| __repr__ | inspect | |
| __str__ | to_s | |
| __cmp__ | <=> | |
| __hash__ | hash | |
| __nonzero__ | nonzero? | |
| Callable | ||
| __call__ | call | |
| Collection | ||
| __len__ | length | |
| __getitem__ | [] | |
| __setitem__ | []= | |
| Numeric | ||
| __add__ | + | |
| __sub__ | - | |
| __mul__ | * | |
| __div__ | / | |
| __mod__ | % | |
| __divmod__ | divmod | |
| __pow__ | ** | |
| __lshift__ | << | |
| __rshift__ | >> | |
| __and__ | & | |
| __xor__ | ^ | |
| __or__ | | | |
| __neg__ | -@ | |
| __pos__ | +@ | |
| __abs__ | abs | |
| __invert__ | ~ | |
| __int__ | to_i | |
| __float__ | to_f | |
| __coerce__ | coerce | |
| Additions in 1.3.13 | ||
| __lt__ | < | |
| __le__ | <= | |
| __eq__ | == | |
| __gt__ | > | |
| __ge__ | >= |
Note that although SWIG supports the __eq__ magic method name for defining an equivalence operator, there is no separate method for handling inequality since Ruby parses the expression a != b as !(a == b).
The chapter on Working with Modules discusses the basics of creating multi-module extensions with SWIG, and in particular the considerations for sharing runtime type information among the different modules.
As an example, consider one module's interface file (shape.i ) that defines our base class:
%module shape
%{
#include "Shape.h"
%}
class Shape {
protected:
double xpos;
double ypos;
protected:
Shape(double x, double y);
public:
double getX() const;
double getY() const;
};
We also have a separate interface file (circle.i) that defines a derived class:
%module circle
%{
#include "Shape.h"
#include "Circle.h"
%}
// Import the base class definition from Shape module
%import shape.i
class Circle : public Shape {
protected:
double radius;
public:
Circle(double x, double y, double r);
double getRadius() const;
};
We'll start by building the Shape extension module:
$ swig -c++ -ruby shape.i
SWIG generates a wrapper file named shape_wrap.cxx. To compile this into a dynamically loadable extension for Ruby, prepare an extconf.rb script using this template:
require 'mkmf'
# Since the SWIG runtime support library for Ruby
# depends on the Ruby library, make sure it's in the list
# of libraries.
$libs = append_library($libs, Config::CONFIG['RUBY_INSTALL_NAME'])
# Create the makefile
create_makefile('shape')
Run this script to create a Makefile and then type make to build the shared library:
$ ruby extconf.rb creating Makefile $ make g++ -fPIC -g -O2 -I. -I/usr/local/lib/ruby/1.7/i686-linux \ -I. -c shape_wrap.cxx gcc -shared -L/usr/local/lib -o shape.so shape_wrap.o -L. \ -lruby -lruby -lc
Note that depending on your installation, the outputs may be slightly different; these outputs are those for a Linux-based development environment. The end result should be a shared library (here, shape.so) containing the extension module code. Now repeat this process in a separate directory for the Circle module:
Once you've built both of these extension modules, you can test them interactively in IRB to confirm that the Shape and Circle modules are properly loaded and initialized:
$ irb irb(main):001:0> require 'shape' true irb(main):002:0> require 'circle' true irb(main):003:0> c = Circle::Circle.new(5, 5, 20) #<Circle::Circle:0xa097208> irb(main):004:0> c.kind_of? Shape::Shape true irb(main):005:0> c.getX() 5.0
The Ruby language doesn't support multiple inheritance, but it does allow you to mix one or more modules into a class using Ruby's include method. For example, if you have a Ruby class that defines an each instance method, e.g.
class Set
def initialize
@members = []
end
def each
@members.each { |m| yield m }
end
end
then you can mix-in Ruby's Enumerable module to easily add a lot of functionality to your class:
class Set
include Enumerable
def initialize
@members = []
end
def each
@members.each { |m| yield m }
end
end
To get the same benefit for your SWIG-wrapped classes, you can use the %mixin directive to specify the names of one or more modules that should be mixed-in to a class. For the above example, the SWIG interface specification might look like this:
%mixin Set "Enumerable";
class Set {
public:
// Constructor
Set();
// Iterates through set members
void each();
};
Multiple modules can be mixed into a class by providing a comma-separated list of module names to the %mixin directive, e.g.
%mixin Set "Fee,Fi,Fo,Fum";
Note that the %mixin directive is implemented using SWIG's "features" mechanism and so the same name matching rules used for other kinds of features apply (see the chapter on "Customization Features") for more details).
One of the most common issues in generating SWIG bindings for Ruby is proper memory management. The key to proper memory management is clearly defining whether a wrapper Ruby object owns the underlying C struct or C++ class. There are two possibilities:
To complicate matters, object ownership may transfer from Ruby to C++ (or vice versa) depending on what function or methods are invoked. Clearly, developing a SWIG wrapper requires a thorough understanding of how the underlying library manages memory.
Ruby uses a mark and sweep garbage collector. When the garbage collector runs, it finds all the "root" objects, including local variables, global variables, global constants, hardware registers and the C stack. For each root object, the garbage collector sets its mark flag to true and calls rb_gc_mark on the object. The job of rb_gc_mark is to recursively mark all the objects that a Ruby object has a reference to (ignoring those objects that have already been marked). Those objects, in turn, may reference other objects. This process will continue until all active objects have been "marked." After the mark phase comes the sweep phase. In the sweep phase, all objects that have not been marked will be garbage collected. For more information about the Ruby garbage collector please refer to http://rubygarden.org/ruby/ruby?GCAndExtensions.
The Ruby C/API provides extension developers two hooks into the garbage collector - a "mark" function and a "sweep" function. By default these functions are set to NULL.
If a C struct or C++ class references any other Ruby objects, then it must provide a "mark" function. The "mark" function should identify any referenced Ruby objects by calling the rb_gc_mark function for each one. Unsurprisingly, this function will be called by the Ruby garbage during the "mark" phase.
During the sweep phase, Ruby destroys any unused objects. If any memory has been allocated in creating the underlying C struct or C++ struct, then a "free" function must be defined that deallocates this memory.
As described above, memory management depends on clearly defining who is responsible for freeing the underlying C struct or C++ class. If the Ruby object is responsible for freeing the C++ object, then a "free" function must be registered for the object. If the Ruby object is not responsible for freeing the underlying memory, then a "free" function must not be registered for the object.
For the most part, SWIG takes care of memory management issues. The rules it uses are:
To make this clearer, let's look at an example. Assume we have a Foo and a Bar class.
/* File "RubyOwernshipExample.h" */
class Foo
{
public:
Foo() {}
~Foo() {}
};
class Bar
{
Foo *foo_;
public:
Bar(): foo_(new Foo) {}
~Bar() { delete foo_; }
Foo* get_foo() { return foo_; }
Foo* get_new_foo() { return new Foo; }
void set_foo(Foo *foo) { delete foo_; foo_ = foo; }
};
First, consider this Ruby code:
foo = Foo.new
In this case, the Ruby code calls the underlying Foo C++ constructor, thus creating a new foo object. By default, SWIG will assign the new Ruby object a "free" function. When the Ruby object is garbage collected, the "free" function will be called. It in turn will call Foo's destructor.
Next, consider this code:
bar = Bar.new foo = bar.get_foo()
In this case, the Ruby code calls a C++ member function, get_foo . By default, SWIG will not assign the Ruby object a "free" function. Thus, when the Ruby object is garbage collected the underlying C++ foo object is not affected.
Unfortunately, the real world is not as simple as the examples above. For example:
bar = Bar.new foo = bar.get_new_foo()
In this case, the default SWIG behavior for calling member functions is incorrect. The Ruby object should assume ownership of the returned object. This can be done by using the %newobject directive. See Object ownership and %newobject for more information.
The SWIG default mappings are also incorrect in this case:
foo = Foo.new bar = Bar.new bar.set_foo(foo)
Without modification, this code will cause a segmentation fault. When the Ruby foo object goes out of scope, it will free the underlying C++ foo object. However, when the Ruby bar object goes out of scope, it will call the C++ bar destructor which will also free the C++ foo object. The problem is that object ownership is transferred from the Ruby object to the C++ object when the set_foo method is called. This can be done by using the special DISOWN type map, which was added to the Ruby bindings in SWIG-1.3.26.
Thus, a correct SWIG interface file correct mapping for these classes is:
/* File RubyOwnershipExample.i */
%module RubyOwnershipExample
%{
#include "RubyOwnershipExample.h"
%}
class Foo
{
public:
Foo();
~Foo();
};
class Bar
{
Foo *foo_;
public:
Bar();
~Bar();
Foo* get_foo();
%newobject get_new_foo;
Foo* get_new_foo();
%apply SWIGTYPE *DISOWN {Foo *foo};
void set_foo(Foo *foo);
%clear Foo *foo;
};
This code can be seen in swig/examples/ruby/tracking.
The remaining parts of this section will use the class library shown below to illustrate different memory management techniques. The class library models a zoo and the animals it contains.
%module zoo
%{
#include <string>
#include <vector>
#include "zoo.h"
%}
class Animal
{
private:
typedef std::vector<Animal*> AnimalsType;
typedef AnimalsType::iterator IterType;
protected:
AnimalsType animals;
protected:
std::string name_;
public:
// Construct an animal with this name
Animal(const char* name) : name_(name) {}
// Return the animal's name
const char* get_name() const { return name.c_str(); }
};
class Zoo
{
protected:
std::vector<animal *=""> animals;
public:
// Construct an empty zoo
Zoo() {}
/* Create a new animal. */
static Animal* Zoo::create_animal(const char* name) {
return new Animal(name);
}
// Add a new animal to the zoo
void add_animal(Animal* animal) {
animals.push_back(animal);
}
Animal* remove_animal(size_t i) {
Animal* result = this->animals[i];
IterType iter = this->animals.begin();
std::advance(iter, i);
this->animals.erase(iter);
return result;
}
// Return the number of animals in the zoo
size_t get_num_animals() const {
return animals.size();
}
// Return a pointer to the ith animal
Animal* get_animal(size_t i) const {
return animals[i];
}
};
Let's say you SWIG this code and then run IRB:
$ irb
irb(main):001:0> require 'example'
=> true
irb(main):002:0> tiger1 = Example::Animal.new("tiger1")
=> #<Example::Animal:0x2be3820>
irb(main):004:0> tiger1.get_name()
=> "tiger1"
irb(main):003:0> zoo = Example::Zoo.new()
=> #<Example::Zoo:0x2be0a60>
irb(main):006:0> zoo.add_animal(tiger)
=> nil
irb(main):007:0> zoo.get_num_animals()
=> 1
irb(main):007:0> tiger2 = zoo.remove_animal(0)
=> #<Example::Animal:0x2bd4a18>
irb(main):008:0> tiger2.get_name()
=> "tiger1"
irb(main):009:0> tiger1.equal?(tiger2)
=> false
Pay particular attention to the code tiger1.equal?(tiger2). Note that the two Ruby objects are not the same - but they reference the same underlying C++ object. This can cause problems. For example:
irb(main):010:0> tiger1 = nil => nil irb(main):011:0> GC.start => nil irb(main):012:0> tiger2.get_name() (irb):12: [BUG] Segmentation fault
After the garbage collector runs, as a result of our call to GC.start, callingtiger2.get_name() causes a segmentation fault. The problem is that when tiger1 is garbage collected, it frees the underlying C++ object. Thus, when tiger2 calls the get_name() method it invokes it on a destroyed object.
This problem can be avoided if SWIG enforces a one-to-one mapping between Ruby objects and C++ classes. This can be done via the use of the %trackobjects functionality available in SWIG-1.3.26. and later.
When the %trackobjects is turned on, SWIG automatically keeps track of mappings between C++ objects and Ruby objects. Note that enabling object tracking causes a slight performance degradation. Test results show this degradation to be about 3% to 5% when creating and destroying 100,000 animals in a row.
Since %trackobjects is implemented as a %feature, it uses the same name matching rules as other kinds of features (see the chapter on "Customization Features") . Thus it can be applied on a class-by-class basis if needed. To fix the example above:
%module example
%{
#include "example.h"
%}
/* Tell SWIG that create_animal creates a new object */
%newobject Zoo::create_animal;
/* Tell SWIG to keep track of mappings between C/C++ structs/classes. */%trackobjects;
%include "example.h"
When this code runs we see:
$ irb
irb(main):001:0> require 'example'
=> true
irb(main):002:0> tiger1 = Example::Animal.new("tiger1")
=> #<Example::Animal:0x2be37d8>
irb(main):003:0> zoo = Example::Zoo.new()
=> #<Example::Zoo:0x2be0a18>
irb(main):004:0> zoo.add_animal(tiger1)
=> nil
irb(main):006:0> tiger2 = zoo.remove_animal(0)
=> #<Example::Animal:0x2be37d8>
irb(main):007:0> tiger1.equal?(tiger2)
=> true
irb(main):008:0> tiger1 = nil
=> nil
irb(main):009:0> GC.start
=> nil
irb(main):010:0> tiger.get_name()
=> "tiger1"
irb(main):011:0>
For those who are interested, object tracking is implemented by storing Ruby objects in a hash table and keying them on C++ pointers. The underlying API is:
static void SWIG_RubyAddTracking(void* ptr, VALUE object); static VALUE SWIG_RubyInstanceFor(void* ptr) ; static void SWIG_RubyRemoveTracking(void* ptr); static void SWIG_RubyUnlinkObjects(void* ptr);
When an object is created, SWIG will automatically call the SWIG_RubyAddTracking method. Similarly, when an object is deleted, SWIG will call the SWIG_RubyRemoveTracking. When an object is returned to Ruby from C++, SWIG will use the SWIG_RubyInstanceFor method to ensure a one-to-one mapping from Ruby to C++ objects. Last, the RubyUnlinkObjects method unlinks a Ruby object from its underlying C++ object.
In general, you will only need to use the SWIG_RubyInstanceFor , which is required for implementing mark functions as shown below. However, if you implement your own free functions (see below) you may also have to call the SWIG_RubyRemoveTracking and RubyUnlinkObjects methods.
With a bit more testing, we see that our class library still has problems. For example:
$ irb
irb(main):001:0> require 'example'
=> true
irb(main):002:0> tiger1 = Example::Animal.new("tiger1")
=> #<Example::Animal:0x2bea6a8>
irb(main):003:0> zoo = Example::Zoo.new()
=> #<Example::Zoo:0x2be7960>
irb(main):004:0> zoo.add_animal(tiger1)
=> nil
irb(main):007:0> tiger1 = nil
=> nil
irb(main):007:0> GC.start
=> nil
irb(main):005:0> tiger2 = zoo.get_animal(0)
(irb):12: [BUG] Segmentation fault
The problem is that Ruby does not know that the zoo object contains a reference to a Ruby object. Thus, when Ruby garbage collects tiger1 it frees the underlying C++ object.
This can be fixed by implementing a mark function as described above in the Mark and Sweep Garbage Collector section. You can specify a mark function by using the %markfunc directive. Since the %markfunc directive is implemented using SWIG's' "features" mechanism it uses the same name matching rules as other kinds of features (see the chapter on "Customization Features" for more details).
A mark function takes a single argument, which is a pointer to the C++ object being marked; it should, in turn, call rb_gc_mark() for any instances that are reachable from the current object. The mark function for our Zoo class should therefore loop over all of the C++ animal objects in the zoo object, look up their Ruby object equivalent, and then call rb_gc_mark(). One possible implementation is:
%module example
%{
#include "example.h"
%}
/* Keep track of mappings between C/C++ structs/classes
and Ruby objects so we can implement a mark function. */
%trackobjects;
/* Specify the mark function */
%markfunc Zoo "mark_Zoo";
%include "example.h"
%header %{
static void mark_Zoo(void* ptr) {
Zoo* zoo = (Zoo*) ptr;
/* Loop over each object and tell the garbage collector
that we are holding a reference to them. */
int count = zoo->get_num_animals();
for(int i = 0; i < count; ++i) {
Animal* animal = zoo->get_animal(i);
VALUE object = SWIG_RubyInstanceFor(animal);
if (object != Qnil) {
rb_gc_mark(object);
}
}
}
%}
Note the mark function is dependent on the SWIG_RUBY_InstanceFor method, and thus requires that %trackobjects is enabled. For more information, please refer to the track_object.i test case in the SWIG test suite.
When this code is compiled we now see:
$ irb
irb(main):002:0> tiger1=Example::Animal.new("tiger1")
=> #<Example::Animal:0x2be3bf8>
irb(main):003:0> Example::Zoo.new()
=> #<Example::Zoo:0x2be1780>
irb(main):004:0> zoo = Example::Zoo.new()
=> #<Example::Zoo:0x2bde9c0>
irb(main):005:0> zoo.add_animal(tiger1)
=> nil
irb(main):009:0> tiger1 = nil
=> nil
irb(main):010:0> GC.start
=> nil
irb(main):014:0> tiger2 = zoo.get_animal(0)
=> #<Example::Animal:0x2be3bf8>
irb(main):015:0> tiger2.get_name()
=> "tiger1"
irb(main):016:0>
This code can be seen in swig/examples/ruby/mark_function.
By default, SWIG creates a "free" function that is called when a Ruby object is garbage collected. The free function simply calls the C++ object's destructor.
However, sometimes an appropriate destructor does not exist or special processing needs to be performed before the destructor is called. Therefore, SWIG allows you to manually specify a "free" function via the use of the %freefunc directive. The %freefunc directive is implemented using SWIG's' "features" mechanism and so the same name matching rules used for other kinds of features apply (see the chapter on "Customization Features") for more details).
IMPORTANT ! - If you define your own free function, then you must ensure that you call the underlying C++ object's destructor. In addition, if object tracking is activated for the object's class, you must also call the SWIG_RubyRemoveTracking function (of course call this before you destroy the C++ object). Note that it is harmless to call this method if object tracking if off so it is advised to always call it.
Note there is a subtle interaction between object ownership and free functions. A custom defined free function will only be called if the Ruby object owns the underlying C++ object. This also to Ruby objects which are created, but then transfer ownership to C++ objects via the use of the disown typemap described above.
To show how to use the %freefunc directive, let's slightly change our example. Assume that the zoo object is responsible for freeing animal that it contains. This means that the Zoo::add_animal function should be marked with a DISOWN typemap and the destructor should be updated as below:
Zoo::~Zoo() {
IterType iter = this->animals.begin();
IterType end = this->animals.end();
for(iter; iter != end; ++iter) {
Animal* animal = *iter;
delete animal;
}
}
When we use these objects in IRB we see:
$irb
irb(main):002:0> require 'example'
=> true
irb(main):003:0> zoo = Example::Zoo.new()
=> #<Example::Zoo:0x2be0fe8>
irb(main):005:0> tiger1 = Example::Animal.new("tiger1")
=> #<Example::Animal:0x2bda760>
irb(main):006:0> zoo.add_animal(tiger1)
=> nil
irb(main):007:0> zoo = nil
=> nil
irb(main):008:0> GC.start
=> nil
irb(main):009:0> tiger1.get_name()
(irb):12: [BUG] Segmentation fault
The error happens because the C++ animal object is freed when the zoo object is freed. Although this error is unavoidable, we can at least prevent the segmentation fault. To do this requires enabling object tracking and implementing a custom free function that calls the SWIG_RubyUnlinkObjects function for each animal object that is destroyed. The SWIG_RubyUnlinkObjects function notifies SWIG that a Ruby object's underlying C++ object is no longer valid. Once notified, SWIG will intercept any calls from the existing Ruby object to the destroyed C++ object and raise an exception.
%module example
%{
#include "example.h"
%}
/* Specify that ownership is transferred to the zoo
when calling add_animal */
%apply SWIGTYPE *DISOWN { Animal* animal };
/* Track objects */
%trackobjects;
/* Specify the mark function */
%freefunc Zoo "free_Zoo";
%include "example.h"
%header %{
static void free_Zoo(void* ptr) {
Zoo* zoo = (Zoo*) ptr;
/* Loop over each animal */
int count = zoo->get_num_animals();
for(int i = 0; i < count; ++i) {
/* Get an animal */
Animal* animal = zoo->get_animal(i);
/* Unlink the Ruby object from the C++ object */
SWIG_RubyUnlinkObjects(animal);
/* Now remove the tracking for this animal */
SWIG_RubyRemoveTracking(animal);
}
/* Now call SWIG_RubyRemoveTracking for the zoo */
SWIG_RubyRemoveTracking(ptr);
/* Now free the zoo which will free the animals it contains */
delete zoo;
}
%}
Now when we use these objects in IRB we see:
$irb
irb(main):002:0> require 'example'
=> true
irb(main):003:0> zoo = Example::Zoo.new()
=> #<Example::Zoo:0x2be0fe8>
irb(main):005:0> tiger1 = Example::Animal.new("tiger1")
=> #<Example::Animal:0x2bda760>
irb(main):006:0> zoo.add_animal(tiger1)
=> nil
irb(main):007:0> zoo = nil
=> nil
irb(main):008:0> GC.start
=> nil
irb(main):009:0> tiger1.get_name()
RuntimeError: This Animal * already released
from (irb):10:in `get_name'
from (irb):10
irb(main):011:0>
Notice that SWIG can now detect the underlying C++ object has been freed, and thus raises a runtime exception.
This code can be seen in swig/examples/ruby/free_function.
As has been said, the Ruby GC runs and marks objects before its sweep phase. When the garbage collector is called, it will also try to mark any Ruby objects (VALUE) it finds in the machine registers and in the C++ stack.
The stack is basically the history of the functions that have been called and also contains local variables, such as the ones you define whenever you do inside a function:
For ruby to determine where its stack space begins, during initialization a normal Ruby interpreter will call the ruby_init() function which in turn will call a function called Init_stack or similar. This function will store a pointer to the location where the stack points at that point in time.
ruby_init() is presumed to always be called within the main() function of your program and whenever the GC is called, ruby will assume that the memory between the current location in memory and the pointer that was stored previously represents the stack, which may contain local (and temporary) VALUE ruby objects. Ruby will then be careful not to remove any of those objects in that location.
So far so good. For a normal Ruby session, all the above is completely transparent and magic to the extensions developer.
However, with an embedded Ruby, it may not always be possible to modify main() to make sure ruby_init() is called there. As such, ruby_init() will likely end up being called from within some other function. This can lead Ruby to measure incorrectly where the stack begins and can result in Ruby incorrectly collecting those temporary VALUE objects that are created once another function is called. The end result: random crashes and segmentation faults.
This problem will often be seen in director functions that are used for callbacks, for example.
To solve the problem, SWIG can now generate code with director functions containing the optional macros SWIG_INIT_STACK and SWIG_RELEASE_STACK. These macros will try to force Ruby to reinitiliaze the beginning of the stack the first time a director function is called. This will lead Ruby to measure and not collect any VALUE objects defined from that point on.
To mark functions to either reset the ruby stack or not, you can use:
%initstack Class::memberfunction; // only re-init the stack in this director method %ignorestack Class::memberfunction; // do not re-init the stack in this director method %initstack Class; // init the stack on all the methods of this class %initstack; // all director functions will re-init the stack
Caution: This chapter is under repair!
This chapter discusses SWIG's support of Tcl. SWIG currently requires Tcl 8.0 or a later release. Earlier releases of SWIG supported Tcl 7.x, but this is no longer supported.
To build a Tcl module, run SWIG using the -tcl option :
$ swig -tcl example.i
If building a C++ extension, add the -c++ option:
$ swig -c++ -tcl example.i
This creates a file example_wrap.c or example_wrap.cxx that contains all of the code needed to build a Tcl extension module. To finish building the module, you need to compile this file and link it with the rest of your program.
In order to compile the wrapper code, the compiler needs the tcl.h header file. This file is usually contained in the directory
/usr/local/include
Be aware that some Tcl versions install this header file with a version number attached to it. If this is the case, you should probably make a symbolic link so that tcl.h points to the correct header file.
The preferred approach to building an extension module is to compile it into a shared object file or DLL. Assuming you have code you need to link to in a file called example.c, you will need to compile your program using commands like this (shown for Linux):
$ swig -tcl example.i $ gcc -c example.c $ gcc -c example_wrap.c -I/usr/local/include $ gcc -shared example.o example_wrap.o -o example.so
The exact commands for doing this vary from platform to platform. SWIG tries to guess the right options when it is installed. Therefore, you may want to start with one of the examples in the SWIG/Examples/tcl directory. If that doesn't work, you will need to read the man-pages for your compiler and linker to get the right set of options. You might also check the SWIG Wiki for additional information.
When linking the module, the name of the output file has to match the name of the module. If the name of your SWIG module is "example ", the name of the corresponding object file should be "example.so ". The name of the module is specified using the %module directive or the -module command line option.
An alternative approach to dynamic linking is to rebuild the Tcl interpreter with your extension module added to it. In the past, this approach was sometimes necessary due to limitations in dynamic loading support on certain machines. However, the situation has improved greatly over the last few years and you should not consider this approach unless there is really no other option.
The usual procedure for adding a new module to Tcl involves writing a special function Tcl_AppInit() and using it to initialize the interpreter and your module. With SWIG, the tclsh.i and wish.i library files can be used to rebuild the tclsh and wish interpreters respectively. For example:
%module example
%inline %{
extern int fact(int);
extern int mod(int, int);
extern double My_variable;
%}
%include "tclsh.i" // Include code for rebuilding tclsh
The tclsh.i library file includes supporting code that contains everything needed to rebuild tclsh. To rebuild the interpreter, you simply do something like this:
$ swig -tcl example.i
$ gcc example.c example_wrap.c \
-Xlinker -export-dynamic \
-DHAVE_CONFIG_H -I/usr/local/include/ \
-L/usr/local/lib -ltcl -lm -ldl \
-o mytclsh
You will need to supply the same libraries that were used to build Tcl the first time. This may include system libraries such as -lsocket, -lnsl, and -lpthread. If this actually works, the new version of Tcl should be identical to the default version except that your extension module will be a built-in part of the interpreter.
Comment: In practice, you should probably try to avoid static linking if possible. Some programmers may be inclined to use static linking in the interest of getting better performance. However, the performance gained by static linking tends to be rather minimal in most situations (and quite frankly not worth the extra hassle in the opinion of this author).
To use your module, simply use the Tcl load command. If all goes well, you will be able to this:
$ tclsh % load ./example.so % fact 4 24 %
A common error received by first-time users is the following:
% load ./example.so couldn't find procedure Example_Init %
This error is almost always caused when the name of the shared object file doesn't match the name of the module supplied using the SWIG %module directive. Double-check the interface to make sure the module name and the shared object file match. Another possible cause of this error is forgetting to link the SWIG-generated wrapper code with the rest of your application when creating the extension module.
Another common error is something similar to the following:
% load ./example.so couldn't load file "./example.so": ./example.so: undefined symbol: fact %
This error usually indicates that you forgot to include some object files or libraries in the linking of the shared library file. Make sure you compile both the SWIG wrapper file and your original program into a shared library file. Make sure you pass all of the required libraries to the linker.
Sometimes unresolved symbols occur because a wrapper has been created for a function that doesn't actually exist in a library. This usually occurs when a header file includes a declaration for a function that was never actually implemented or it was removed from a library without updating the header file. To fix this, you can either edit the SWIG input file to remove the offending declaration or you can use the %ignore directive to ignore the declaration.
Finally, suppose that your extension module is linked with another library like this:
$ gcc -shared example.o example_wrap.o -L/home/beazley/projects/lib -lfoo \
-o example.so
If the foo library is compiled as a shared library, you might get the following problem when you try to use your module:
% load ./example.so couldn't load file "./example.so": libfoo.so: cannot open shared object file: No such file or directory %
This error is generated because the dynamic linker can't locate the libfoo.so library. When shared libraries are loaded, the system normally only checks a few standard locations such as /usr/lib and /usr/local/lib. To fix this problem, there are several things you can do. First, you can recompile your extension module with extra path information. For example, on Linux you can do this:
$ gcc -shared example.o example_wrap.o -L/home/beazley/projects/lib -lfoo \
-Xlinker -rpath /home/beazley/projects/lib \
-o example.so
Alternatively, you can set the LD_LIBRARY_PATH environment variable to include the directory with your shared libraries. If setting LD_LIBRARY_PATH, be aware that setting this variable can introduce a noticeable performance impact on all other applications that you run. To set it only for Tcl, you might want to do this instead:
$ env LD_LIBRARY_PATH=/home/beazley/projects/lib tclsh
Finally, you can use a command such as ldconfig to add additional search paths to the default system configuration (this requires root access and you will need to read the man pages).
Compilation of C++ extensions has traditionally been a tricky problem. Since the Tcl interpreter is written in C, you need to take steps to make sure C++ is properly initialized and that modules are compiled correctly.
On most machines, C++ extension modules should be linked using the C++ compiler. For example:
% swig -c++ -tcl example.i % g++ -c example.cxx % g++ -c example_wrap.cxx -I/usr/local/include % g++ -shared example.o example_wrap.o -o example.so
In addition to this, you may need to include additional library files to make it work. For example, if you are using the Sun C++ compiler on Solaris, you often need to add an extra library -lCrun like this:
% swig -c++ -tcl example.i % CC -c example.cxx % CC -c example_wrap.cxx -I/usr/local/include % CC -G example.o example_wrap.o -L/opt/SUNWspro/lib -o example.so -lCrun
Of course, the extra libraries to use are completely non-portable---you will probably need to do some experimentation.
Sometimes people have suggested that it is necessary to relink the Tcl interpreter using the C++ compiler to make C++ extension modules work. In the experience of this author, this has never actually appeared to be necessary. Relinking the interpreter with C++ really only includes the special run-time libraries described above---as long as you link your extension modules with these libraries, it should not be necessary to rebuild Tcl.
If you aren't entirely sure about the linking of a C++ extension, you might look at an existing C++ program. On many Unix machines, the ldd command will list library dependencies. This should give you some clues about what you might have to include when you link your extension module. For example:
$ ldd swig
libstdc++-libc6.1-1.so.2 => /usr/lib/libstdc++-libc6.1-1.so.2 (0x40019000)
libm.so.6 => /lib/libm.so.6 (0x4005b000)
libc.so.6 => /lib/libc.so.6 (0x40077000)
/lib/ld-linux.so.2 => /lib/ld-linux.so.2 (0x40000000)
$
As a final complication, a major weakness of C++ is that it does not define any sort of standard for binary linking of libraries. This means that C++ code compiled by different compilers will not link together properly as libraries nor is the memory layout of classes and data structures implemented in any kind of portable manner. In a monolithic C++ program, this problem may be unnoticed. However, in Tcl, it is possible for different extension modules to be compiled with different C++ compilers. As long as these modules are self-contained, this probably won't matter. However, if these modules start sharing data, you will need to take steps to avoid segmentation faults and other erratic program behavior. If working with lots of software components, you might want to investigate using a more formal standard such as COM.
On platforms that support 64-bit applications (Solaris, Irix, etc.), special care is required when building extension modules. On these machines, 64-bit applications are compiled and linked using a different set of compiler/linker options. In addition, it is not generally possible to mix 32-bit and 64-bit code together in the same application.
To utilize 64-bits, the Tcl executable will need to be recompiled as a 64-bit application. In addition, all libraries, wrapper code, and every other part of your application will need to be compiled for 64-bits. If you plan to use other third-party extension modules, they will also have to be recompiled as 64-bit extensions.
If you are wrapping commercial software for which you have no source code, you will be forced to use the same linking standard as used by that software. This may prevent the use of 64-bit extensions. It may also introduce problems on platforms that support more than one linking standard (e.g., -o32 and -n32 on Irix).
To avoid namespace problems, you can instruct SWIG to append a package prefix to all of your functions and variables. This is done using the -prefix option as follows :
swig -tcl -prefix Foo example.i
If you have a function "bar" in the SWIG file, the prefix option will append the prefix to the name when creating a command and call it "Foo_bar".
Alternatively, you can have SWIG install your module into a Tcl namespace by specifying the -namespace option :
swig -tcl -namespace example.i
By default, the name of the namespace will be the same as the module name, but you can override it using the -prefix option.
When the -namespace option is used, objects in the module are always accessed with the namespace name such as Foo::bar.
Building a SWIG extension to Tcl/Tk under Windows 95/NT is roughly similar to the process used with Unix. Normally, you will want to produce a DLL that can be loaded into tclsh or wish. This section covers the process of using SWIG with Microsoft Visual C++. although the procedure may be similar with other compilers.
If you are developing your application within Microsoft developer studio, SWIG can be invoked as a custom build option. The process roughly follows these steps :
Now, assuming all went well, SWIG will be automatically invoked when you build your project. Any changes made to the interface file will result in SWIG being automatically invoked to produce a new version of the wrapper file. To run your new Tcl extension, simply run tclsh or wish and use the load command. For example :
MSDOS > tclsh80 % load example.dll % fact 4 24 %
Alternatively, SWIG extensions can be built by writing a Makefile for NMAKE. To do this, make sure the environment variables for MSVC++ are available and the MSVC++ tools are in your path. Now, just write a short Makefile like this :
# Makefile for building various SWIG generated extensions SRCS = example.c IFILE = example INTERFACE = $(IFILE).i WRAPFILE = $(IFILE)_wrap.c # Location of the Visual C++ tools (32 bit assumed) TOOLS = c:\msdev TARGET = example.dll CC = $(TOOLS)\bin\cl.exe LINK = $(TOOLS)\bin\link.exe INCLUDE32 = -I$(TOOLS)\include MACHINE = IX86 # C Library needed to build a DLL DLLIBC = msvcrt.lib oldnames.lib # Windows libraries that are apparently needed WINLIB = kernel32.lib advapi32.lib user32.lib gdi32.lib comdlg32.lib winspool.lib # Libraries common to all DLLs LIBS = $(DLLIBC) $(WINLIB) # Linker options LOPT = -debug:full -debugtype:cv /NODEFAULTLIB /RELEASE /NOLOGO / MACHINE:$(MACHINE) -entry:_DllMainCRTStartup@12 -dll # C compiler flags CFLAGS = /Z7 /Od /c /nologo TCL_INCLUDES = -Id:\tcl8.0a2\generic -Id:\tcl8.0a2\win TCLLIB = d:\tcl8.0a2\win\tcl80.lib tcl:: ..\..\swig -tcl -o $(WRAPFILE) $(INTERFACE) $(CC) $(CFLAGS) $(TCL_INCLUDES) $(SRCS) $(WRAPFILE) set LIB=$(TOOLS)\lib $(LINK) $(LOPT) -out:example.dll $(LIBS) $(TCLLIB) example.obj example_wrap.obj
To build the extension, run NMAKE (you may need to run vcvars32 first). This is a pretty minimal Makefile, but hopefully its enough to get you started. With a little practice, you'll be making lots of Tcl extensions.
By default, SWIG tries to build a very natural Tcl interface to your C/C++ code. Functions are wrapped as functions, classes are wrapped in an interface that mimics the style of Tk widgets and [incr Tcl] classes. This section briefly covers the essential aspects of this wrapping.
The SWIG %module directive specifies the name of the Tcl module. If you specify `%module example', then everything is compiled into an extension module example.so. When choosing a module name, make sure you don't use the same name as a built-in Tcl command.
One pitfall to watch out for is module names involving numbers. If you specify a module name like %module md5, you'll find that the load command no longer seems to work:
% load ./md5.so couldn't find procedure Md_Init
To fix this, supply an extra argument to load like this:
% load ./md5.so md5
Global functions are wrapped as new Tcl built-in commands. For example,
%module example int fact(int n);
creates a built-in function fact that works exactly like you think it does:
% load ./example.so % fact 4 24 % set x [fact 6] %
C/C++ global variables are wrapped by Tcl global variables. For example:
// SWIG interface file with global variables
%module example
...
%inline %{
extern double density;
%}
...
Now look at the Tcl interface:
% puts $density # Output value of C global variable 1.0 % set density 0.95 # Change value
If you make an error in variable assignment, you will get an error message. For example:
% set density "hello" can't set "density": Type error. expected a double. %
If a variable is declared as const, it is wrapped as a read-only variable. Attempts to modify its value will result in an error.
To make ordinary variables read-only, you can use the %immutable directive. For example:
%{
extern char *path;
%}
%immutable;
extern char *path;
%mutable;
The %immutable directive stays in effect until it is explicitly disabled or cleared using %mutable. See the Creating read-only variables section for further details.
If you just want to make a specific variable immutable, supply a declaration name. For example:
%{
extern char *path;
%}
%immutable path;
...
extern char *path; // Read-only (due to %immutable)
C/C++ constants are installed as global Tcl variables containing the appropriate value. To create a constant, use #define, enum , or the %constant directive. For example:
#define PI 3.14159
#define VERSION "1.0"
enum Beverage { ALE, LAGER, STOUT, PILSNER };
%constant int FOO = 42;
%constant const char *path = "/usr/local";
For enums, make sure that the definition of the enumeration actually appears in a header file or in the wrapper file somehow---if you just stick an enum in a SWIG interface without also telling the C compiler about it, the wrapper code won't compile.
Note: declarations declared as const are wrapped as read-only variables and will be accessed using the cvar object described in the previous section. They are not wrapped as constants. For further discussion about this, see the SWIG Basics chapter.
Constants are not guaranteed to remain constant in Tcl---the value of the constant could be accidentally reassigned.You will just have to be careful.
A peculiarity of installing constants as variables is that it is necessary to use the Tcl global statement to access constants in procedure bodies. For example:
proc blah {} {
global FOO
bar $FOO
}
If a program relies on a lot of constants, this can be extremely annoying. To fix the problem, consider using the following typemap rule:
%apply int CONSTANT { int x };
#define FOO 42
...
void bar(int x);
When applied to an input argument, the CONSTANT rule allows a constant to be passed to a function using its actual value or a symbolic identifier name. For example:
proc blah {} {
bar FOO
}
When an identifier name is given, it is used to perform an implicit hash-table lookup of the value during argument conversion. This allows the global statement to be omitted.
C/C++ pointers are fully supported by SWIG. Furthermore, SWIG has no problem working with incomplete type information. Here is a rather simple interface:
%module example FILE *fopen(const char *filename, const char *mode); int fputs(const char *, FILE *); int fclose(FILE *);
When wrapped, you will be able to use the functions in a natural way from Tcl. For example:
% load ./example.so % set f [fopen junk w] % fputs "Hello World\n" $f % fclose $f
If this makes you uneasy, rest assured that there is no deep magic involved. Underneath the covers, pointers to C/C++ objects are simply represented as opaque values--normally an encoded character string like this:
% puts $f _c0671108_p_FILE %
This pointer value can be freely passed around to different C functions that expect to receive an object of type FILE *. The only thing you can't do is dereference the pointer from Tcl.
The NULL pointer is represented by the string NULL.
As much as you might be inclined to modify a pointer value directly from Tcl, don't. The hexadecimal encoding is not necessarily the same as the logical memory address of the underlying object. Instead it is the raw byte encoding of the pointer value. The encoding will vary depending on the native byte-ordering of the platform (i.e., big-endian vs. little-endian). Similarly, don't try to manually cast a pointer to a new type by simply replacing the type-string. This may not work like you expect and it is particularly dangerous when casting C++ objects. If you need to cast a pointer or change its value, consider writing some helper functions instead. For example:
%inline %{
/* C-style cast */
Bar *FooToBar(Foo *f) {
return (Bar *) f;
}
/* C++-style cast */
Foo *BarToFoo(Bar *b) {
return dynamic_cast<Foo*>(b);
}
Foo *IncrFoo(Foo *f, int i) {
return f+i;
}
%}
Also, if working with C++, you should always try to use the new C++ style casts. For example, in the above code, the C-style cast may return a bogus result whereas as the C++-style cast will return None if the conversion can't be performed.
If you wrap a C structure, it is wrapped by a Tcl interface that somewhat resembles a Tk widget. This provides a very natural interface. For example,
struct Vector {
double x,y,z;
};
is used as follows:
% Vector v % v configure -x 3.5 -y 7.2 % puts "[v cget -x] [v cget -y] [v cget -z]" 3.5 7.2 0.0 %
Similar access is provided for unions and the data members of C++ classes.
In the above example, v is a name that's used for the object. However, underneath the covers, there's a pointer to a raw C structure. This can be obtained by looking at the -this attribute. For example:
% puts [v cget -this] _88e31408_p_Vector
Further details about the relationship between the Tcl and the underlying C structure are covered a little later.
const members of a structure are read-only. Data members can also be forced to be read-only using the %immutable directive. For example:
struct Foo {
...
%immutable;
int x; /* Read-only members */
char *name;
%mutable;
...
};
When char * members of a structure are wrapped, the contents are assumed to be dynamically allocated using malloc or new (depending on whether or not SWIG is run with the -c++ option). When the structure member is set, the old contents will be released and a new value created. If this is not the behavior you want, you will have to use a typemap (described later).
If a structure contains arrays, access to those arrays is managed through pointers. For example, consider this:
struct Bar {
int x[16];
};
If accessed in Tcl, you will see behavior like this:
% Bar b % puts [b cget -x] _801861a4_p_int %
This pointer can be passed around to functions that expect to receive an int * (just like C). You can also set the value of an array member using another pointer. For example:
% Bar c % c configure -x [b cget -x] # Copy contents of b.x to c.x
For array assignment, SWIG copies the entire contents of the array starting with the data pointed to by b.x. In this example, 16 integers would be copied. Like C, SWIG makes no assumptions about bounds checking---if you pass a bad pointer, you may get a segmentation fault or access violation.
When a member of a structure is itself a structure, it is handled as a pointer. For example, suppose you have two structures like this:
struct Foo {
int a;
};
struct Bar {
Foo f;
};
Now, suppose that you access the f attribute of Bar like this:
% Bar b % set x [b cget -f]
In this case, x is a pointer that points to the Foo that is inside b. This is the same value as generated by this C code:
Bar b; Foo *x = &b->f; /* Points inside b */
However, one peculiarity of accessing a substructure like this is that the returned value does work quite like you might expect. For example:
% Bar b % set x [b cget -f] % x cget -a invalid command name "x"
This is because the returned value was not created in a normal way from the interpreter (x is not a command object). To make it function normally, just evaluate the variable like this:
% Bar b % set x [b cget -f] % $x cget -a 0 %
In this example, x points inside the original structure. This means that modifications work just like you would expect. For example:
% Bar b % set x [b cget -f] % $x configure -a 3 # Modifies contents of f (inside b) % [b cget -f] -configure -a 3 # Same thing
In many of these structure examples, a simple name like "v" or "b" has been given to wrapped structures. If necessary, this name can be passed to functions that expect to receive an object. For example, if you have a function like this,
void blah(Foo *f);
you can call the function in Tcl as follows:
% Foo x # Create a Foo object % blah x # Pass the object to a function
It is also possible to call the function using the raw pointer value. For instance:
% blah [x cget -this] # Pass object to a function
It is also possible to create and use objects using variables. For example:
% set b [Bar] # Create a Bar % $b cget -f # Member access % puts $b _108fea88_p_Bar %
Finally, to destroy objects created from Tcl, you can either let the object name go out of scope or you can explicitly delete the object. For example:
% Foo f # Create object f % rename f ""
or
% Foo f # Create object f % f -delete
Note: Tcl only destroys the underlying object if it has ownership. See the memory management section that appears shortly.
C++ classes are wrapped as an extension of structure wrapping. For example, if you have this class,
class List {
public:
List();
~List();
int search(char *item);
void insert(char *item);
void remove(char *item);
char *get(int n);
int length;
};
you can use it in Tcl like this:
% List x % x insert Ale % x insert Stout % x insert Lager % x get 1 Stout % puts [l cget -length] 3 %
Class data members are accessed in the same manner as C structures.
Static class members are accessed as global functions or variables. To illustrate, suppose you have a class like this:
class Spam {
public:
static void foo();
static int bar;
};
In Tcl, the static member is accessed as follows:
% Spam_foo # Spam::foo() % puts $Spam_bar # Spam::bar
SWIG is fully aware of issues related to C++ inheritance. Therefore, if you have classes like this
class Foo {
...
};
class Bar : public Foo {
...
};
An object of type Bar can be used where a Foo is expected. For example, if you have this function:
void spam(Foo *f);
then the function spam() accepts a Foo * or a pointer to any class derived from Foo. For instance:
% Foo f # Create a Foo % Bar b # Create a Bar % spam f # OK % spam b # OK
It is safe to use multiple inheritance with SWIG.
In C++, there are many different ways a function might receive and manipulate objects. For example:
void spam1(Foo *x); // Pass by pointer void spam2(Foo &x); // Pass by reference void spam3(Foo x); // Pass by value void spam4(Foo x[]); // Array of objects
In Tcl, there is no detailed distinction like this. Because of this, SWIG unifies all of these types together in the wrapper code. For instance, if you actually had the above functions, it is perfectly legal to do this:
% Foo f # Create a Foo % spam1 f # Ok. Pointer % spam2 f # Ok. Reference % spam3 f # Ok. Value. % spam4 f # Ok. Array (1 element)
Similar behavior occurs for return values. For example, if you had functions like this,
Foo *spam5(); Foo &spam6(); Foo spam7();
then all three functions will return a pointer to some Foo object. Since the third function (spam7) returns a value, newly allocated memory is used to hold the result and a pointer is returned (Tcl will release this memory when the return value is garbage collected).
C++ overloaded functions, methods, and constructors are mostly supported by SWIG. For example, if you have two functions like this:
void foo(int); void foo(char *c);
You can use them in Tcl in a straightforward manner:
% foo 3 # foo(int) % foo Hello # foo(char *c)
Similarly, if you have a class like this,
class Foo {
public:
Foo();
Foo(const Foo &);
...
};
you can write Tcl code like this:
% Foo f # Create a Foo % Foo g f # Copy f
Overloading support is not quite as flexible as in C++. Sometimes there are methods that SWIG can't disambiguate. For example:
void spam(int); void spam(short);
or
void foo(Bar *b); void foo(Bar &b);
If declarations such as these appear, you will get a warning message like this:
example.i:12: Warning 509: Overloaded method spam(short) effectively ignored, example.i:11: Warning 509: as it is shadowed by spam(int).
To fix this, you either need to ignore or rename one of the methods. For example:
%rename(spam_short) spam(short); ... void spam(int); void spam(short); // Accessed as spam_short
or
%ignore spam(short); ... void spam(int); void spam(short); // Ignored
SWIG resolves overloaded functions and methods using a disambiguation scheme that ranks and sorts declarations according to a set of type-precedence rules. The order in which declarations appear in the input does not matter except in situations where ambiguity arises--in this case, the first declaration takes precedence.
Please refer to the "SWIG and C++" chapter for more information about overloading.
Certain C++ overloaded operators can be handled automatically by SWIG. For example, consider a class like this:
class Complex {
private:
double rpart, ipart;
public:
Complex(double r = 0, double i = 0) : rpart(r), ipart(i) { }
Complex(const Complex &c) : rpart(c.rpart), ipart(c.ipart) { }
Complex &operator=(const Complex &c);
Complex operator+(const Complex &c) const;
Complex operator-(const Complex &c) const;
Complex operator*(const Complex &c) const;
Complex operator-() const;
double re() const { return rpart; }
double im() const { return ipart; }
};
When wrapped, it works like this:
% Complex c 3 4 % Complex d 7 8 % set e [c + d] % $e re 10.0 % $e im 12.0
It should be stressed that operators in SWIG have no relationship to operators in Tcl. In fact, the only thing that's happening here is that an operator like operator + has been renamed to a method + . Therefore, the statement [c + d] is really just invoking the + method on c. When more than operator is defined (with different arguments), the standard method overloading facilities are used. Here is a rather odd looking example:
% Complex c 3 4 % Complex d 7 8 % set e [c - d] # operator-(const Complex &) % puts "[$e re] [$e im]" 10.0 12.0 % set f [c -] # operator-() % puts "[$f re] [$f im]" -3.0 -4.0 %
One restriction with operator overloading support is that SWIG is not able to fully handle operators that aren't defined as part of the class. For example, if you had code like this
class Complex {
...
friend Complex operator+(double, const Complex &c);
...
};
then SWIG doesn't know what to do with the friend function--in fact, it simply ignores it and issues a warning. You can still wrap the operator, but you may have to encapsulate it in a special function. For example:
%rename(Complex_add_dc) operator+(double, const Complex &); ... Complex operator+(double, const Complex &c);
There are ways to make this operator appear as part of the class using the %extend directive. Keep reading.
SWIG is aware of C++ namespaces, but namespace names do not appear in the module nor do namespaces result in a module that is broken up into submodules or packages. For example, if you have a file like this,
%module example
namespace foo {
int fact(int n);
struct Vector {
double x,y,z;
};
};
it works in Tcl as follows:
% load ./example.so % fact 3 6 % Vector v % v configure -x 3.4
If your program has more than one namespace, name conflicts (if any) can be resolved using %rename For example:
%rename(Bar_spam) Bar::spam;
namespace Foo {
int spam();
}
namespace Bar {
int spam();
}
If you have more than one namespace and your want to keep their symbols separate, consider wrapping them as separate SWIG modules. For example, make the module name the same as the namespace and create extension modules for each namespace separately. If your program utilizes thousands of small deeply nested namespaces each with identical symbol names, well, then you get what you deserve.
C++ templates don't present a huge problem for SWIG. However, in order to create wrappers, you have to tell SWIG to create wrappers for a particular template instantiation. To do this, you use the %template directive. For example:
%module example
%{
#include "pair.h"
%}
template<class T1, class T2>
struct pair {
typedef T1 first_type;
typedef T2 second_type;
T1 first;
T2 second;
pair();
pair(const T1&, const T2&);
~pair();
};
%template(pairii) pair<int,int>;
In Tcl:
% pairii p 3 4 % p cget -first 3 % p cget -second 4
Obviously, there is more to template wrapping than shown in this example. More details can be found in the SWIG and C++ chapter. Some more complicated examples will appear later.
In certain C++ programs, it is common to use classes that have been wrapped by so-called "smart pointers." Generally, this involves the use of a template class that implements operator->() like this:
template<class T> class SmartPtr {
...
T *operator->();
...
}
Then, if you have a class like this,
class Foo {
public:
int x;
int bar();
};
A smart pointer would be used in C++ as follows:
SmartPtr<Foo> p = CreateFoo(); // Created somehow (not shown) ... p->x = 3; // Foo::x int y = p->bar(); // Foo::bar
To wrap this in Tcl, simply tell SWIG about the SmartPtr class and the low-level Foo object. Make sure you instantiate SmartPtr using %template if necessary. For example:
%module example ... %template(SmartPtrFoo) SmartPtr<Foo>; ...
Now, in Tcl, everything should just "work":
% set p [CreateFoo] # Create a smart-pointer somehow % $p configure -x 3 # Foo::x % $p bar # Foo::bar
If you ever need to access the underlying pointer returned by operator->() itself, simply use the __deref__() method. For example:
% set f [$p __deref__] # Returns underlying Foo *
In the previous section, a high-level view of Tcl wrapping was presented. A key component of this wrapping is that structures and classes are wrapped by Tcl class-like objects. This provides a very natural Tcl interface and allows SWIG to support a number of advanced features such as operator overloading. However, a number of low-level details were omitted. This section provides a brief overview of how the proxy classes work.
In the "SWIG basics" and "SWIG and C++" chapters, details of low-level structure and class wrapping are described. To summarize those chapters, if you have a class like this
class Foo {
public:
int x;
int spam(int);
...
then SWIG transforms it into a set of low-level procedural wrappers. For example:
Foo *new_Foo() {
return new Foo();
}
void delete_Foo(Foo *f) {
delete f;
}
int Foo_x_get(Foo *f) {
return f->x;
}
void Foo_x_set(Foo *f, int value) {
f->x = value;
}
int Foo_spam(Foo *f, int arg1) {
return f->spam(arg1);
}
These wrappers are actually found in the Tcl extension module. For example, you can certainly do this:
% load ./example.so % set f [new_Foo] % Foo_x_get $f 0 % Foo_spam $f 3 1 %
However, in addition to this, the classname Foo is used as an object constructor function. This allows objects to be encapsulated objects that look a lot like Tk widgets as shown in the last section.
Associated with each wrapped object, is an ownership flag thisown The value of this flag determines who is responsible for deleting the underlying C++ object. If set to 1, the Tcl interpreter destroys the C++ object when the proxy class is garbage collected. If set to 0 (or if the attribute is missing), then the destruction of the proxy class has no effect on the C++ object.
When an object is created by a constructor or returned by value, Tcl automatically takes ownership of the result. For example:
class Foo {
public:
Foo();
Foo bar();
};
In Tcl:
% Foo f % f cget -thisown 1 % set g [f bar] % $g cget -thisown 1
On the other hand, when pointers are returned to Tcl, there is often no way to know where they came from. Therefore, the ownership is set to zero. For example:
class Foo {
public:
...
Foo *spam();
...
};
% Foo f % set s [f spam] % $s cget -thisown 0 %
This behavior is especially important for classes that act as containers. For example, if a method returns a pointer to an object that is contained inside another object, you definitely don't want Tcl to assume ownership and destroy it!
Related to containers, ownership issues can arise whenever an object is assigned to a member or global variable. For example, consider this interface:
%module example
struct Foo {
int value;
Foo *next;
};
Foo *head = 0;
When wrapped in Tcl, careful observation will reveal that ownership changes whenever an object is assigned to a global variable. For example:
% Foo f % f cget -thisown 1 % set head f % f cget -thisown 0
In this case, C is now holding a reference to the object---you probably don't want Tcl to destroy it. Similarly, this occurs for members. For example:
% Foo f % Foo g % f cget -thisown 1 % g cget -thisown 1 % f configure -next g % g cget -thisown 0 %
For the most part, memory management issues remain hidden. However, there are occasionally situations where you might have to manually change the ownership of an object. For instance, consider code like this:
class Node {
Object *value;
public:
void set_value(Object *v) { value = v; }
...
};
Now, consider the following Tcl code:
% Object v # Create an object % Node n # Create a node % n setvalue v # Set value % v cget -thisown 1 %
In this case, the object n is holding a reference to v internally. However, SWIG has no way to know that this has occurred. Therefore, Tcl still thinks that it has ownership of the object. Should the proxy object be destroyed, then the C++ destructor will be invoked and n will be holding a stale-pointer. If you're lucky, you will only get a segmentation fault.
To work around this, it is always possible to flip the ownership flag. For example,
% v -disown # Give ownership to C/C++ % v -acquire # Acquire ownership
It is also possible to deal with situations like this using typemaps--an advanced topic discussed later.
A common problem in some C programs is handling parameters passed as simple pointers. For example:
void add(int x, int y, int *result) {
*result = x + y;
}
or perhaps
int sub(int *x, int *y) {
return *x+*y;
}
The easiest way to handle these situations is to use the typemaps.i file. For example:
%module example %include "typemaps.i" void add(int, int, int *OUTPUT); int sub(int *INPUT, int *INPUT);
In Tcl, this allows you to pass simple values instead of pointer. For example:
set a [add 3 4] puts $a 7
Notice how the INPUT parameters allow integer values to be passed instead of pointers and how the OUTPUT parameter creates a return result.
If you don't want to use the names INPUT or OUTPUT , use the %apply directive. For example:
%module example
%include "typemaps.i"
%apply int *OUTPUT { int *result };
%apply int *INPUT { int *x, int *y};
void add(int x, int y, int *result);
int sub(int *x, int *y);
If a function mutates one of its parameters like this,
void negate(int *x) {
*x = -(*x);
}
you can use INOUT like this:
%include "typemaps.i" ... void negate(int *INOUT);
In Tcl, a mutated parameter shows up as a return value. For example:
set a [negate 3] puts $a -3
The most common use of these special typemap rules is to handle functions that return more than one value. For example, sometimes a function returns a result as well as a special error code:
/* send message, return number of bytes sent, along with success code */ int send_message(char *text, int len, int *success);
To wrap such a function, simply use the OUTPUT rule above. For example:
%module example
%include "typemaps.i"
%apply int *OUTPUT { int *success };
...
int send_message(char *text, int *success);
When used in Tcl, the function will return multiple values as a list.
set r [send_message "Hello World"] set bytes [lindex $r 0] set success [lindex $r 1]
Another common use of multiple return values are in query functions. For example:
void get_dimensions(Matrix *m, int *rows, int *columns);
To wrap this, you might use the following:
%module example
%include "typemaps.i"
%apply int *OUTPUT { int *rows, int *columns };
...
void get_dimensions(Matrix *m, int *rows, *columns);
Now, in Perl:
set dim [get_dimensions $m] set r [lindex $dim 0] set c [lindex $dim 1]
The %exception directive can be used to create a user-definable exception handler in charge of converting exceptions in your C/C++ program into Tcl exceptions. The chapter on customization features contains more details, but suppose you extended the array example into a C++ class like the following :
class RangeError {}; // Used for an exception
class DoubleArray {
private:
int n;
double *ptr;
public:
// Create a new array of fixed size
DoubleArray(int size) {
ptr = new double[size];
n = size;
}
// Destroy an array
~DoubleArray() {
delete ptr;
}
// Return the length of the array
int length() {
return n;
}
// Get an item from the array and perform bounds checking.
double getitem(int i) {
if ((i >= 0) && (i < n))
return ptr[i];
else
throw RangeError();
}
// Set an item in the array and perform bounds checking.
void setitem(int i, double val) {
if ((i >= 0) && (i < n))
ptr[i] = val;
else {
throw RangeError();
}
}
};
The functions associated with this class can throw a C++ range exception for an out-of-bounds array access. We can catch this in our Tcl extension by specifying the following in an interface file :
%exception {
try {
$action // Gets substituted by actual function call
}
catch (RangeError) {
Tcl_SetStringObj(tcl_result,"Array index out-of-bounds");
return TCL_ERROR;
}
}
As shown, the exception handling code will be added to every wrapper function. Since this is somewhat inefficient. You might consider refining the exception handler to only apply to specific methods like this:
%exception getitem {
try {
$action
}
catch (RangeError) {
Tcl_SetStringObj(tcl_result,"Array index out-of-bounds");
return TCL_ERROR;
}
}
%exception setitem {
try {
$action
}
catch (RangeError) {
Tcl_SetStringObj(tcl_result,"Array index out-of-bounds");
return TCL_ERROR;
}
}
In this case, the exception handler is only attached to methods and functions named getitem and setitem.
If you had a lot of different methods, you can avoid extra typing by using a macro. For example:
%define RANGE_ERROR
{
try {
$action
}
catch (RangeError) {
Tcl_SetStringObj(tcl_result,"Array index out-of-bounds");
return TCL_ERROR;
}
}
%enddef
%exception getitem RANGE_ERROR;
%exception setitem RANGE_ERROR;
Since SWIG's exception handling is user-definable, you are not limited to C++ exception handling. See the chapter on " Customization Features" for more examples.
This section describes how you can modify SWIG's default wrapping behavior for various C/C++ datatypes using the %typemap directive. This is an advanced topic that assumes familiarity with the Tcl C API as well as the material in the "Typemaps " chapter.
Before proceeding, it should be stressed that typemaps are not a required part of using SWIG---the default wrapping behavior is enough in most cases. Typemaps are only used if you want to change some aspect of the primitive C-Tcl interface.
A typemap is nothing more than a code generation rule that is attached to a specific C datatype. For example, to convert integers from Tcl to C, you might define a typemap like this:
%module example
%typemap(in) int {
if (Tcl_GetIntFromObj(interp,$input,&$1) == TCL_ERROR) return TCL_ERROR;
printf("Received an integer : %d\n",$1);
}
%inline %{
extern int fact(int n);
%}
Typemaps are always associated with some specific aspect of code generation. In this case, the "in" method refers to the conversion of input arguments to C/C++. The datatype int is the datatype to which the typemap will be applied. The supplied C code is used to convert values. In this code a number of special variable prefaced by a $ are used. The $1 variable is placeholder for a local variable of type int. The $input variable is the input object of type Tcl_Obj *.
When this example is compiled into a Tcl module, it operates as follows:
% load ./example.so % fact 6 Received an integer : 6 720
In this example, the typemap is applied to all occurrences of the int datatype. You can refine this by supplying an optional parameter name. For example:
%module example
%typemap(in) int n {
if (Tcl_GetIntFromObj(interp,$input,&$1) == TCL_ERROR) return TCL_ERROR;
printf("n = %d\n",$1);
}
%inline %{
extern int fact(int n);
%}
In this case, the typemap code is only attached to arguments that exactly match int n.
The application of a typemap to specific datatypes and argument names involves more than simple text-matching--typemaps are fully integrated into the SWIG type-system. When you define a typemap for int, that typemap applies to int and qualified variations such as const int. In addition, the typemap system follows typedef declarations. For example:
%typemap(in) int n {
if (Tcl_GetIntFromObj(interp,$input,&$1) == TCL_ERROR) return TCL_ERROR;
printf("n = %d\n",$1);
}
%inline %{
typedef int Integer;
extern int fact(Integer n); // Above typemap is applied
%}
However, the matching of typedef only occurs in one direction. If you defined a typemap for Integer, it is not applied to arguments of type int.
Typemaps can also be defined for groups of consecutive arguments. For example:
%typemap(in) (char *str, int len) {
$1 = Tcl_GetStringFromObj($input,&$2);
};
int count(char c, char *str, int len);
When a multi-argument typemap is defined, the arguments are always handled as a single Tcl object. This allows the function to be used like this (notice how the length parameter is omitted):
% count e "Hello World" 1
The previous section illustrated an "in" typemap for converting Tcl objects to C. A variety of different typemap methods are defined by the Tcl module. For example, to convert a C integer back into a Tcl object, you might define an "out" typemap like this:
%typemap(out) int {
Tcl_SetObjResult(interp,Tcl_NewIntObj($1));
}
The following list details all of the typemap methods that can be used by the Tcl module:
%typemap(in)
%typemap(out)
%typemap(varin)
%typemap(varout)
%typemap(freearg)
%typemap(argout)
%typemap(ret)
%typemap(consttab)
%typemap(constcode)
%typemap(memberin)
%typemap(globalin)
%typemap(check)
%typemap(default)
%typemap(arginit)
Examples of these methods will appear shortly.
Within typemap code, a number of special variables prefaced with a $ may appear. A full list of variables can be found in the " Typemaps" chapter. This is a list of the most common variables:
$1
$input
$result
$1_name
$1_type
$1_ltype
$symname
A common problem in many C programs is the processing of command line arguments, which are usually passed in an array of NULL terminated strings. The following SWIG interface file allows a Tcl list to be used as a char ** object.
%module argv
// This tells SWIG to treat char ** as a special case
%typemap(in) char ** {
Tcl_Obj **listobjv;
int nitems;
int i;
if (Tcl_ListObjGetElements(interp, $input, &nitems, &listobjv) == TCL_ERROR) {
return TCL_ERROR;
}
$1 = (char **) malloc((nitems+1)*sizeof(char *));
for (i = 0; i < nitems; i++) {
$1[i] = Tcl_GetStringFromObj(listobjv[i],0);
}
$1[i] = 0;
}
// This gives SWIG some cleanup code that will get called after the function call
%typemap(freearg) char ** {
if ($1) {
free($1);
}
}
// Now a test functions
%inline %{
int print_args(char **argv) {
int i = 0;
while (argv[i]) {
printf("argv[%d] = %s\n", i,argv[i]);
i++;
}
return i;
}
%}
%include "tclsh.i"
In Tcl:
% print_args {John Guido Larry}
argv[0] = John
argv[1] = Guido
argv[2] = Larry
3
The "argout" typemap can be used to return a value originating from a function argument. For example :
// A typemap defining how to return an argument by appending it to the result
%typemap(argout) double *outvalue {
Tcl_Obj *o = Tcl_NewDoubleObj($1);
Tcl_ListObjAppendElement(interp,$result,o);
}
// A typemap telling SWIG to ignore an argument for input
// However, we still need to pass a pointer to the C function
%typemap(in,numinputs=0) double *outvalue (double temp) {
$1 = &temp;
}
// Now a function returning two values
int mypow(double a, double b, double *outvalue) {
if ((a < 0) || (b < 0)) return -1;
*outvalue = pow(a,b);
return 0;
};
When wrapped, SWIG matches the argout typemap to the " double *outvalue" argument. The numinputs=0 specification tells SWIG to simply ignore this argument when generating wrapper code. As a result, a Tcl function using these typemaps will work like this :
% mypow 2 3 # Returns two values, a status value and the result 0 8 %
The following tables provide some functions that may be useful in writing Tcl typemaps.
Integers
Tcl_Obj *Tcl_NewIntObj(int Value); void Tcl_SetIntObj(Tcl_Obj *obj, int Value); int Tcl_GetIntFromObj(Tcl_Interp *, Tcl_Obj *obj, int *ip);
Floating Point
Tcl_Obj *Tcl_NewDoubleObj(double Value); void Tcl_SetDoubleObj(Tcl_Obj *obj, double value); int Tcl_GetDoubleFromObj(Tcl_Interp *, Tcl_Obj *o, double *dp);
Strings
Tcl_Obj *Tcl_NewStringObj(char *str, int len); void Tcl_SetStringObj(Tcl_Obj *obj, char *str, int len); char *Tcl_GetStringFromObj(Tcl_Obj *obj, int *len); void Tcl_AppendToObj(Tcl_Obj *obj, char *str, int len);
Lists
Tcl_Obj *Tcl_NewListObj(int objc, Tcl_Obj *objv);
int Tcl_ListObjAppendList(Tcl_Interp *, Tcl_Obj *listPtr, Tcl_Obj *elemListPtr);
int Tcl_ListObjAppendElement(Tcl_Interp *, Tcl_Obj *listPtr, Tcl_Obj *element);
int Tcl_ListObjGetElements(Tcl_Interp *, Tcl_Obj *listPtr, int *objcPtr,
Tcl_Obj ***objvPtr);
int Tcl_ListObjLength(Tcl_Interp *, Tcl_Obj *listPtr, int *intPtr);
int Tcl_ListObjIndex(Tcl_Interp *, Tcl_Obj *listPtr, int index,
Tcl_Obj_Obj **objptr);
int Tcl_ListObjReplace(Tcl_Interp *, Tcl_Obj *listPtr, int first, int count,
int objc, Tcl_Obj *objv);
Objects
Tcl_Obj *Tcl_DuplicateObj(Tcl_Obj *obj); void Tcl_IncrRefCount(Tcl_Obj *obj); void Tcl_DecrRefCount(Tcl_Obj *obj); int Tcl_IsShared(Tcl_Obj *obj);
The following typemaps show how to convert a few common kinds of objects between Tcl and C (and to give a better idea of how typemaps work)
Integer conversion
%typemap(in) int, short, long {
int temp;
if (Tcl_GetIntFromObj(interp, $input, &temp) == TCL_ERROR)
return TCL_ERROR;
$1 = ($1_ltype) temp;
}
%typemap(out) int, short, long {
Tcl_SetIntObj($result,(int) $1);
}
Floating point conversion
%typemap(in) float, double {
double temp;
if (Tcl_GetDoubleFromObj(interp, $input, &temp) == TCL_ERROR)
return TCL_ERROR;
$1 = ($1_ltype) temp;
}
%typemap(out) float, double {
Tcl_SetDoubleObj($result, $1);
}
String Conversion
%typemap(in) char * {
int len;
$1 = Tcl_GetStringFromObj(interp, &len);
}
}
%typemap(out) char * {
Tcl_SetStringObj($result,$1);
}
SWIG pointers are mapped into Tcl strings containing the hexadecimal value and type. The following functions can be used to create and read pointer values.
int SWIG_ConvertPtr(Tcl_Obj *obj, void **ptr, swig_type_info *ty, int flags)
Tcl_Obj *SWIG_NewPointerObj(void *ptr, swig_type_info *ty, int flags)
Both of these functions require the use of a special SWIG type-descriptor structure. This structure contains information about the mangled name of the datatype, type-equivalence information, as well as information about converting pointer values under C++ inheritance. For a type of Foo *, the type descriptor structure is usually accessed as follows:
Foo *f; if (SWIG_ConvertPtr($input, (void **) &f, SWIGTYPE_p_Foo, 0) == -1) return NULL; Tcl_Obj *; obj = SWIG_NewPointerObj(f, SWIGTYPE_p_Foo, 0);
In a typemap, the type descriptor should always be accessed using the special typemap variable $1_descriptor. For example:
%typemap(in) Foo * {
if ((SWIG_ConvertPtr($input,(void **) &$1, $1_descriptor,0)) == -1) return NULL;
}
If necessary, the descriptor for any type can be obtained using the $descriptor() macro in a typemap. For example:
%typemap(in) Foo * {
if ((SWIG_ConvertPtr($input,(void **) &$1, $descriptor(Foo *), 0)) == -1) return NULL;
}
Tcl 7.4 introduced the idea of an extension package. By default, SWIG generates all of the code necessary to create a package. To set the package version, simply use the -pkgversion option. For example:
% swig -tcl -pkgversion 2.3 example.i
After building the SWIG generated module, you need to execute the " pkg_mkIndex" command inside tclsh. For example :
unix > tclsh % pkg_mkIndex . example.so % exit
This creates a file "pkgIndex.tcl" with information about the package. To use your package, you now need to move it to its own subdirectory which has the same name as the package. For example :
./example/ pkgIndex.tcl # The file created by pkg_mkIndex example.so # The SWIG generated module
Finally, assuming that you're not entirely confused at this point, make sure that the example subdirectory is visible from the directories contained in either the tcl_library or auto_path variables. At this point you're ready to use the package as follows :
unix > tclsh % package require example % fact 4 24 %
If you're working with an example in the current directory and this doesn't work, do this instead :
unix > tclsh % lappend auto_path . % package require example % fact 4 24
As a final note, most SWIG examples do not yet use the package commands. For simple extensions it may be easier just to use the load command instead.
One of the most interesting aspects of Tcl and SWIG is that you can create entirely new kinds of Tcl interfaces in Tcl using the low-level SWIG accessor functions. For example, suppose you had a library of helper functions to access arrays :
/* File : array.i */
%module array
%inline %{
double *new_double(int size) {
return (double *) malloc(size*sizeof(double));
}
void delete_double(double *a) {
free(a);
}
double get_double(double *a, int index) {
return a[index];
}
void set_double(double *a, int index, double val) {
a[index] = val;
}
int *new_int(int size) {
return (int *) malloc(size*sizeof(int));
}
void delete_int(int *a) {
free(a);
}
int get_int(int *a, int index) {
return a[index];
}
int set_int(int *a, int index, int val) {
a[index] = val;
}
%}
While these could be called directly, we could also write a Tcl script like this :
proc Array {type size} {
set ptr [new_$type $size]
set code {
set method [lindex $args 0]
set parms [concat $ptr [lrange $args 1 end]]
switch $method {
get {return [eval "get_$type $parms"]}
set {return [eval "set_$type $parms"]}
delete {eval "delete_$type $ptr; rename $ptr {}"}
}
}
# Create a procedure
uplevel "proc $ptr args {set ptr $ptr; set type $type;$code}"
return $ptr
}
Our script allows easy array access as follows :
set a [Array double 100] ;# Create a double [100]
for {set i 0} {$i < 100} {incr i 1} { ;# Clear the array
$a set $i 0.0
}
$a set 3 3.1455 ;# Set an individual element
set b [$a get 10] ;# Retrieve an element
set ia [Array int 50] ;# Create an int[50]
for {set i 0} {$i < 50} {incr i 1} { ;# Clear it
$ia set $i 0
}
$ia set 3 7 ;# Set an individual element
set ib [$ia get 10] ;# Get an individual element
$a delete ;# Destroy a
$ia delete ;# Destroy ia
The cool thing about this approach is that it makes a common interface for two different types of arrays. In fact, if we were to add more C datatypes to our wrapper file, the Tcl code would work with those as well--without modification. If an unsupported datatype was requested, the Tcl code would simply return with an error so there is very little danger of blowing something up (although it is easily accomplished with an out of bounds array access).
A similar approach can be applied to proxy classes (also known as shadow classes). The following example is provided by Erik Bierwagen and Paul Saxe. To use it, run SWIG with the -noobject option (which disables the builtin object oriented interface). When running Tcl, simply source this file. Now, objects can be used in a more or less natural fashion.
# swig_c++.tcl
# Provides a simple object oriented interface using
# SWIG's low level interface.
#
proc new {objectType handle_r args} {
# Creates a new SWIG object of the given type,
# returning a handle in the variable "handle_r".
#
# Also creates a procedure for the object and a trace on
# the handle variable that deletes the object when the
# handle variable is overwritten or unset
upvar $handle_r handle
#
# Create the new object
#
eval set handle \[new_$objectType $args\]
#
# Set up the object procedure
#
proc $handle {cmd args} "eval ${objectType}_\$cmd $handle \$args"
#
# And the trace ...
#
uplevel trace variable $handle_r uw "{deleteObject $objectType $handle}"
#
# Return the handle so that 'new' can be used as an argument to a procedure
#
return $handle
}
proc deleteObject {objectType handle name element op} {
#
# Check that the object handle has a reasonable form
#
if {![regexp {_[0-9a-f]*_(.+)_p} $handle]} {
error "deleteObject: not a valid object handle: $handle"
}
#
# Remove the object procedure
#
catch {rename $handle {}}
#
# Delete the object
#
delete_$objectType $handle
}
proc delete {handle_r} {
#
# A synonym for unset that is more familiar to C++ programmers
#
uplevel unset $handle_r
}
To use this file, we simply source it and execute commands such as "new" and "delete" to manipulate objects. For example :
// list.i
%module List
%{
#include "list.h"
%}
// Very simple C++ example
class List {
public:
List(); // Create a new list
~List(); // Destroy a list
int search(char *value);
void insert(char *); // Insert a new item into the list
void remove(char *); // Remove item from list
char *get(int n); // Get the nth item in the list
int length; // The current length of the list
static void print(List *l); // Print out the contents of the list
};
Now a Tcl script using the interface...
load ./list.so list ; # Load the module source swig_c++.tcl ; # Source the object file new List l $l insert Dave $l insert John $l insert Guido $l remove Dave puts $l length_get delete l
The cool thing about this example is that it works with any C++ object wrapped by SWIG and requires no special compilation. Proof that a short, but clever Tcl script can be combined with SWIG to do many interesting things.
For background information about the Tcl Stubs feature, see http://www.tcl.tk/doc/howto/stubs.html.
As of SWIG 1.3.10, the generated C/C++ wrapper will use the Tcl Stubs feature if compiled with -DUSE_TCL_STUBS.
As of SWIG 1.3.40, the generated C/C++ wrapper will use the Tk Stubs feature if compiled with -DUSE_TK_STUBS. Also, you can override the minimum version to support which is passed to Tcl_InitStubs() and Tk_InitStubs() with -DSWIG_TCL_STUBS_VERSION="8.3" or the version being compiled with using -DSWIG_TCL_STUBS_VERSION=TCL_VERSION.
This chapter describes SWIG's internal organization and the process by which new target languages can be developed. First, a brief word of warning---SWIG is continually evolving. The information in this chapter is mostly up to date, but changes are ongoing. Expect a few inconsistencies.
Also, this chapter is not meant to be a hand-holding tutorial. As a starting point, you should probably look at one of SWIG's existing modules.
In order to extend SWIG, it is useful to have the following background:
Since SWIG is essentially a specialized C++ compiler, it may be useful to have some prior experience with compiler design (perhaps even a compilers course) to better understand certain parts of the system. A number of books will also be useful. For example, "The C Programming Language" by Kernighan and Ritchie (a.k.a, "K&R") and the C++ standard, "ISO/IEC 14882 Programming Languages - C++" will be of great use.
Also, it is useful to keep in mind that SWIG primarily operates as an extension of the C++ type system. At first glance, this might not be obvious, but almost all SWIG directives as well as the low-level generation of wrapper code are driven by C++ datatypes.
SWIG is a special purpose compiler that parses C++ declarations to generate wrapper code. To make this conversion possible, SWIG makes three fundamental extensions to the C++ language:
It is important to emphasize that virtually all SWIG features reduce to one of these three fundamental concepts. The type system and pattern matching rules also play a critical role in making the system work. For example, both typemaps and declaration annotation are based on pattern matching and interact heavily with the underlying type system.
When you run SWIG on an interface, processing is handled in stages by a series of system components:
The next few sections briefly describe some of these stages.
The preprocessor plays a critical role in the SWIG implementation. This is because a lot of SWIG's processing and internal configuration is managed not by code written in C, but by configuration files in the SWIG library. In fact, when you run SWIG, parsing starts with a small interface file like this (note: this explains the cryptic error messages that new users sometimes get when SWIG is misconfigured or installed incorrectly):
%include "swig.swg" // Global SWIG configuration %include "langconfig.swg" // Language specific configuration %include "yourinterface.i" // Your interface file
The swig.swg file contains global configuration information. In addition, this file defines many of SWIG's standard directives as macros. For instance, part of of swig.swg looks like this:
...
/* Code insertion directives such as %wrapper %{ ... %} */
#define %begin %insert("begin")
#define %runtime %insert("runtime")
#define %header %insert("header")
#define %wrapper %insert("wrapper")
#define %init %insert("init")
/* Access control directives */
#define %immutable %feature("immutable","1")
#define %mutable %feature("immutable")
/* Directives for callback functions */
#define %callback(x) %feature("callback") `x`;
#define %nocallback %feature("callback");
/* %ignore directive */
#define %ignore %rename($ignore)
#define %ignorewarn(x) %rename("$ignore:" x)
...
The fact that most of the standard SWIG directives are macros is intended to simplify the implementation of the internals. For instance, rather than having to support dozens of special directives, it is easier to have a few basic primitives such as %feature or %insert.
The langconfig.swg file is supplied by the target language. This file contains language-specific configuration information. More often than not, this file provides run-time wrapper support code (e.g., the type-checker) as well as a collection of typemaps that define the default wrapping behavior. Note: the name of this file depends on the target language and is usually something like python.swg or perl5.swg.
As a debugging aide, the text that SWIG feeds to its C++ parser can be obtained by running swig -E interface.i. This output probably isn't too useful in general, but it will show how macros have been expanded as well as everything else that goes into the low-level construction of the wrapper code.
The current C++ parser handles a subset of C++. Most incompatibilities with C are due to subtle aspects of how SWIG parses declarations. Specifically, SWIG expects all C/C++ declarations to follow this general form:
storage type declarator initializer;
storage is a keyword such as extern, static, typedef, or virtual. type is a primitive datatype such as int or void. type may be optionally qualified with a qualifier such as const or volatile. declarator is a name with additional type-construction modifiers attached to it (pointers, arrays, references, functions, etc.). Examples of declarators include *x, **x, x[20], and (*x)(int,double). The initializer may be a value assigned using = or body of code enclosed in braces { ... }.
This declaration format covers most common C++ declarations. However, the C++ standard is somewhat more flexible in the placement of the parts. For example, it is technically legal, although uncommon to write something like int typedef const a in your program. SWIG simply doesn't bother to deal with this case.
The other significant difference between C++ and SWIG is in the treatment of typenames. In C++, if you have a declaration like this,
int blah(Foo *x, Bar *y);
it won't parse correctly unless Foo and Bar have been previously defined as types either using a class definition or a typedef. The reasons for this are subtle, but this treatment of typenames is normally integrated at the level of the C tokenizer---when a typename appears, a different token is returned to the parser instead of an identifier.
SWIG does not operate in this manner--any legal identifier can be used as a type name. The reason for this is primarily motivated by the use of SWIG with partially defined data. Specifically, SWIG is supposed to be easy to use on interfaces with missing type information.
Because of the different treatment of typenames, the most serious limitation of the SWIG parser is that it can't process type declarations where an extra (and unnecessary) grouping operator is used. For example:
int (x); /* A variable x */ int (y)(int); /* A function y */
The placing of extra parentheses in type declarations like this is already recognized by the C++ community as a potential source of strange programming errors. For example, Scott Meyers "Effective STL" discusses this problem in a section on avoiding C++'s "most vexing parse."
The parser is also unable to handle declarations with no return type or bare argument names. For example, in an old C program, you might see things like this:
foo(a,b) {
...
}
In this case, the return type as well as the types of the arguments are taken by the C compiler to be an int. However, SWIG interprets the above code as an abstract declarator for a function returning a foo and taking types a and b as arguments).
The SWIG parser produces a complete parse tree of the input file before any wrapper code is actually generated. Each item in the tree is known as a "Node". Each node is identified by a symbolic tag. Furthermore, a node may have an arbitrary number of children. The parse tree structure and tag names of an interface can be displayed using swig -debug-tags. For example:
$ swig -c++ -python -debug-tags example.i . top (example.i:1) . top . include (example.i:1) . top . include . typemap (/r0/beazley/Projects/lib/swig1.3/swig.swg:71) . top . include . typemap . typemapitem (/r0/beazley/Projects/lib/swig1.3/swig.swg:71) . top . include . typemap (/r0/beazley/Projects/lib/swig1.3/swig.swg:83) . top . include . typemap . typemapitem (/r0/beazley/Projects/lib/swig1.3/swig.swg:83) . top . include (example.i:4) . top . include . insert (/r0/beazley/Projects/lib/swig1.3/python/python.swg:7) . top . include . insert (/r0/beazley/Projects/lib/swig1.3/python/python.swg:8) . top . include . typemap (/r0/beazley/Projects/lib/swig1.3/python/python.swg:19) ... . top . include (example.i:6) . top . include . module (example.i:2) . top . include . insert (example.i:6) . top . include . include (example.i:9) . top . include . include . class (example.h:3) . top . include . include . class . access (example.h:4) . top . include . include . class . constructor (example.h:7) . top . include . include . class . destructor (example.h:10) . top . include . include . class . cdecl (example.h:11) . top . include . include . class . cdecl (example.h:11) . top . include . include . class . cdecl (example.h:12) . top . include . include . class . cdecl (example.h:13) . top . include . include . class . cdecl (example.h:14) . top . include . include . class . cdecl (example.h:15) . top . include . include . class (example.h:18) . top . include . include . class . access (example.h:19) . top . include . include . class . cdecl (example.h:20) . top . include . include . class . access (example.h:21) . top . include . include . class . constructor (example.h:22) . top . include . include . class . cdecl (example.h:23) . top . include . include . class . cdecl (example.h:24) . top . include . include . class (example.h:27) . top . include . include . class . access (example.h:28) . top . include . include . class . cdecl (example.h:29) . top . include . include . class . access (example.h:30) . top . include . include . class . constructor (example.h:31) . top . include . include . class . cdecl (example.h:32) . top . include . include . class . cdecl (example.h:33)
Even for the most simple interface, the parse tree structure is larger than you might expect. For example, in the above output, a substantial number of nodes are actually generated by the python.swg configuration file which defines typemaps and other directives. The contents of the user-supplied input file don't appear until the end of the output.
The contents of each parse tree node consist of a collection of attribute/value pairs. Internally, the nodes are simply represented by hash tables. A display of the entire parse-tree structure can be obtained using swig -debug-top <n>, where n is the stage being processed. There are a number of other parse tree display options, for example, swig -debug-module <n> will avoid displaying system parse information and only display the parse tree pertaining to the user's module at stage n of processing.
$ swig -c++ -python -debug-module 4 example.i
+++ include ----------------------------------------
| name - "example.i"
+++ module ----------------------------------------
| name - "example"
|
+++ insert ----------------------------------------
| code - "\n#include \"example.h\"\n"
|
+++ include ----------------------------------------
| name - "example.h"
+++ class ----------------------------------------
| abstract - "1"
| sym:name - "Shape"
| name - "Shape"
| kind - "class"
| symtab - 0x40194140
| sym:symtab - 0x40191078
+++ access ----------------------------------------
| kind - "public"
|
+++ constructor ----------------------------------------
| sym:name - "Shape"
| name - "Shape"
| decl - "f()."
| code - "{\n nshapes++;\n }"
| sym:symtab - 0x40194140
|
+++ destructor ----------------------------------------
| sym:name - "~Shape"
| name - "~Shape"
| storage - "virtual"
| code - "{\n nshapes--;\n }"
| sym:symtab - 0x40194140
|
+++ cdecl ----------------------------------------
| sym:name - "x"
| name - "x"
| decl - ""
| type - "double"
| sym:symtab - 0x40194140
|
+++ cdecl ----------------------------------------
| sym:name - "y"
| name - "y"
| decl - ""
| type - "double"
| sym:symtab - 0x40194140
|
+++ cdecl ----------------------------------------
| sym:name - "move"
| name - "move"
| decl - "f(double,double)."
| parms - double ,double
| type - "void"
| sym:symtab - 0x40194140
|
+++ cdecl ----------------------------------------
| sym:name - "area"
| name - "area"
| decl - "f(void)."
| parms - void
| storage - "virtual"
| value - "0"
| type - "double"
| sym:symtab - 0x40194140
|
+++ cdecl ----------------------------------------
| sym:name - "perimeter"
| name - "perimeter"
| decl - "f(void)."
| parms - void
| storage - "virtual"
| value - "0"
| type - "double"
| sym:symtab - 0x40194140
|
+++ cdecl ----------------------------------------
| sym:name - "nshapes"
| name - "nshapes"
| decl - ""
| storage - "static"
| type - "int"
| sym:symtab - 0x40194140
|
+++ class ----------------------------------------
| sym:name - "Circle"
| name - "Circle"
| kind - "class"
| bases - 0x40194510
| symtab - 0x40194538
| sym:symtab - 0x40191078
+++ access ----------------------------------------
| kind - "private"
|
+++ cdecl ----------------------------------------
| name - "radius"
| decl - ""
| type - "double"
|
+++ access ----------------------------------------
| kind - "public"
|
+++ constructor ----------------------------------------
| sym:name - "Circle"
| name - "Circle"
| parms - double
| decl - "f(double)."
| code - "{ }"
| sym:symtab - 0x40194538
|
+++ cdecl ----------------------------------------
| sym:name - "area"
| name - "area"
| decl - "f(void)."
| parms - void
| storage - "virtual"
| type - "double"
| sym:symtab - 0x40194538
|
+++ cdecl ----------------------------------------
| sym:name - "perimeter"
| name - "perimeter"
| decl - "f(void)."
| parms - void
| storage - "virtual"
| type - "double"
| sym:symtab - 0x40194538
|
+++ class ----------------------------------------
| sym:name - "Square"
| name - "Square"
| kind - "class"
| bases - 0x40194760
| symtab - 0x40194788
| sym:symtab - 0x40191078
+++ access ----------------------------------------
| kind - "private"
|
+++ cdecl ----------------------------------------
| name - "width"
| decl - ""
| type - "double"
|
+++ access ----------------------------------------
| kind - "public"
|
+++ constructor ----------------------------------------
| sym:name - "Square"
| name - "Square"
| parms - double
| decl - "f(double)."
| code - "{ }"
| sym:symtab - 0x40194788
|
+++ cdecl ----------------------------------------
| sym:name - "area"
| name - "area"
| decl - "f(void)."
| parms - void
| storage - "virtual"
| type - "double"
| sym:symtab - 0x40194788
|
+++ cdecl ----------------------------------------
| sym:name - "perimeter"
| name - "perimeter"
| decl - "f(void)."
| parms - void
| storage - "virtual"
| type - "double"
| sym:symtab - 0x40194788
Attributes of parse tree nodes are often prepended with a namespace qualifier. For example, the attributes sym:name and sym:symtab are attributes related to symbol table management and are prefixed with sym:. As a general rule, only those attributes which are directly related to the raw declaration appear without a prefix (type, name, declarator, etc.).
Target language modules may add additional attributes to nodes to assist the generation of wrapper code. The convention for doing this is to place these attributes in a namespace that matches the name of the target language. For example, python:foo or perl:foo.
During parsing, all symbols are managed in the space of the target language. The sym:name attribute of each node contains the symbol name selected by the parser. Normally, sym:name and name are the same. However, the %rename directive can be used to change the value of sym:name. You can see the effect of %rename by trying it on a simple interface and dumping the parse tree. For example:
%rename(foo_i) foo(int); %rename(foo_d) foo(double); void foo(int); void foo(double); void foo(Bar *b);
There are various debug- options that can be useful for debugging and analysing the parse tree. For example, the debug-top <n> or debug-module <n> options will dump the entire/top of the parse tree or the module subtree at one of the four n stages of processing. The parse tree can be viewed after the final stage of processing by running SWIG:
$ swig -debug-top 4 example.i
...
+++ cdecl ----------------------------------------
| sym:name - "foo_i"
| name - "foo"
| decl - "f(int)."
| parms - int
| type - "void"
| sym:symtab - 0x40165078
|
+++ cdecl ----------------------------------------
| sym:name - "foo_d"
| name - "foo"
| decl - "f(double)."
| parms - double
| type - "void"
| sym:symtab - 0x40165078
|
+++ cdecl ----------------------------------------
| sym:name - "foo"
| name - "foo"
| decl - "f(p.Bar)."
| parms - Bar *
| type - "void"
| sym:symtab - 0x40165078
All symbol-related conflicts and complaints about overloading are based on sym:name values. For instance, the following example uses %rename in reverse to generate a name clash.
%rename(foo) foo_i(int); %rename(foo) foo_d(double; void foo_i(int); void foo_d(double); void foo(Bar *b);
When you run SWIG on this you now get:
$ ./swig example.i example.i:6. Overloaded declaration ignored. foo_d(double ) example.i:5. Previous declaration is foo_i(int ) example.i:7. Overloaded declaration ignored. foo(Bar *) example.i:5. Previous declaration is foo_i(int )
A number of SWIG directives such as %exception are implemented using the low-level %feature directive. For example:
%feature("except") getitem(int) {
try {
$action
} catch (badindex) {
...
}
}
...
class Foo {
public:
Object *getitem(int index) throws(badindex);
...
};
The behavior of %feature is very easy to describe--it simply attaches a new attribute to any parse tree node that matches the given prototype. When a feature is added, it shows up as an attribute in the feature: namespace. You can see this when running with the -debug-top 4 option. For example:
+++ cdecl ----------------------------------------
| sym:name - "getitem"
| name - "getitem"
| decl - "f(int).p."
| parms - int
| type - "Object"
| feature:except - "{\n try {\n $action\n } catc..."
| sym:symtab - 0x40168ac8
|
Feature names are completely arbitrary and a target language module can be programmed to respond to any feature name that it wants to recognize. The data stored in a feature attribute is usually just a raw unparsed string. For example, the exception code above is simply stored without any modifications.
Language modules work by defining handler functions that know how to respond to different types of parse-tree nodes. These handlers simply look at the attributes of each node in order to produce low-level code.
In reality, the generation of code is somewhat more subtle than simply invoking handler functions. This is because parse-tree nodes might be transformed. For example, suppose you are wrapping a class like this:
class Foo {
public:
virtual int *bar(int x);
};
When the parser constructs a node for the member bar, it creates a raw "cdecl" node with the following attributes:
nodeType : cdecl name : bar type : int decl : f(int).p parms : int x storage : virtual sym:name : bar
To produce wrapper code, this "cdecl" node undergoes a number of transformations. First, the node is recognized as a function declaration. This adjusts some of the type information--specifically, the declarator is joined with the base datatype to produce this:
nodeType : cdecl name : bar type : p.int <-- Notice change in return type decl : f(int).p parms : int x storage : virtual sym:name : bar
Next, the context of the node indicates that the node is really a member function. This produces a transformation to a low-level accessor function like this:
nodeType : cdecl name : bar type : int.p decl : f(int).p parms : Foo *self, int x <-- Added parameter storage : virtual wrap:action : result = (arg1)->bar(arg2) <-- Action code added sym:name : Foo_bar <-- Symbol name changed
In this transformation, notice how an additional parameter was added to the parameter list and how the symbol name of the node has suddenly changed into an accessor using the naming scheme described in the "SWIG Basics" chapter. A small fragment of "action" code has also been generated--notice how the wrap:action attribute defines the access to the underlying method. The data in this transformed node is then used to generate a wrapper.
Language modules work by registering handler functions for dealing with various types of nodes at different stages of transformation. This is done by inheriting from a special Language class and defining a collection of virtual methods. For example, the Python module defines a class as follows:
class PYTHON : public Language {
protected:
public :
virtual void main(int, char *argv[]);
virtual int top(Node *);
virtual int functionWrapper(Node *);
virtual int constantWrapper(Node *);
virtual int variableWrapper(Node *);
virtual int nativeWrapper(Node *);
virtual int membervariableHandler(Node *);
virtual int memberconstantHandler(Node *);
virtual int memberfunctionHandler(Node *);
virtual int constructorHandler(Node *);
virtual int destructorHandler(Node *);
virtual int classHandler(Node *);
virtual int classforwardDeclaration(Node *);
virtual int insertDirective(Node *);
virtual int importDirective(Node *);
};
The role of these functions is described shortly.
Much of SWIG's current parser design was originally motivated by interest in using XML to represent SWIG parse trees. Although XML is not currently used in any direct manner, the parse tree structure, use of node tags, attributes, and attribute namespaces are all influenced by aspects of XML parsing. Therefore, in trying to understand SWIG's internal data structures, it may be useful to keep XML in the back of your mind as a model.
Most of SWIG is constructed using three basic data structures: strings, hashes, and lists. These data structures are dynamic in same way as similar structures found in many scripting languages. For instance, you can have containers (lists and hash tables) of mixed types and certain operations are polymorphic.
This section briefly describes the basic structures so that later sections of this chapter make more sense.
When describing the low-level API, the following type name conventions are used:
In most cases, other typenames in the source are aliases for one of these primitive types. Specifically:
typedef String SwigType; typedef Hash Parm; typedef Hash ParmList; typedef Hash Node; typedef Hash Symtab; typedef Hash Typetab;
String *NewString(const String_or_char *val)
String *NewStringf(const char *fmt, ...)
String *Copy(String *s)
void Delete(String *s)
int Len(const String_or_char *s)
char *Char(const String_or_char *s)
void Append(String *s, const String_or_char *t)
void Insert(String *s, int pos, const String_or_char *t)
int Strcmp(const String_or_char *s, const String_or_char *t)
int Strncmp(const String_or_char *s, const String_or_char *t, int len)
char *Strstr(const String_or_char *s, const String_or_char *pat)
char *Strchr(const String_or_char *s, char ch)
void Chop(String *s)
int Replace(String *s, const String_or_char *pat, const String_or_char *rep, int flags)
Replaces the pattern pat with rep in string s . flags is a combination of the following flags:
DOH_REPLACE_ANY - Replace all occurrences DOH_REPLACE_ID - Valid C identifiers only DOH_REPLACE_NOQUOTE - Don't replace in quoted strings DOH_REPLACE_FIRST - Replace first occurrence only.
Returns the number of replacements made (if any).
Hash *NewHash()
Hash *Copy(Hash *h)
void Delete(Hash *h)
int Len(Hash *h)
Object *Getattr(Hash *h, const String_or_char *key)
int Setattr(Hash *h, const String_or_char *key, const Object_or_char *val)
int Delattr(Hash *h, const String_or_char *key)
List *Keys(Hash *h)
List *NewList()
List *Copy(List *x)
void Delete(List *x)
int Len(List *x)
Object *Getitem(List *x, int n)
int *Setitem(List *x, int n, const Object_or_char *val)
int *Delitem(List *x, int n)
void Append(List *x, const Object_or_char *t)
void Insert(String *s, int pos, const Object_or_char *t)
Object *Copy(Object *x)
void Delete(Object *x)
void Setfile(Object *x, String_or_char *f)
String *Getfile(Object *x)
void Setline(Object *x, int n)
int Getline(Object *x)
Iterator First(Object *x)
Iterator Next(Iterator i)
Returns an iterator that points to the next item in a list or hash table. Here are two examples of iteration:
List *l = (some list);
Iterator i;
for (i = First(l); i.item; i = Next(i)) {
Printf(stdout,"%s\n", i.item);
}
Hash *h = (some hash);
Iterator j;
for (j = First(j); j.item; j= Next(j)) {
Printf(stdout,"%s : %s\n", j.key, j.item);
}
int Printf(String_or_FILE *f, const char *fmt, ...)
int Printv(String_or_FILE *f, String_or_char *arg1,..., NULL)
int Putc(int ch, String_or_FILE *f)
int Write(String_or_FILE *f, void *buf, int len)
int Read(String_or_FILE *f, void *buf, int maxlen)
int Getc(String_or_FILE *f)
int Ungetc(int ch, String_or_FILE *f)
int Seek(String_or_FILE *f, int offset, int whence)
long Tell(String_or_FILE *f)
File *NewFile(const char *filename, const char *mode, List *newfiles)
File *NewFileFromFile(FILE *f)
int Close(String_or_FILE *f)
Closes a file. Has no effect on strings.
The use of the above I/O functions and strings play a critical role in SWIG. It is common to see small code fragments of code generated using code like this:
/* Print into a string */
String *s = NewString("");
Printf(s,"Hello\n");
for (i = 0; i < 10; i++) {
Printf(s,"%d\n", i);
}
...
/* Print string into a file */
Printf(f, "%s\n", s);
Similarly, the preprocessor and parser all operate on string-files.
String *nodeType(Node *n)
Node *nextSibling(Node *n)
Node *previousSibling(Node *n)
Node *firstChild(Node *n)
Node *lastChild(Node *n)
Node *parentNode(Node *n)
The following macros can be used to change all of the above attributes. Normally, these functions are only used by the parser. Changing them without knowing what you are doing is likely to be dangerous.
void set_nodeType(Node *n, const String_or_char)
void set_nextSibling(Node *n, Node *s)
void set_previousSibling(Node *n, Node *s)
void set_firstChild(Node *n, Node *c)
void set_lastChild(Node *n, Node *c)
void set_parentNode(Node *n, Node *p)
The following utility functions are used to alter the parse tree (at your own risk)
void appendChild(Node *parent, Node *child)
void deleteNode(Node *node)
Since parse tree nodes are just hash tables, attributes are accessed using the Getattr(), Setattr(), and Delattr() operations. For example:
int functionHandler(Node *n) {
String *name = Getattr(n,"name");
String *symname = Getattr(n,"sym:name");
SwigType *type = Getattr(n,"type");
...
}
New attributes can be freely attached to a node as needed. However, when new attributes are attached during code generation, they should be prepended with a namespace prefix. For example:
... Setattr(n,"python:docstring", doc); /* Store docstring */ ...
A quick way to check the value of an attribute is to use the checkAttribute() function like this:
if (checkAttribute(n,"storage","virtual")) {
/* n is virtual */
...
}
Changing the values of existing attributes is allowed and is sometimes done to implement node transformations. However, if a function/method modifies a node, it is required to restore modified attributes to their original values. To simplify the task of saving/restoring attributes, the following functions are used:
int Swig_save(const char *ns, Node *n, const char *name1, const char *name2, ..., NIL)
int Swig_restore(Node *n)
Restores the attributes saved by the previous call to Swig_save(). Those attributes that were supplied to Swig_save() will be restored to their original values.
The Swig_save() and Swig_restore() functions must always be used as a pair. That is, every call to Swig_save() must have a matching call to Swig_restore(). Calls can be nested if necessary. Here is an example that shows how the functions might be used:
int variableHandler(Node *n) {
Swig_save("variableHandler",n,"type","sym:name",NIL);
String *symname = Getattr(n,"sym:name");
SwigType *type = Getattr(n,"type");
...
Append(symname,"_global"); // Change symbol name
SwigType_add_pointer(type); // Add pointer
...
generate wrappers
...
Swig_restore(n); // Restore original values
return SWIG_OK;
}
int Swig_require(const char *ns, Node *n, const char *name1, const char *name2, ..., NIL)
SWIG implements the complete C++ type system including typedef, inheritance, pointers, references, and pointers to members. A detailed discussion of type theory is impossible here. However, let's cover the highlights.
All types in SWIG consist of a base datatype and a collection of type operators that are applied to the base. A base datatype is almost always some kind of primitive type such as int or double . The operators consist of things like pointers, references, arrays, and so forth. Internally, types are represented as strings that are constructed in a very precise manner. Here are some examples:
C datatype SWIG encoding (strings) ----------------------------- -------------------------- int "int" int * "p.int" const int * "p.q(const).int" int (*x)(int,double) "p.f(int,double).int" int [20][30] "a(20).a(30).int" int (F::*)(int) "m(F).f(int).int" vector<int> * "p.vector<(int)>"
Reading the SWIG encoding is often easier than figuring out the C code---just read it from left to right. For a type of "p.f(int,double).int" is a "pointer to a function(int,double) that returns int".
The following operator encodings are used in type strings:
Operator Meaning ------------------- ------------------------------- p. Pointer to a(n). Array of dimension n r. C++ reference m(class). Member pointer to class f(args). Function. q(qlist). Qualifiers
In addition, type names may be parameterized by templates. This is represented by enclosing the template parameters in <( ... )>. Variable length arguments are represented by the special base type of v(...).
If you want to experiment with type encodings, the raw type strings can be inserted into an interface file using backticks `` wherever a type is expected. For instance, here is an extremely perverted example:
`p.a(10).p.f(int,p.f(int).int)` foo(int, int (*x)(int));
This corresponds to the immediately obvious C declaration:
(*(*foo(int,int (*)(int)))[10])(int,int (*)(int));
Aside from the potential use of this declaration on a C programming quiz, it motivates the use of the special SWIG encoding of types. The SWIG encoding is much easier to work with because types can be easily examined, modified, and constructed using simple string operations (comparison, substrings, concatenation, etc.). For example, in the parser, a declaration like this
int *a[30];
is processed in a few pieces. In this case, you have the base type " int" and the declarator of type "a(30).p.". To make the final type, the two parts are just joined together using string concatenation.
The following functions are used to construct types. You should use these functions instead of trying to build the type strings yourself.
void SwigType_add_pointer(SwigType *ty)
void SwigType_del_pointer(SwigType *ty)
void SwigType_add_reference(SwigType *ty)
void SwigType_add_array(SwigType *ty, const String_or_char *size)
void SwigType_del_array(SwigType *ty)
int SwigType_array_ndim(SwigType *ty)
String* SwigType_array_getdim(SwigType *ty,int n)
void SwigType_array_setdim(SwigType *ty, int n, const String_or_char *rep)
void SwigType_add_qualifier(SwigType *ty, const String_or_char *q)
void SwigType_add_memberpointer(SwigType *ty, const String_or_char *cls)
void SwigType_add_function(SwigType *ty, ParmList *p)
void SwigType_add_template(SwigType *ty, ParmList *p)
SwigType *SwigType_pop(SwigType *ty)
void SwigType_push(SwigType *ty, SwigType *op)
SwigType *SwigType_pop_arrays(SwigType *ty)
SwigType *SwigType_pop_function(SwigType *ty)
SwigType *SwigType_base(SwigType *ty)
SwigType *SwigType_prefix(SwigType *ty)
The following functions can be used to test properties of a datatype.
int SwigType_ispointer(SwigType *ty)
int SwigType_ismemberpointer(SwigType *ty)
int SwigType_isreference(SwigType *ty)
int SwigType_isarray(SwigType *ty)
int SwigType_isfunction(SwigType *ty)
int SwigType_isqualifier(SwigType *ty)
int SwigType_issimple(SwigType *ty)
int SwigType_isconst(SwigType *ty)
int SwigType_isvarargs(SwigType *ty)
int SwigType_istemplate(SwigType *ty)
The behavior of typedef declaration is to introduce a type alias. For instance, typedef int Integer makes the identifier Integer an alias for int. The treatment of typedef in SWIG is somewhat complicated due to the pattern matching rules that get applied in typemaps and the fact that SWIG prefers to generate wrapper code that closely matches the input to simplify debugging (a user will see the typedef names used in their program instead of the low-level primitive C datatypes).
To handle typedef, SWIG builds a collection of trees containing typedef relations. For example,
typedef int Integer; typedef Integer *IntegerPtr; typedef int Number; typedef int Size;
produces two trees like this:
int p.Integer
^ ^ ^ ^
/ | \ |
/ | \ |
Integer Size Number IntegerPtr
To resolve a single typedef relationship, the following function is used:
SwigType *SwigType_typedef_resolve(SwigType *ty)
Typedefs are only resolved in simple typenames that appear in a type. For example, the type base name and in function parameters. When resolving types, the process starts in the leaf nodes and moves up the tree towards the root. Here are a few examples that show how it works:
Original type After typedef_resolve() ------------------------ ----------------------- Integer int a(30).Integer int p.IntegerPtr p.p.Integer p.p.Integer p.p.int
For complicated types, the process can be quite involved. Here is the reduction of a function pointer:
p.f(Integer, p.IntegerPtr, Size).Integer : Start p.f(Integer, p.IntegerPtr, Size).int p.f(int, p.IntegerPtr, Size).int p.f(int, p.p.Integer, Size).int p.f(int, p.p.int, Size).int p.f(int, p.p.int, int).int : End
Two types are equivalent if their full type reductions are the same. The following function will fully reduce a datatype:
SwigType *SwigType_typedef_resolve_all(SwigType *ty)
When generating wrapper code, it is necessary to emit datatypes that can be used on the left-hand side of an assignment operator (an lvalue). However, not all C datatypes can be used in this way---especially arrays and const-qualified types. To generate a type that can be used as an lvalue, use the following function:
SwigType *SwigType_ltype(SwigType *ty)
The creation of lvalues is fully aware of typedef and other aspects of the type system. Therefore, the creation of an lvalue may result in unexpected results. Here are a few examples:
typedef double Matrix4[4][4]; Matrix4 x; // type = 'Matrix4', ltype='p.a(4).double' typedef const char * Literal; Literal y; // type = 'Literal', ltype='p.char'
The following functions produce strings that are suitable for output.
String *SwigType_str(SwigType *ty, const String_or_char *id = 0)
String *SwigType_lstr(SwigType *ty, const String_or_char *id = 0)
String *SwigType_lcaststr(SwigType *ty, const String_or_char *id = 0)
String *SwigType_rcaststr(SwigType *ty, const String_or_char *id = 0)
String *SwigType_manglestr(SwigType *ty)
Several type-related functions involve parameter lists. These include functions and templates. Parameter list are represented as a list of nodes with the following attributes:
"type" - Parameter type (required) "name" - Parameter name (optional) "value" - Initializer (optional)
Typically parameters are denoted in the source by using a typename of Parm * or ParmList *. To walk a parameter list, simply use code like this:
Parm *parms;
Parm *p;
for (p = parms; p; p = nextSibling(p)) {
SwigType *type = Getattr(p,"type");
String *name = Getattr(p,"name");
String *value = Getattr(p,"value");
...
}
Note: this code is exactly the same as what you would use to walk parse tree nodes.
An empty list of parameters is denoted by a NULL pointer.
Since parameter lists are fairly common, the following utility functions are provided to manipulate them:
Parm *CopyParm(Parm *p);
ParmList *CopyParmList(ParmList *p);
int ParmList_len(ParmList *p);
String *ParmList_str(ParmList *p);
String *ParmList_protostr(ParmList *p);
int ParmList_numrequired(ParmList *p);
One of the easiest routes to supporting a new language module is to copy an already supported language module implementation and modify it. Be sure to choose a language that is similar in nature to the new language. All language modules follow a similar structure and this section briefly outlines the steps needed to create a bare-bones language module from scratch. Since the code is relatively easy to read, this section describes the creation of a minimal Python module. You should be able to extrapolate this to other languages.
Code generation modules are defined by inheriting from the Language class, currently defined in the Source/Modules directory of SWIG. Starting from the parsing of command line options, all aspects of code generation are controlled by different methods of the Language that must be defined by your module.
To define a new language module, first create a minimal implementation using this example as a guide:
#include "swigmod.h"
class PYTHON : public Language {
public:
virtual void main(int argc, char *argv[]) {
printf("I'm the Python module.\n");
}
virtual int top(Node *n) {
printf("Generating code.\n");
return SWIG_OK;
}
};
extern "C" Language *
swig_python(void) {
return new PYTHON();
}
The "swigmod.h" header file contains, among other things, the declaration of the Language base class and so you should include it at the top of your language module's source file. Similarly, the "swigconfig.h" header file contains some other useful definitions that you may need. Note that you should not include any header files that are installed with the target language. That is to say, the implementation of the SWIG Python module shouldn't have any dependencies on the Python header files. The wrapper code generated by SWIG will almost always depend on some language-specific C/C++ header files, but SWIG itself does not.
Give your language class a reasonable name, usually the same as the target language. By convention, these class names are all uppercase (e.g. "PYTHON" for the Python language module) but this is not a requirement. This class will ultimately consist of a number of overrides of the virtual functions declared in the Language base class, in addition to any language-specific member functions and data you need. For now, just use the dummy implementations shown above.
The language module ends with a factory function, swig_python() , that simply returns a new instance of the language class. As shown, it should be declared with the extern "C" storage qualifier so that it can be called from C code. It should also return a pointer to the base class (Language) so that only the interface (and not the implementation) of your language module is exposed to the rest of SWIG.
Save the code for your language module in a file named " python.cxx" and. place this file in the Source/Modules directory of the SWIG distribution. To ensure that your module is compiled into SWIG along with the other language modules, modify the file Source/Modules/Makefile.am to include the additional source files. In addition, modify the file Source/Modules/swigmain.cxx with an additional command line option that activates the module. Read the source---it's straightforward.
Next, at the top level of the SWIG distribution, re-run the autogen.sh script to regenerate the various build files:
$ ./autogen.sh
Next re-run configure to regenerate all of the Makefiles:
$ ./configure
Finally, rebuild SWIG with your module added:
$ make
Once it finishes compiling, try running SWIG with the command-line option that activates your module. For example, swig -python foo.i . The messages from your new module should appear.
When SWIG starts, the command line options are passed to your language module. This occurs before any other processing occurs (preprocessing, parsing, etc.). To capture the command line options, simply use code similar to this:
void Language::main(int argc, char *argv[]) {
for (int i = 1; i < argc; i++) {
if (argv[i]) {
if(strcmp(argv[i],"-interface") == 0) {
if (argv[i+1]) {
interface = NewString(argv[i+1]);
Swig_mark_arg(i);
Swig_mark_arg(i+1);
i++;
} else {
Swig_arg_error();
}
} else if (strcmp(argv[i],"-globals") == 0) {
if (argv[i+1]) {
global_name = NewString(argv[i+1]);
Swig_mark_arg(i);
Swig_mark_arg(i+1);
i++;
} else {
Swig_arg_error();
}
} else if ( (strcmp(argv[i],"-proxy") == 0)) {
proxy_flag = 1;
Swig_mark_arg(i);
} else if (strcmp(argv[i],"-keyword") == 0) {
use_kw = 1;
Swig_mark_arg(i);
} else if (strcmp(argv[i],"-help") == 0) {
fputs(usage,stderr);
}
...
}
}
}
The exact set of options depends on what you want to do in your module. Generally, you would use the options to change code generation modes or to print diagnostic information.
If a module recognizes an option, it should always call Swig_mark_arg() to mark the option as valid. If you forget to do this, SWIG will terminate with an unrecognized command line option error.
In addition to looking at command line options, the main() method is responsible for some initial configuration of the SWIG library and preprocessor. To do this, insert some code like this:
void main(int argc, char *argv[]) {
... command line options ...
/* Set language-specific subdirectory in SWIG library */
SWIG_library_directory("python");
/* Set language-specific preprocessing symbol */
Preprocessor_define("SWIGPYTHON 1", 0);
/* Set language-specific configuration file */
SWIG_config_file("python.swg");
/* Set typemap language (historical) */
SWIG_typemap_lang("python");
}
The above code does several things--it registers the name of the language module with the core, it supplies some preprocessor macro definitions for use in input files (so that they can determine the target language), and it registers a start-up file. In this case, the file python.swg will be parsed before any part of the user-supplied input file.
Before proceeding any further, create a directory for your module in the SWIG library (The Lib directory). Now, create a configuration file in the directory. For example, python.swg.
Just to review, your language module should now consist of two files-- an implementation file python.cxx and a configuration file python.swg.
SWIG is a multi-pass compiler. Once the main() method has been invoked, the language module does not execute again until preprocessing, parsing, and a variety of semantic analysis passes have been performed. When the core is ready to start generating wrappers, it invokes the top() method of your language class. The argument to top is a single parse tree node that corresponds to the top of the entire parse tree.
To get the code generation process started, the top() procedure needs to do several things:
An outline of top() might be as follows:
int Python::top(Node *n) {
/* Get the module name */
String *module = Getattr(n,"name");
/* Get the output file name */
String *outfile = Getattr(n,"outfile");
/* Initialize I/O (see next section) */
...
/* Output module initialization code */
...
/* Emit code for children */
Language::top(n);
...
/* Cleanup files */
...
return SWIG_OK;
}
Within SWIG wrappers, there are five main sections. These are (in order)
Different parts of the SWIG code will fill different sections, then upon completion of the wrappering all the sections will be saved to the wrapper file.
To perform this will require several additions to the code in various places, such as:
class PYTHON : public Language {
protected:
/* General DOH objects used for holding the strings */
File *f_begin;
File *f_runtime;
File *f_header;
File *f_wrappers;
File *f_init;
public:
...
};
int Python::top(Node *n) {
...
/* Initialize I/O */
f_begin = NewFile(outfile, "w", SWIG_output_files());
if (!f_begin) {
FileErrorDisplay(outfile);
SWIG_exit(EXIT_FAILURE);
}
f_runtime = NewString("");
f_init = NewString("");
f_header = NewString("");
f_wrappers = NewString("");
/* Register file targets with the SWIG file handler */
Swig_register_filebyname("begin", f_begin);
Swig_register_filebyname("header", f_header);
Swig_register_filebyname("wrapper", f_wrappers);
Swig_register_filebyname("runtime", f_runtime);
Swig_register_filebyname("init", f_init);
/* Output module initialization code */
Swig_banner(f_begin);
...
/* Emit code for children */
Language::top(n);
...
/* Write all to the file */
Dump(f_runtime, f_begin);
Dump(f_header, f_begin);
Dump(f_wrappers, f_begin);
Wrapper_pretty_print(f_init, f_begin);
/* Cleanup files */
Delete(f_runtime);
Delete(f_header);
Delete(f_wrappers);
Delete(f_init);
Close(f_begin);
Delete(f_begin);
return SWIG_OK;
}
Using this to process a file will generate a wrapper file, however the wrapper will only consist of the common SWIG code as well as any inline code which was written in the .i file. It does not contain any wrappers for any of the functions or classes.
The code to generate the wrappers are the various member functions, which currently have not been touched. We will look at functionWrapper() as this is the most commonly used function. In fact many of the other wrapper routines will call this to do their work.
A simple modification to write some basic details to the wrapper looks like this:
int Python::functionWrapper(Node *n) {
/* Get some useful attributes of this function */
String *name = Getattr(n,"sym:name");
SwigType *type = Getattr(n,"type");
ParmList *parms = Getattr(n,"parms");
String *parmstr= ParmList_str_defaultargs(parms); // to string
String *func = SwigType_str(type, NewStringf("%s(%s)", name, parmstr));
String *action = Getattr(n,"wrap:action");
Printf(f_wrappers,"functionWrapper : %s\n", func);
Printf(f_wrappers," action : %s\n", action);
return SWIG_OK;
}
This will now produce some useful information within your wrapper file.
functionWrapper : void delete_Shape(Shape *self)
action : delete arg1;
functionWrapper : void Shape_x_set(Shape *self,double x)
action : if (arg1) (arg1)->x = arg2;
functionWrapper : double Shape_x_get(Shape *self)
action : result = (double) ((arg1)->x);
functionWrapper : void Shape_y_set(Shape *self,double y)
action : if (arg1) (arg1)->y = arg2;
...
As ingenious as SWIG is, and despite all its capabilities and the power of its parser, the Low-level code generation takes a lot of work to write properly. Mainly because every language insists on its own manner of interfacing to C/C++. To write the code generators you will need a good understanding of how to manually write an interface to your chosen language, so make sure you have your documentation handy.
At this point it is also probably a good idea to take a very simple file (just one function), and try letting SWIG generate wrappers for many different languages. Take a look at all of the wrappers generated, and decide which one looks closest to the language you are trying to wrap. This may help you to decide which code to look at.
In general most language wrappers look a little like this:
/* wrapper for TYPE3 some_function(TYPE1,TYPE2); */
RETURN_TYPE _wrap_some_function(ARGS){
TYPE1 arg1;
TYPE2 arg2;
TYPE3 result;
if(ARG1 is not of TYPE1) goto fail;
arg1=(convert ARG1);
if(ARG2 is not of TYPE2) goto fail;
arg2=(convert ARG2);
result=some_function(arg1,arg2);
convert 'result' to whatever the language wants;
do any tidy up;
return ALL_OK;
fail:
do any tidy up;
return ERROR;
}
Yes, it is rather vague and not very clear. But each language works differently so this will have to do for now.
Tackling this problem will be done in two stages:
The first step will be done in the code, the second will be done in typemaps.
Our first step will be to write the code for functionWrapper() . What is shown below is NOT the solution, merely a step in the right direction. There are a lot of issues to address.
virtual int functionWrapper(Node *n) {
/* get useful attributes */
String *name = Getattr(n,"sym:name");
SwigType *type = Getattr(n,"type");
ParmList *parms = Getattr(n,"parms");
...
/* create the wrapper object */
Wrapper *wrapper = NewWrapper();
/* create the functions wrappered name */
String *wname = Swig_name_wrapper(iname);
/* deal with overloading */
....
/* write the wrapper function definition */
Printv(wrapper->def,"RETURN_TYPE ", wname, "(ARGS) {",NIL);
/* if any additional local variable needed, add them now */
...
/* write the list of locals/arguments required */
emit_args(type, parms, wrapper);
/* check arguments */
...
/* write typemaps(in) */
....
/* write constriants */
....
/* Emit the function call */
emit_action(n,wrapper);
/* return value if necessary */
....
/* write typemaps(out) */
....
/* add cleanup code */
....
/* Close the function(ok) */
Printv(wrapper->code, "return ALL_OK;\n", NIL);
/* add the failure cleanup code */
...
/* Close the function(error) */
Printv(wrapper->code, "return ERROR;\n", "}\n", NIL);
/* final substititions if applicable */
...
/* Dump the function out */
Wrapper_print(wrapper,f_wrappers);
/* tidy up */
Delete(wname);
DelWrapper(wrapper);
return SWIG_OK;
}
Executing this code will produce wrappers which have our basic skeleton but without the typemaps, there is still work to do.
At the time of this writing, SWIG supports nearly twenty languages, which means that for continued sanity in maintaining the configuration files, the language modules need to follow some conventions. These are outlined here along with the admission that, yes it is ok to violate these conventions in minor ways, as long as you know where to apply the proper kludge to keep the overall system regular and running. Engineering is the art of compromise, see...
Much of the maintenance regularity depends on choosing a suitable nickname for your language module (and then using it in a controlled way). Nicknames should be all lower case letters with an optional numeric suffix (no underscores, no dashes, no spaces). Some examples are: foo, bar, qux99.
The numeric suffix variant, as in the last example, is somewhat tricky to work with because sometimes people expect to refer to the language without this number but sometimes that number is extremely relevant (especially when it corresponds to language implementation versions with incompatible interfaces). New language modules that unavoidably require a numeric suffix in their nickname should include that number in all uses, or be prepared to kludge.
The nickname is used in four places:
| usage | transform |
| "skip" tag | (none) |
| Examples/ subdir name | (none) |
| Examples/test-suite/ subdir name | (none) |
As you can see, most usages are direct.
autoconf to generate the configure script. This is where you need to add shell script fragments and autoconf macros to detect the presence of whatever development support your language module requires, typically directories where headers and libraries can be found, and/or utility programs useful for integrating the generated wrapper code.
Use the AC_ARG_WITH, AC_MSG_CHECKING, AC_SUBST macros and so forth (see other languages for examples). Avoid using the [ and ] character in shell script fragments. The variable names passed to AC_SUBST should begin with the nickname, entirely upcased.
At the end of the new section is the place to put the aforementioned nickname kludges (should they be needed). See Perl5 for examples of what to do. [If this is still unclear after you've read the code, ping me and I'll expand on this further. --ttn]
Some of the variables AC_SUBSTituted are essential to the support of your language module. Fashion these into a shell script "test" clause and assign that to a skip tag using "-z" and "-o":
This means if those vars should ever be empty, qux99 support should be considered absent and so it would be a good idea to skip actions that might rely on it.
Here is where you may also define an alias (but then you'll need to kludge --- don't do this):
Lastly, you need to modify each of check-aliveness, check-examples, check-test-suite and lib-languages (var). Use the nickname for these, not the alias. Note that you can do this even before you have any tests or examples set up; the Makefile rules do some sanity checking and skip around these kinds of problems.
When you have modified these files, please make sure that the new language module is completely ignored if it is not installed and detected on a box, that is, make check-examples and make check-test-suite politely displays the ignoring language message.
Discuss the kinds of functions typically needed for SWIG runtime support (e.g. SWIG_ConvertPtr() and SWIG_NewPointerObj() ) and the names of the SWIG files that implement those functions.
The standard library files that most languages supply keeps growing as SWIG matures. The following are the minimum that are usually supported:
Please copy these and modify for any new language.
Each of the language modules provides one or more examples. These examples are used to demonstrate different features of the language module to SWIG end-users, but you'll find that they're useful during development and testing of your language module as well. You can use examples from the existing SWIG language modules for inspiration.
Each example is self-contained and consists of (at least) a Makefile, a SWIG interface file for the example module, and a 'runme' script that demonstrates the functionality for that module. All of these files are stored in the same subdirectory under the Examples/[lang] directory. There are two classic examples which should be the first to convert to a new language module. These are the "simple" C example and the "class" C++ example. These can be found, for example for Python, in Examples/python/simple and Examples/python/class.
By default, all of the examples are built and run when the user types make check. To ensure that your examples are automatically run during this process, see the section on configuration files.
A test driven development approach is central to the improvement and development of SWIG. Most modifications to SWIG are accompanied by additional regression tests and checking all tests to ensure that no regressions have been introduced.
The regression testing is carried out by the SWIG test-suite. The test-suite consists of numerous testcase interface files in the Examples/test-suite directory as well as target language specific runtime tests in the Examples/test-suite/[lang] directory. When a testcase is run, it will execute the following steps for each testcase:
For example, the ret_by_value testcase consists of two components. The first component is the Examples/test-suite/ret_by_value.i interface file. The name of the SWIG module must always be the name of the testcase, so the ret_by_value.i interface file thus begins with:
%module ret_by_value
The testcase code will then follow the module declaration, usually within a %inline %{ ... %} section for the majority of the tests.
The second component is the optional runtime tests. Any runtime tests are named using the following convention: [testcase]_runme.[ext], where [testcase] is the testcase name and [ext] is the normal extension for the target language file. In this case, the Java and Python target languages implement a runtime test, so their files are respectively, Examples/test-suite/java/ret_by_value_runme.java and Examples/test-suite/python/ret_by_value_runme.py.
The goal of the test-suite is to test as much as possible in a silent manner. This way any SWIG or compiler errors or warnings are easily visible. Should there be any warnings, changes must be made to either fix them (preferably) or suppress them. Compilation or runtime errors result in a testcase failure and will be immediately visible. It is therefore essential that the runtime tests are written in a manner that displays nothing to stdout/stderr on success but error/exception out with an error message on stderr on failure.
In order for the test-suite to work for a particular target language, the language must be correctly detected and configured during the configure stage so that the correct Makefiles are generated. Most development occurs on Linux, so usually it is a matter of installing the development packages for the target language and simply configuring as outlined earlier.
If when running the test-suite commands that follow, you get a message that the test was skipped, it indicates that the configure stage is missing information in order to compile and run everything for that language.
The test-suite can be run in a number of ways. The first group of commands are for running multiple testcases in one run and should be executed in the top level directory. To run the entire test-suite (can take a long time):
make -k check-test-suite
To run the test-suite just for target language [lang], replace [lang] with one of csharp, java, perl5, python, ruby, tcl etc:
make check-[lang]-test-suite
Note that if a runtime test is available, a message "(with run test)" is displayed when run. For example:
$ make check-python-test-suite checking python test-suite checking testcase argcargvtest (with run test) under python checking testcase python_autodoc under python checking testcase python_append (with run test) under python checking testcase callback (with run test) under python
The files generated on a previous run can be deleted using the clean targets, either the whole test-suite or for a particular language:
make clean-test-suite make clean-[lang]-test-suite
The test-suite can be run in a partialcheck mode where just SWIG is executed, that is, the compile, link and running of the testcases is not performed. Note that the partialcheck does not require the target language to be correctly configured and detected and unlike the other test-suite make targets, is never skipped. Once again, either all the languages can be executed or just a chosen language:
make partialcheck-test-suite make partialcheck-[lang]-test-suite
If your computer has more than one CPU, you are strongly advised to use parallel make to speed up the execution speed. This can be done with any of the make targets that execute more than one testcase. For example, a dual core processor can efficiently use 2 parallel jobs:
make -j2 check-test-suite make -j2 check-python-test-suite make -j2 partialcheck-java-test-suite
The second group of commands are for running individual testcases and should be executed in the appropriate target language directory, Examples/test-suite/[lang]. Testcases can contain either C or C++ code and when one is written, a decision must be made as to which of these input languages is to be used. Replace [testcase] in the commands below with the name of the testcase.
For a C language testcase, add the testcase under the C_TEST_CASES list in Examples/test-suite/common.mk and execute individually as:
make -s [testcase].ctest
For a C++ language testcase, add the testcase under the CPP_TEST_CASES list in Examples/test-suite/common.mk and execute individually as:
make -s [testcase].cpptest
A third category of tests are C++ language testcases testing multiple modules (the %import directive). These require more than one shared library (dll/shared object) to be built and so are separated out from the normal C++ testcases. Add the testcase under the MULTI_CPP_TEST_CASES list in Examples/test-suite/common.mk and execute individually as:
make -s [testcase].multicpptest
To delete the generated files, execute:
make -s [testcase].clean
If you would like to see the exact commands being executed, drop the -s option:
make [testcase].ctest make [testcase].cpptest make [testcase].multicpptest
Some real examples of each:
make -s ret_by_value.clean make -s ret_by_value.ctest make -s bools.cpptest make -s imports.multicpptest
Advanced usage of the test-suite facilitates running tools on some of the five stages. The make variables SWIGTOOL and RUNTOOL are used to specify a tool to respectively, invoke SWIG and the execution of the runtime test. You are advised to view the Examples/test-suite/common.mk file for details but for a short summary, the classic usage is to use Valgrind for memory checking. For example, checking for memory leaks when running the runtime test in the target language interpreter:
make ret_by_value.ctest RUNTOOL="valgrind --leak-check=full"
This will probably make more sense if you look at the output of the above as it will show the exact commands being executed. SWIG can be analyzed for bad memory accesses using:
make ret_by_value.ctest SWIGTOOL="valgrind --tool=memcheck --trace-children=yes"
A debugger can also be invoked easily on an individual test, for example gdb:
make ret_by_value.ctest RUNTOOL="gdb --args"
SWIG reads the SWIG_FEATURES environment variable to obtain options in addition to those passed on the command line. This is particularly useful as the entire test-suite or a particular testcase can be run customized by using additional arguments, for example the -O optimization flag can be added in, as shown below for the bash shell:
env SWIG_FEATURES=-O make check-python-test-suite
The syntax for setting environment variables varies from one shell to the next, but it also works as shown in the example below, where some typemap debugging is added in:
make ret_by_value.ctest SWIG_FEATURES="-debug-tmsearch"
Don't forget to write end-user documentation for your language module. Currently, each language module has a dedicated chapter You shouldn't rehash things that are already covered in sufficient detail in the SWIG Basics and SWIG and C++ chapters. There is no fixed format for what, exactly, you should document about your language module, but you'll obviously want to cover issues that are unique to your language.
Some topics that you'll want to be sure to address include:
If you wish for a new language module to be distributed with SWIG, which we encourage for all popular languages, there are a few requirements. While we appreciate that getting all aspects of a new language working won't happen at the outset, there are a set of minimum requirements before a module can be committed into the official Github repository for distribution with future versions of SWIG. The following are really a summary of this whole section with details being outlined earlier on.
Once accepted into the official Git repository, development efforts should concentrate on getting the entire test-suite to work with plenty of runtime tests. Runtime tests should be for existing testcases and new test cases should be added should there be an area not already covered by the existing tests.
The coding guidelines for the C/C++ source code are pretty much K&R C style. The style can be inferred from the existing code base and is largely dictated by the indent code beautifier tool set to K&R style. The code can formatted using the make targets in the Source directory. Below is an example of how to format the emit.cxx file:
$ cd Source $ make beautify-file INDENTFILE=Modules/emit.cxx
Of particular note is indentation is set to 2 spaces and a tab is used instead of 8 spaces. The generated C/C++ code should also follow this style as close as possible. However, tabs should be avoided as unlike the SWIG developers, users will never have consistent tab settings.
There are various command line options which can aid debugging a SWIG interface as well as debugging the development of a language module. These are as follows:
-debug-classes - Display information about the classes found in the interface -debug-module <n> - Display module parse tree at stages 1-4, <n> is a csv list of stages -debug-symtabs - Display symbol tables information -debug-symbols - Display target language symbols in the symbol tables -debug-csymbols - Display C symbols in the symbol tables -debug-lsymbols - Display target language layer symbols -debug-tags - Display information about the tags found in the interface -debug-template - Display information for debugging templates -debug-top <n> - Display entire parse tree at stages 1-4, <n> is a csv list of stages -debug-typedef - Display information about the types and typedefs in the interface -debug-typemap - Display information for debugging typemaps -debug-tmsearch - Display typemap search debugging information -debug-tmused - Display typemaps used debugging information
The complete list of command line options for SWIG are available by running swig -help.
This section describes the different parse tree nodes and their attributes.
cdecl
Describes general C declarations including variables, functions, and typedefs. A declaration is parsed as "storage T D" where storage is a storage class, T is a base type, and D is a declarator.
"name" - Declarator name "type" - Base type T "decl" - Declarator type (abstract) "storage" - Storage class (static, extern, typedef, etc.) "parms" - Function parameters (if a function) "code" - Function body code (if supplied) "value" - Default value (if supplied)
constructor
C++ constructor declaration.
"name" - Name of constructor "parms" - Parameters "decl" - Declarator (function with parameters) "code" - Function body code (if any) "feature:new" - Set to indicate return of new object.
destructor
C++ destructor declaration.
"name" - Name of destructor "code" - Function body code (if any) "storage" - Storage class (set if virtual) "value" - Default value (set if pure virtual).
access
C++ access change.
"kind" - public, protected, private
constant
Constant created by %constant or #define.
"name" - Name of constant. "type" - Base type. "value" - Value. "storage" - Set to %constant "feature:immutable" - Set to indicate read-only
class
C++ class definition or C structure definition.
"name" - Name of the class.
"kind" - Class kind ("struct", "union", "class")
"symtab" - Enclosing symbol table.
"tdname" - Typedef name. Use for typedef struct { ... } A.
"abstract" - Set if class has pure virtual methods.
"baselist" - List of base class names.
"storage" - Storage class (if any)
"unnamed" - Set if class is unnamed.
enum
Enumeration.
"name" - Name of the enum (if supplied).
"storage" - Storage class (if any)
"tdname" - Typedef name (typedef enum { ... } name).
"unnamed" - Set if enum is unnamed.
enumitem
Enumeration value.
"name" - Name of the enum value. "type" - Type (integer or char) "value" - Enum value (if given) "feature:immutable" - Set to indicate read-only
namespace
C++ namespace.
"name" - Name of the namespace. "symtab" - Symbol table for enclosed scope. "unnamed" - Set if unnamed namespace "alias" - Alias name. Set for namespace A = B;
using
C++ using directive.
"name" - Name of the object being referred to. "uname" - Qualified name actually given to using. "node" - Node being referenced. "namespace" - Namespace name being reference (using namespace name)
classforward
A forward C++ class declaration.
"name" - Name of the class.
"kind" - Class kind ("union", "struct", "class")
insert
Code insertion directive. For example, %{ ... %} or %insert(section).
"code" - Inserted code
"section" - Section name ("header", "wrapper", etc.)
top
Top of the parse tree.
"module" - Module name
extend
%extend directive.
"name" - Module name "symtab" - Symbol table of enclosed scope.
apply
%apply pattern { patternlist }.
"pattern" - Source pattern. "symtab" - Symbol table of enclosed scope.
clear
%clear patternlist;
"firstChild" - Patterns to clear
include
%include directive.
"name" - Filename "firstChild" - Children
import
%import directive.
"name" - Filename "firstChild" - Children
module
%module directive.
"name" - Name of the module
typemap
%typemap directive.
"method" - Typemap method name. "code" - Typemap code. "kwargs" - Keyword arguments (if any) "firstChild" - Typemap patterns
typemapcopy
%typemap directive with copy.
"method" - Typemap method name. "pattern" - Typemap source pattern. "firstChild" - Typemap patterns
typemapitem
%typemap pattern. Used with %apply, %clear, %typemap.
"pattern" - Typemap pattern (a parameter list) "parms" - Typemap parameters.
types
%types directive.
"parms" - List of parameter types. "convcode" - Code which replaces the default casting / conversion code
extern
extern "X" { ... } declaration.
"name" - Name "C", "Fortran", etc.
There is further documentation available on the internals of SWIG, API documentation and debugging information. This is shipped with SWIG in the Doc/Devel directory.